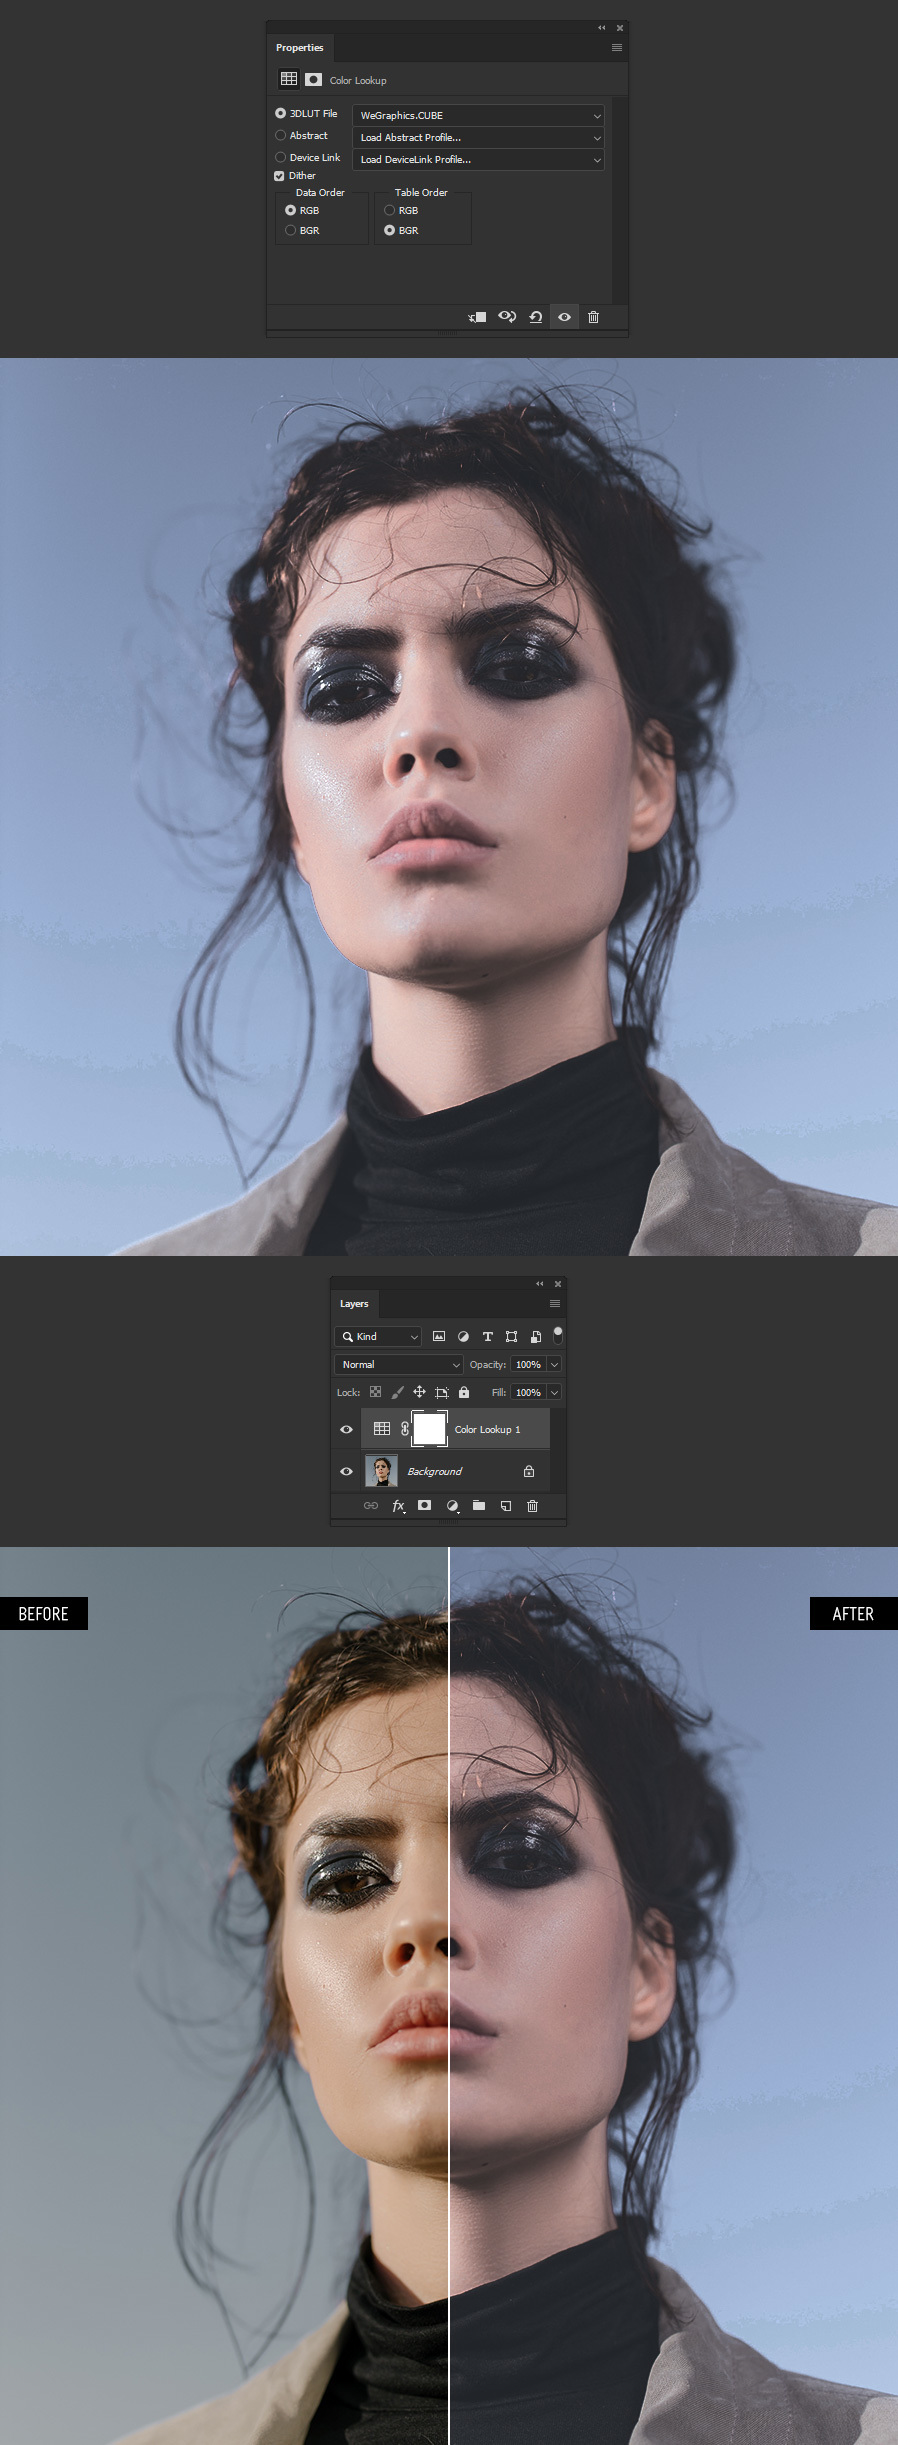
How to Make Your Own LUTs in Photoshop
Photoshop LUT Color Grading
A LookUp Table (LUT) is an additional tool that will expand your capabilities when creating, saving and using colour grading on your images or footages. It is a great addition to your toolbox that will save you time and help you change the look & feel of your images faster and with consistency. Today, I will show you how easily you can make your own LUTs files in Photoshop for you to use them in Photoshop, Lightroom, or any other software that makes use of LUT files, and all we will need is a picture, any picture.
Due you can make your own adjustments and corrections, this tutorial is just to show you how you can make your own LUT file, not how to color grade your image, so all the adjustments and values that you will see in this tutorial are for demostrations purposes only and you are free to make your own adjustment layers to get the exact look you are looking for.
Step 1
Open your image in Photoshop.

Step 2
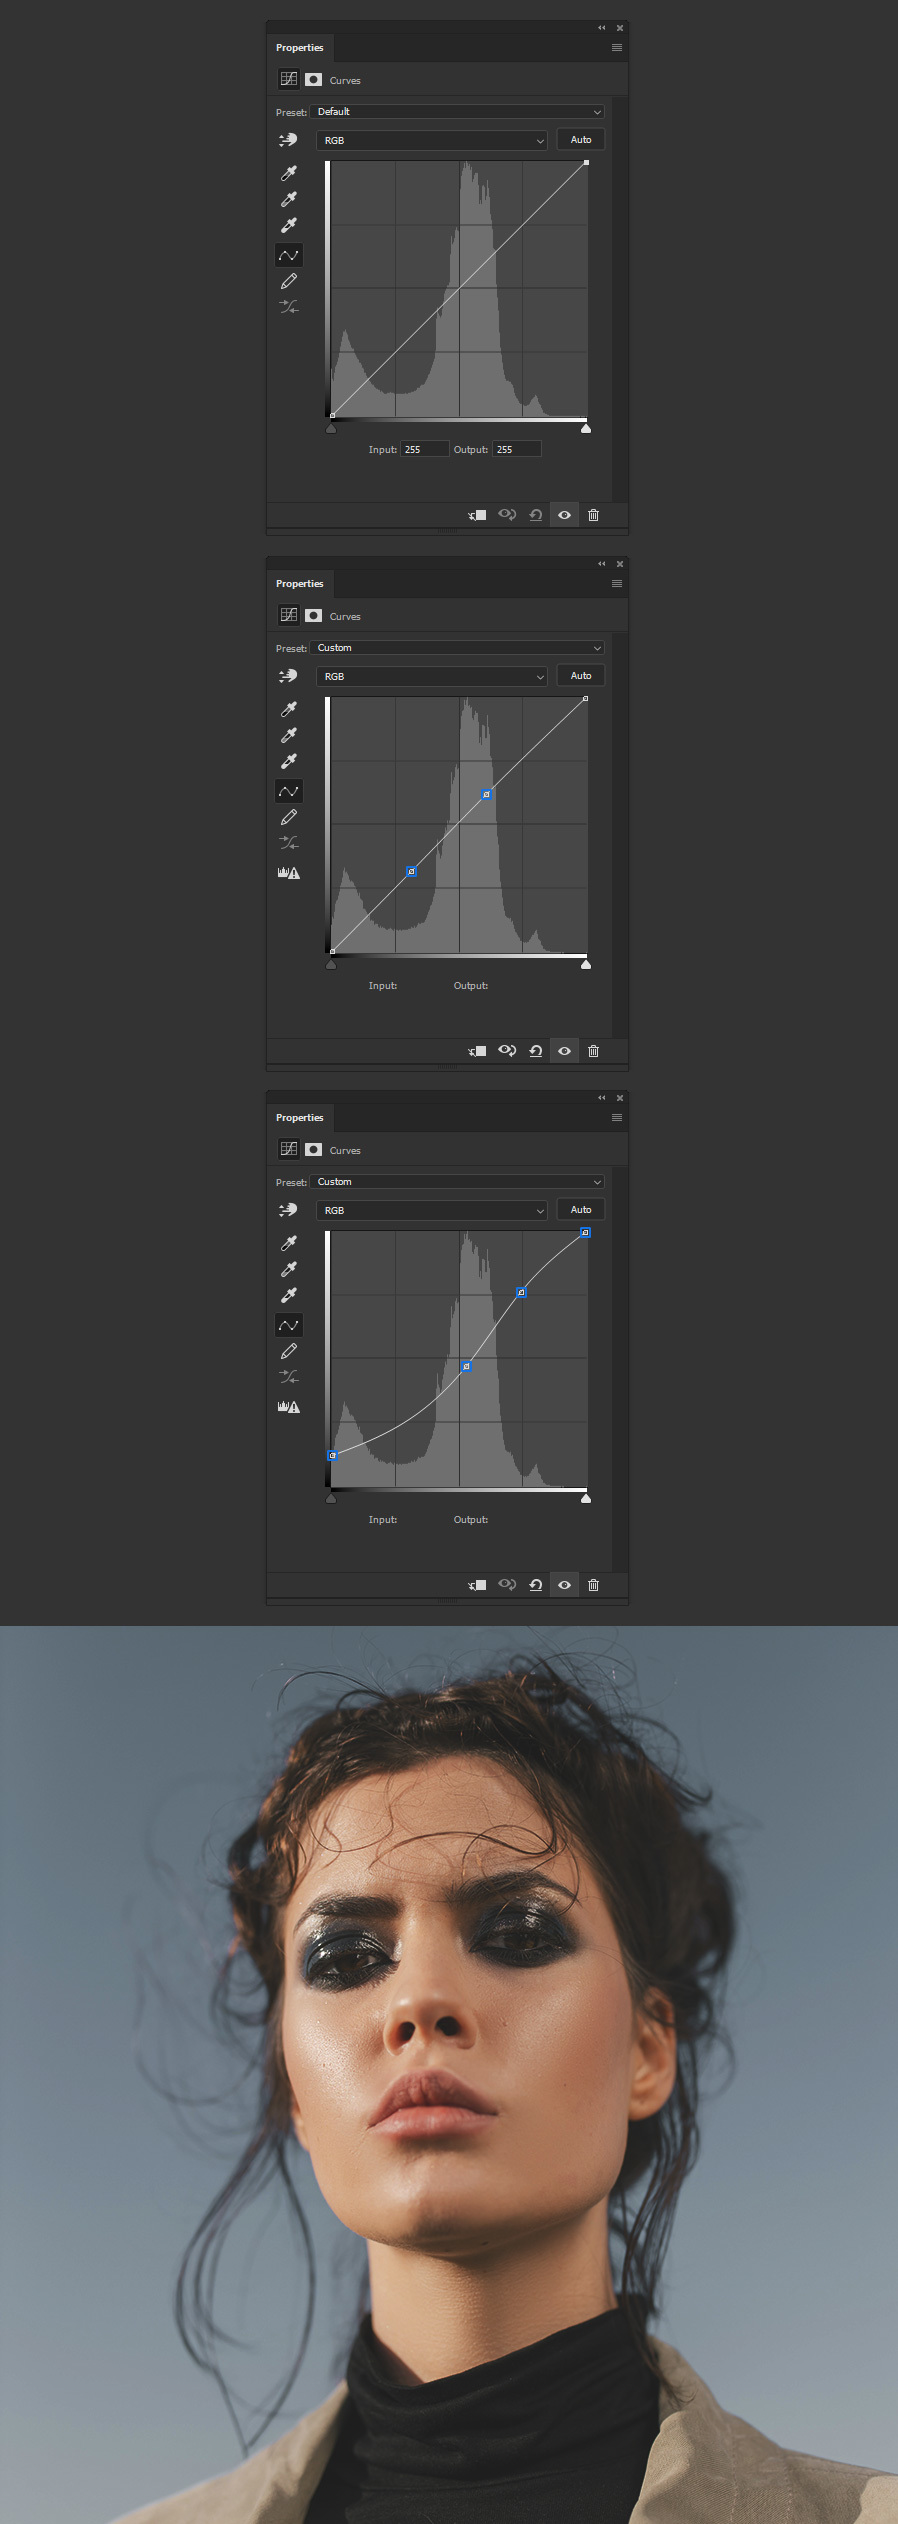
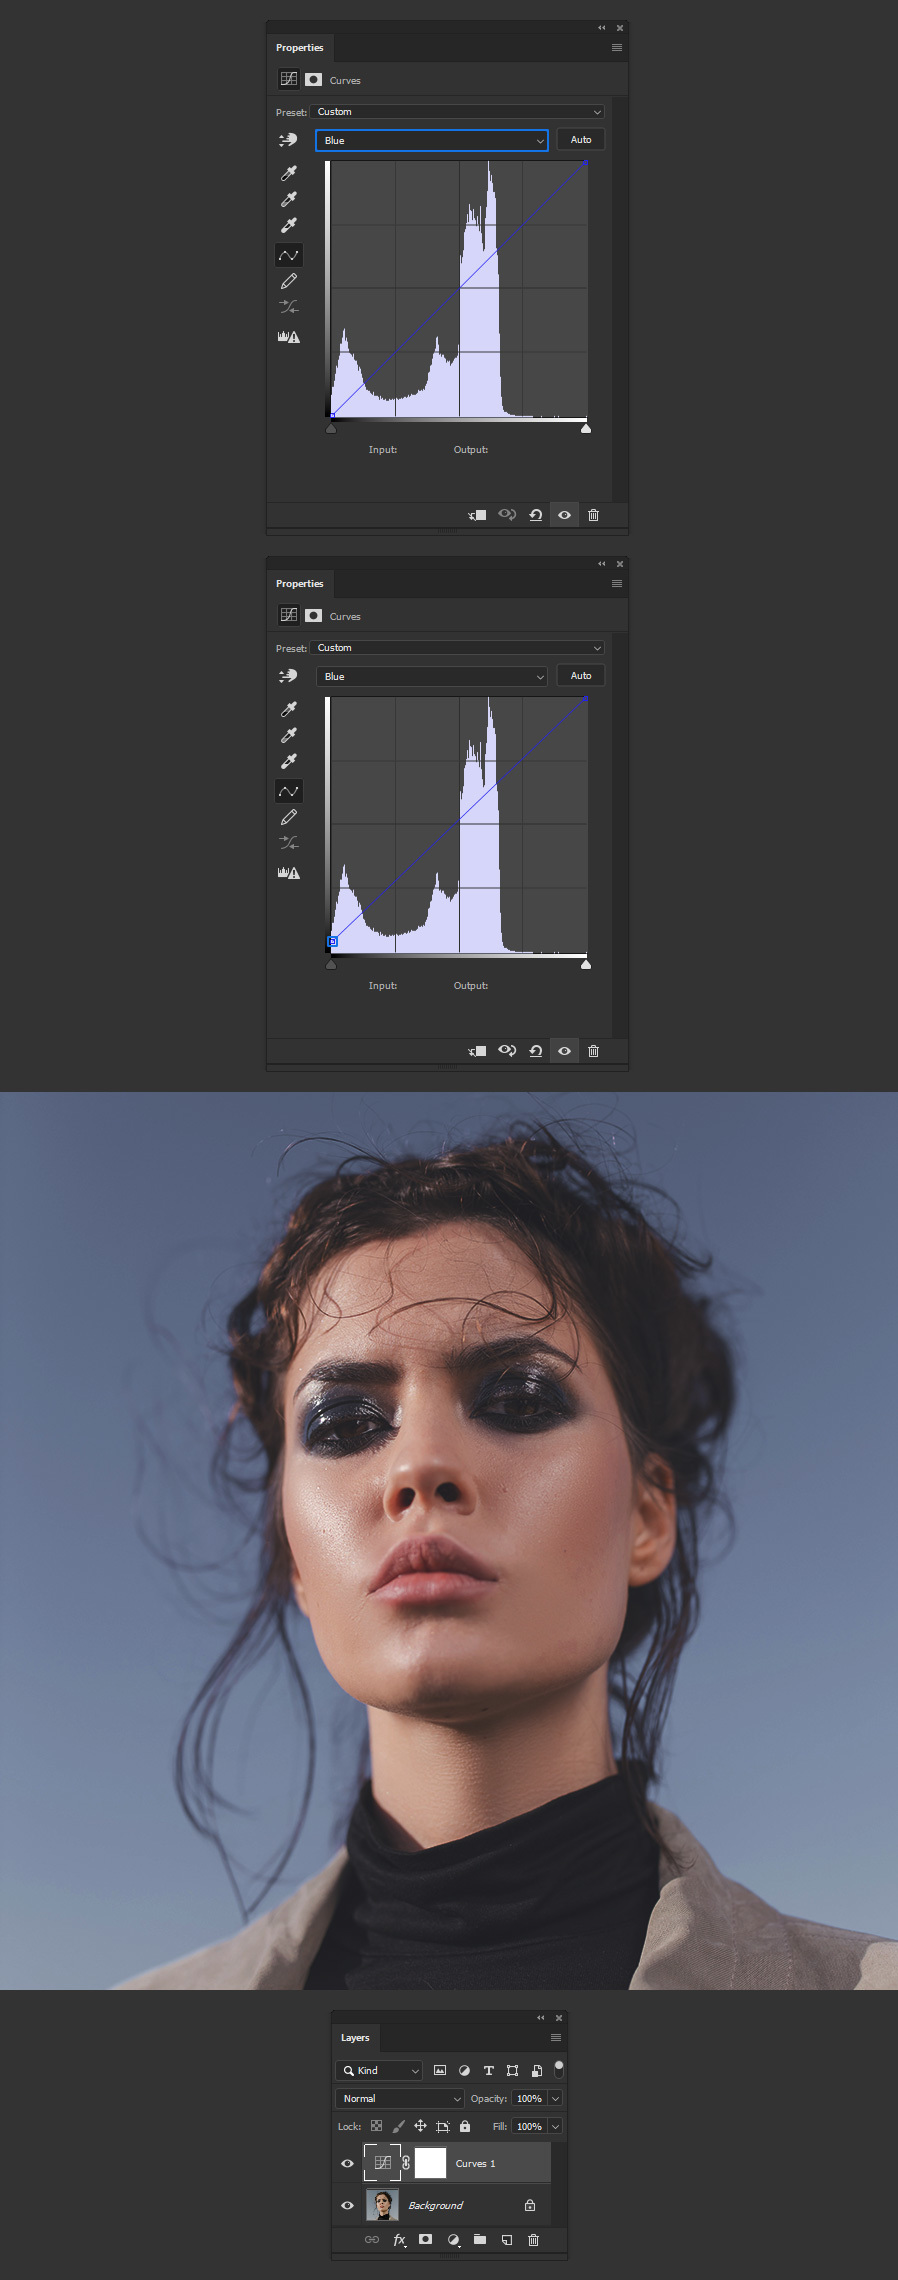
Go to Layer > New Adjustment Layer > Curves. Add 2 points to the curve by clicking anywhere on the curve graphic and set the following values for each of the 4 points:
- 0-30
- 135-120
- 190-195
- 255-255
Step 3
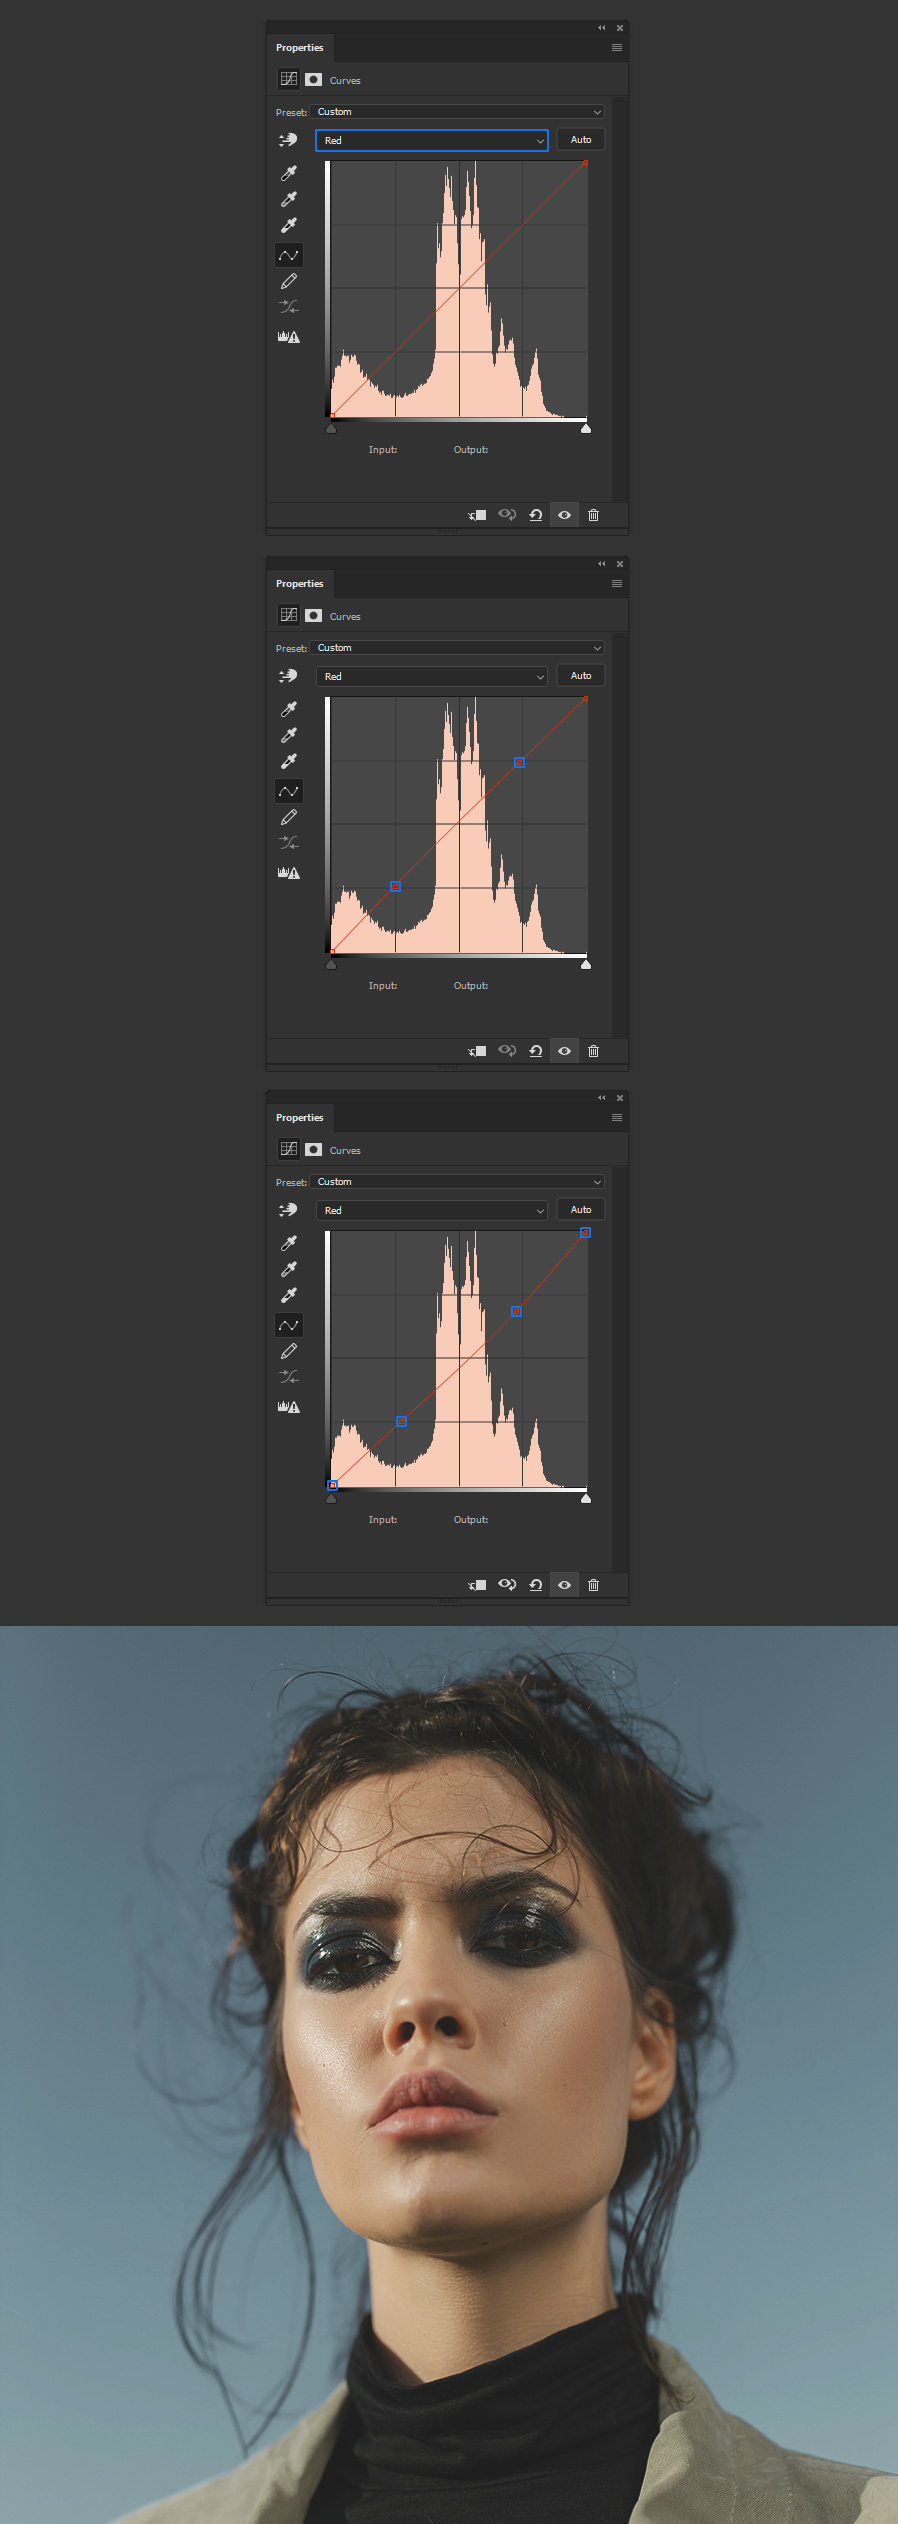
Select the Red Channel and again add 2 more points. Set the following values for each of the 4 points:
- 0-0
- 70-65
- 185-175
- 255-255
Step 4
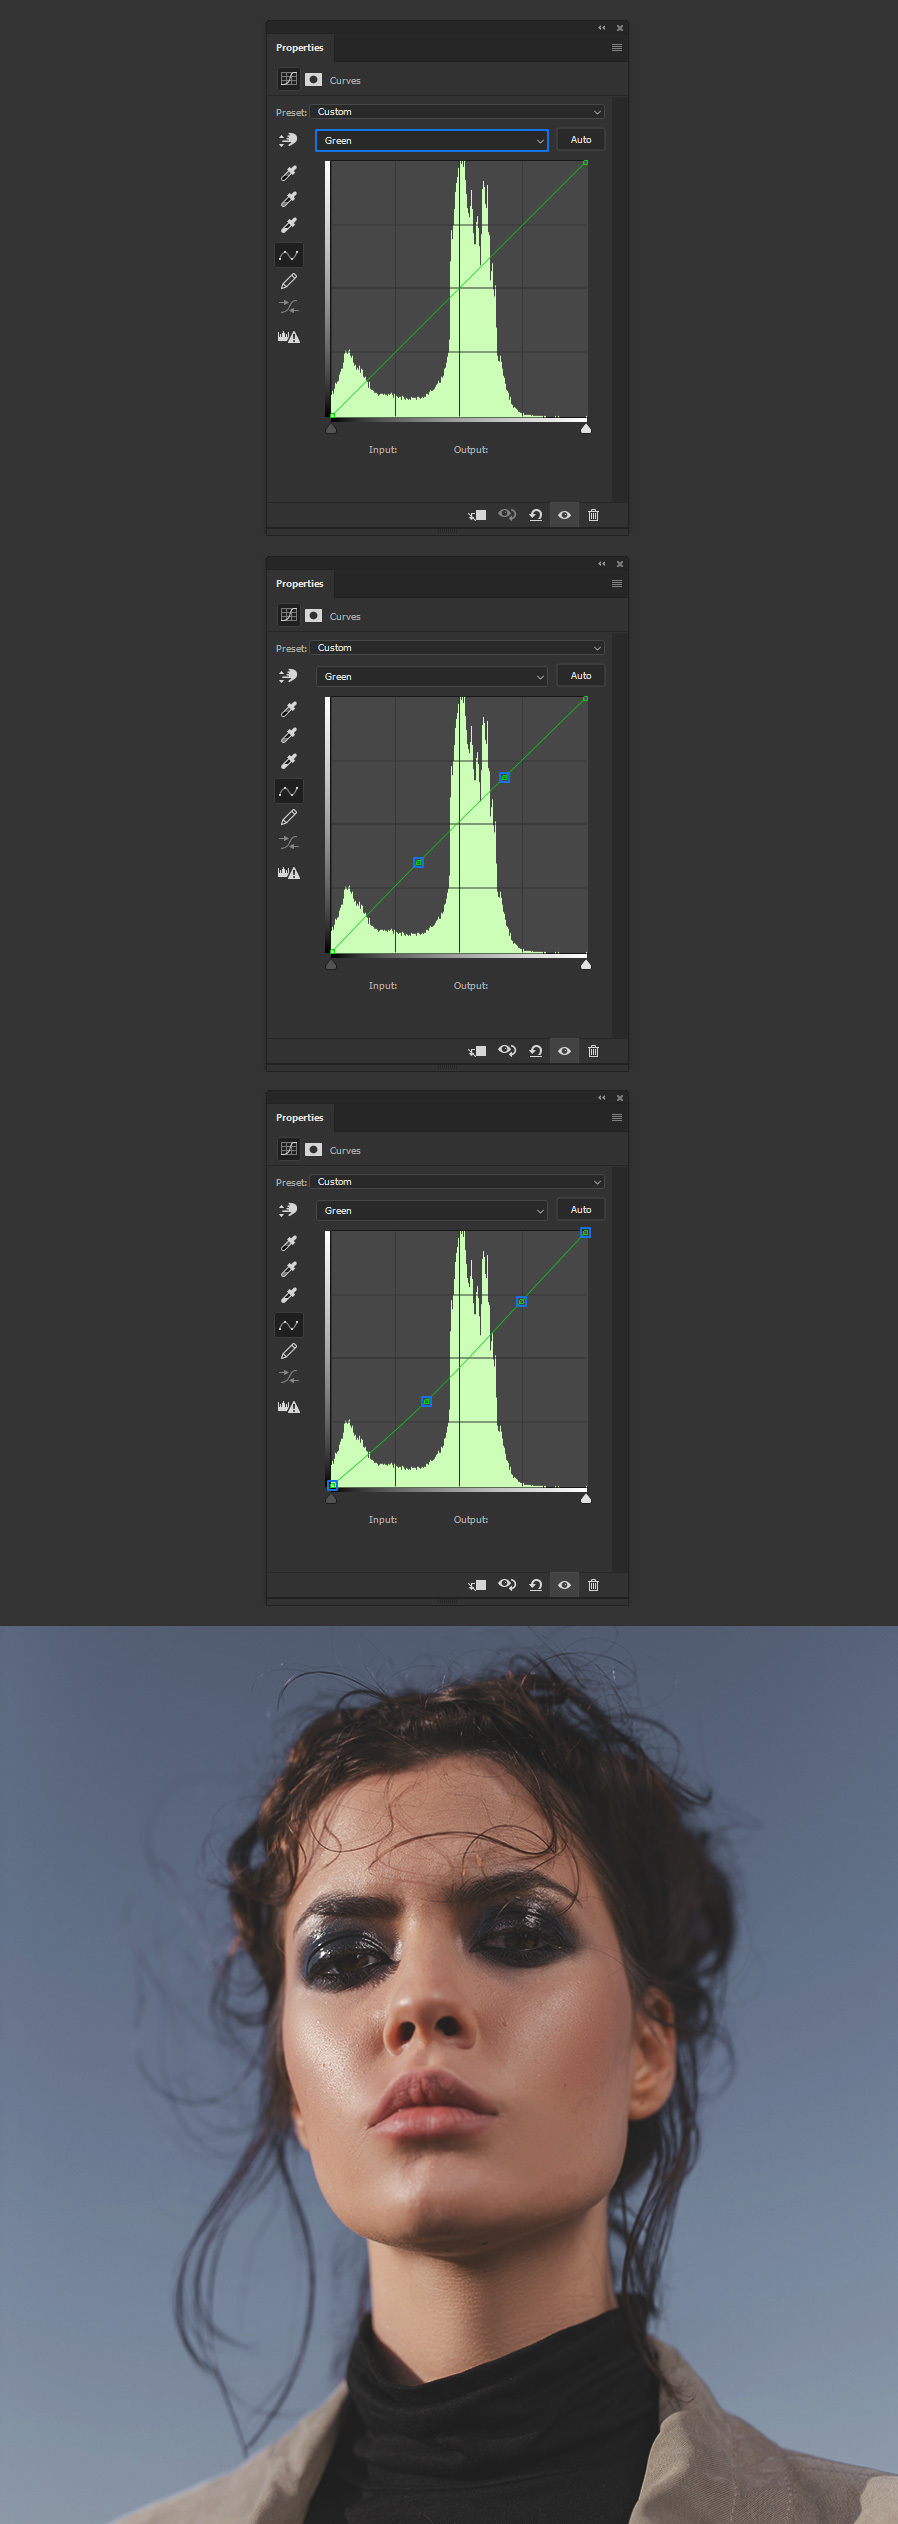
Select the Green Channel and again add 2 more points. Set the following values for each of the 4 points:
- 0-0
- 95-85
- 190-185
- 255-255
Step 5
Select the Blue Channel and set the value of the left point to 0-10.
Step 6
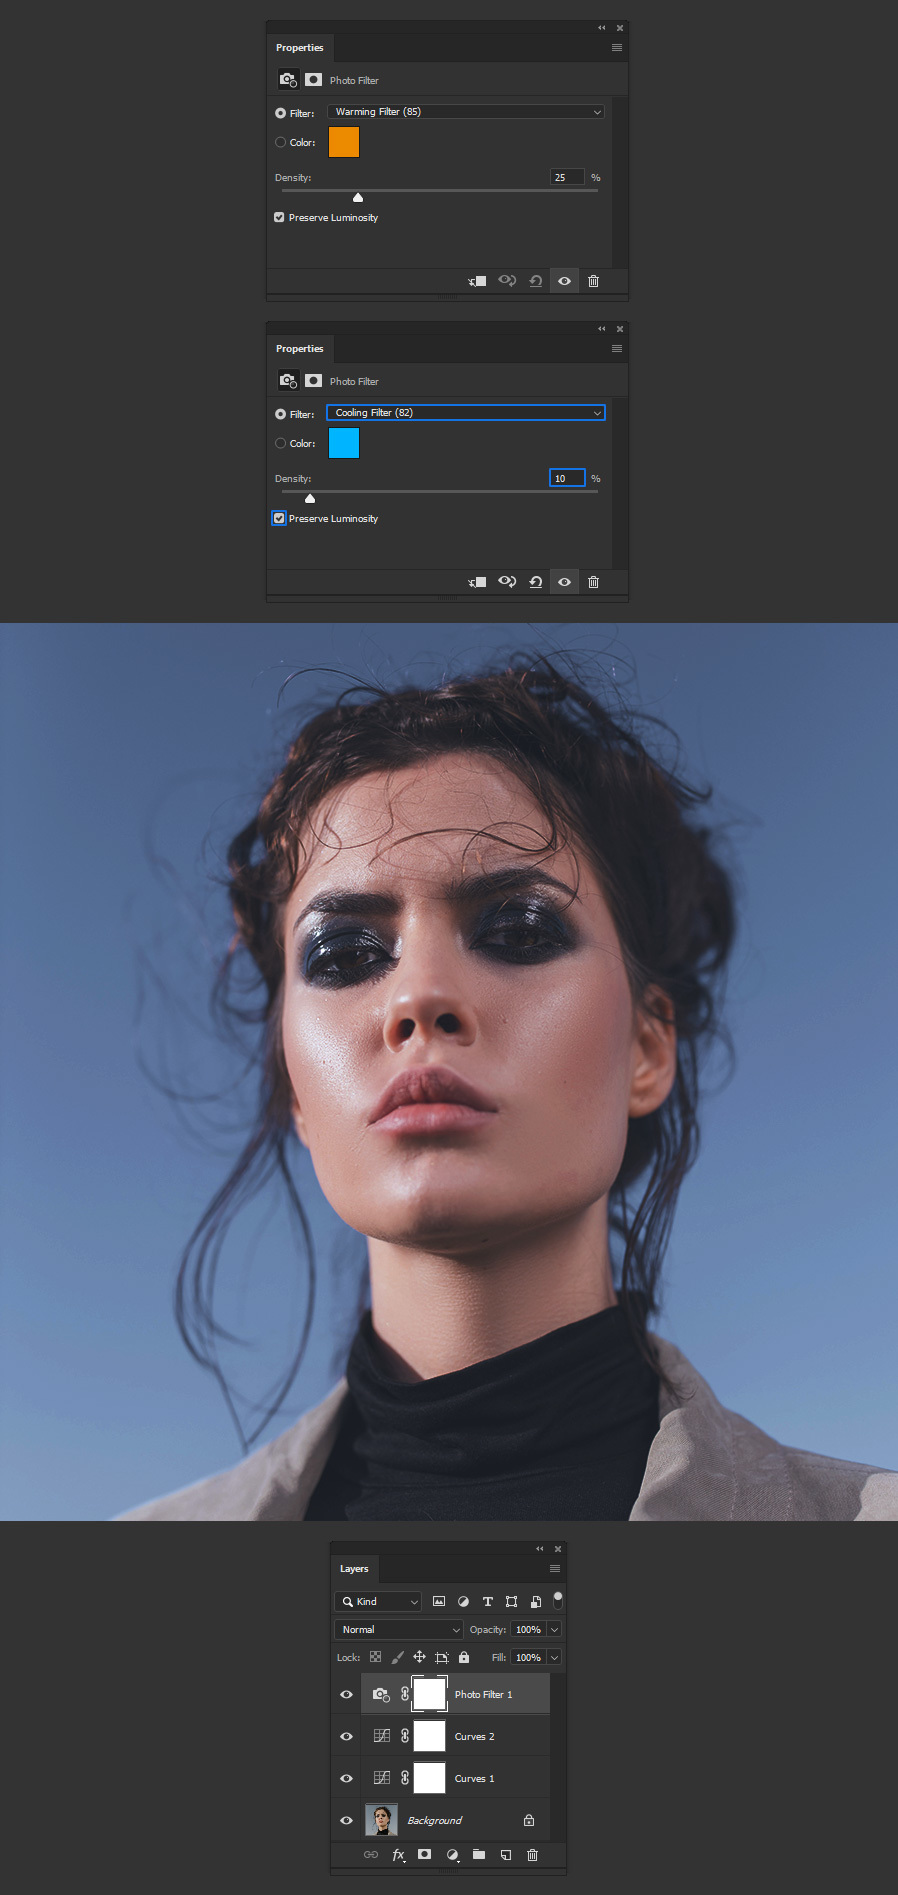
Again, go to Layer > New Adjustment Layer > Curves. Add 2 points to the curve by clicking anywhere on the curve graphic and set the following values for each of the 4 points:
- 0-0
- 170-175
- 200-210
- 255-255

Step 7
Go to Layer > New Adjustment Layer > Photo Filter. Select the "Cooling Filter (82)" from the filter dropdown menu and set the Density to 10%.
Step 8
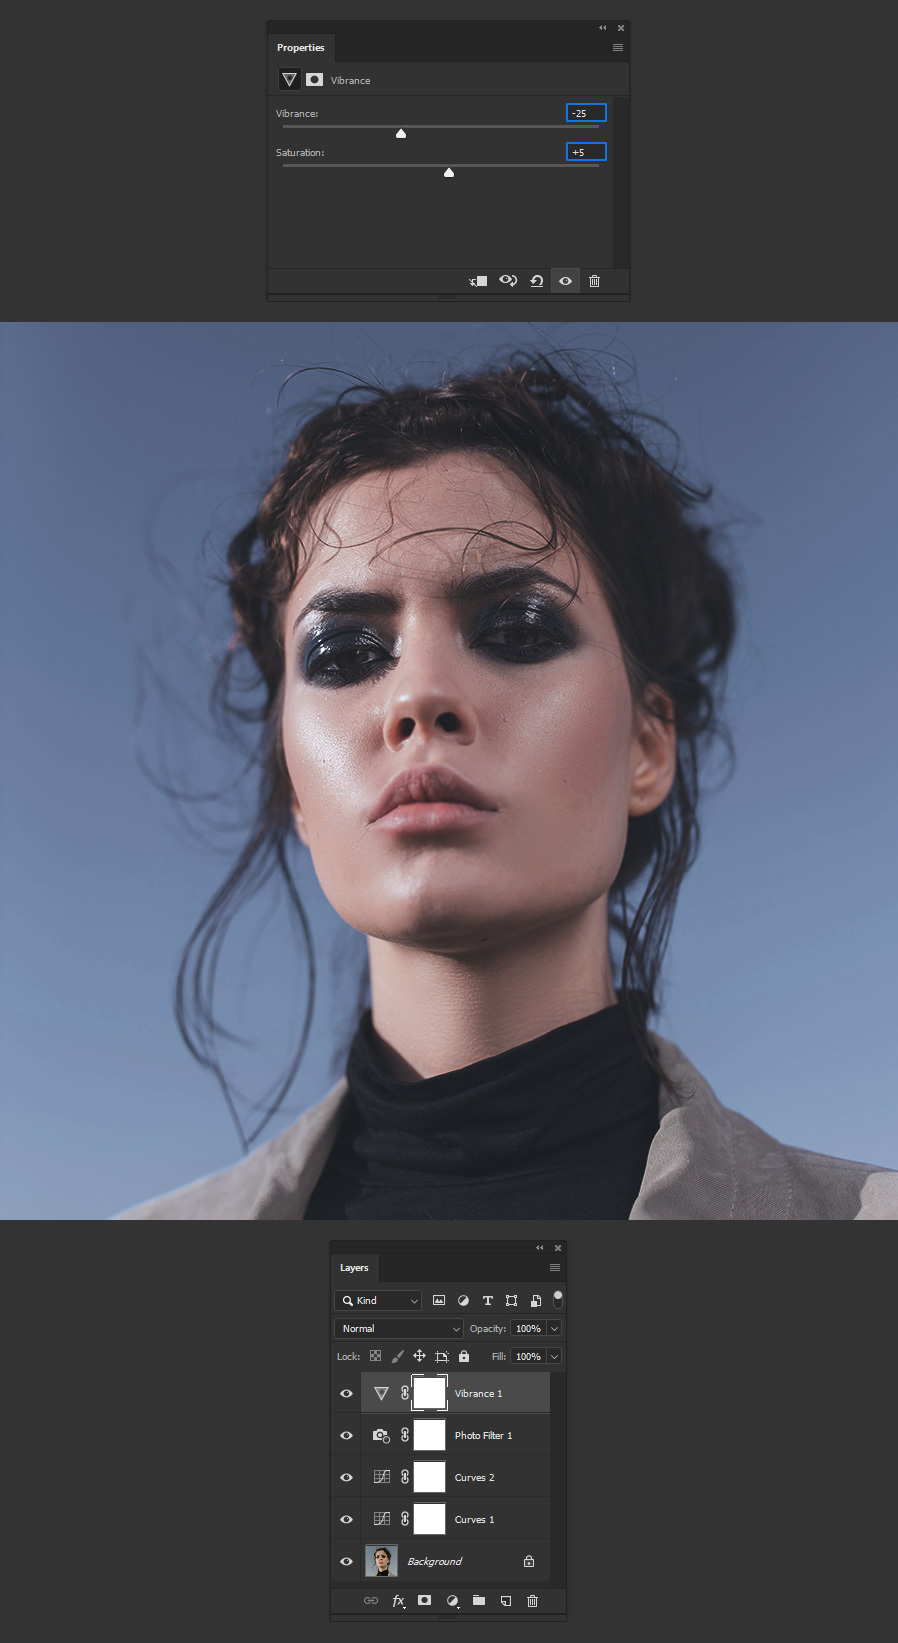
Go to Layer > New Adjustment Layer > Vibrance. Set the Vibrance to -25 and the Saturation to +5.
Step 9
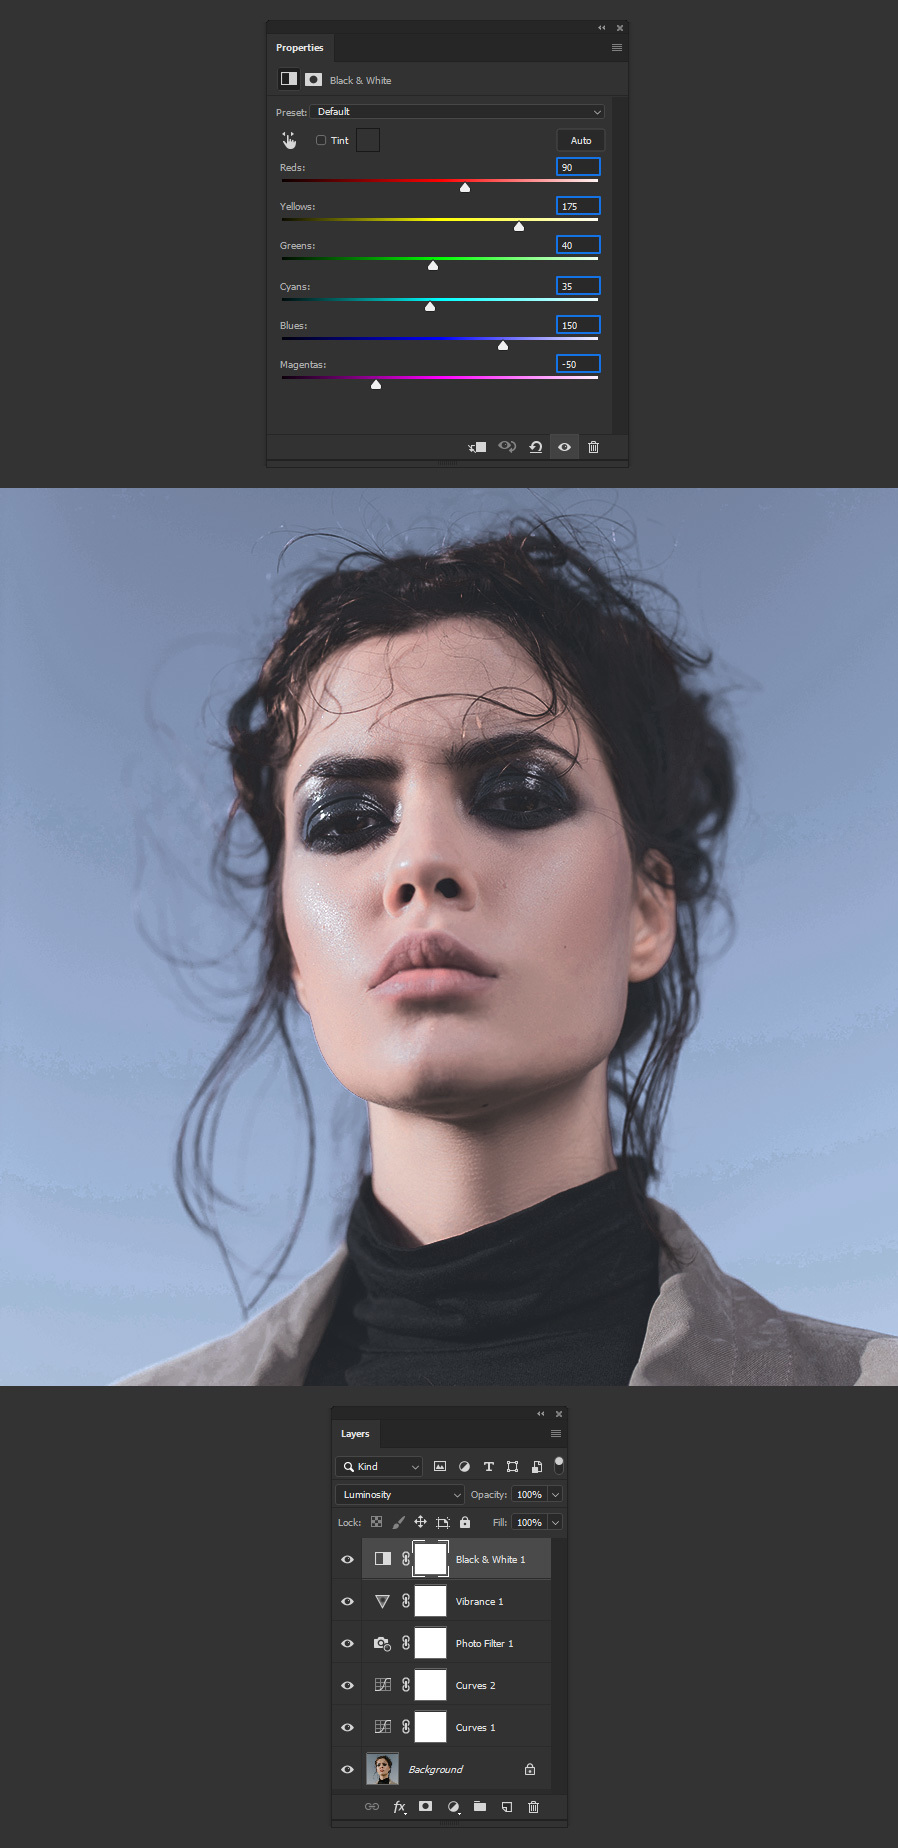
Go to Layer > New Adjustment Layer > Black & White and apply the following values.
Step 10
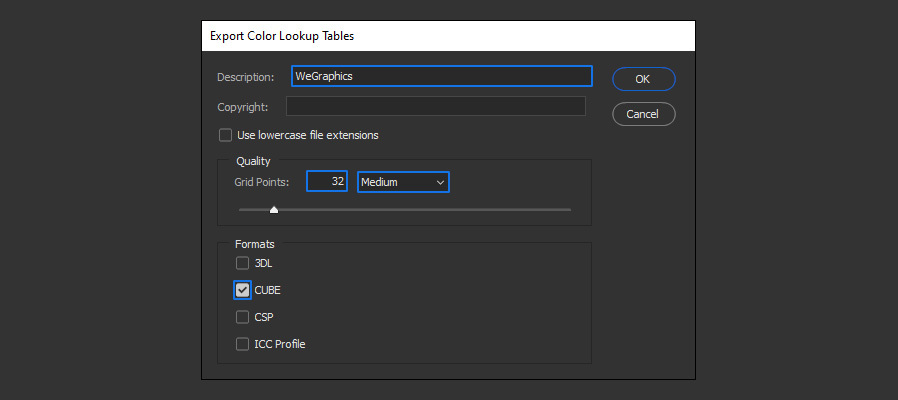
With all the adjustments finished, go to File > Export > Color Lookup Tables. Apply the following values, click OK and save the file on your computer.
Step 11
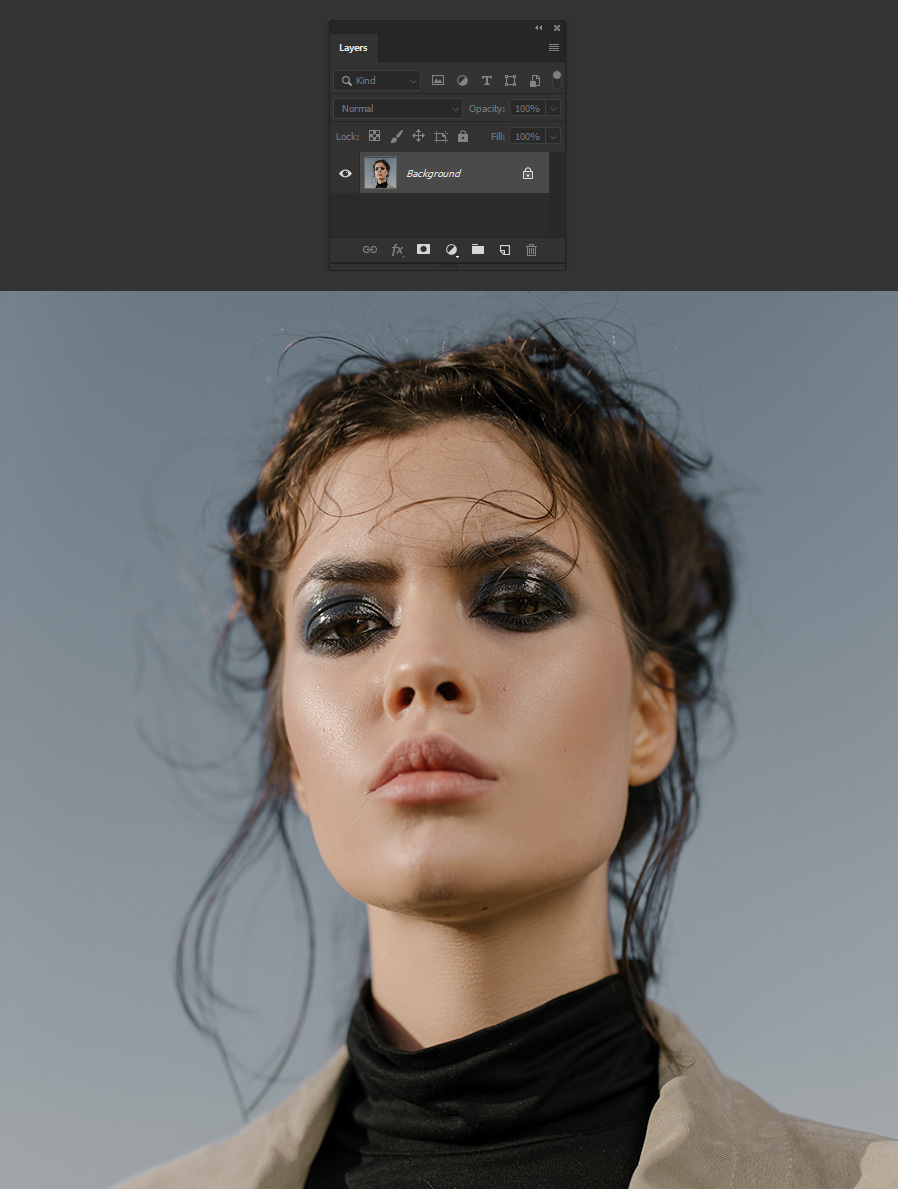
To see how the LUT file works, hide or delete all the adjustment layers we just did.
Step 12
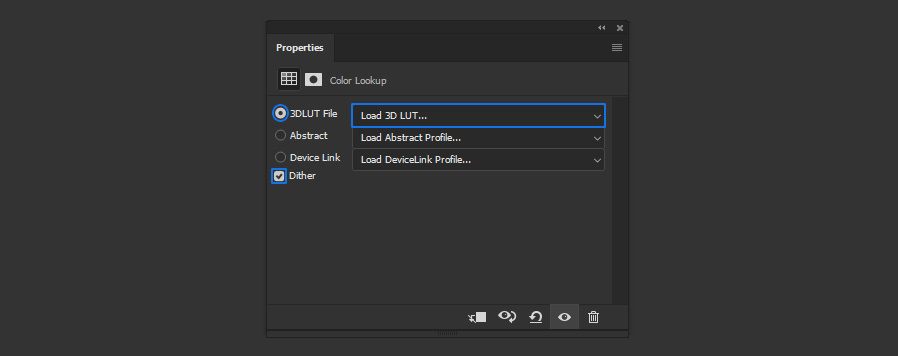
With the image back to the original look, go to Layer > New Adjustment Layer > Color Lookup. Be sure to select the "3DLUT File" option and from the dropdown menu select "Load 3D LUT".
Step 13
Lastly, locate the .CUBE file we save it on your computer and click the Load button to apply the LUT to your image.
