How to Quickly Make Live Metaballs in Illustrator
Illustrator Live Metaballs
Metaballs, with their fluid and organic shapes offer an endless creative potential for various design projects. But sometimes in Illustrator, a simple shape can take you a few extra minutes to make. And this is the case with metaballs, because if you make them using a traditional method (like manually drawing the paths between two circles) you will accomplish the task, but using more time than you need. So today, I will show you a very simple method to create metaballs in Illustrator, using only the default tools, with the ability to scale and move the shapes used and with no need to manually trace anything.
Step 1
Open Illustrator and make a new file at any size you want. in this case I will make mine at 1800 x 1200 px.

Step 2
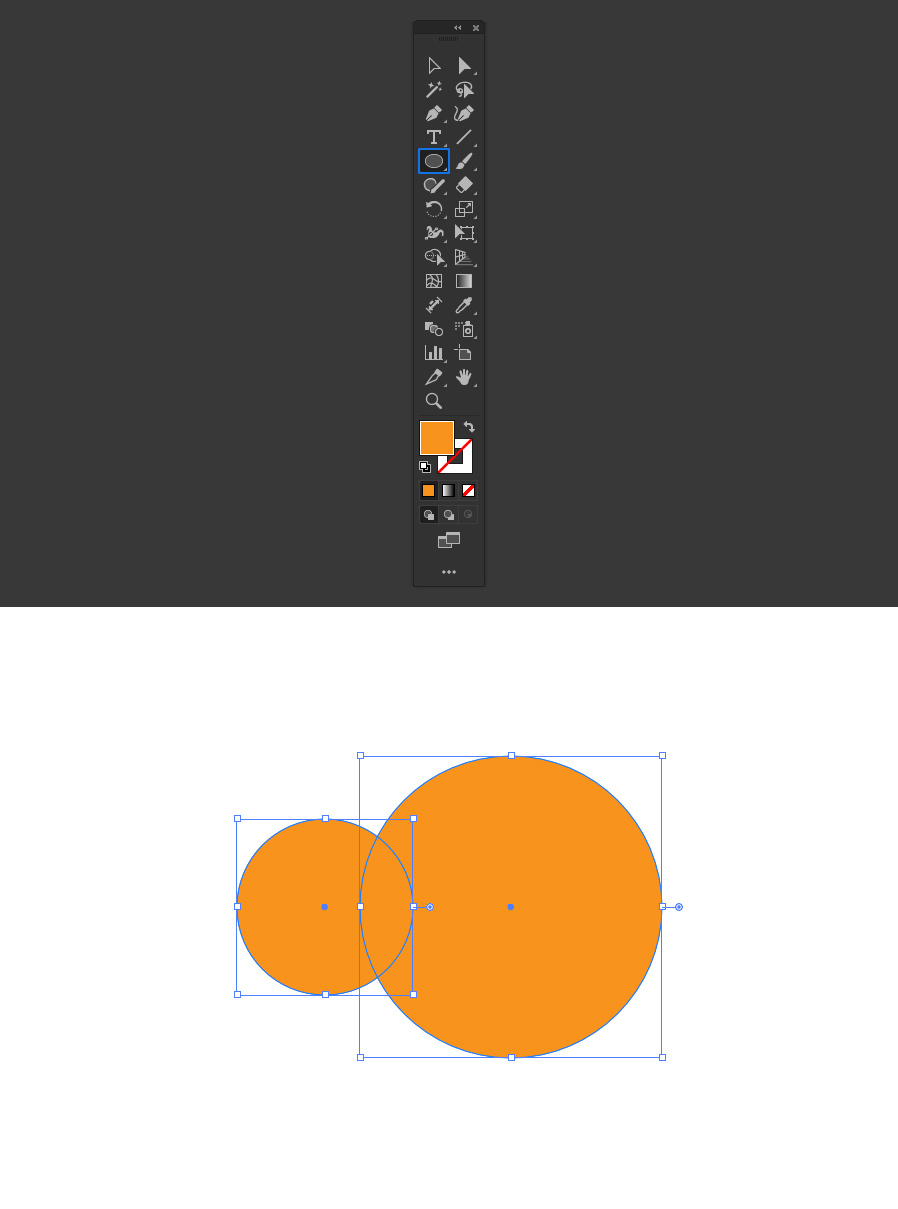
Select the Ellipse tool and make 2 overlapping circles at any size you wish. Here I will make one at 600 px and the other one at 350 px.
Step 3
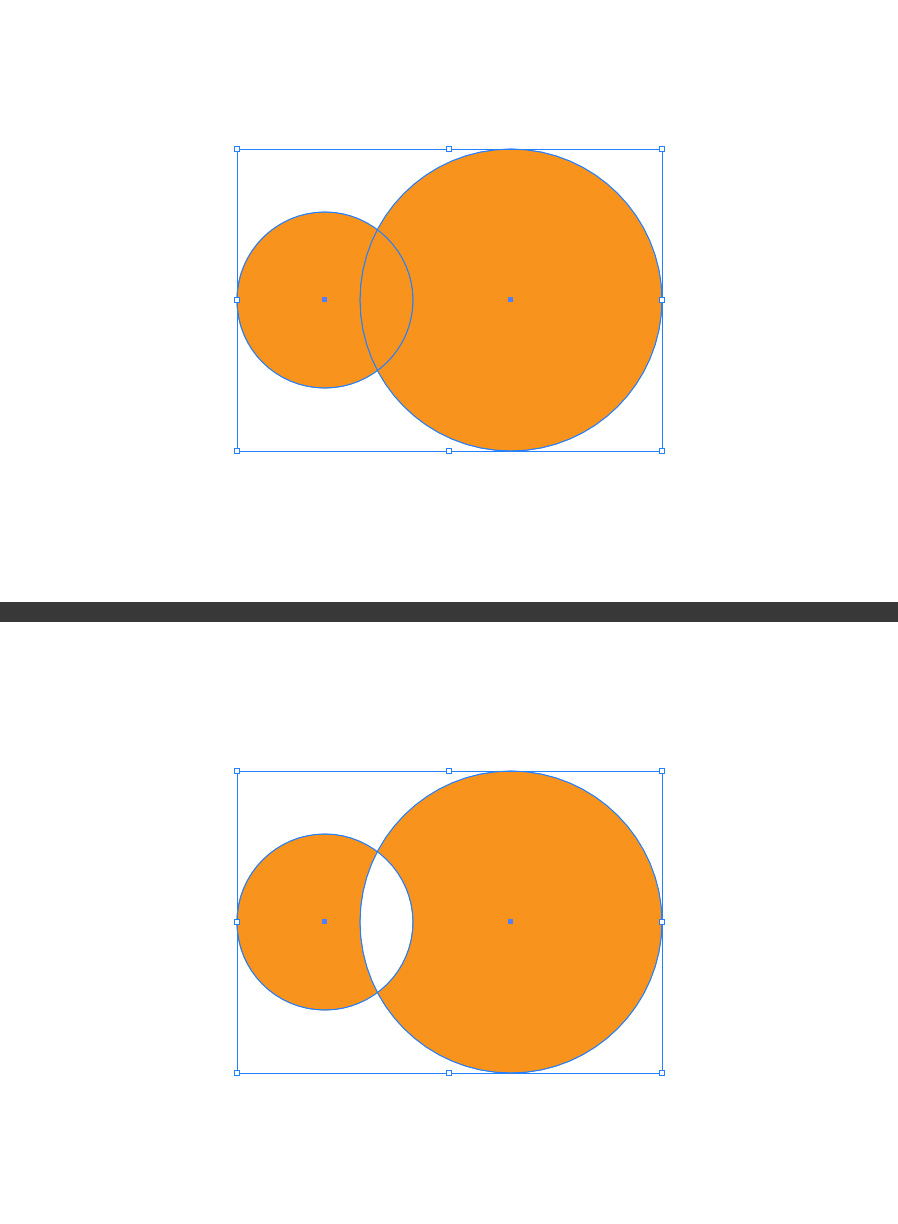
Select both circles and go to Object > Compound Path > Make.
Step 4
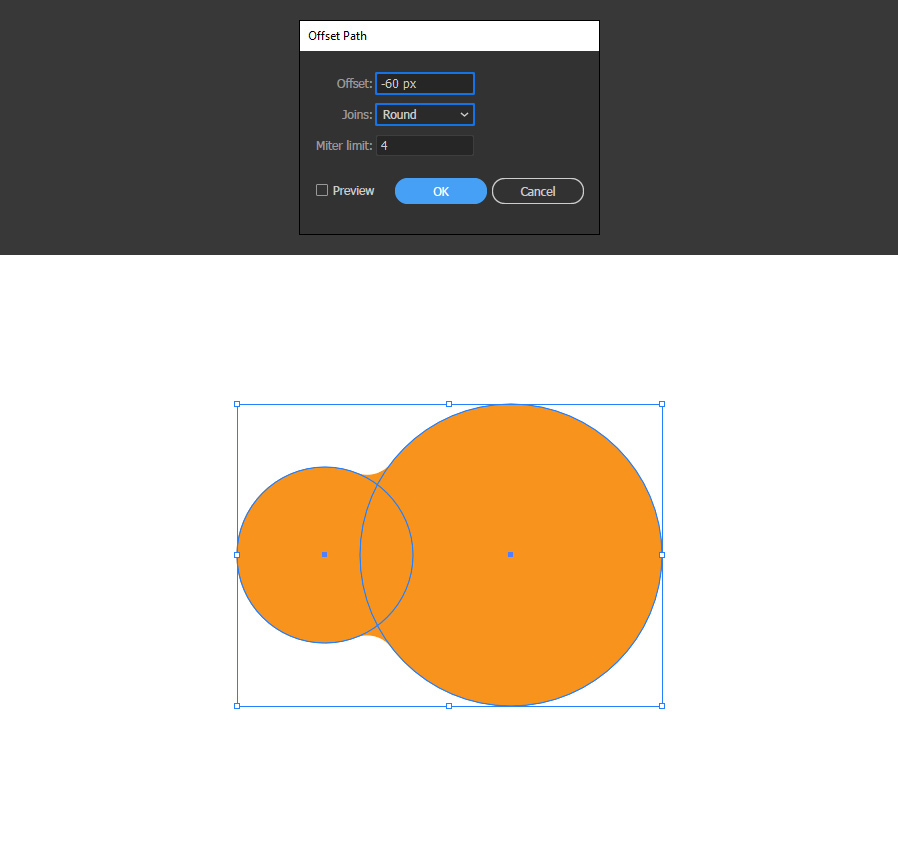
Go to Effect > Path > Offset Path. Apply the following settings and click OK.

Step 5
Again, go to Effect > Path > Offset Path. Apply the following settings and click OK.
Step 6
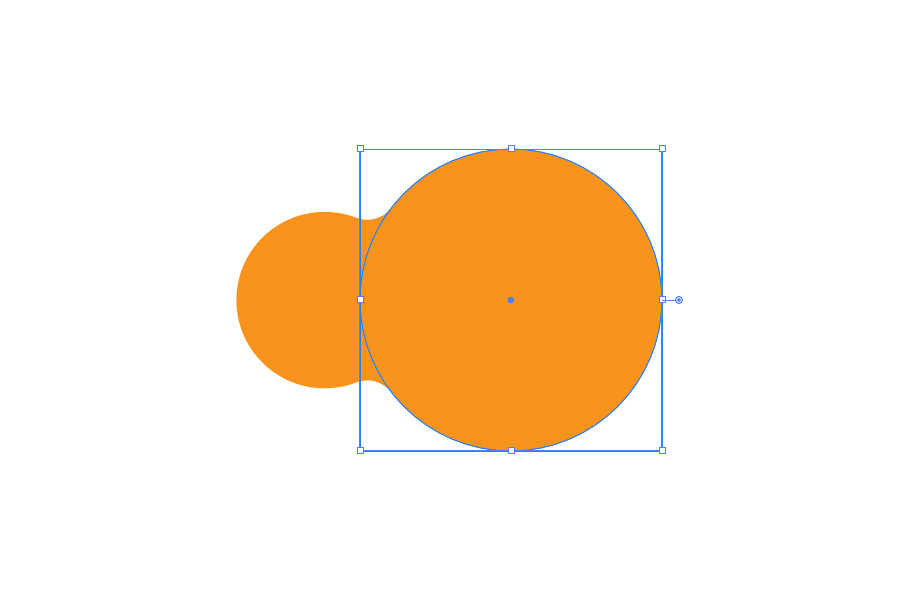
Double click on any of the circles to enter on the Compund Path Isolation Mode.
Step 7
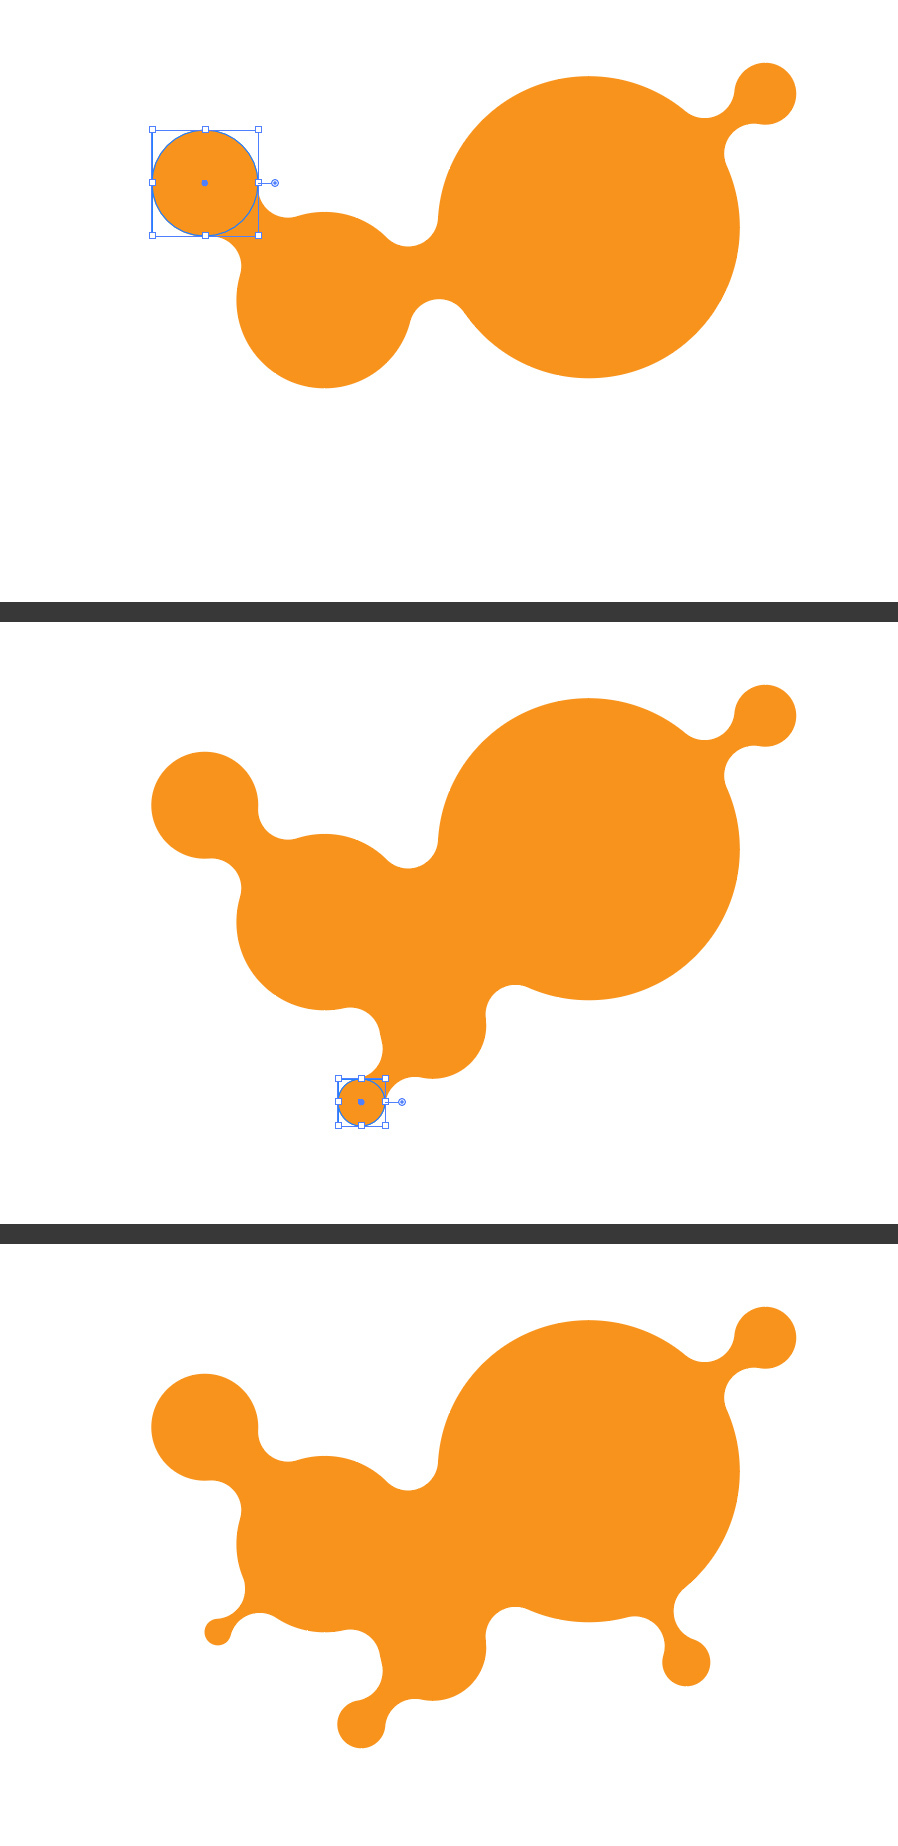
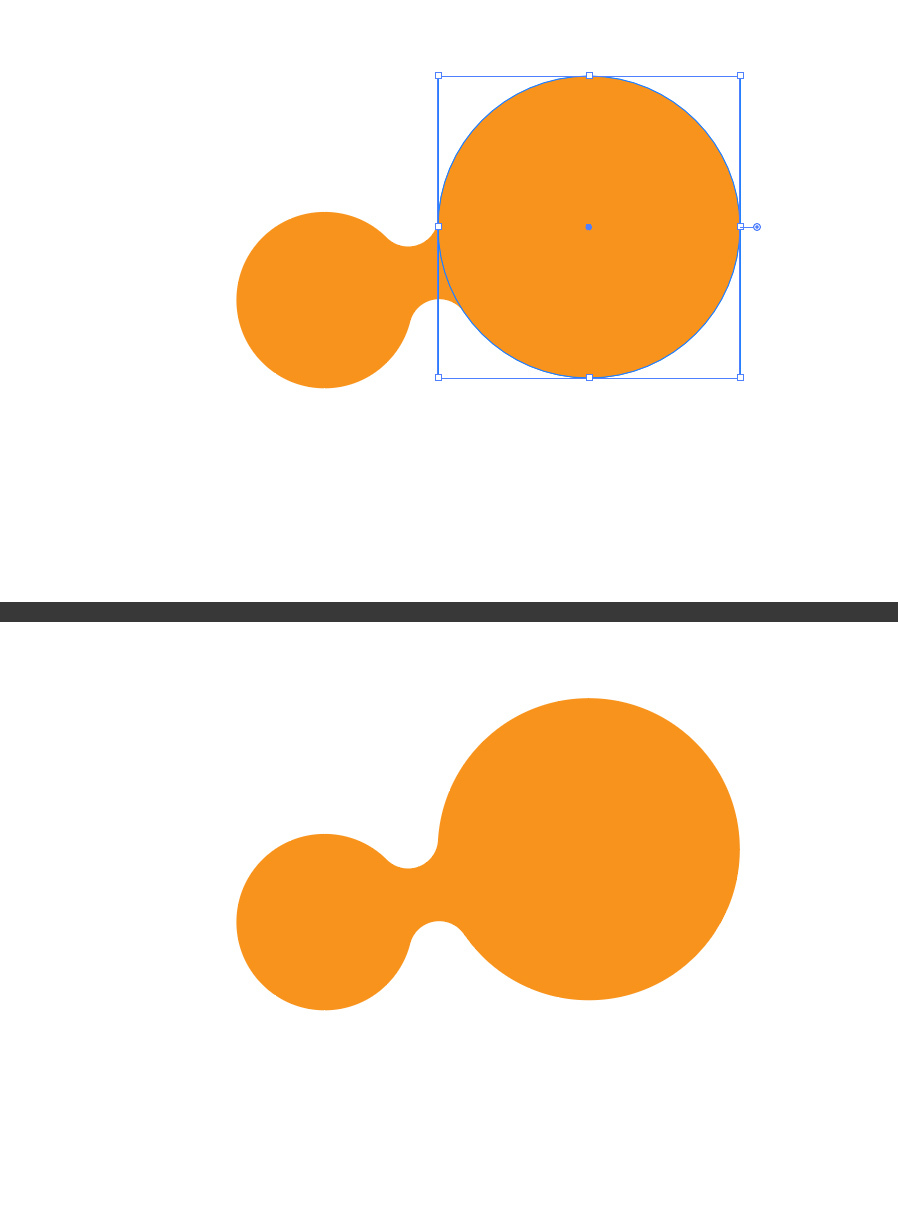
Now, simply drag the circle around to any location that you want to get a live metaball effect.
Step 8
Lastly, and only if you want, you can copy and paste one of the circles as many times as you wish (and even scale it) while in Isolation Mode and place it anywhere you wish to get a new metaball figure like in the example below.
