How to Make a Indie Film Effect in Photoshop
Photoshop Photo Effects
You probably saw a lot of images with an effect that reminds you those independent films used over almost any type of photo that you can think of. An there are many different methods to achieve that look in Photoshop. But today, I will show you how you can achieve that Indie Film look in Photoshop using the powerful Camera RAW plugin that you can adjust to fine tune your image once the main effect is made. Please, keep in mind that every image is unique, so the settings I will show you here should be taken as a basis for all of your images and it may require some different values on each setting depending on your photo.
But before we begin, and if you want to follow this tutorial exactly as described, please download the following image from Adobe Stock: Download.
Step 1
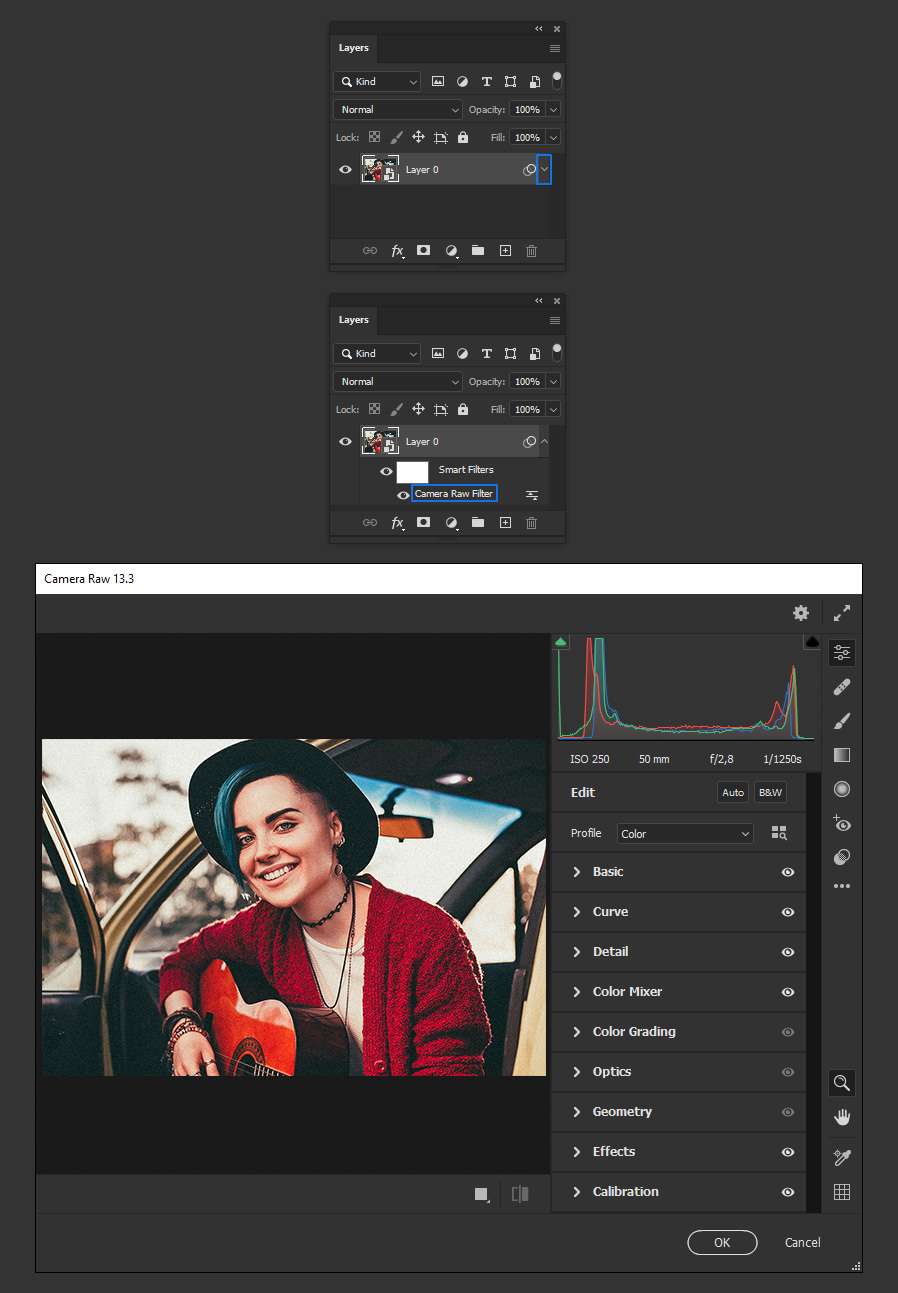
Open your image in Photoshop.

Step 2
Go to Layer > Smart Objects > Convert to Smart Object.

Step 3
Go to Filter > Camera Raw Filter.

Step 4
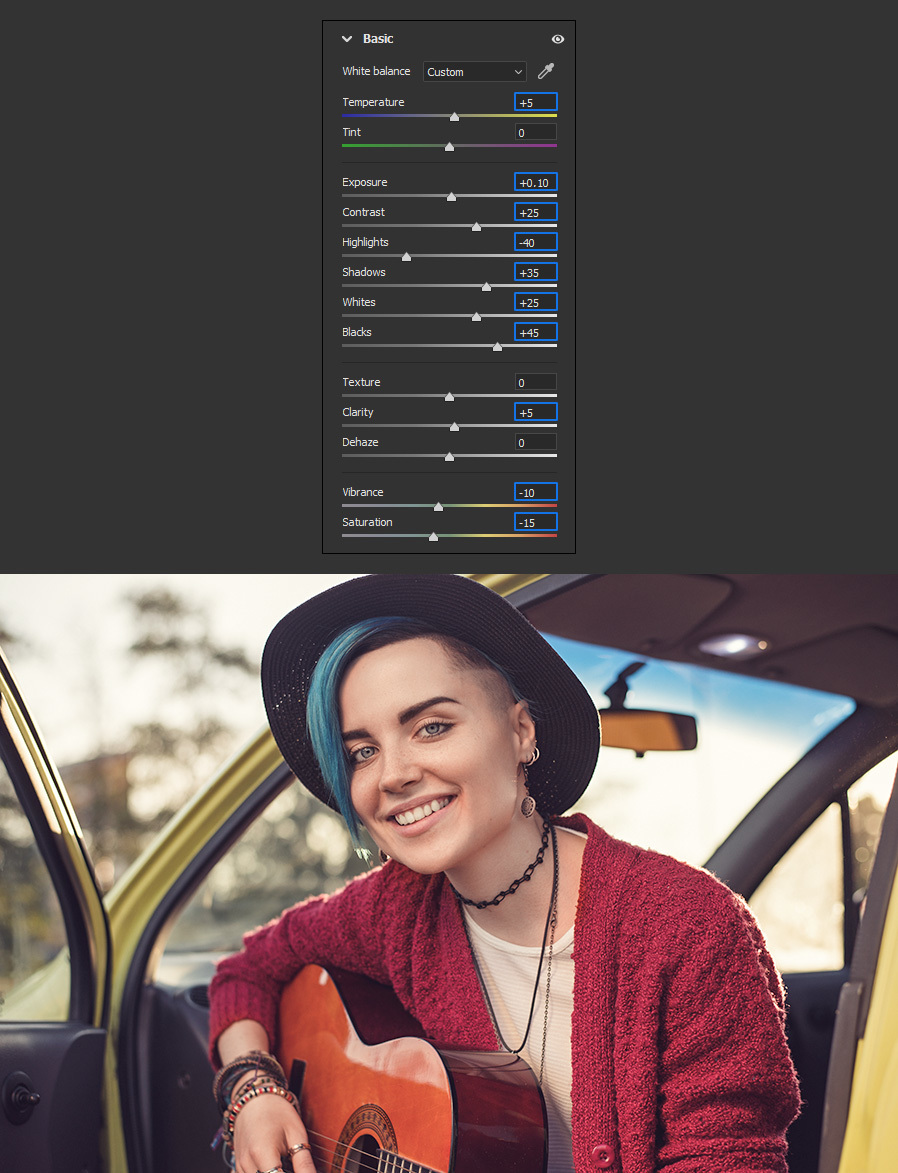
In the Camera Raw window expand the Basic tab and apply the following settings.
Step 5
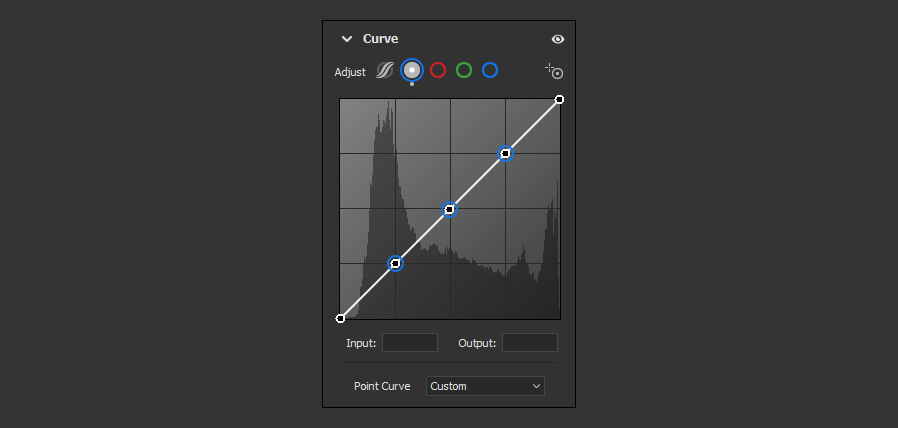
Expand the Curve tab. Be sure to select the Point Curve option and add 3 new anchor points by clicking 3 times anywhere on the curve graphic.
Step 6
Still in the Curve tab, apply the following values for the Input-Output of each of the points:
- 0-55
- 95-90
- 140-130
- 190-175
- 255-255

Step 7
Following the same procedure, select the Red Channel, add 3 new anchor points and apply the following values for the Input-Output of each of the points:
- 0-0
- 80-45
- 125-120
- 180-200
- 255-255

Step 8
Select the Green Channel, add 3 new anchor points and apply the following values for the Input-Output of each of the points:
- 0-0
- 75-45
- 128-120
- 180-200
- 255-255

Step 9
Select the Blue Channel, add 3 new anchor points and apply the following values for the Input-Output of each of the points:
- 0-55
- 75-45
- 125-115
- 185-200
- 255-255

Step 10
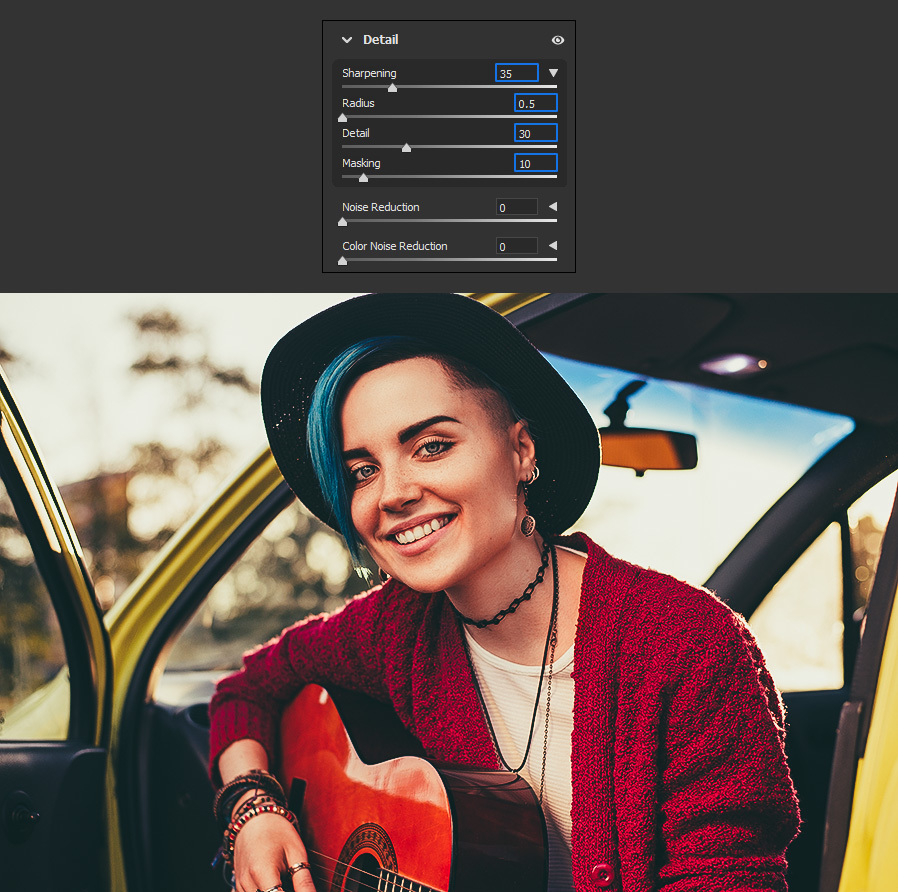
Next, expand the Detail tab and apply the following Sharpening values.
Step 11
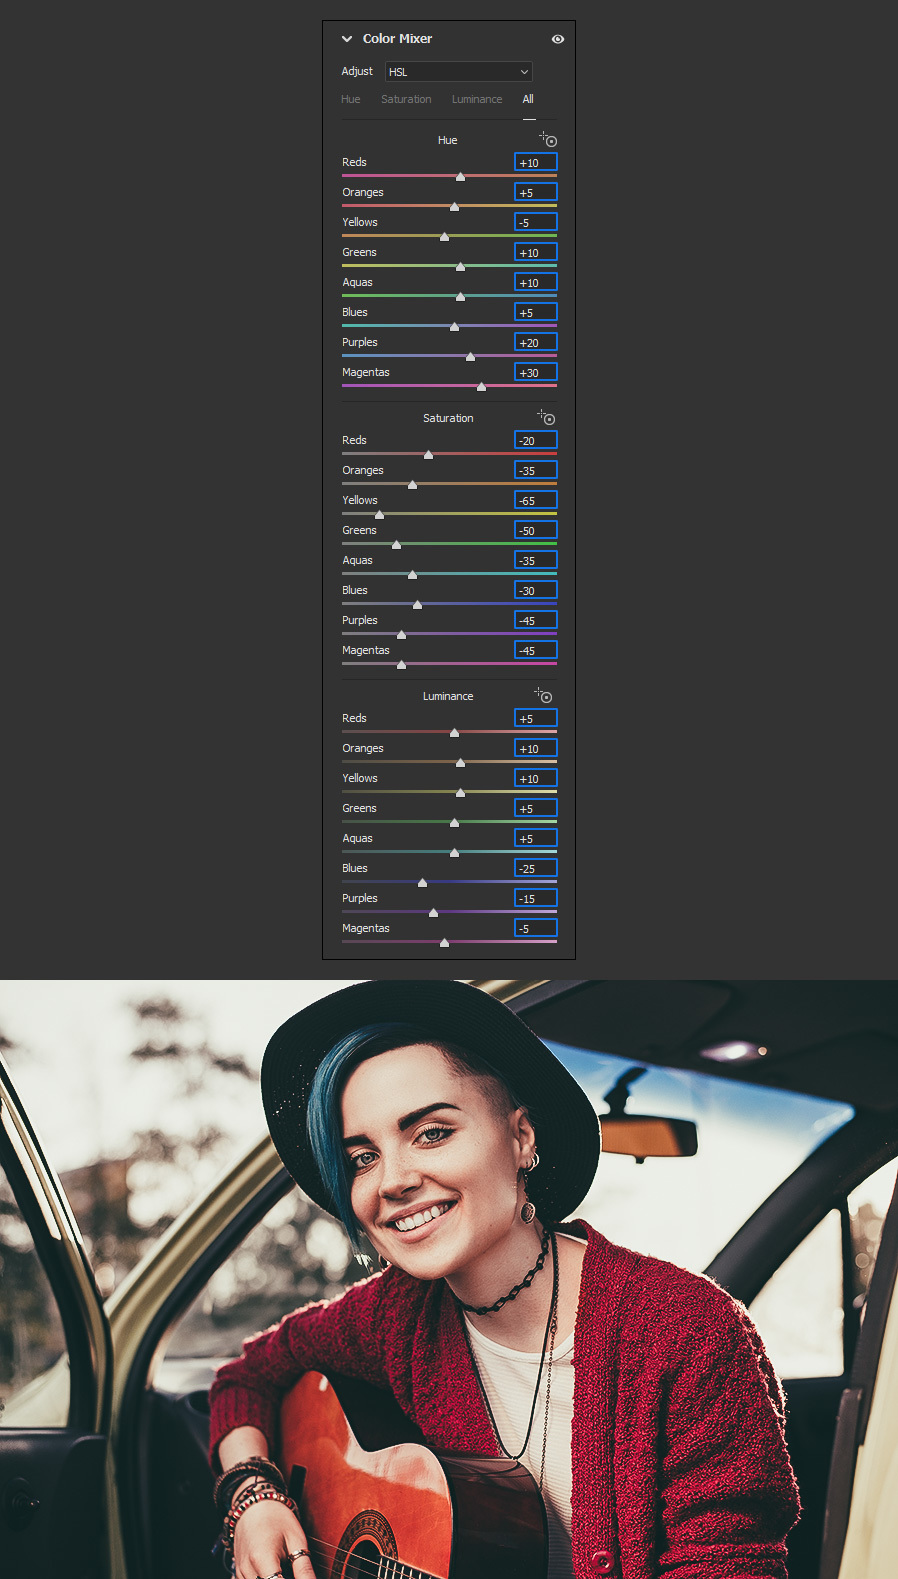
Expand the Color Mixer tab and apply the following values.
Step 12
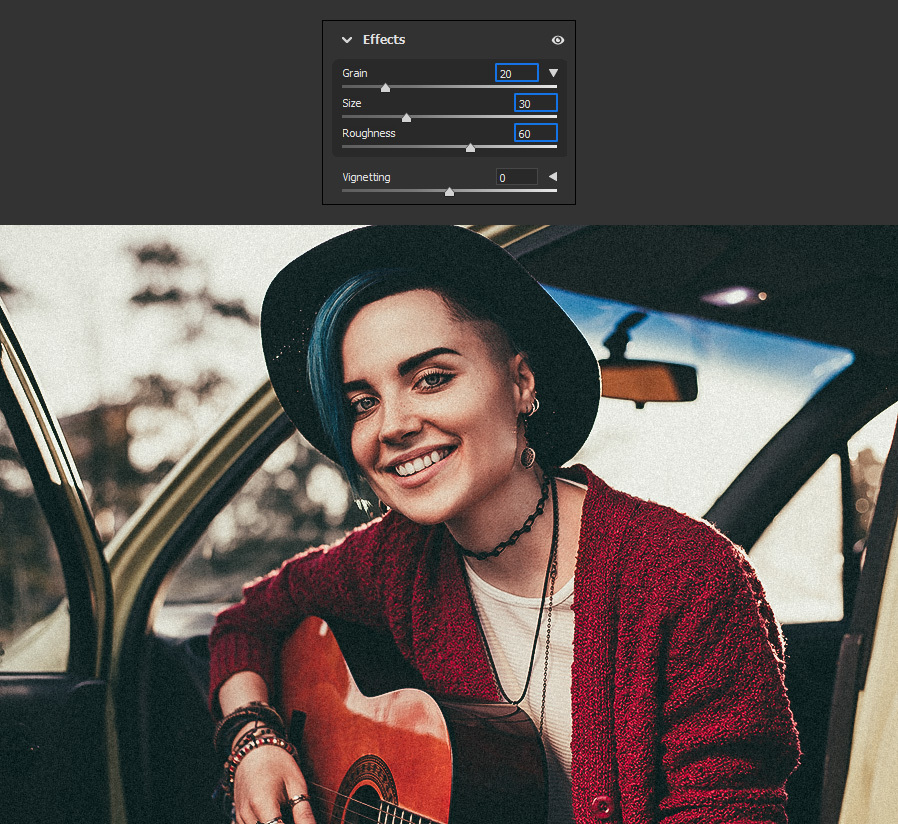
Now expand the Effects tab and apply the following values for the Grain option.
Step 13
Lastly, expand the Calibration tab and apply the following values.

A Final Tip
If you later want to adjust some of the effect settings, simply click on the down arrow of the image layer to reveal the layer effects and then double click on "Camera Raw Filter" to open the Camera Raw window, make your adjustments and then click Ok in the Camera Raw window.
