How to Make a Green Moody Look in Photoshop
Photoshop Photo Effects
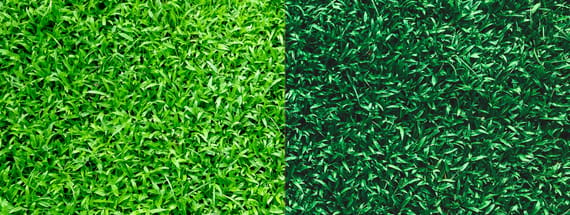
In Photoshop, there are many different methods to achieve certain photo effects. Usually the most well-known methods are provide good end results, but often those methods require you to use many different filters and layers. So today, I will show you how you can make a green moody look in Photoshop - One you can easily adjust even when finished. We'll get this effect by using just the Camera Raw Filter and a single layer. But before we begin, please keep in mind that every image is unique, so the settings I will show you here should be taken as a basis for all of your images. It may require some different values on each setting depending on your photo, but they will work on most of them.
Step 1
Open your image in Photoshop.

Step 2
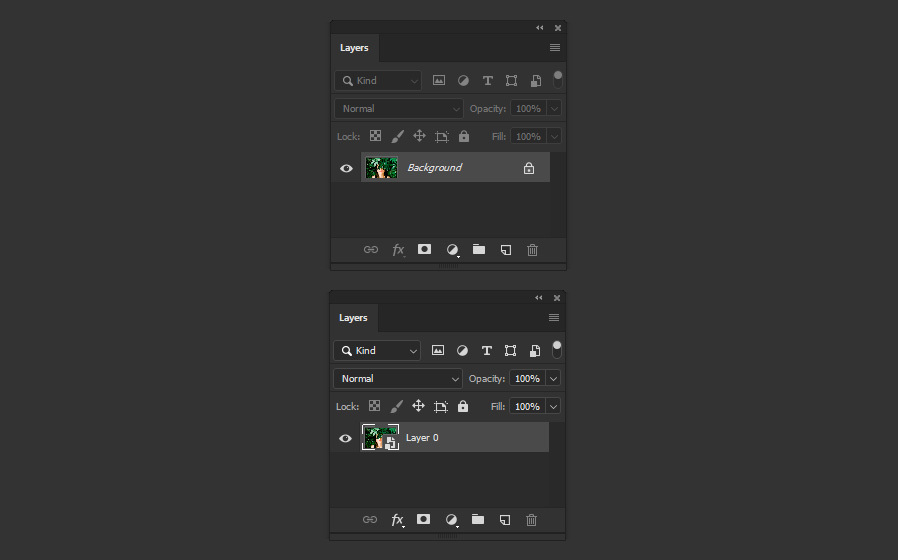
Go to Layer > Smart Objects > Convert to Smart Object.
Step 3
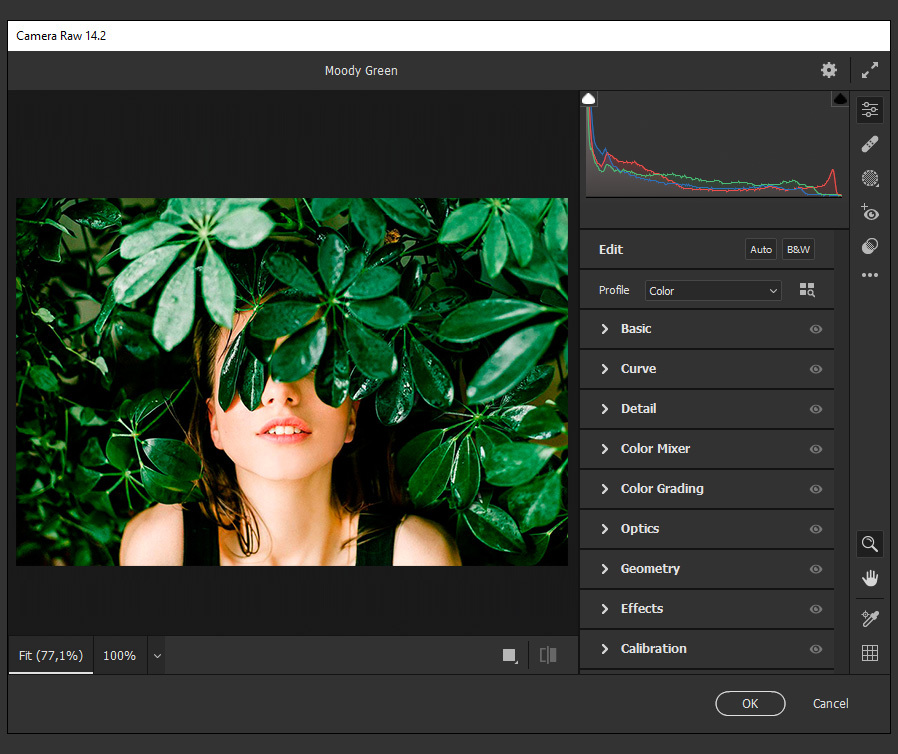
With the Smart Object layer selected, go to Filter > Camera Raw Filter.
Step 4
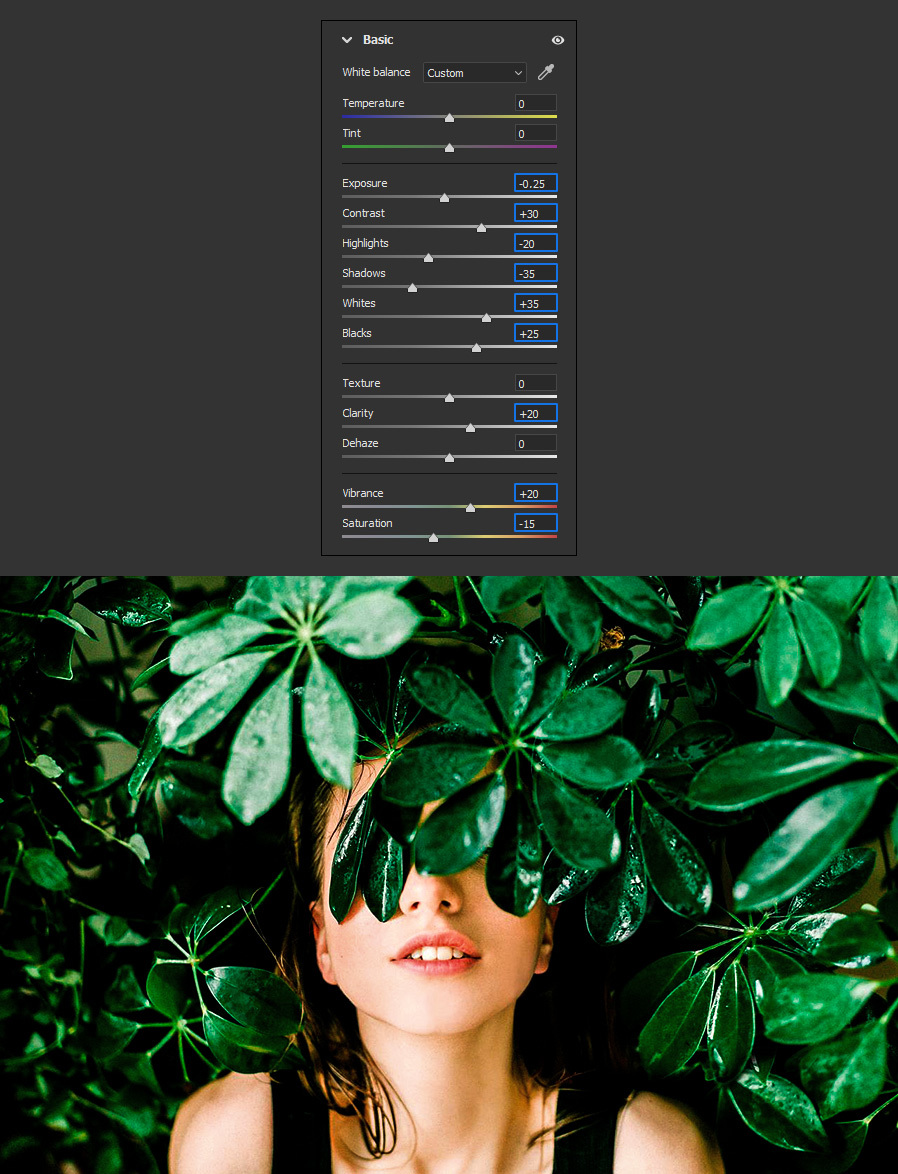
Expand the Basic panel and apply the following values.
Step 5
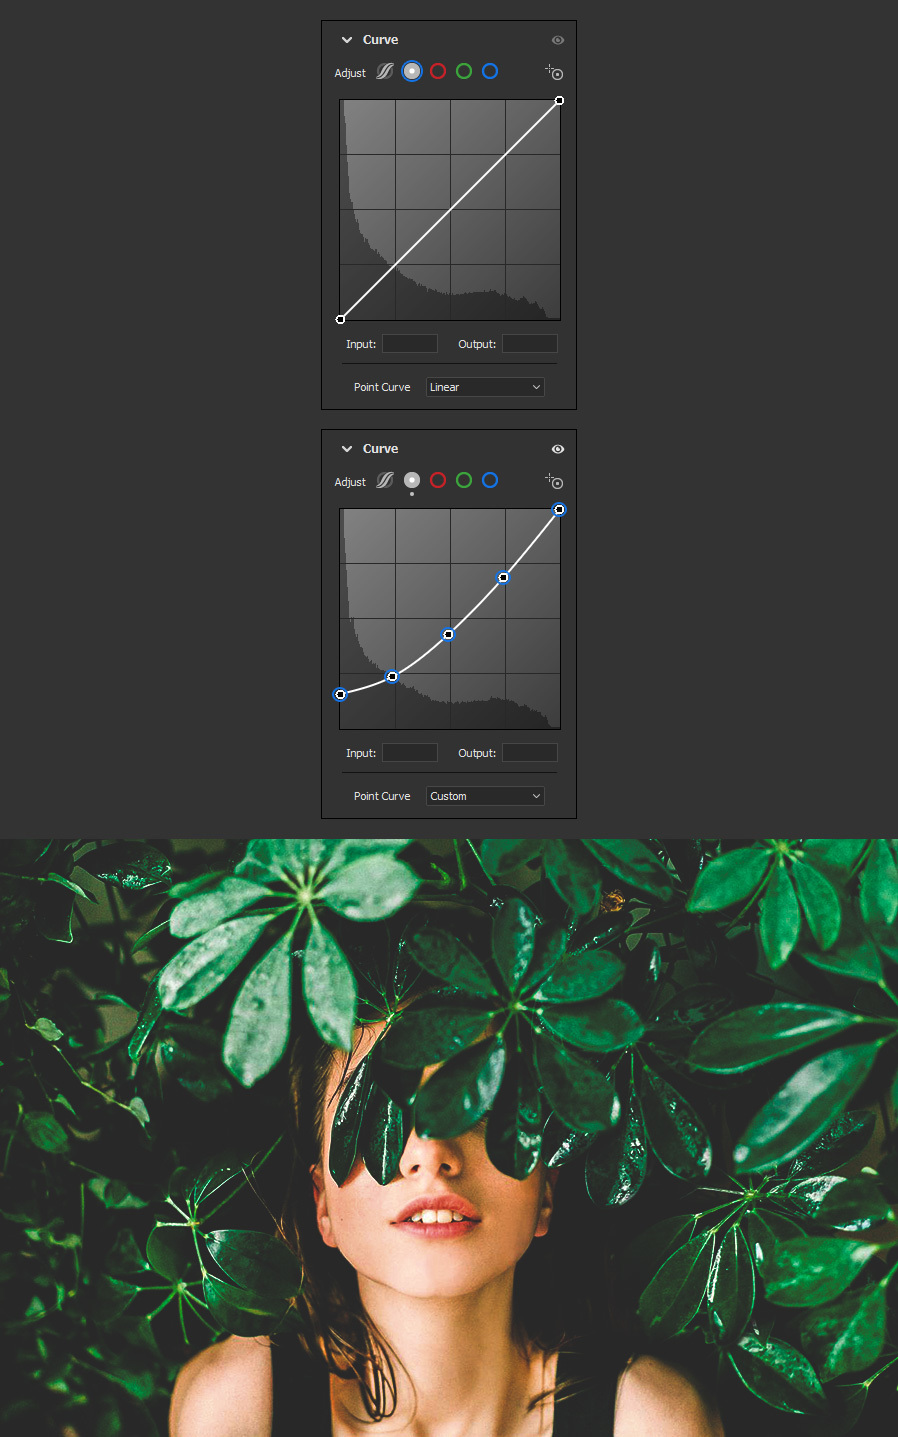
Expand the Curve panel and select the "Point Curve". Add 3 new anchor points by clicking anywhere on the curve and set the following Input/Output values for each of the points:
- 0 - 40
- 60 - 60
- 125 - 110
- 190 - 170
- 255 - 255
Step 6
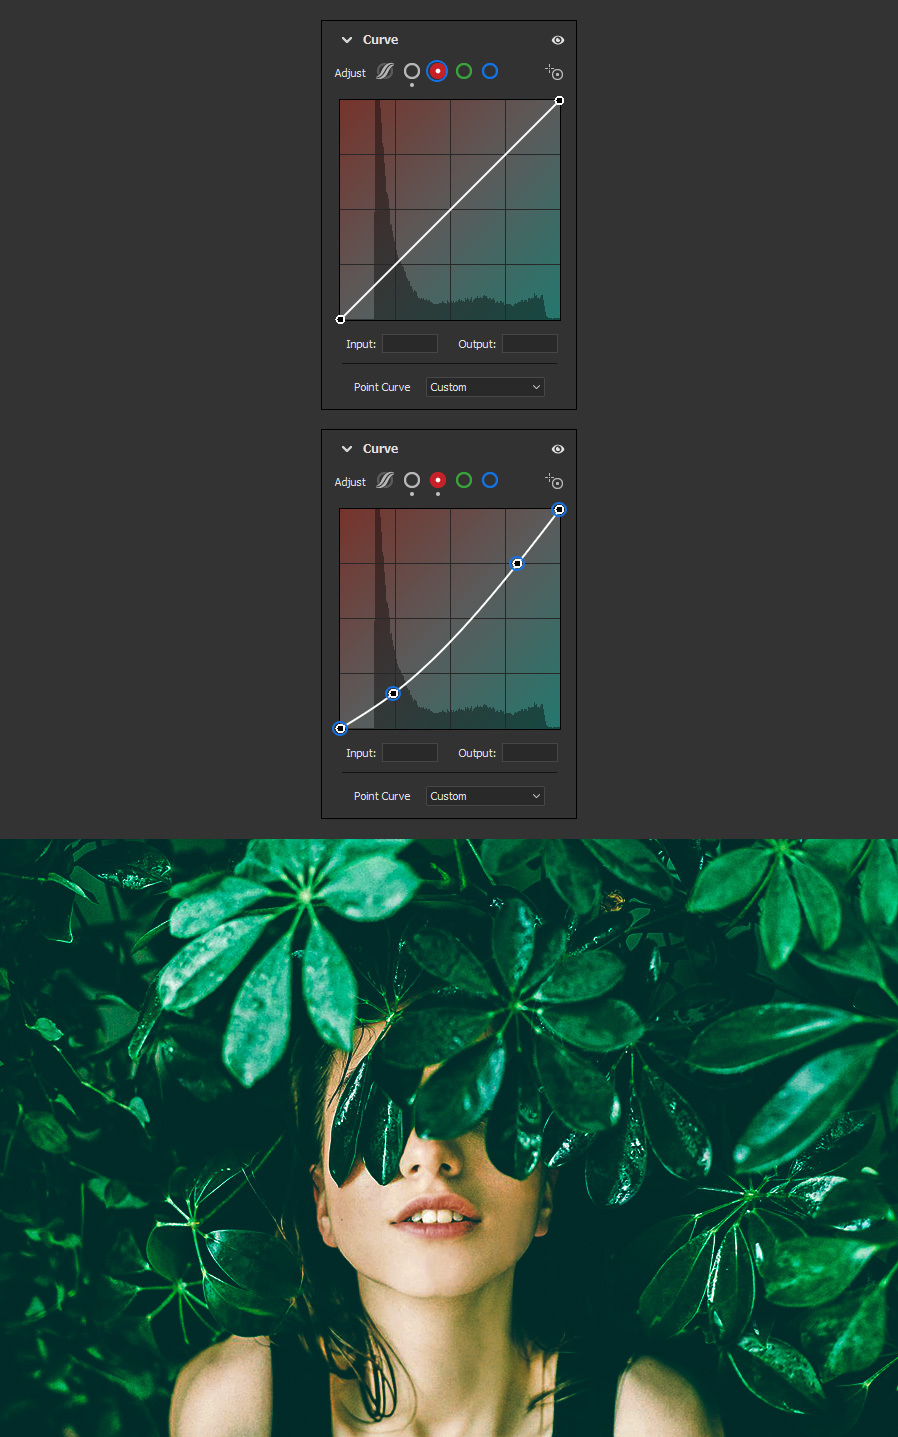
Select the Red Channel curve. Add 2 new anchor points by clicking anywhere on the curve and set the following Input/Output values for each of the points:
- 0 - 0
- 65 - 40
- 210 - 190
- 255 - 255
Step 7
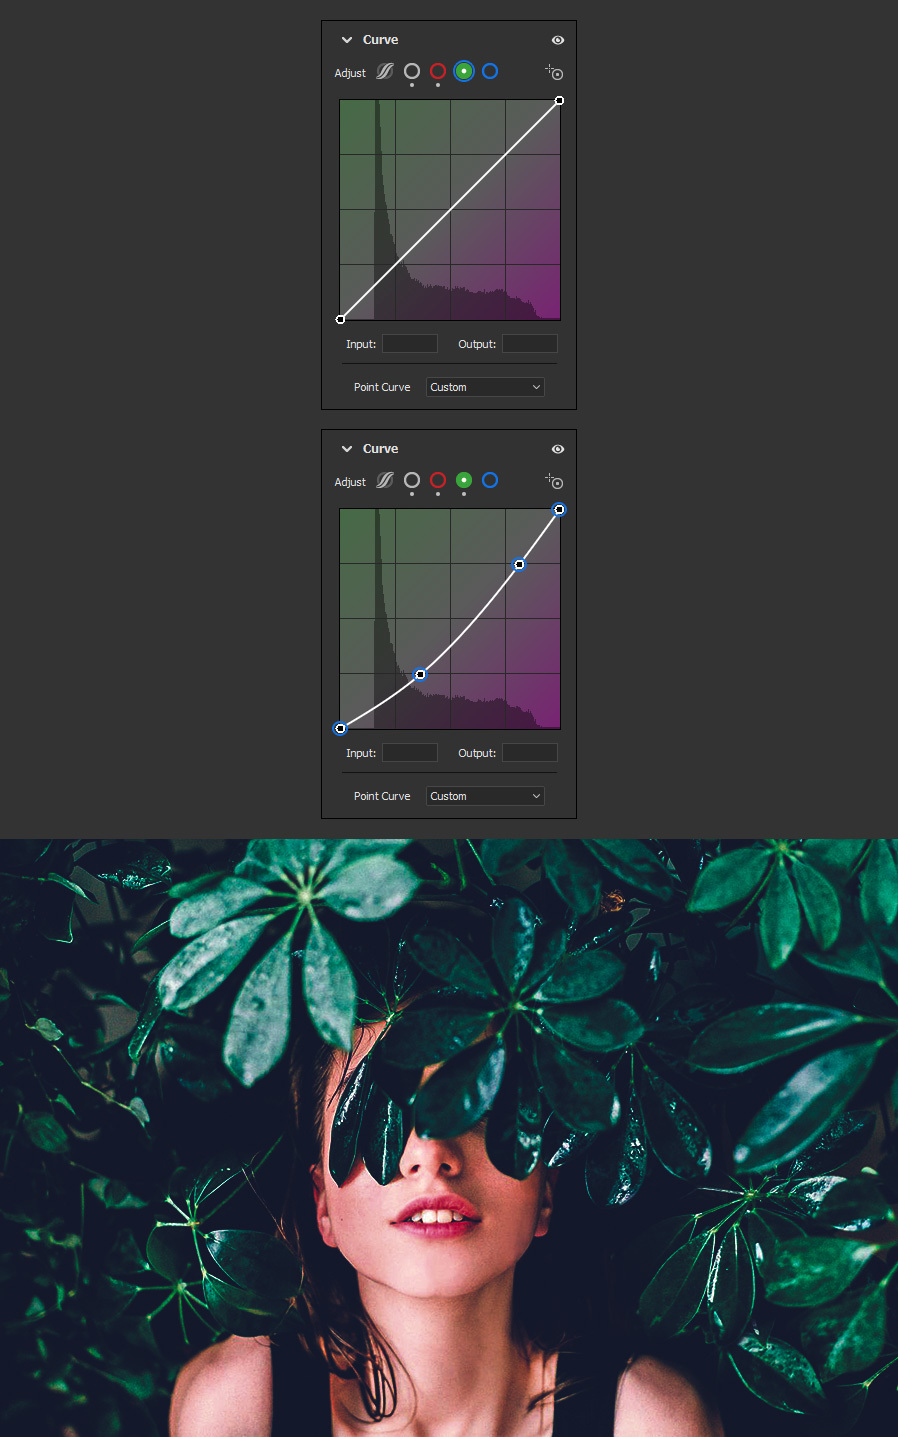
Next, select the Green Channel. Add 2 new anchor points by clicking anywhere on the curve and set the following Input/Output values for each of the points:
- 0 - 0
- 95 - 65
- 210 - 190
- 255 - 255
Step 8
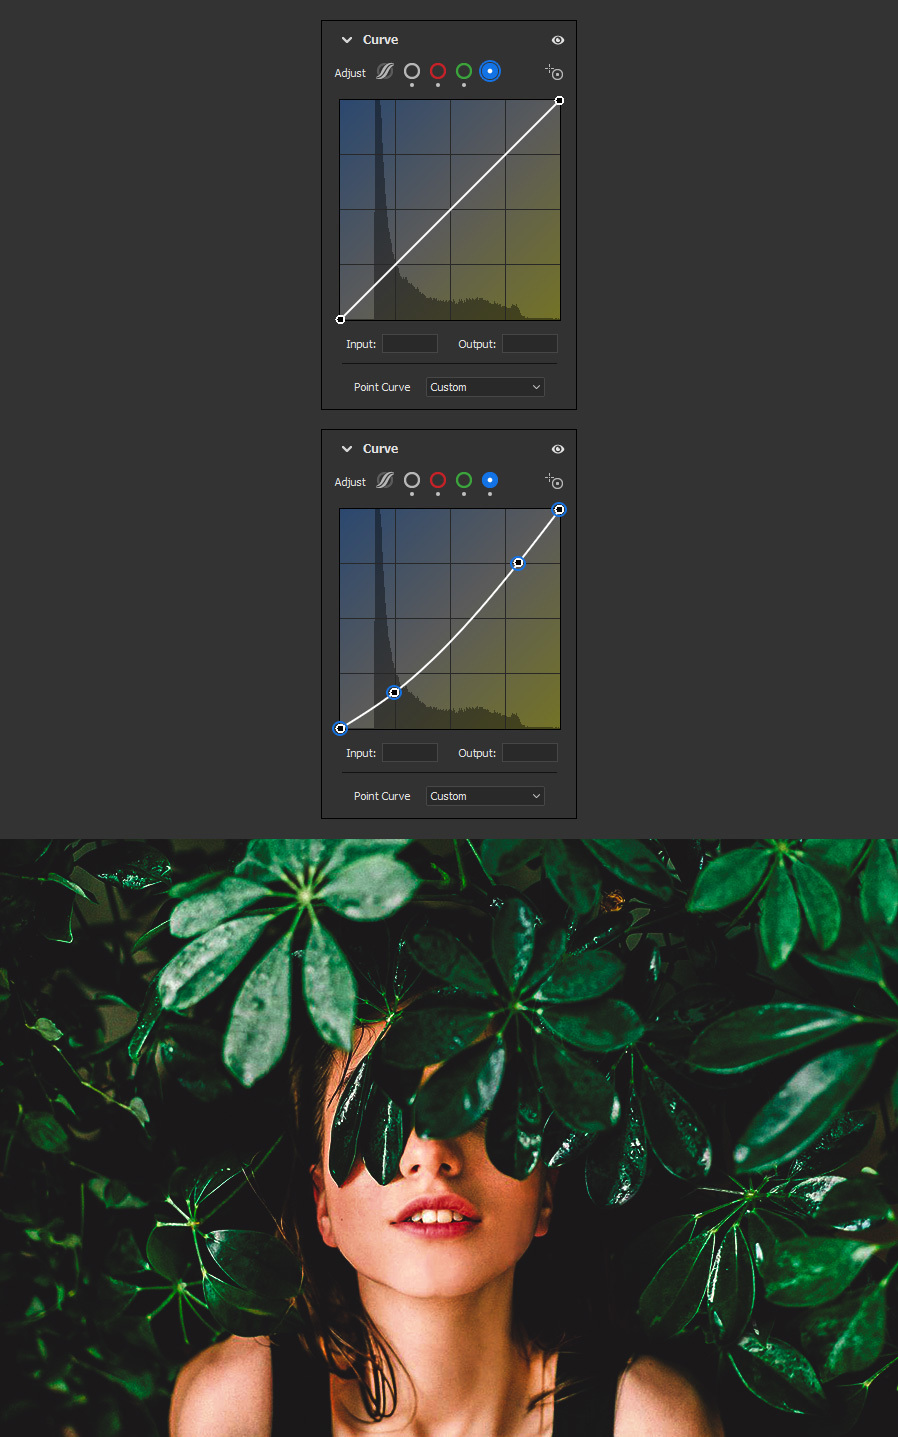
Now select the Blue Channel. Add 2 new anchor points by clicking anywhere on the curve and set the following Input/Output values for each of the points:
- 0 - 0
- 65 - 40
- 210 - 190
- 255 - 255
Step 9
Lastly, expand the Color Mixer panel, apply the following values and click OK in the Camera RAW window.

A Final Tip
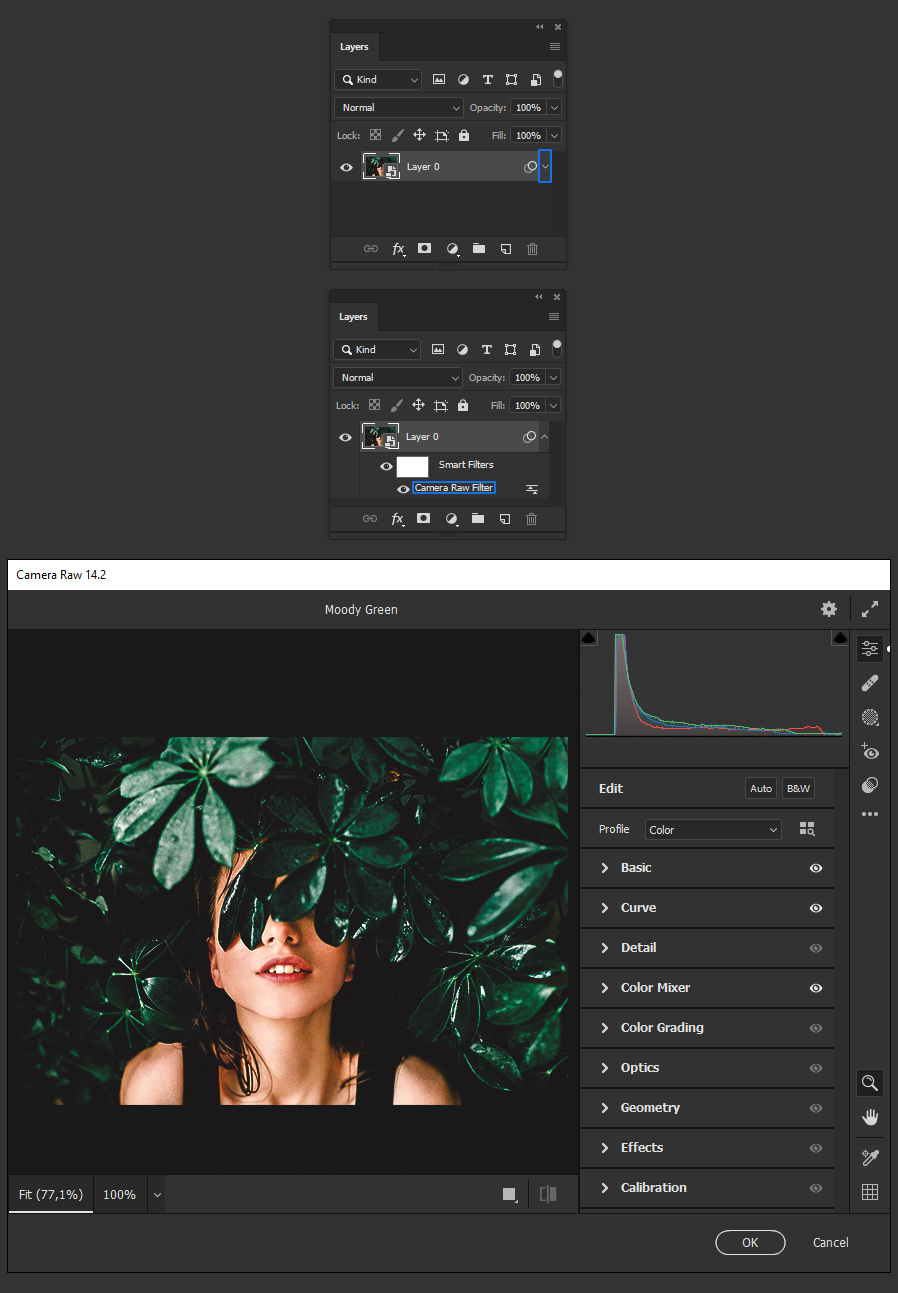
If you want to adjust some of the effect settings later, simply click on the down arrow of the image layer to reveal the layer effects and then double click on "Camera Raw Filter" to open the Camera Raw window, make your adjustments and then click Ok in the Camera Raw window.
