How to Make a 3D Tube Text Effect in Photoshop
3D Effects in Photoshop
In Photoshop, there are a few tool that designers do not use often, maybe because they do not need them or maybe because they don't know what it is useful for, so today i will show you how you can easily create a 3D tube effect in Photoshop using a circle, a simple path and the (not so often used) Mixer Brush Tool. Although this effect can be used along any path, for this tutorial we will focus on how to apply this 3D effect to a hand made text path to create an eye catching effect.
Step 1
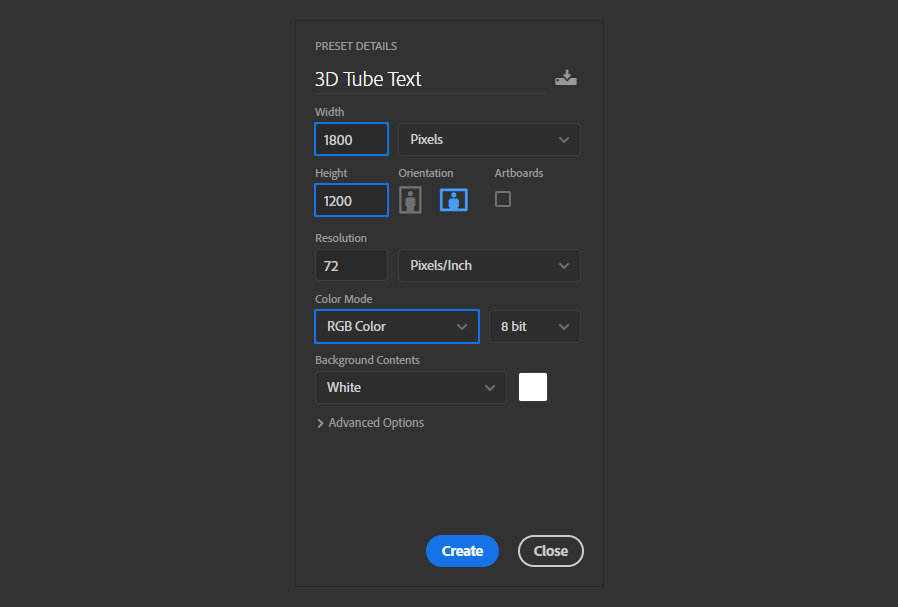
Open Photoshop and make a new file at any size you want. In this case, I will setup mine at 1800 x 1200 px.
Step 2
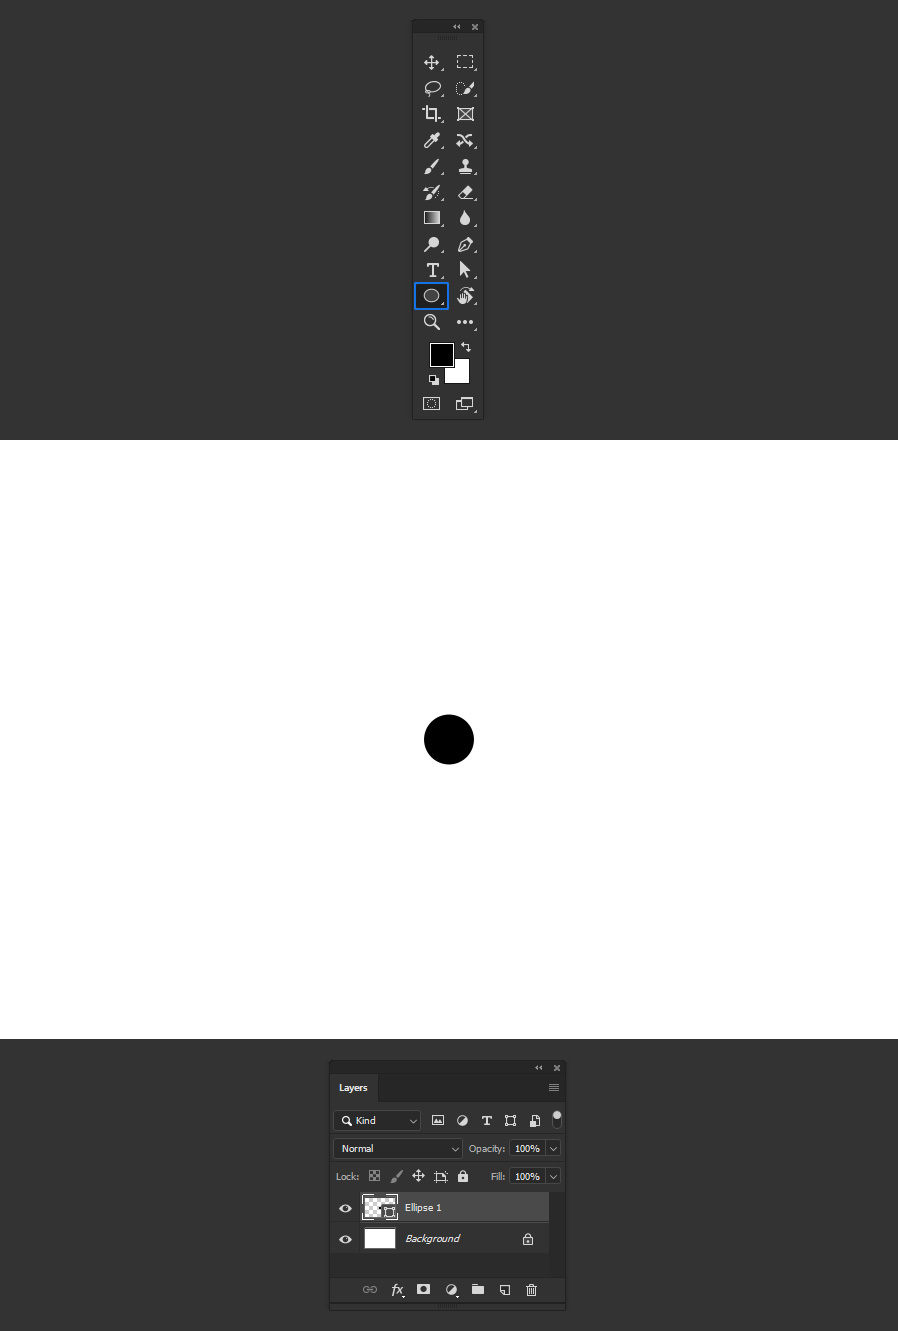
Select the Ellipse Tool (U), and in a new layer draw a circle of approximately 100px.
Step 3
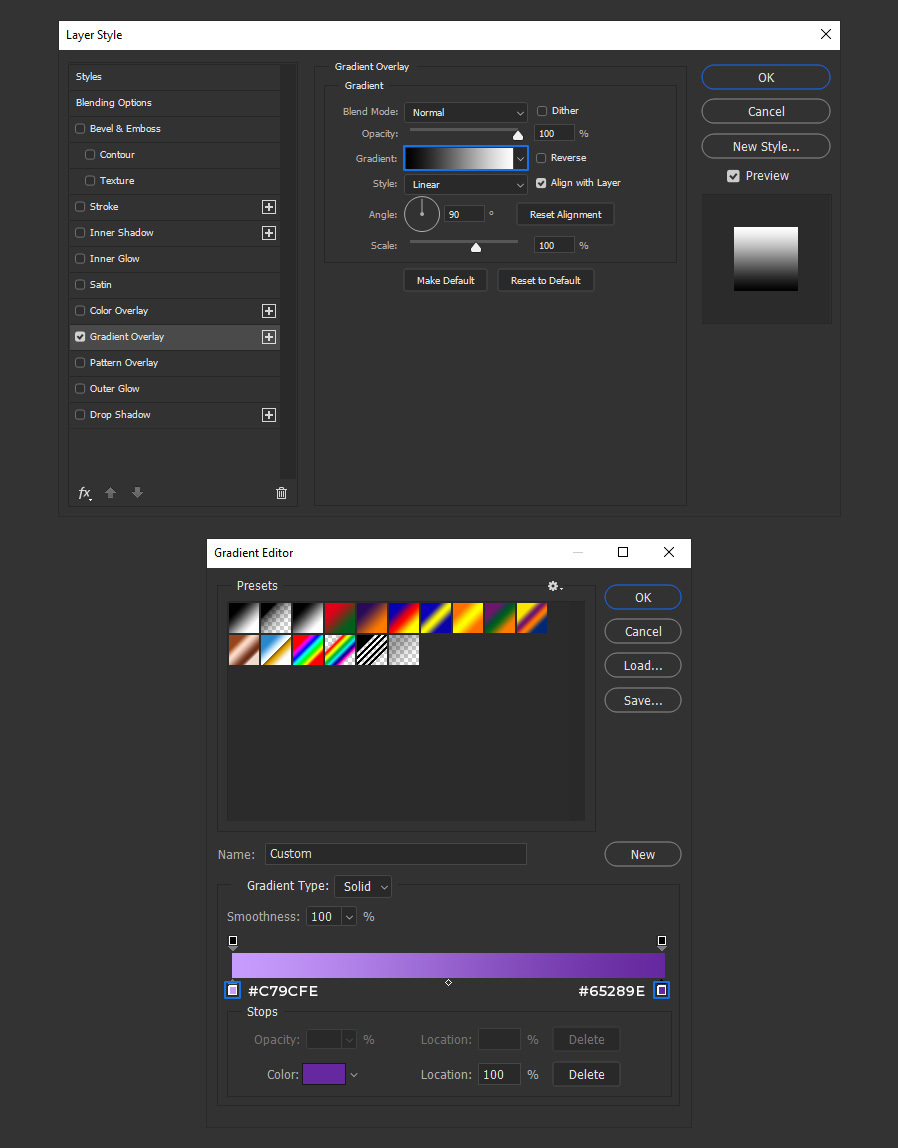
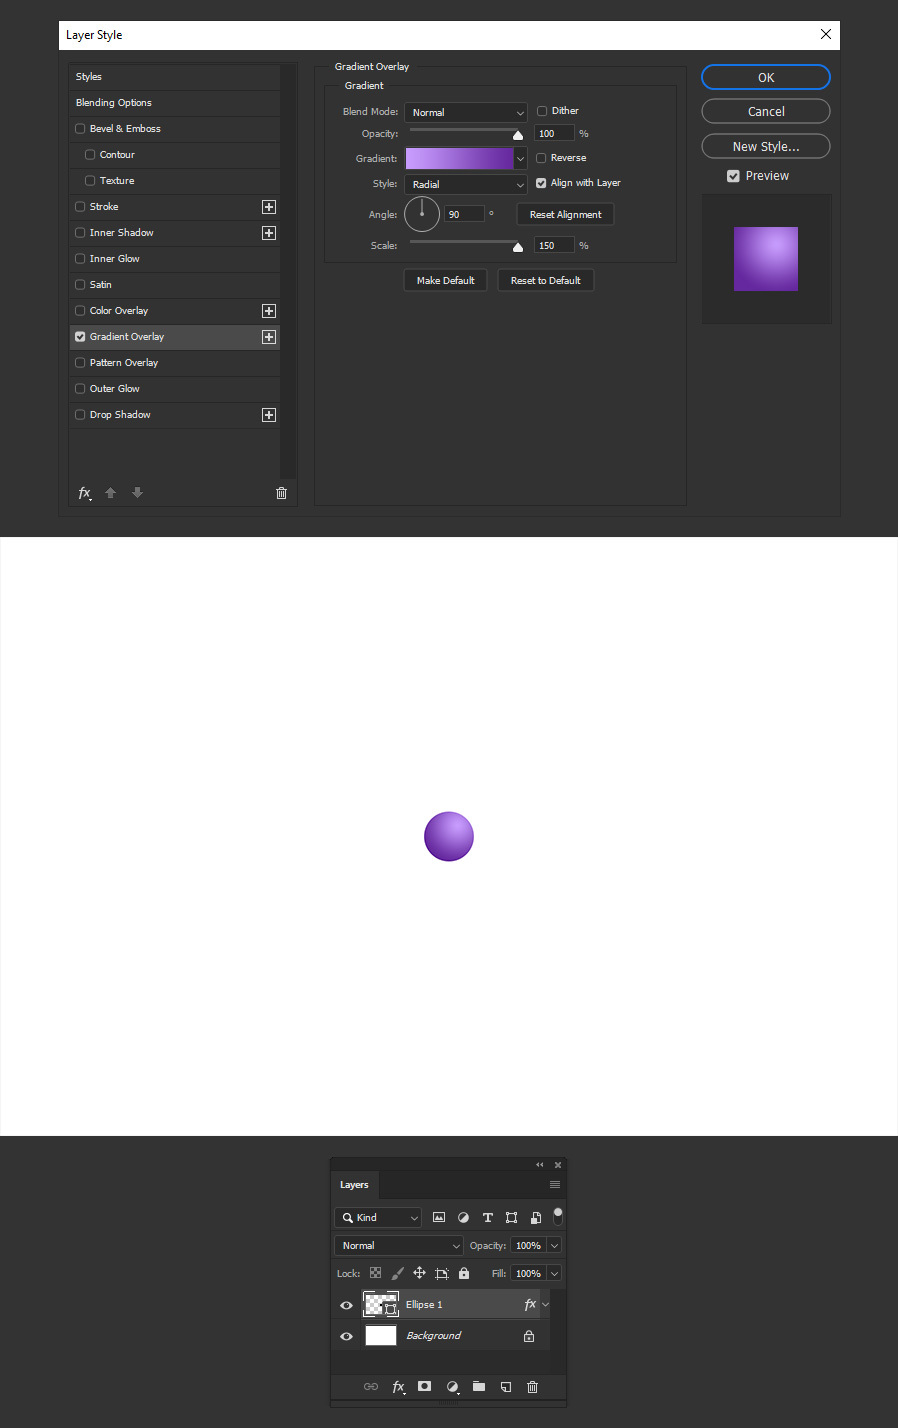
Go to Layer > Layer Style > Gradient Overlay.

Step 4
Click on the Gradient Thumbnail and in the Gradient Editor set the first color stop to #c79cfe, the second color stop to #65289e and click OK.
Step 5
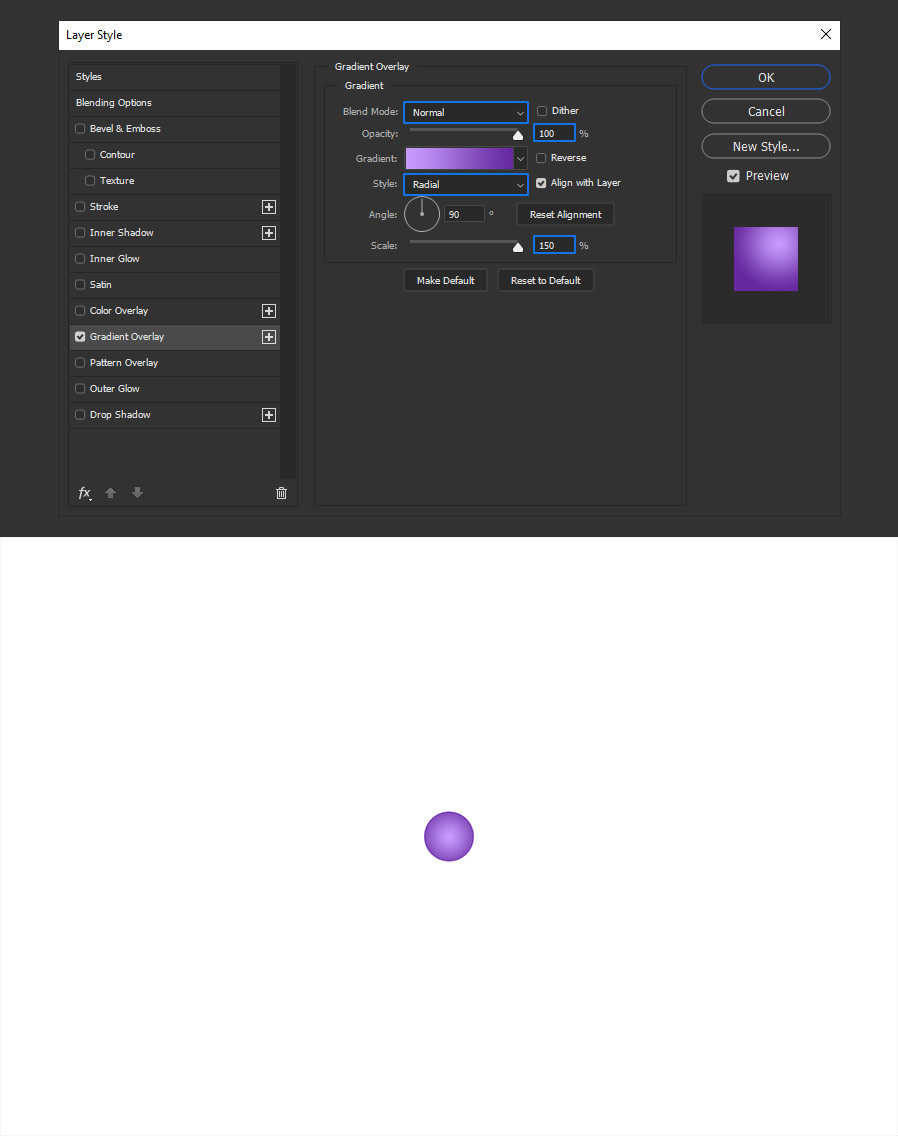
Apply the following settings (but do not click OK yet).
Step 6
With the Layer Style window still visible, click and drag over the circle to reposition the gradient as shown.

Step 7
Click OK in the Layer Style window.
Step 8
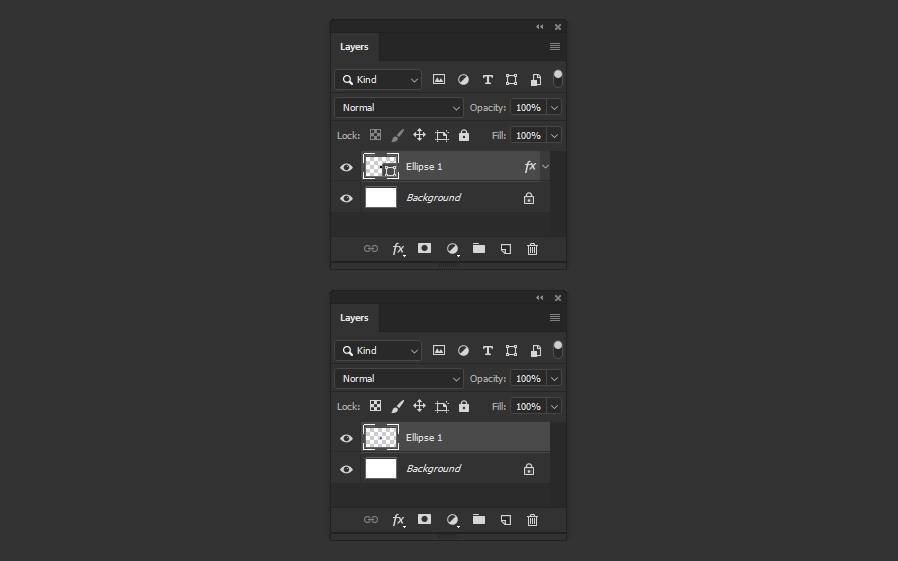
Go to Layer > Rasterize > Layer Style.
Step 9
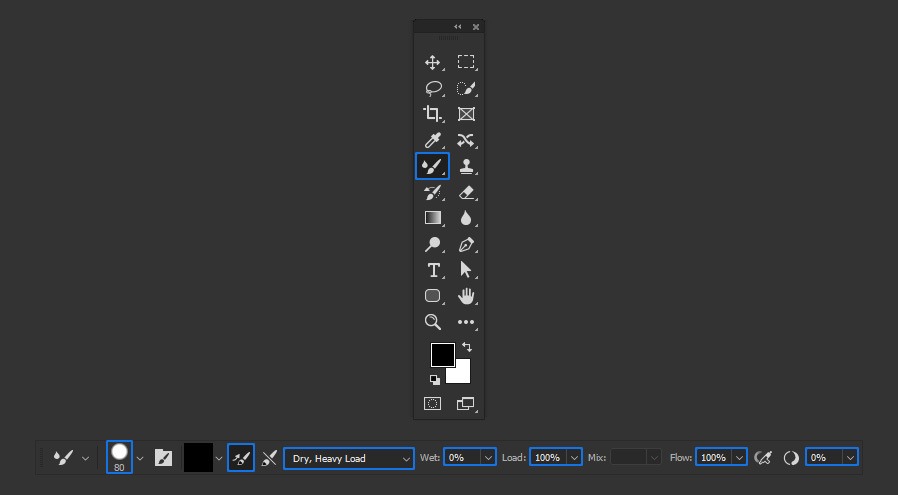
Select the Mixer Brush Tool (B) and in the top toolbar set the following values.
Step 10
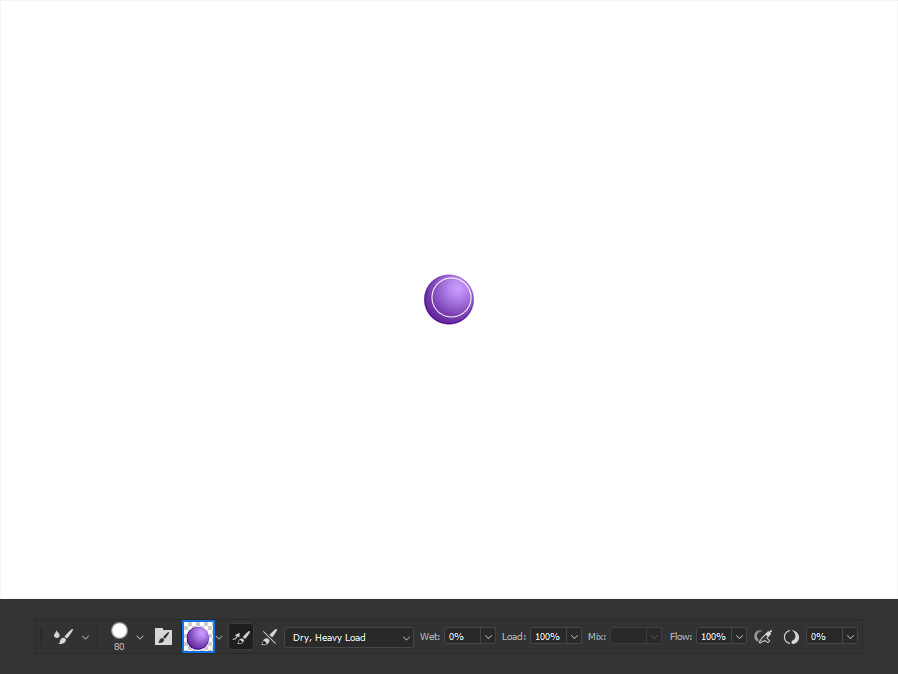
With the Mixer Brush Tool already set, position the cursor over the circle and while holding the Alt key on your keyboard click once to sample a portion of the circle as shown.
Step 11
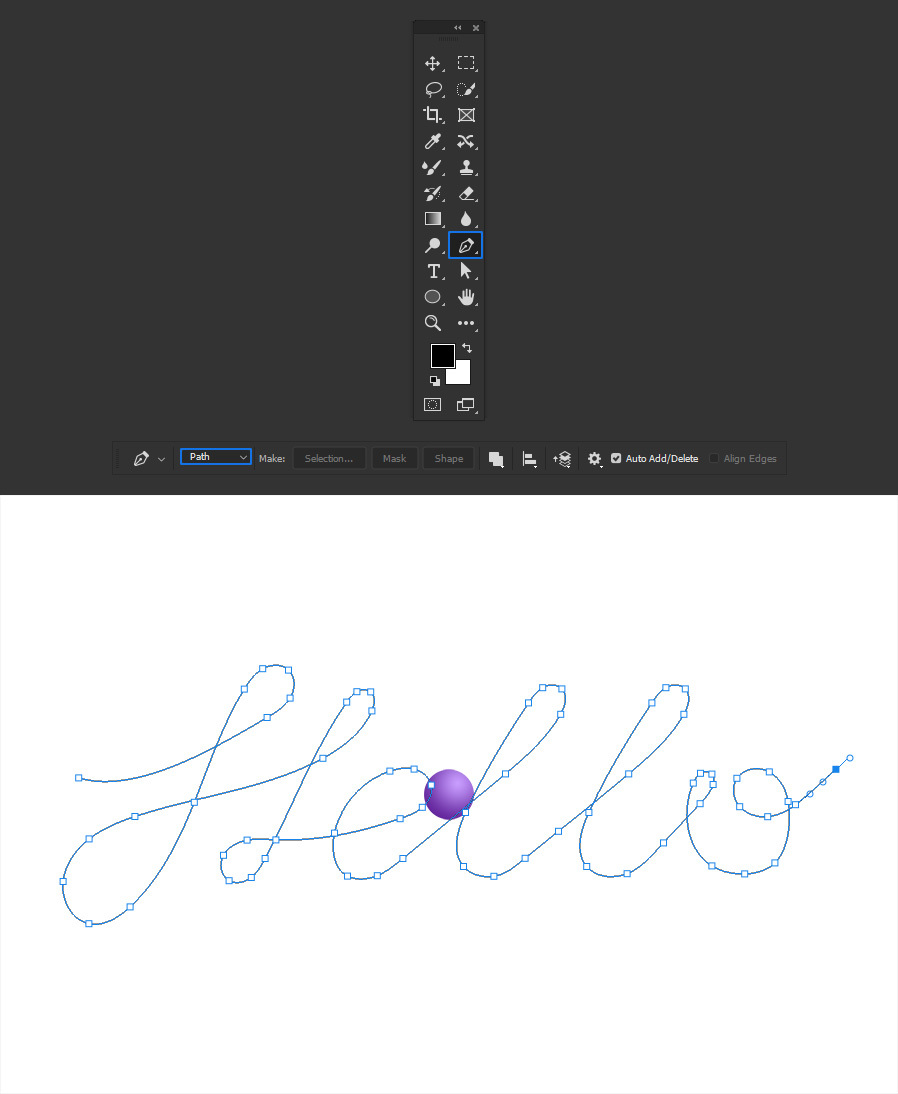
Select the Pen Tool (P), be sure to have the mode in the top toolbar set to "Path" and draw your text. In this case i will simply write "Hello".
Step 12
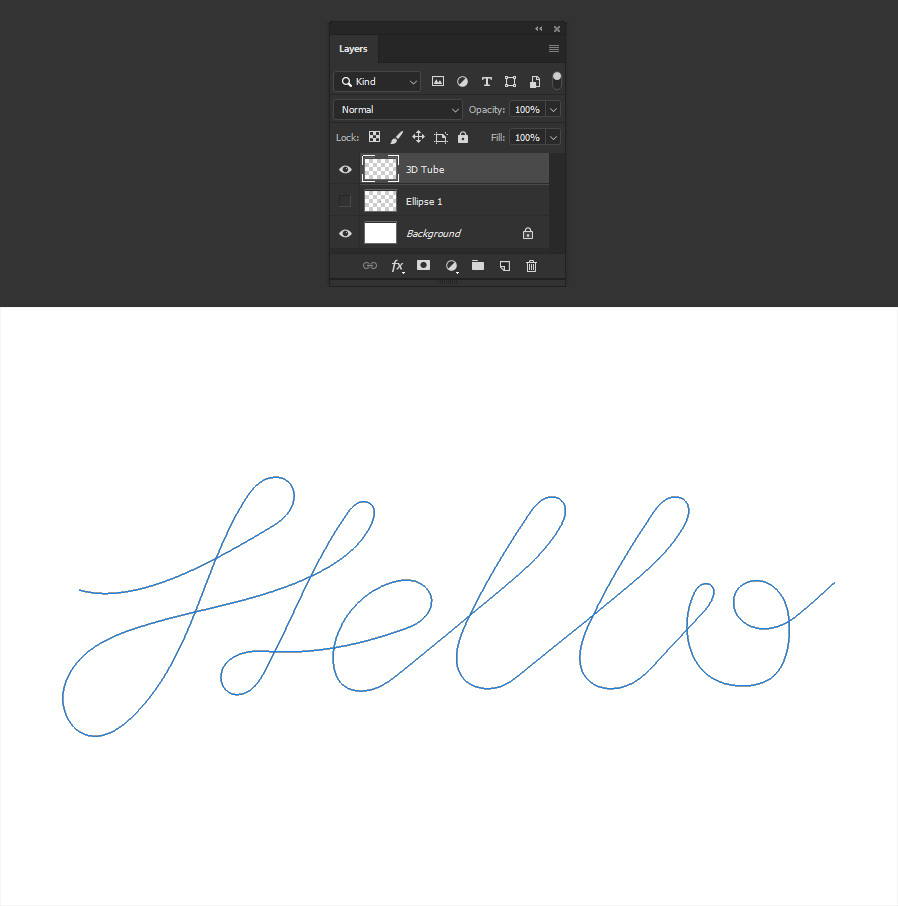
Hide the Ellipse layer and make a new layer called "3D Tube".
Step 13
In the Paths window (Window > Paths) and with the Pen Tool still selected, right click over the recently created Work Path and from the dropdown menu select "Stroke Path".

Step 14
To finish the 3D Tube effect, in the Stroke Path window select the "Mixer Brush Tool" from the dropdown menu and click OK.

