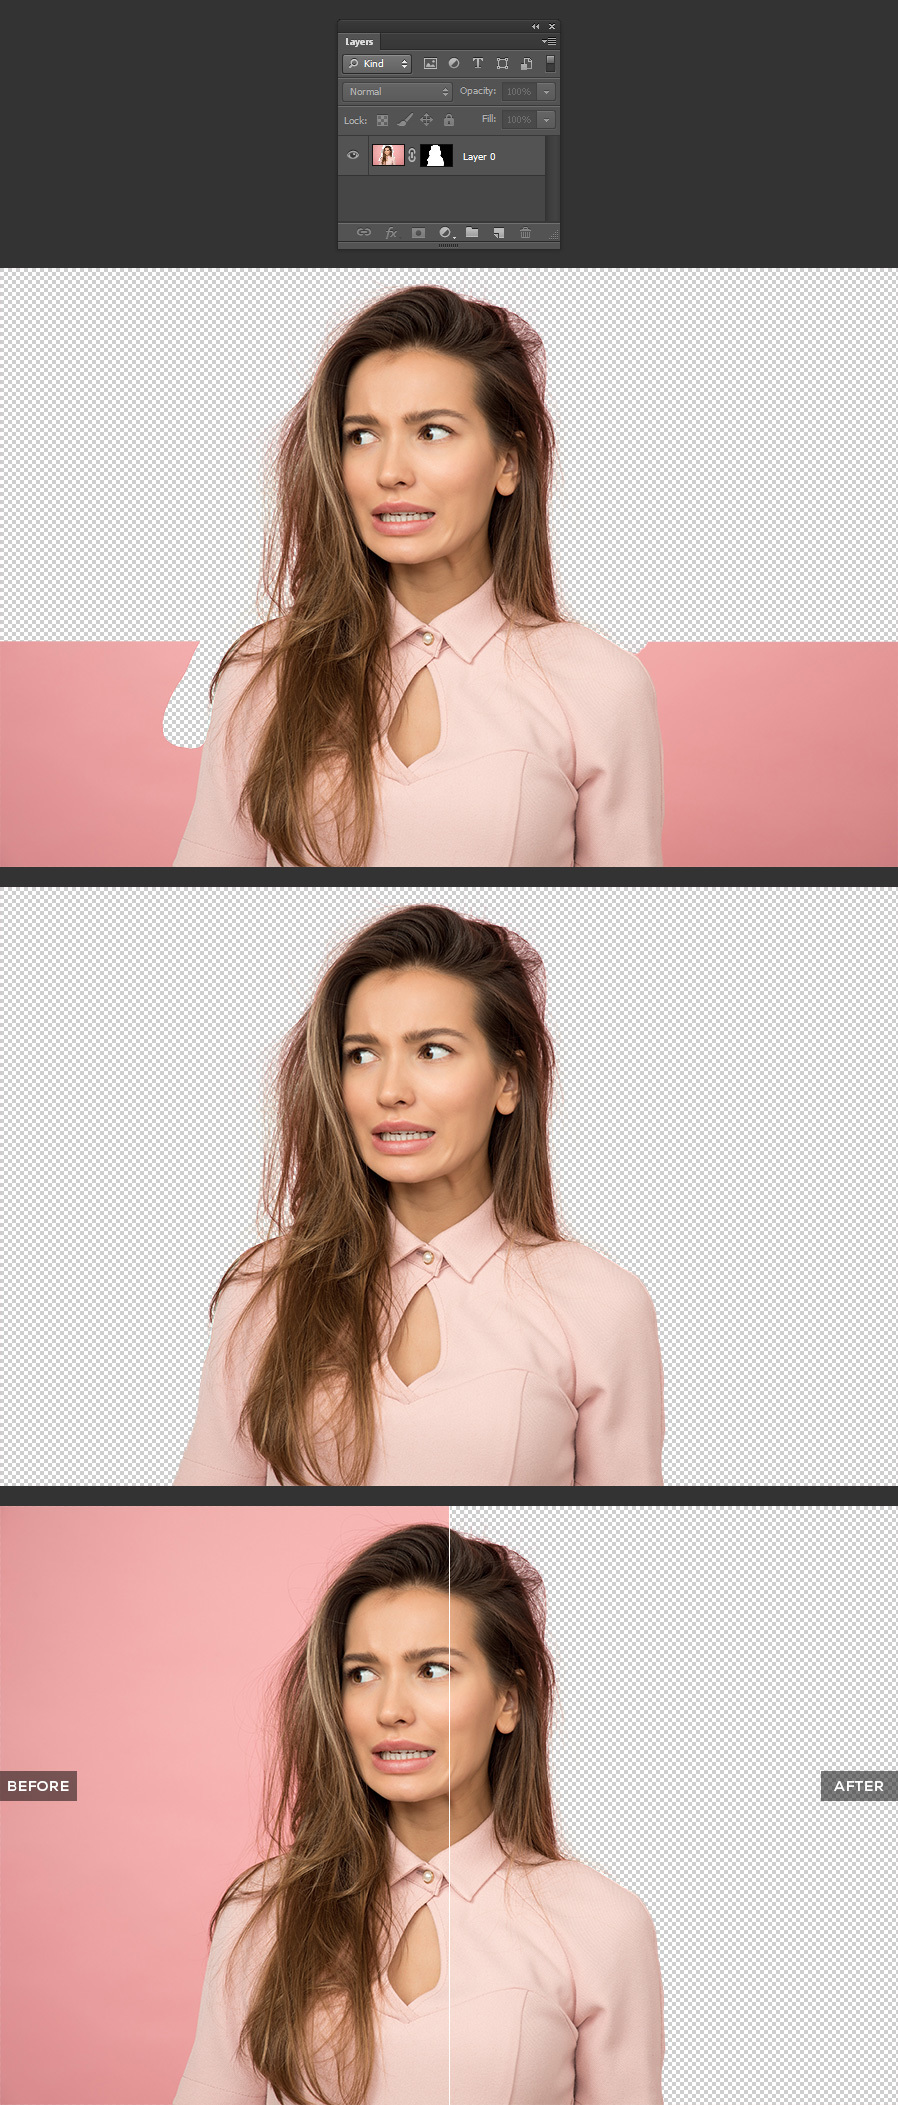
How to Easily Erase Background from Hair: the Photoshop Background Eraser Tool
Easy background removal in Photoshop
Put away your magic wand, everyone: did you know there's a built-in Photoshop "background eraser"? Here's how to use it.
Touching up hair in a picture can be one of the most annoying Photoshop tasks — all the little details involved to get a perfect end result are eye-straining. One of the most difficult version of this is when you need to retouch hair to separate it from the background. Luckily, Photoshop has a tool custom built just for that and today you'll learn to use it!
Before we begin, if you want to follow this tutorial exactly as described go ahead and download the following woman image from Pexels.
Step 1
Open the woman image in Photoshop.

Step 2
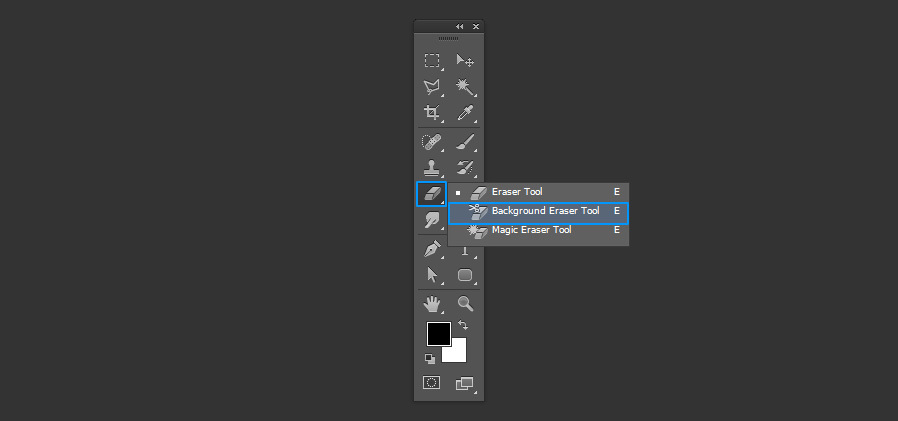
Click and hold over the “Eraser” tool in the toolbar and select the “Background Eraser Tool”.
Step 3
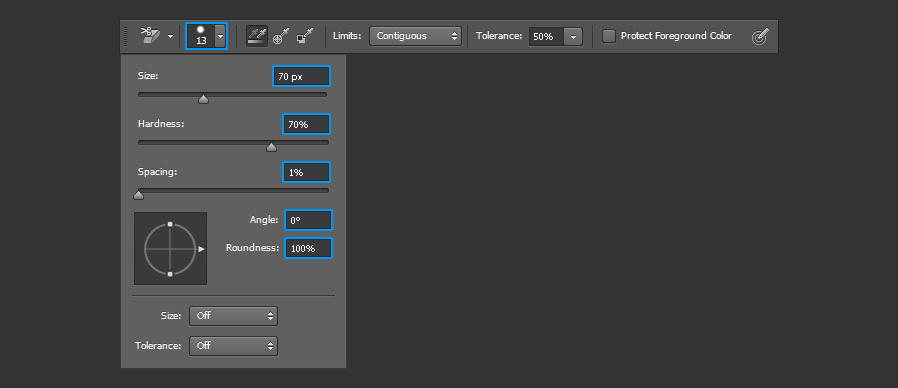
In the top toolbar, set a brush size that works best for you according to the image you are editing. In this case it is set to 70 with the Hardness set to 70% and the Spacing set to 1%.
Step 4
In the “Sampling” method, choose “Once”.

Step 5
Under “Limits” pick the "Discontiguous" one from the dropdown menu.

Step 6
Finally, set the Tolerance to about 45%.

Step 7
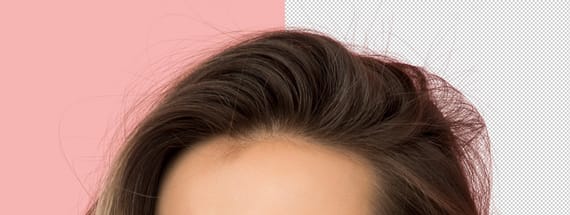
Now that the Background Eraser Tool is set, simply click on a background area near the hair and start erasing as you normally do with the eraser tool.
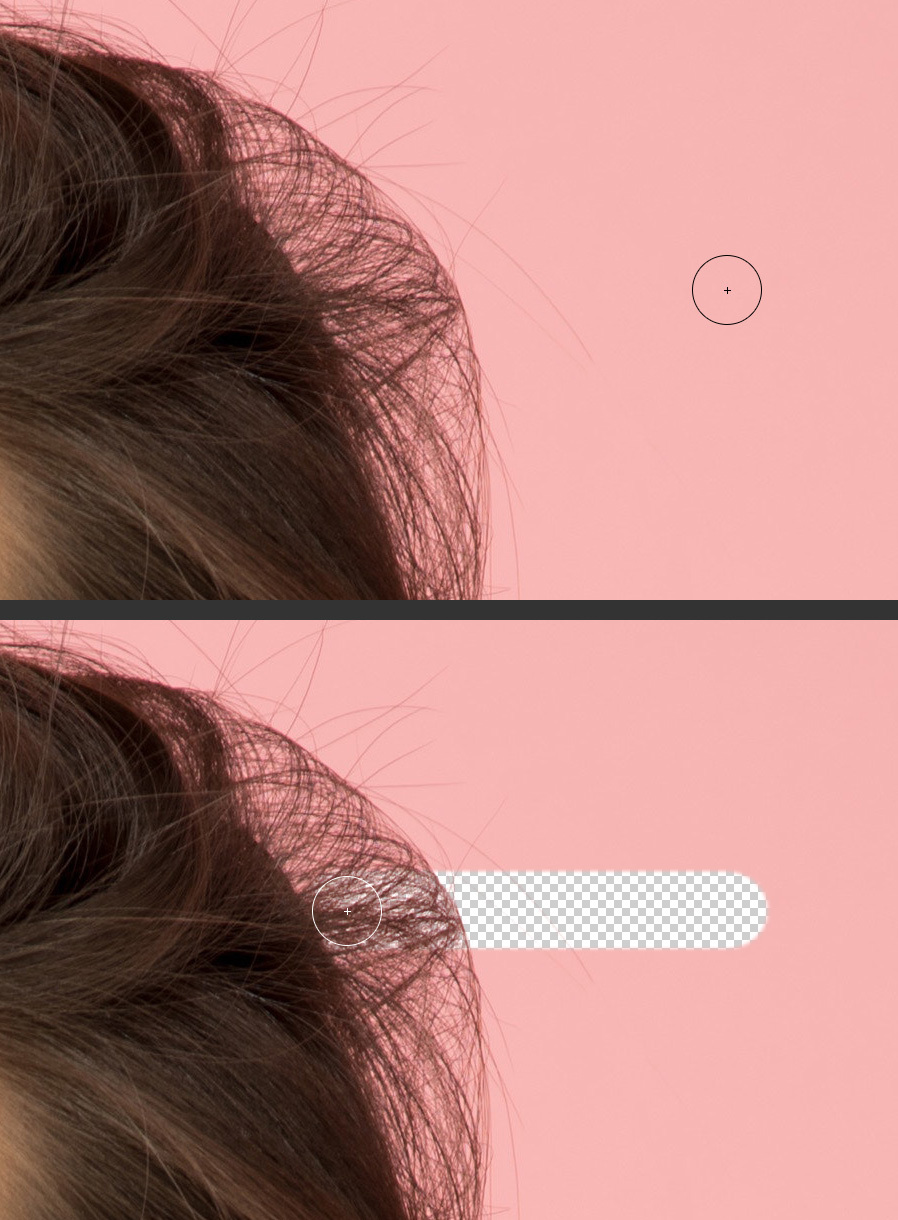
Step 8
With this simple process, keep erasing the background from hair on your subject.
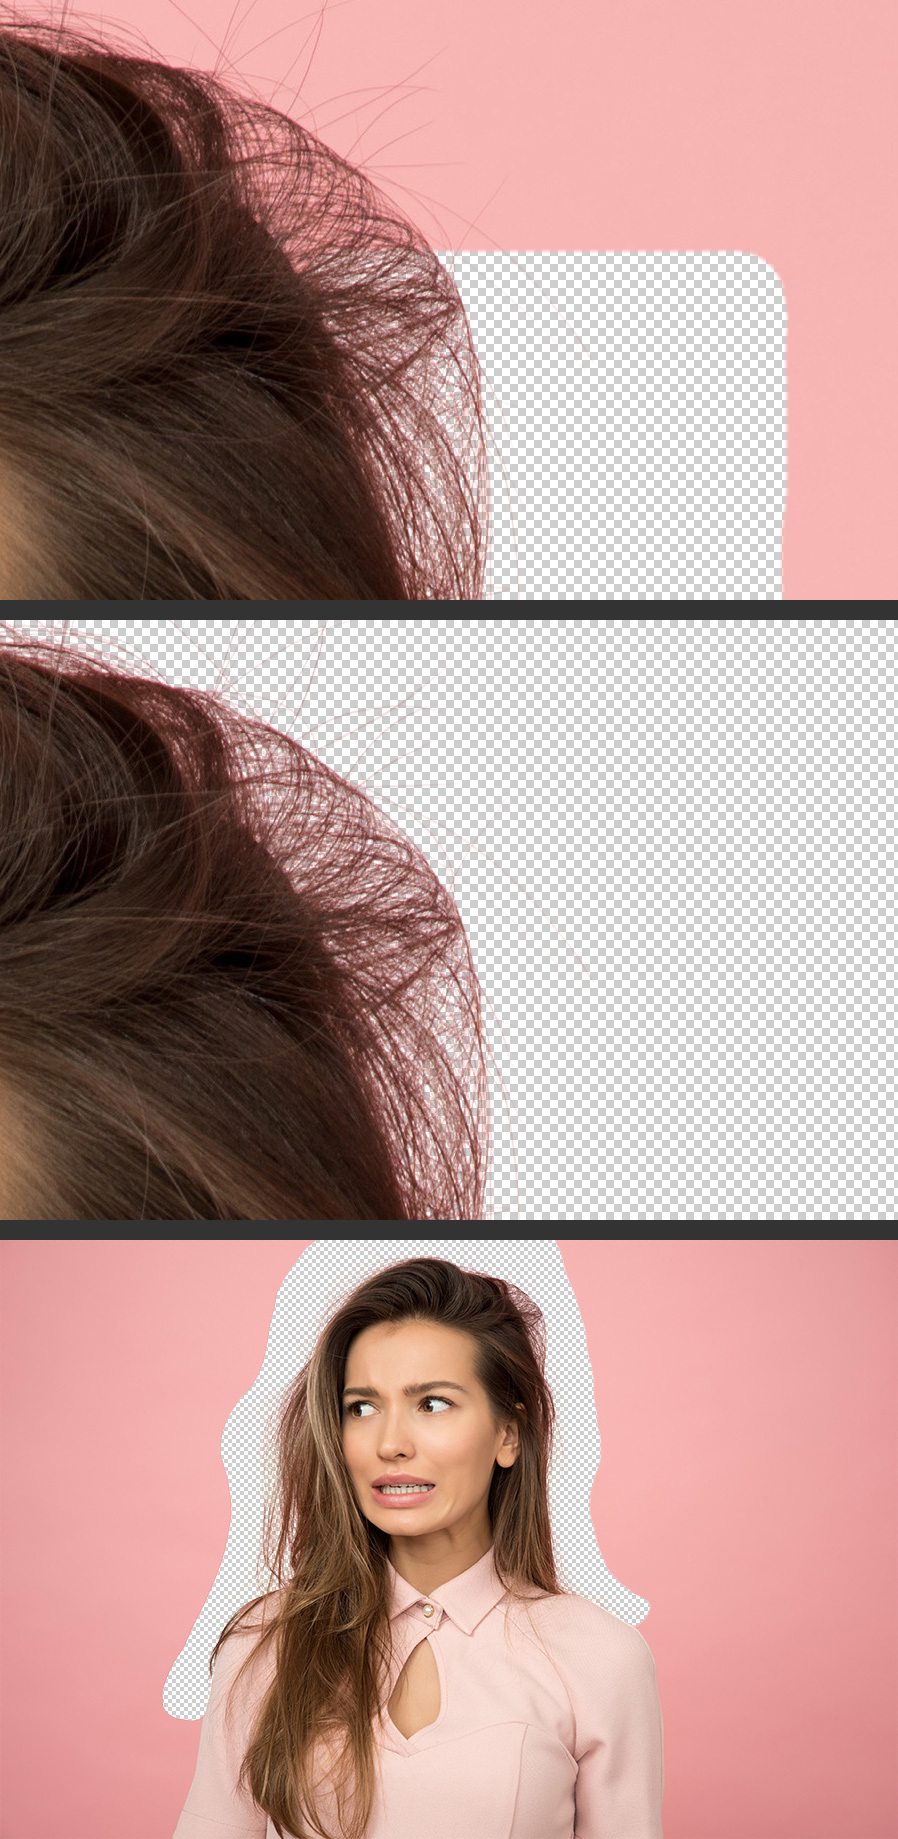
Step 9
Once you finish erasing the background from hair, you can keep using the “Background Eraser Tool” to remove the remaining background content or you can simply add a layer mask and mask the rest of the image as you normally do. To do that, click on the “Add Layer Mask” icon in the Layers Panel.
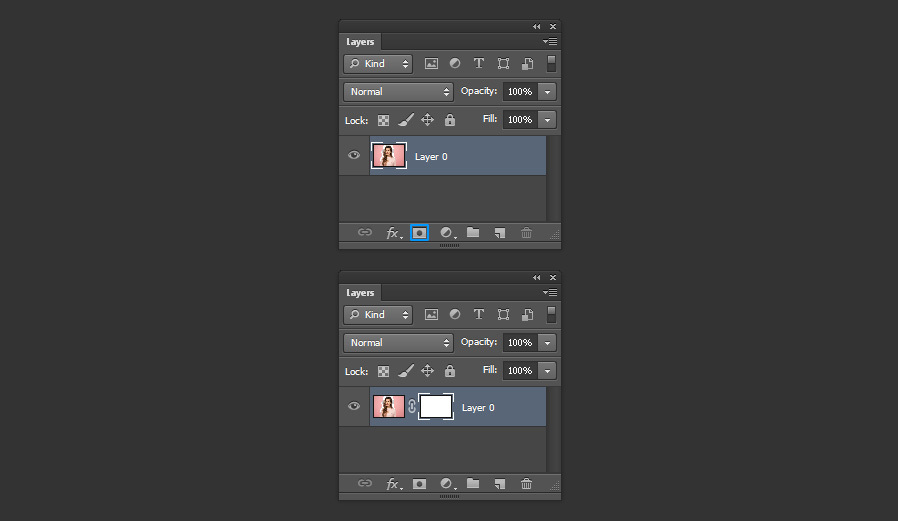
Step 10
Be sure to have a black color set as your Foreground Color. Select a soft rounded brush and click over the layer mask thumbnail in the layers panel.

Step 11
Now simply paint over the image on those areas that you want to hide.
