How to Easily Enhance Any Image With a Single Adjustment Layer
Photoshop Post-Processing Techniques
There are many different ways to enhance an image in Photoshop, by using levels, curves, brightness, contrast, color balance, etc. But all those methods requires too many fine tuning settings and they are only made to be used on that specific image. But we can achieve a similar end result using nothing more than a single (yet powerful) adjustment layer that is suitable to be used as a base for all of the images you want to enhance.
Step 1
Open your image in Photoshop.

Step 2
Go to Layer > New Adjustment Layer > Channel Mixer.

Step 3
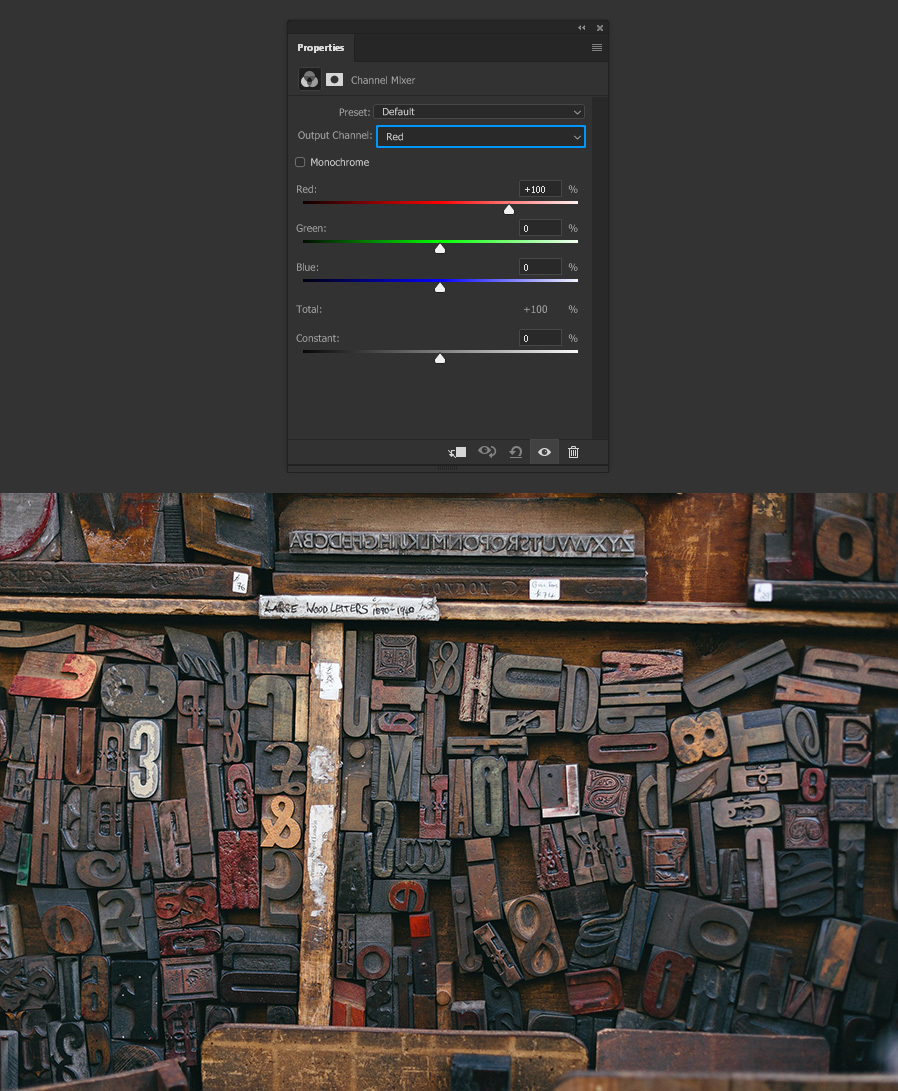
In the Properties Panel of the Channel Mixer window, select the Red Output Channel.

Step 4
Set the Red Influence to +200%, the Green to 0% and the Blue to -100%.

Step 5
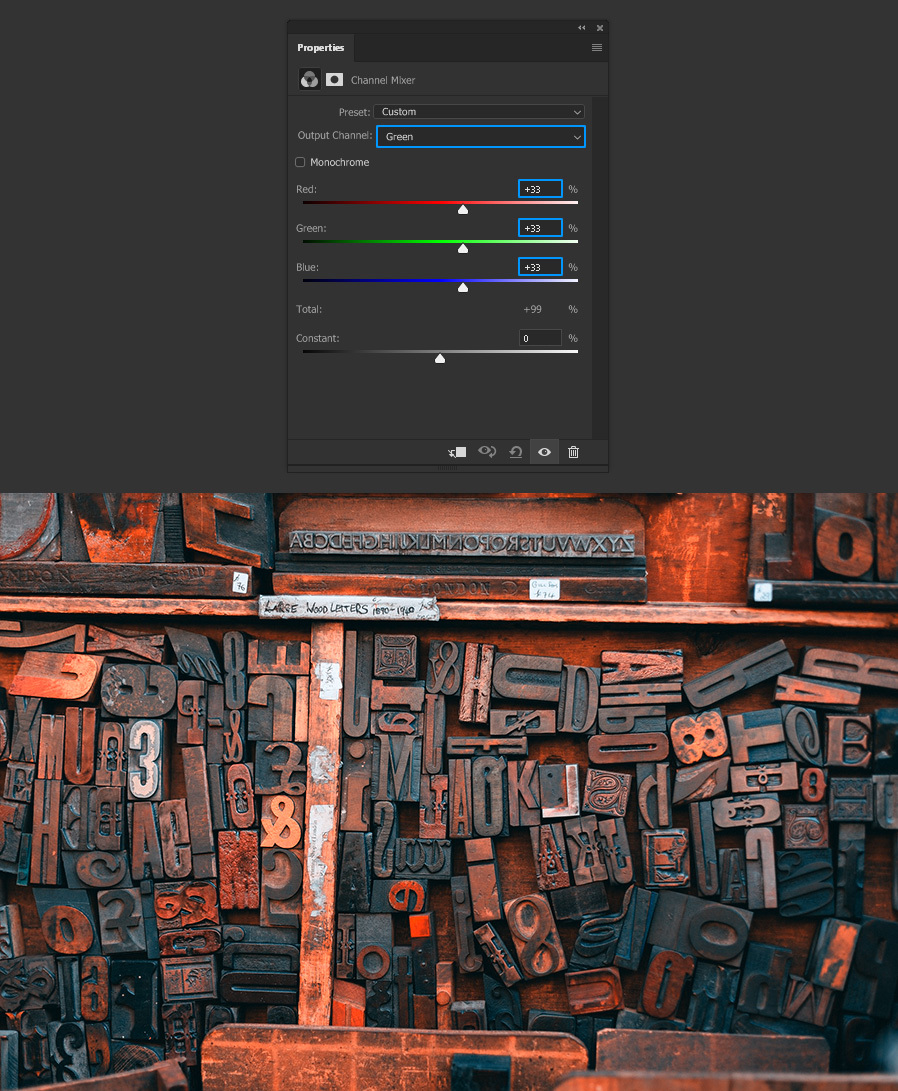
Select the Green Channel from the Output Channel dropdown menu, and set the Red, Green and Blue to +33%.

Step 6
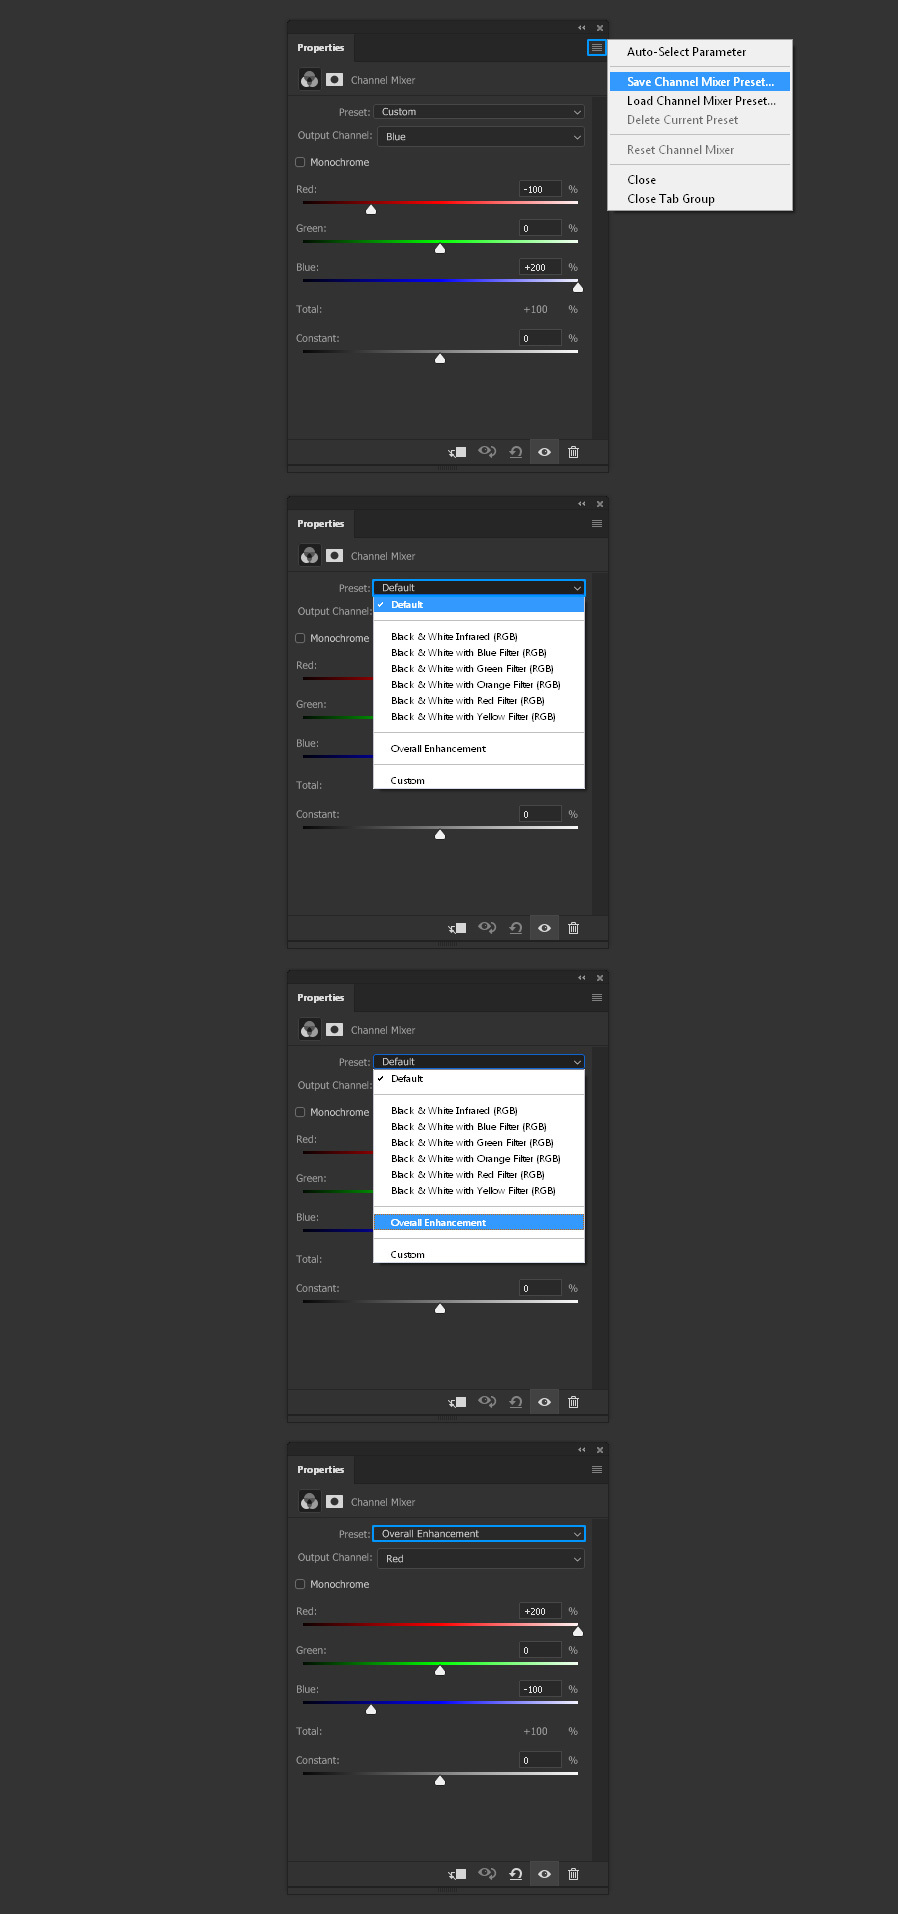
Select the Blue Channel from the Output Channel dropdown menu, and set the Red to -100%, the Green to 0% and the Blue to +200%.

Step 7
To use these settings in other images (instead of making the whole process again) in the Channel Mixer Properties Panel click on the top right icon and select “Save Channel Mixer Preset”. Name the preset as “Overall Enhancement” and save it anywhere on your computer. The next time, you just need to add the Channel Mixer layer to your image and select the “Overall Enhancement” preset from the Preset dropdown menu.

Step 8
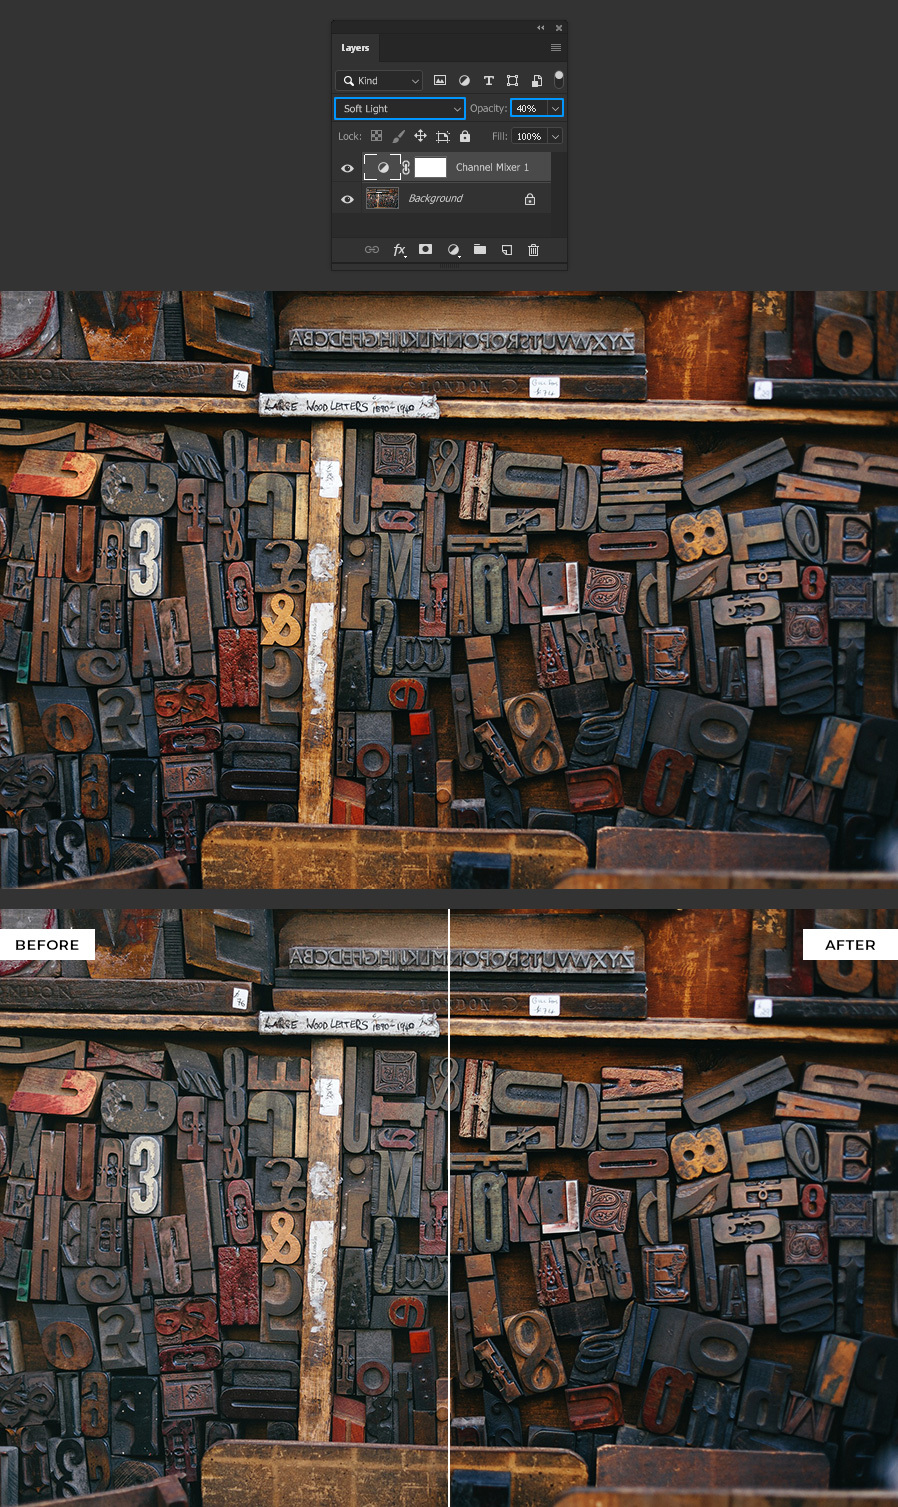
To finish up the image enhancement, in the Layers Panel set the blending mode of the Channel Mixer layer to “Soft Light” and bring down the opacity until you reach the desired enhancement intensity that you want.

Some Final Words
As you saw, enhancing your images in Photoshop could be an easy task if you use the right tools. The next time you need to improve your images, you can start by using this method, adjusting the Channel Mixer layer opacity and (if needed) make some minor adjustments to it to make it look just the way you want it.


