Quick Tip: Using Adjustment Layers for a Fast Hipster Look
We?ve all seen it on Instagram. The look is a blend of retro and vintage with a touch of cross processing. We tend refer to it as a ?hipster? photo effect. Whatever you like to call it, the look is undeniably appealing, and very quick and easy to create in Photoshop with just a few adjustment layers. In this quick tip, I?ll show you how.
Note: Be sure to check out our recent actions set for Photoshop called Hipster Tones!
First up, I chose this great image from Unsplash. You can download it here, or use your own photo.
 Open your image in Photoshop, and add a new Black & White adjustment layer. To do this click the little half filled circle icon in the bottom of the layers panel and choose Black & White.
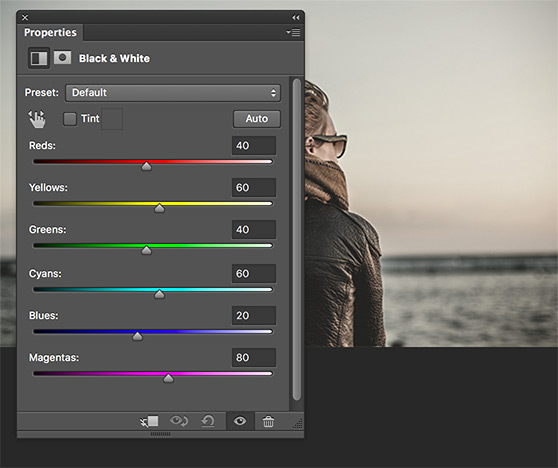
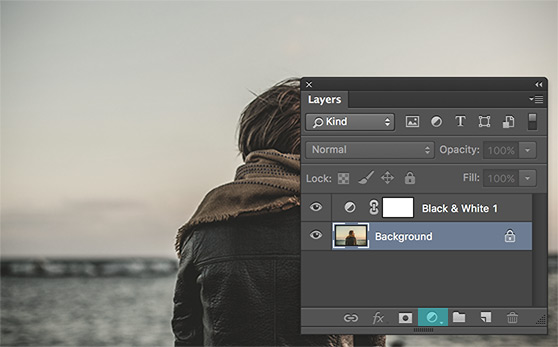 Now use the settings below, which for me were the defaults. Set this adjustment layers opacity to 60%. We still have some color but the overall tones are much more muted now.
 Next we?re going to add a slight cross processing effect. If you?re not familiar with what cross processing is in traditional film development, check out this explanation.
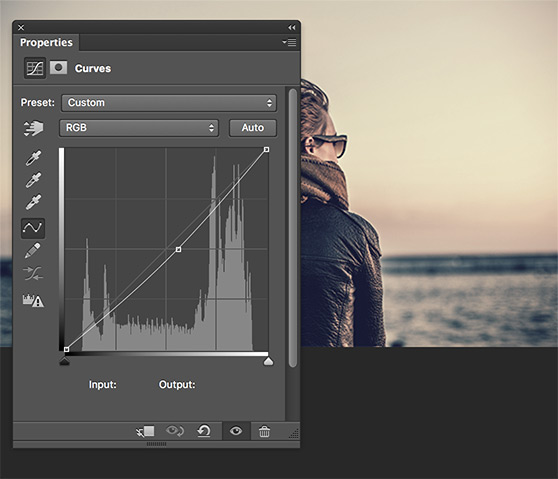
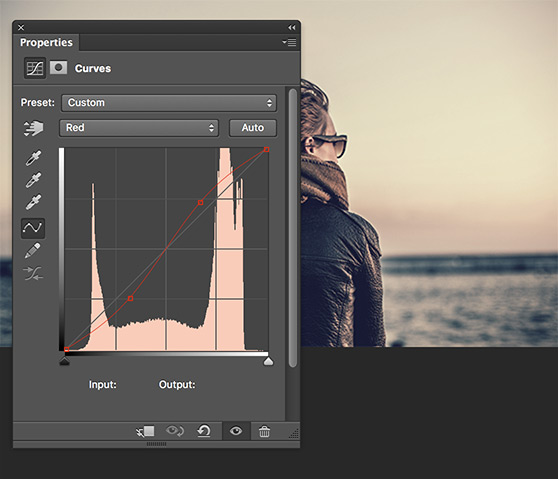
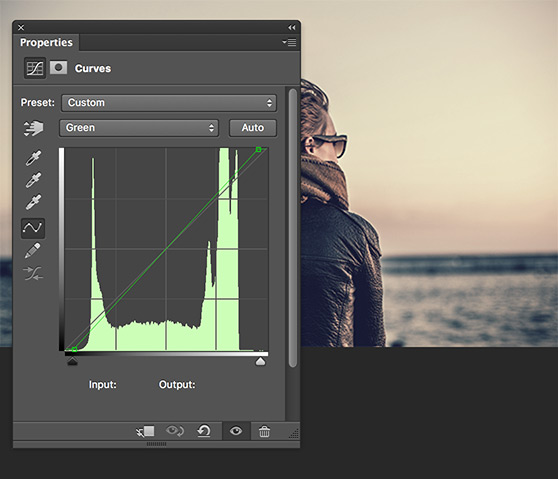
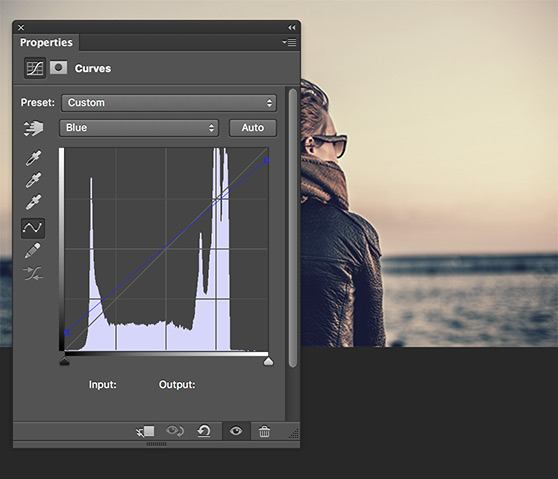
Add a new Curves adjustment layer. Below I?ll show you each setting I used for all RGB channels.
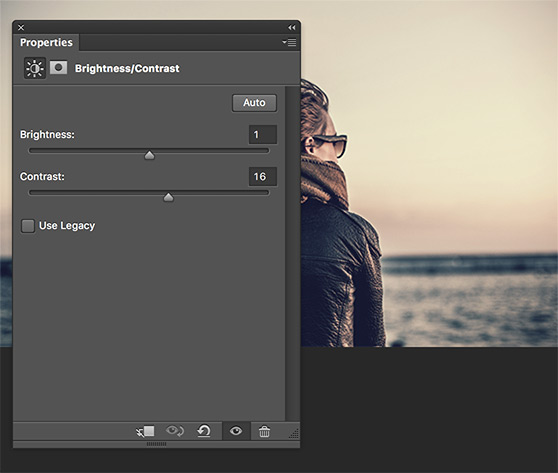
 Now add a Brightness & Contrast adjustment layer to boost the contrast a bit. Use setting similar to mine below.
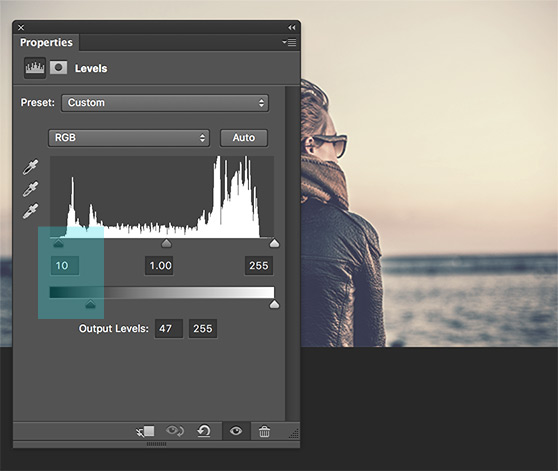
 For the final edit, add a Levels adjustment layer and use the following settings. Pull the left most handles in a bit as I have below.
 That?s it! Instant hipster. Through your lettering work over the image and your ready to build a following on Instagram :-)
Don?t forget to check out our new Hipster Tones Photoshop Action Set for more!

 Open your image in Photoshop, and add a new Black & White adjustment layer. To do this click the little half filled circle icon in the bottom of the layers panel and choose Black & White.
 Now use the settings below, which for me were the defaults. Set this adjustment layers opacity to 60%. We still have some color but the overall tones are much more muted now.
 Next we?re going to add a slight cross processing effect. If you?re not familiar with what cross processing is in traditional film development, check out this explanation.
Add a new Curves adjustment layer. Below I?ll show you each setting I used for all RGB channels.


 Now add a Brightness & Contrast adjustment layer to boost the contrast a bit. Use setting similar to mine below.
 For the final edit, add a Levels adjustment layer and use the following settings. Pull the left most handles in a bit as I have below.
 That?s it! Instant hipster. Through your lettering work over the image and your ready to build a following on Instagram :-)
Don?t forget to check out our new Hipster Tones Photoshop Action Set for more!


