Photoshop Quick Tip: Working with Smart Text
While working in Photoshop I'm sure you've run into a situation where you needed to apply a filter to a text layer, and received a notification from PS telling you that you need to rasterize the text in order to apply the filter. Well, that's fine if you don't plan to edit the text any further, but what if you do? What if you decide the text should be bigger, or should say something else? If you utilize Smart Objects you can get around the need to rasterize text to apply filters.
First create a new document that contains a type layer.
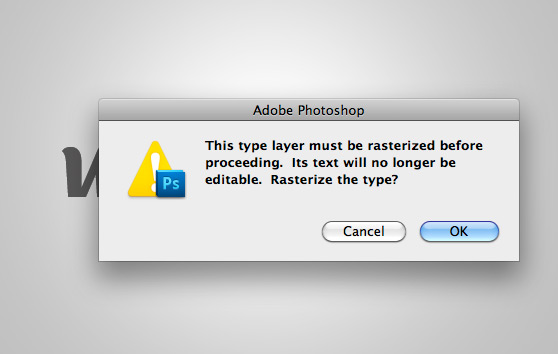
 If you try to apply a filter to the layer you will receive a notification about rasterizing.
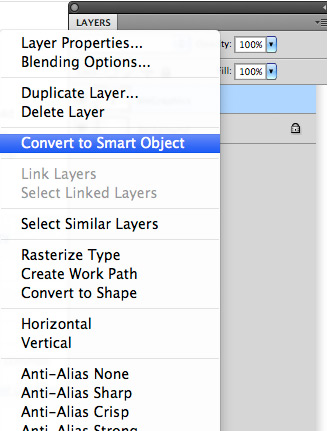
 To avoid this, let's convert our type layer to a Smart Object. (Ctrl + Click) the layer and select "Convert to Smart Object" from the menu.
 Now try applying a filter. I applied a Radial Blur in the example below.
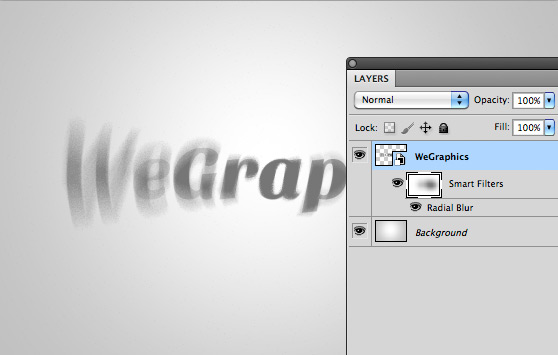 Just like all other Smart Objects, the filter is applied as a mask, so you can draw on the mask to reveal parts of the original layer.
Now for the really cool part... Double click the Smart Object type layer's thumb nail. A new document opens up revealing the Smart Object .psb file. You can now select and edit the text.
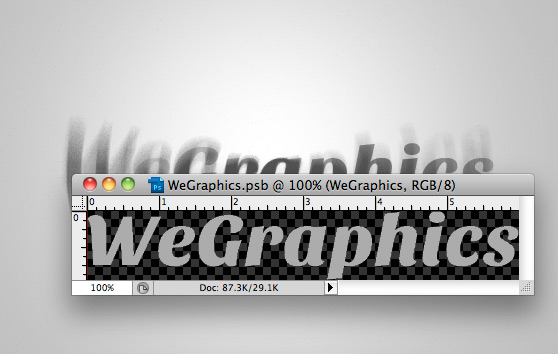 Below I just changed the color of the text. You can see that the color of the blur effect changed as well.
 If you want to add more text, you'll need to adjust the canvas size of the .psb file.
 I hope this quick tutorial helps you understand the benefits of working with type and Smart Layers. Experiment and have fun!
 If you try to apply a filter to the layer you will receive a notification about rasterizing.
 To avoid this, let's convert our type layer to a Smart Object. (Ctrl + Click) the layer and select "Convert to Smart Object" from the menu.
 Now try applying a filter. I applied a Radial Blur in the example below.
 Just like all other Smart Objects, the filter is applied as a mask, so you can draw on the mask to reveal parts of the original layer.
Now for the really cool part... Double click the Smart Object type layer's thumb nail. A new document opens up revealing the Smart Object .psb file. You can now select and edit the text.
 Below I just changed the color of the text. You can see that the color of the blur effect changed as well.
 If you want to add more text, you'll need to adjust the canvas size of the .psb file.
 I hope this quick tutorial helps you understand the benefits of working with type and Smart Layers. Experiment and have fun!


