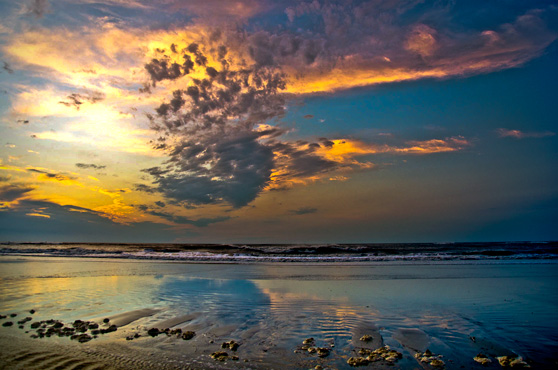
Photoshop Quick Tip: Using The Adjustment Brush in Camera Raw
In the past I've only used Camera Raw for making image wide adjustments. Then recently I discovered the Adjustment Brush, which is new as of Photoshop CS4. Below I'm going to run through a quick tutorial on how the adjustment brush works, and how it can be used for some powerful editing directly in Camera Raw.
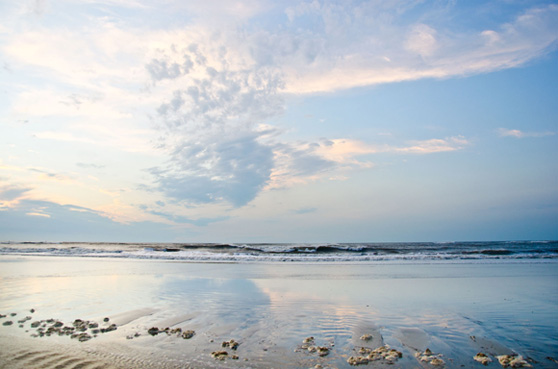
Below I have an image of a few clouds over the ocean. This image very soft and even in tone, and what I would like to do is give it some hard contrast and bright colors to create more of a sunset scene.
To open the image in Camera Raw, simply drag your Raw files to Photoshop, or if you have a JPG, you can Ctrl+Click in Bridge and select "Open in Camera Raw"
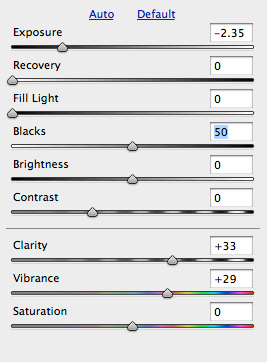
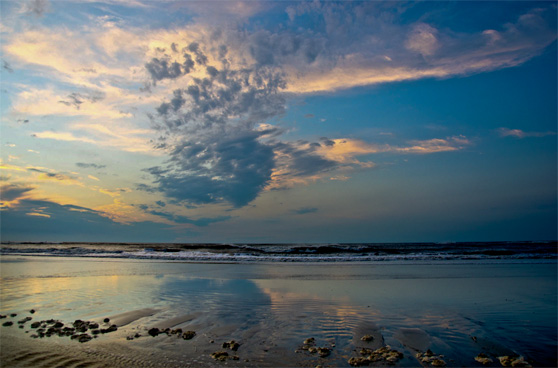
 Now that you're in Camera Raw, go ahead and make a few adjustments to the entire image. I took the exposure and brightness down, and bumped the clarity and vibrance up a bit.
 Now select the Adjustment Brush from the top menu in Camera Raw.
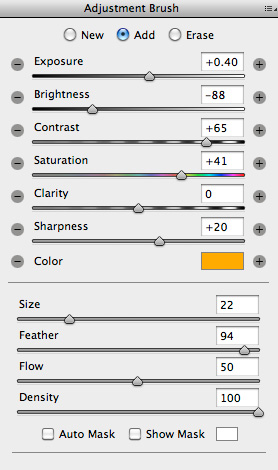
 Once you select the brush, you'll notice the options on the right change. These options control the area that you've painted with the brush. Go ahead and paint a large area of the sky. Once you've used the brush change some of the options to the right and you will see that only your brushed area is effected.
I made some adjustments to the brightness and exposure, and added a warm orange tone.
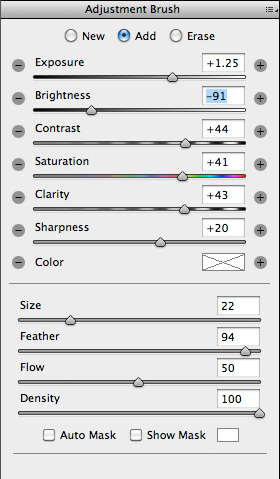
 Now select "New" from the top of the options panel. and draw a new stroke across the beach. You may need to size the brush down a little.
I made some more minor adjustments to the exposure and brightness.
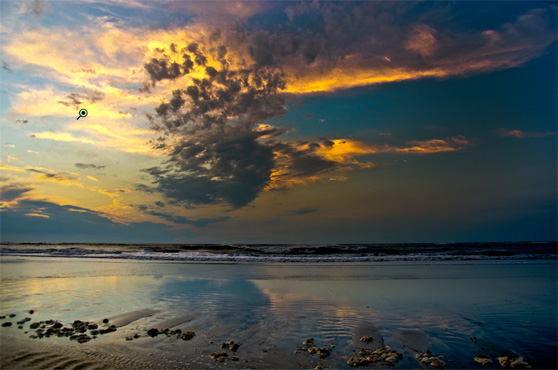
 Below is my final image. As you can see it is drastically different from the original. The Adjustment Brush adds some very powerful flexibility to Camera Raw. Keep it in mind, and use it to edit photos in your next design project.

 Now that you're in Camera Raw, go ahead and make a few adjustments to the entire image. I took the exposure and brightness down, and bumped the clarity and vibrance up a bit.

 Now select the Adjustment Brush from the top menu in Camera Raw.
 Once you select the brush, you'll notice the options on the right change. These options control the area that you've painted with the brush. Go ahead and paint a large area of the sky. Once you've used the brush change some of the options to the right and you will see that only your brushed area is effected.
I made some adjustments to the brightness and exposure, and added a warm orange tone.

 Now select "New" from the top of the options panel. and draw a new stroke across the beach. You may need to size the brush down a little.
I made some more minor adjustments to the exposure and brightness.
 Below is my final image. As you can see it is drastically different from the original. The Adjustment Brush adds some very powerful flexibility to Camera Raw. Keep it in mind, and use it to edit photos in your next design project.
