Photoshop Mastery: 25 MORE Techniques Every Designer Must Know
As I stated at the beginning of our first Photoshop Mastery post, it seems that you never really stop learning Photoshop. There are always new tools and new techniques being shared. In that spirit of sharing, we decided to put together another 25 tips and techniques that every Photoshop designer must know. So sit back and take a peak at this new collection of Photoshop goodies.
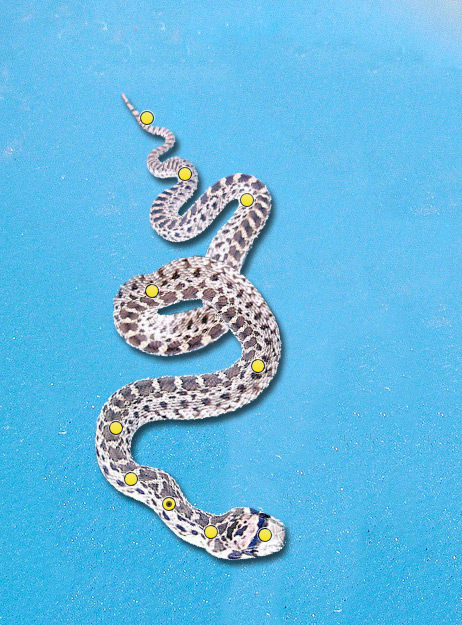
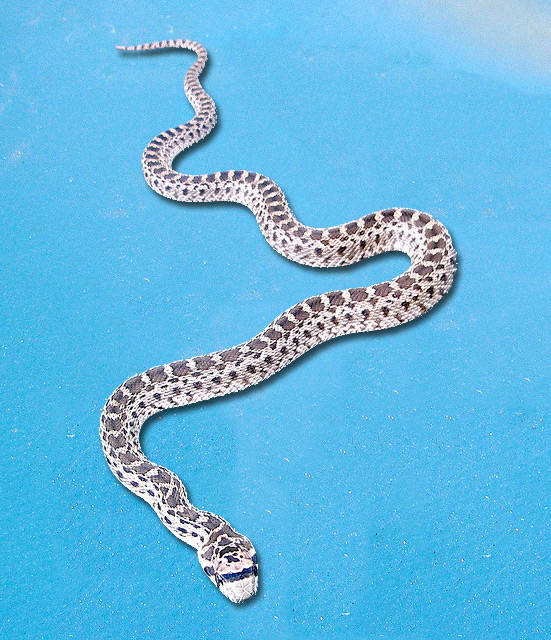 Using the puppet warp tool, I added some control points, and manipulated the snake to a new position. Pretty cool, huh? For a more in-depth tutorial on puppet warp click here.
 Snake photo by jurveston
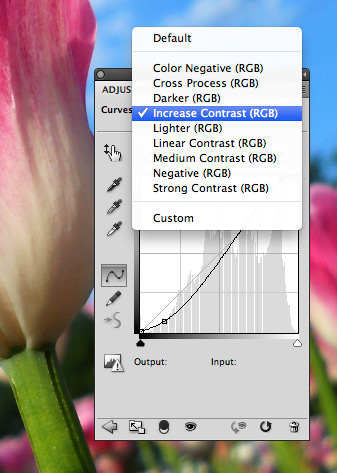 You can find these presets as a drop down on the top of the Adjustments Palette. I particularly like the presets found in the Black & White adjustment layer presets.
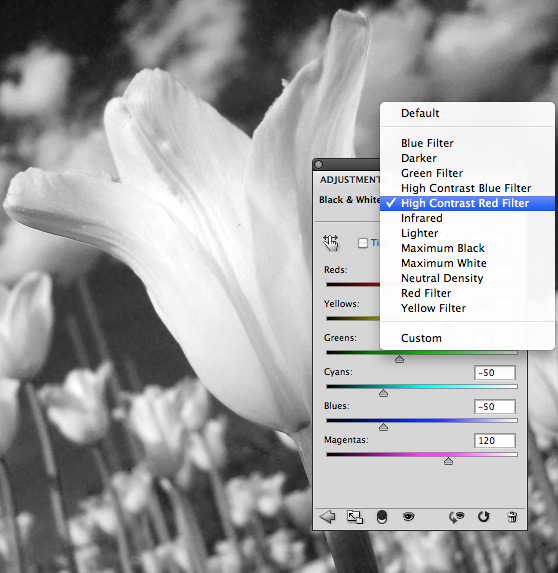 Photo By Olga Oslina
 You can also create and save your workspaces. Once you have Photoshop's menus and panels setup the way you want them, click (Window | Workspace | New Workspace) and name the workspace whatever you prefer. This is a very useful tip if you have multiple workflows that you use within Photoshop.

 Once you click Okay, the selected area is available in your document. Below I chose the highlights in the photo.
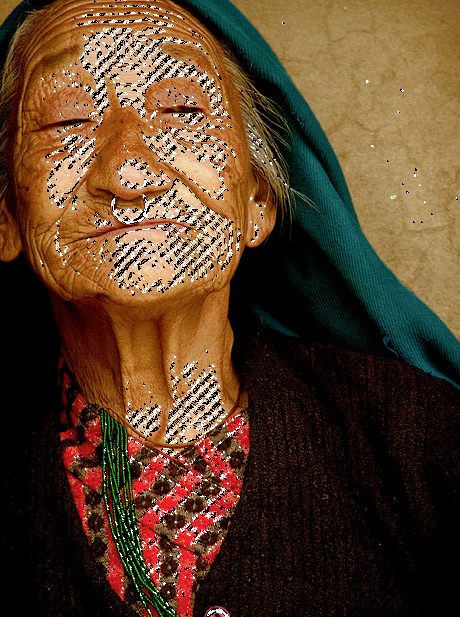 Photo by Sukanto Debnath
 By adjusting the feather option on the Mask Panel, I can create a soft focus effect on the photo. The effect remains completely editable or removable without harming the original photo. Being aware of the options on this panel gives masking a lot more flexibility.
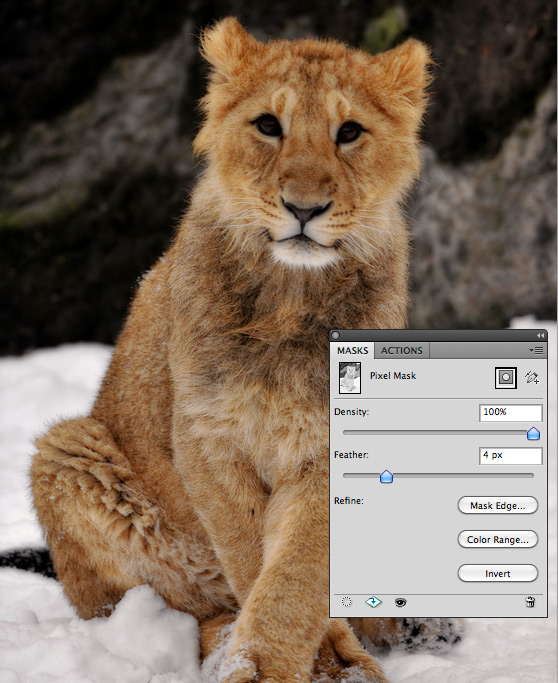 Photo By Tambako the Jaguar
 Then lets invert it (Cmd+i). Now we can use the Levels to remove some of the midtones.
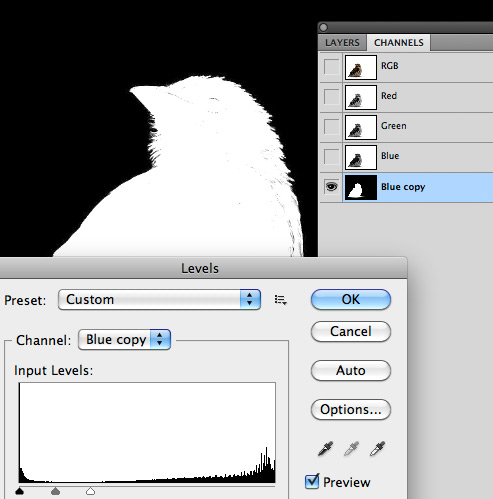 If needed we can remove any stray black areas inside the bird's shape using a white brush. Now we can make a selection by holding the Cmd key and clicking our new alpha channel's thumbnail. Next we need to head back over to the layers panel and click the "Add Layer Mask" icon at the bottom of the panel. This should instantly create a mask of the bird revealing the layer below.
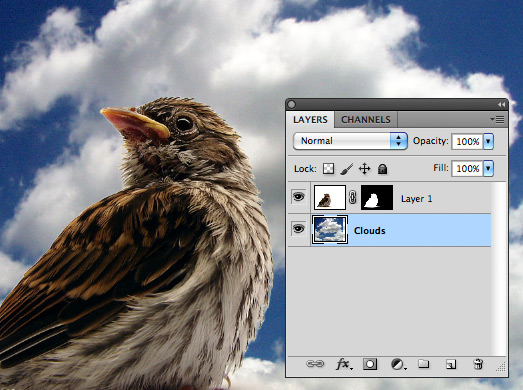 Original bird photo by Furryscaly
 Below I loaded one of the default textures labeled as Canvas. The effect is not bad, but not particularly exciting either.
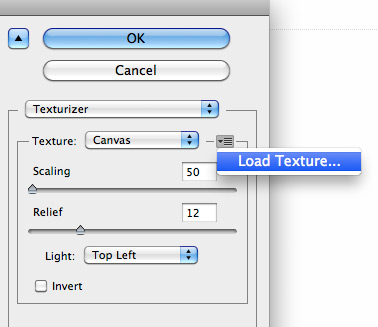
 The real fun of this filter is loading your own textures. Click the down arrow icon next to the texture drop down. The only requirement is that the texture file format must be a PSD.
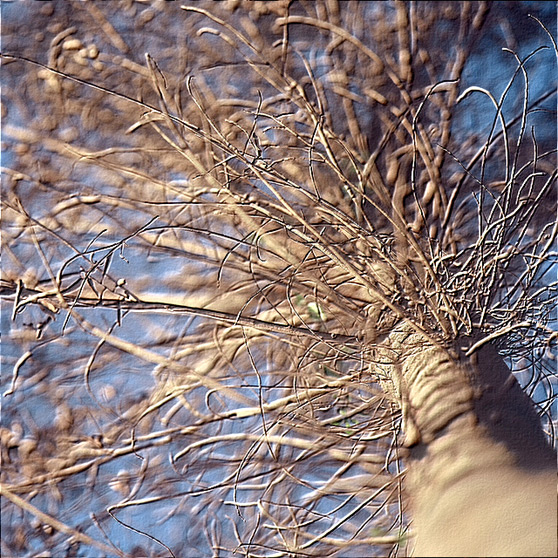
 In the example below, I loaded the original image as a texture onto itself, which creates an interesting effect.
 Check out this quick video tutorial on using video layers.
 Now add a gradient fill adjustment layer using transparent white to black, and set the layers blend mode to Soft Light.
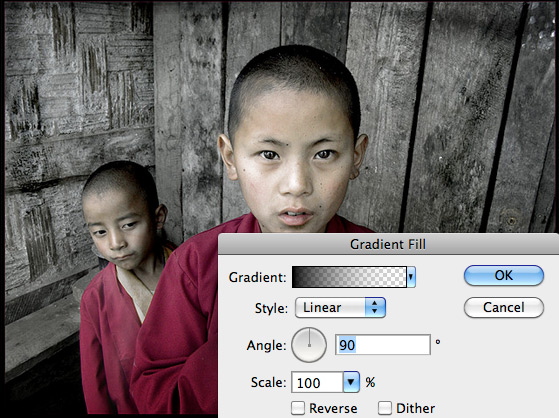 Now add a gradient fill layer style to the adjustment layer using the following settings.
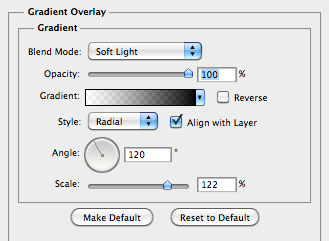 Use a semi-transparent white to black again for the gradient. Below is the final image. What's great about this method is that the vignette remains editable, and the adjustment layer can be dragged to a new document and it will auto-resize.
 Original photo by Sukanto Debnath
 Being aware of these buttons can save a lot of time in your workflow.
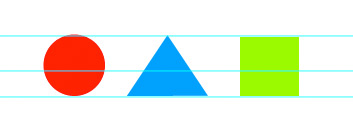
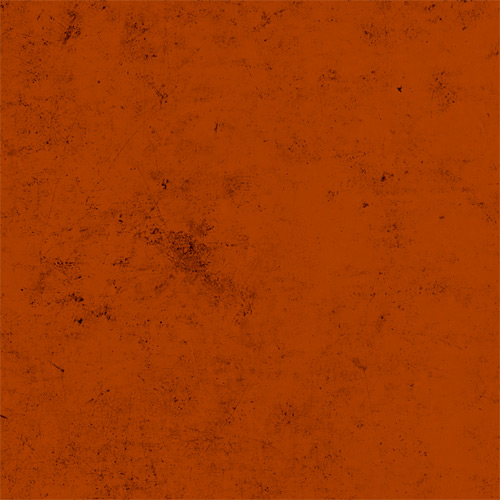 Now click (Filter | Other | Offset) and enter 250 both vertical and horizontal. I'm entering 250 because my document is 500x500, and you want to offset it by half.
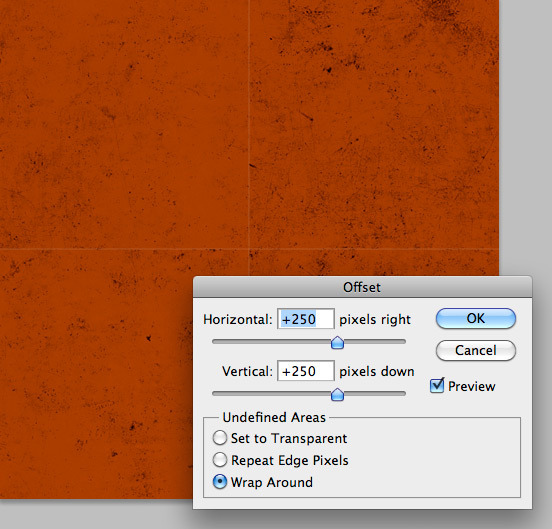 Now, using the Clone Stamp Tool (S), blend the center lines as much as possible. This file could be saved as a repeating pattern, and would appear seamless on files larger than 500 pixels.

Master Manipulation Using Puppet Warp
The puppet warp tool is not one that comes into play that often, but when it does, it makes you look like a design rock star. Basically the tool, allows you to set control points on a layer, and then allows you to bend and manipulate those points, warping the content of the layer in a somewhat realistic manner. In other words, it's like adding a skeleton to an object giving you puppet-like control. Below is an image of a snake that I removed from the background and placed on it's own layer. Using the puppet warp tool, I added some control points, and manipulated the snake to a new position. Pretty cool, huh? For a more in-depth tutorial on puppet warp click here.
 Snake photo by jurveston
One-Click Edits Using Adjustment Layer Presets
We're all familiar with adjustment layers and how incredible they are, but what you may not have noticed is that several of the adjustment layer types contain some very useful presets. You can find these presets as a drop down on the top of the Adjustments Palette. I particularly like the presets found in the Black & White adjustment layer presets.
 Photo By Olga Oslina
Did you know?
You can clip adjustment layers to a particular layer by clicking the "Clip to" icon at the bottom of the Adjustments panel. Otherwise adjustment layers will effect all layers underneath.
Full Path Control by Using the Path Palette
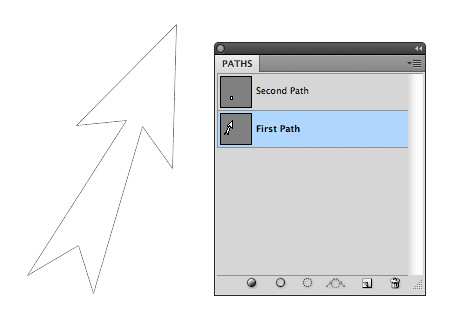
If you spend any time drawing paths in Photoshop, the path palette is a must. The path palette in Photoshop is essentially the same as the layer palette, but for paths only. From this panel you can create new paths and delete them, set them as selections, stroke or fill them with color.
Create and Edit Your Own Keyboard Shortcuts
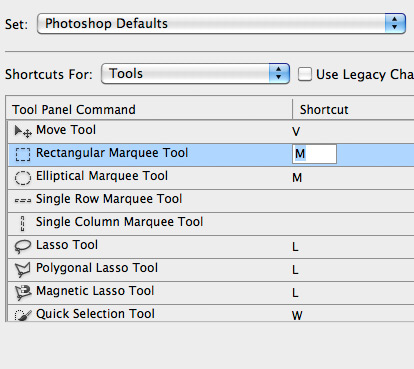
Have you ever found yourself wishing you could change Photoshops default keyboard shortcuts, or create your own? You can, and it's easy. Just click (Edit | Keyboard Shortcuts). From this panel you can change the defaults or even add your own.
Perfect Control Over Your Type Using the Character Palette
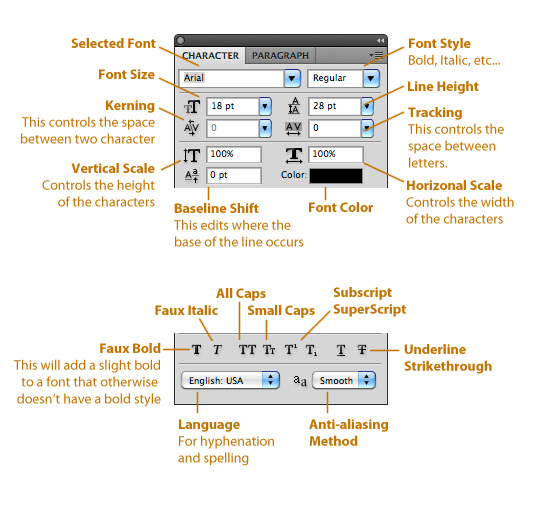
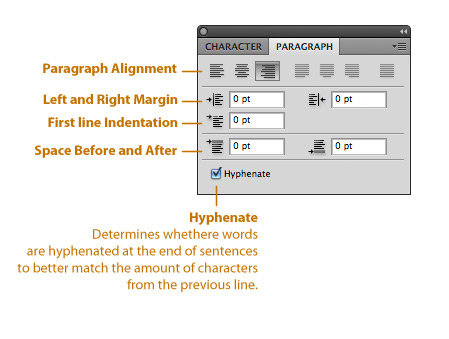
The Character Palette in Photoshop contains all of the editing capabilities needed for handling text and paragraphs. To access the character palette, press the icon on the far right of the type tool bar when the type too is selected or click (Window | Character).

Did you know?
You can adjust all of the settings from the Character Panel by hovering over the icons next to the drop down, then click and drag to adjust.
Streamline Your Workflow Using Workspace
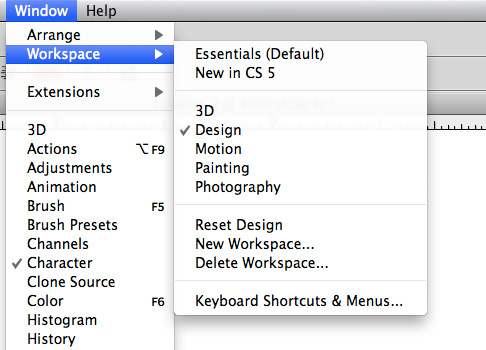
Photoshop provides 5 workspace settings. One each for 3D, Design, Motion, Painting, and Photography. By selecting one of these workspaces, Photoshop will open the most useful panels and arrange them in a way that is easily accessible, given the chosen work flow. To access Worskpace options click (Window | Workspace). You can also create and save your workspaces. Once you have Photoshop's menus and panels setup the way you want them, click (Window | Workspace | New Workspace) and name the workspace whatever you prefer. This is a very useful tip if you have multiple workflows that you use within Photoshop.
Bending Reality with the Liquify Filter
My favorite filter in PS has to be the Liquify Filter (Filter | Liquify). You can create some interesting warp effects that remain somewhat realistic looking using this filter. In the example below, I used brushes within the filter to enlarge the girl's eyes, and make her hair come to life with a bit of craziness. Give this filter a try.
 Alexander McQueen Hair by StarMama
Avoid Confusion by Showing Layer Edges
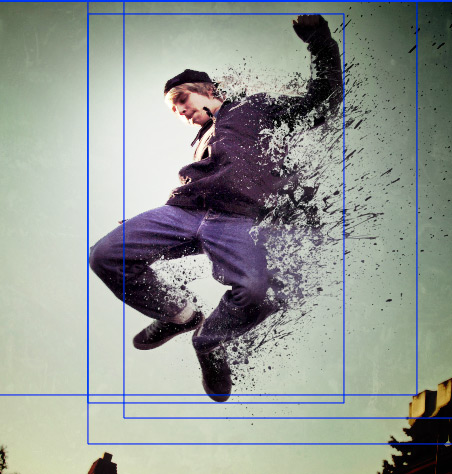
A really useful but overlooked tip is to show layer edges as you work. This comes in very handy if you are working on a document with a ton of layers, and it becomes hard to tell what content is on what layer. To access this feature, click (View | Show | Layer Edges). Now when you click an individual layer or multiple layers they will be highlighted with a box on the document.
Selecting Specific Colors and Tones Using Color Range
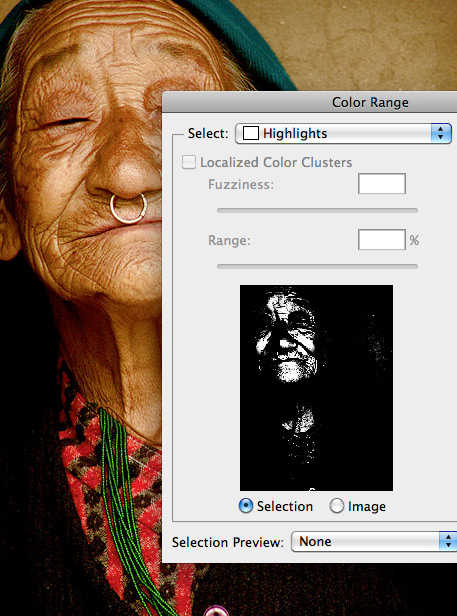
A huge part of working in Photoshop is making selections, and anything you can do to speed up the selection process is a plus in my book. One incredible way to select specific colors or tones in a photo is to use the Color Range option. To access this feature, click (Select | Color Range). From the options window you can select a specific color or range, such as highlights or midtones. Once you click Okay, the selected area is available in your document. Below I chose the highlights in the photo.
 Photo by Sukanto Debnath
Organizing and Arranging Documents
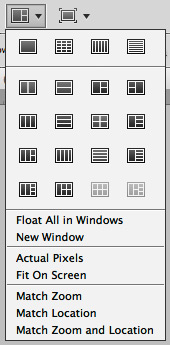
In the topmost toolbar under the file menu there is an icon drop down for arranging multiple documents. This is very useful when you have a lot of documents open, or you are working on one or more documents at once. Using this drop down is a lot faster than hunting through overlapping document windows.
Customizing Photoshop's Default Menus
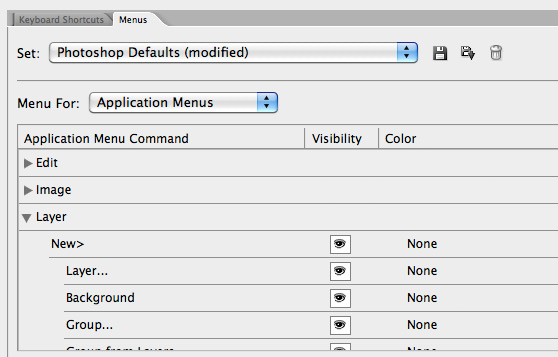
If extreme customization and absolute streamlining of your workflow is your thing, then you have to spend the time to customize Photoshop's default menus. Remove what you don't want or don't need to see for particular workspaces and flows. It's surprisingly easy to do by clicking (Edit | Menus). If you don't want to see certain options, then just turn them off by clicking the eye icon. It's that easy.
Did you know?
You can also highlight certain menu options with color from the Menus panel. Simply click the word "None" in the color column to assign a color.
Editing and Fine Tuning Your Brushes
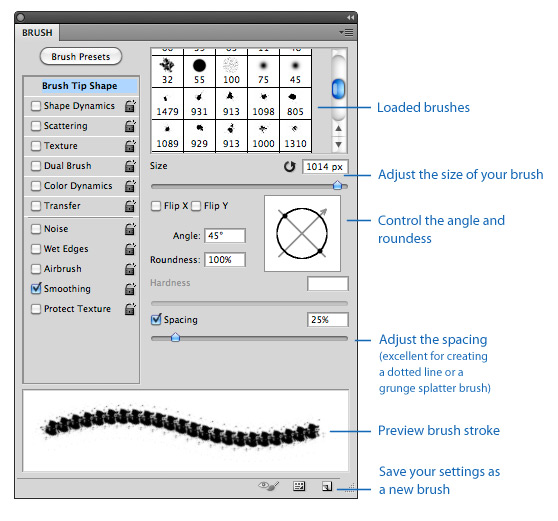
The brushes panel is THE go-to place for full control of your brushes behavior. Familiarizing yourself with this panel is essential for using custom brushes, such as the ones available here at WeGraphics.
Using the Mask Palette
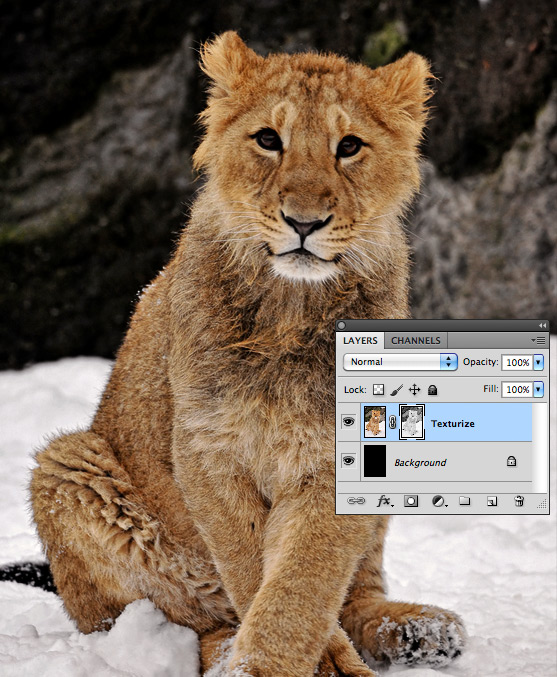
Layer masks provide incredible means for editing layers in a non-destructive manner. But if you've never explored the options available on the Mask Palette your missing half of the flexibility that a mask can provide. To open the Mask Palette, click (Window | Masks). When you select a mask you've created on a layer, the options will become active on the Mask panel. Below I've created a mask from a copy of the red alpha channel in the photo. By adjusting the feather option on the Mask Panel, I can create a soft focus effect on the photo. The effect remains completely editable or removable without harming the original photo. Being aware of the options on this panel gives masking a lot more flexibility.
 Photo By Tambako the Jaguar
Editing JPG Images in Camera Raw
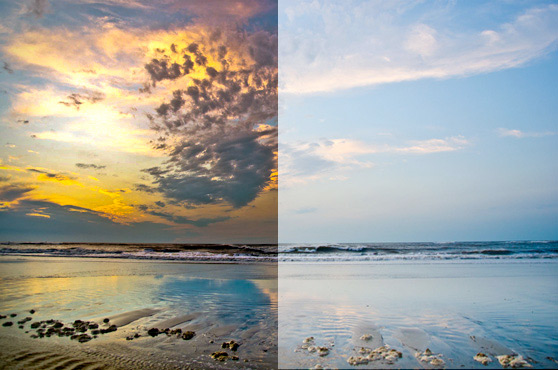
There are some awesome tools found in Camera Raw, and they're not limited to native camera file formats. You can also open JPG images in Camera Raw. To do so, open Bridge. From Bridge navigate to your JPG image and Ctrl+Click (Right click on a PC) and select "Open in Camera Raw". One of my favorite tools in Camera Raw is the Adjustment Brush. Below is a JPG image that I edited with the Adjustment Brush in Camera Raw. For a quick tutorial on how to achieve this effect, check out our Adjustment Brush tutorial.
Using Alpha Channels to Make Precise Selections
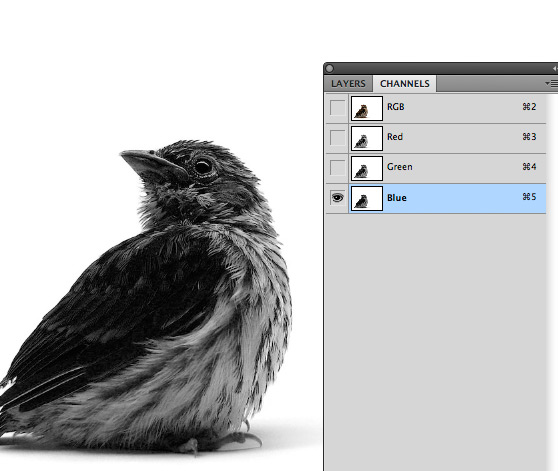
An often overlooked method of selection is using an Alpha Channel to isolate an object from it's background via layer mask. For example, in the image below we have a bird on a white background, which we need to remove to reveal the layer below. Lets start by looking at the Channels Palette to see which channel contains the most contrast. In this photo, the blue channel contains the most contrast. So lets make a copy of the blue channel by dragging it to the copy icon at the bottom of the palette. Then lets invert it (Cmd+i). Now we can use the Levels to remove some of the midtones.
 If needed we can remove any stray black areas inside the bird's shape using a white brush. Now we can make a selection by holding the Cmd key and clicking our new alpha channel's thumbnail. Next we need to head back over to the layers panel and click the "Add Layer Mask" icon at the bottom of the panel. This should instantly create a mask of the bird revealing the layer below.
 Original bird photo by Furryscaly
Roughen Your Designs Using The Texturizer
This is another one of those fun little filters that can inspire some creative experimentation from time to time. To load this filter, click (Filter | Texture | Texturizer). The Texturizer window opens up, and there are only a few options. Lets take a closer look. Below is the original image. Below I loaded one of the default textures labeled as Canvas. The effect is not bad, but not particularly exciting either.
 The real fun of this filter is loading your own textures. Click the down arrow icon next to the texture drop down. The only requirement is that the texture file format must be a PSD.
 In the example below, I loaded the original image as a texture onto itself, which creates an interesting effect.

Creating GIF Animation in Photoshop
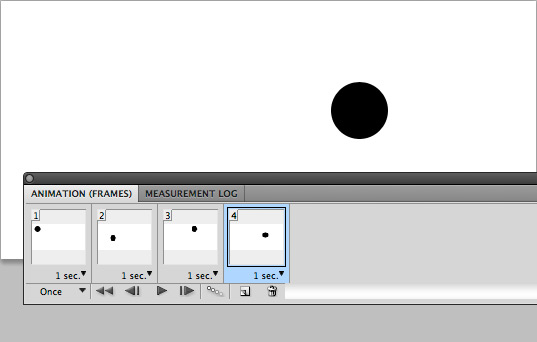
Creating GIF animations is not something that I do a lot of, but when I get the opportunity, I jump at it. Doing frame animations in Photoshop is not only incredibly simple but sort of fun.To access the animation panel, click (Window | Animation). Then click the frame animation icon in the bottom right of the animation timeline view. To create new frames press the new frame icon at the bottom of the panel. Basically you can add to, edit, or rearrange your document for each frame. Then set the time the animation should stay on that given frame from the drop down below the frame thumbnail. Use the player controls to preview your animation. To save the GIF that contains the sequence, use (File | Save for Web & Devices). Choose GIF as the file format.
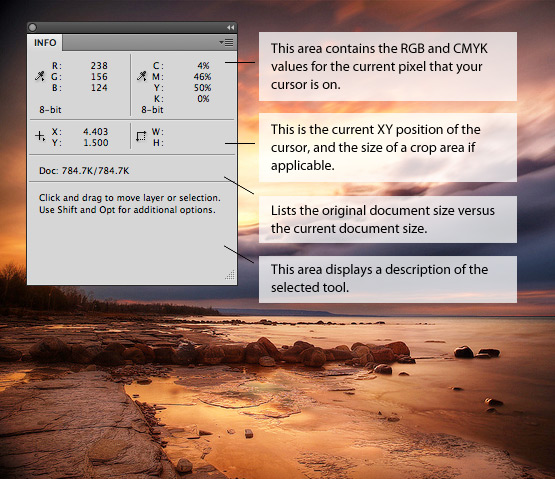
Demystifying the Info Panel
You may have asked yourself what is the info panel, and why do I need it taking up space on the screen. I know this, because I've asked myself that same question several times. But the truth is, the info panel contains a good deal of useful information.
Working with Color Schemes Via the Kuler Extension
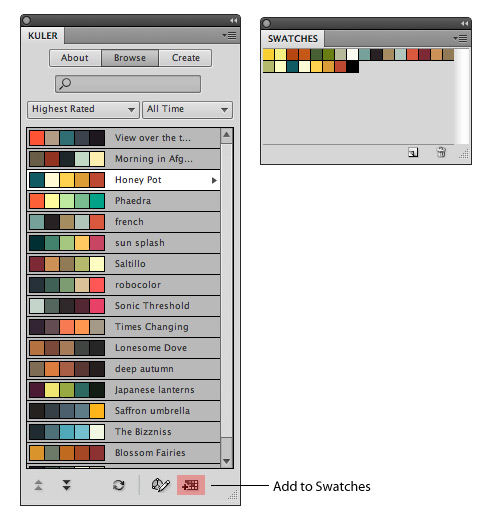
If you're a color nut, like I am, chances are you've seen Adobe's Kuler project. It's a user supported collection of color schemes, where you can spend a great deal of time browsing and getting lost in the vast collection of color ideas. Now you can access Kuler from within Photoshop via the Kuler Extension (Window | Extensions | Kuler). From the Kuler panel you can search and browse, just like on the main site. Once you find the right color scheme, you can add it to your swatches palette for use in your document.
Editing Video Within Photoshop
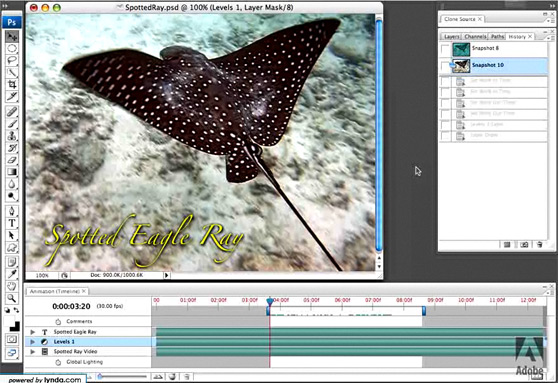
I'm betting that there is a pretty good chance that you didn't know that video could be edited from within Photoshop. It can, and it's insanely easy to do. You can import a video by clicking (Layer | Video Layers | New Video Layer From File). All of the frames in the video can be edited the same as a normal layer would be. To access the individual frames you'll need to open the animation timeline (Window | Animation). You can also make global changes to the video by adding adjustment layers to the layers panel. Check out this quick video tutorial on using video layers.
Creating a Vignette Using Adjustment Layers
Recently I discovered a method for creating a vignette effect by using a gradient fill adjustment layer. I love adjustment layers, so naturally I found a way to incorporate this technique into my bag of tricks. Open any photo. Below is the original photo that I'm using for the example. Now add a gradient fill adjustment layer using transparent white to black, and set the layers blend mode to Soft Light.
 Now add a gradient fill layer style to the adjustment layer using the following settings.
 Use a semi-transparent white to black again for the gradient. Below is the final image. What's great about this method is that the vignette remains editable, and the adjustment layer can be dragged to a new document and it will auto-resize.
 Original photo by Sukanto Debnath
Perfect Placement Using Object Alignment
This tip may seem obvious to some, but you'd be surprised at how long I used Photoshop before noticing these tools. When the Move Tool (V) is selected the top toolbar contains several alignment icons. When you select multiple layers, and press one of these buttons the layers align instantly.
Using The Offset Filter to Create a Repeating Pattern
Creating patterns in Photoshop is something we do a lot of around here at WeGraphics, and the offset filter is essential to that process. To produce a repeating pattern from a texture you need to select a perfect square from your texture file. Preferably one that is even in tone. Copy that selection to a new file. Mine is 500x500 pixels. Now click (Filter | Other | Offset) and enter 250 both vertical and horizontal. I'm entering 250 because my document is 500x500, and you want to offset it by half.
 Now, using the Clone Stamp Tool (S), blend the center lines as much as possible. This file could be saved as a repeating pattern, and would appear seamless on files larger than 500 pixels.

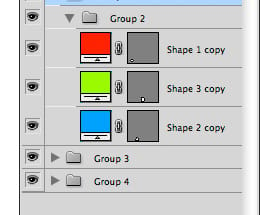
Organizing Your Layers Panel by Grouping Layers
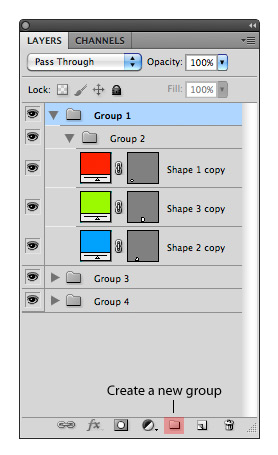
You may be well aware of this feature, but I wanted to list it in this article, because it is a game changer for those who are not. I don't typically flatten anything, and as a result my designs can consist of dozens of layers. In order to keep my sanity, I group layers into manageable sections. It's an essential technique to add to your workflow. Not only does it keep you sane, but it also keeps others sane when working in a group and sharing files.
Did you know?
You can place multiple groups of layers inside of master groups to further organize your layers panel.
