How to Quickly Make an Analog Camera Effect in Photoshop
Photoshop Photo Effects
Making an analog effect to be used on your digital photos can be a very simple task if you know which tools to use. There are many different ways to achieve this effect, but today we will take a look at how easy is to make an analog camera effect in Photoshop. We will use only the Camera Raw filter. You can adjust the values later, but we will be working with a non-destructive process. Please note: Every image is unique, so the settings I show you here should be taken as a basis for all of your images. The process for your images may require different values on each setting depending on your photo.
Step 1
Open your image in Photoshop.

Step 2
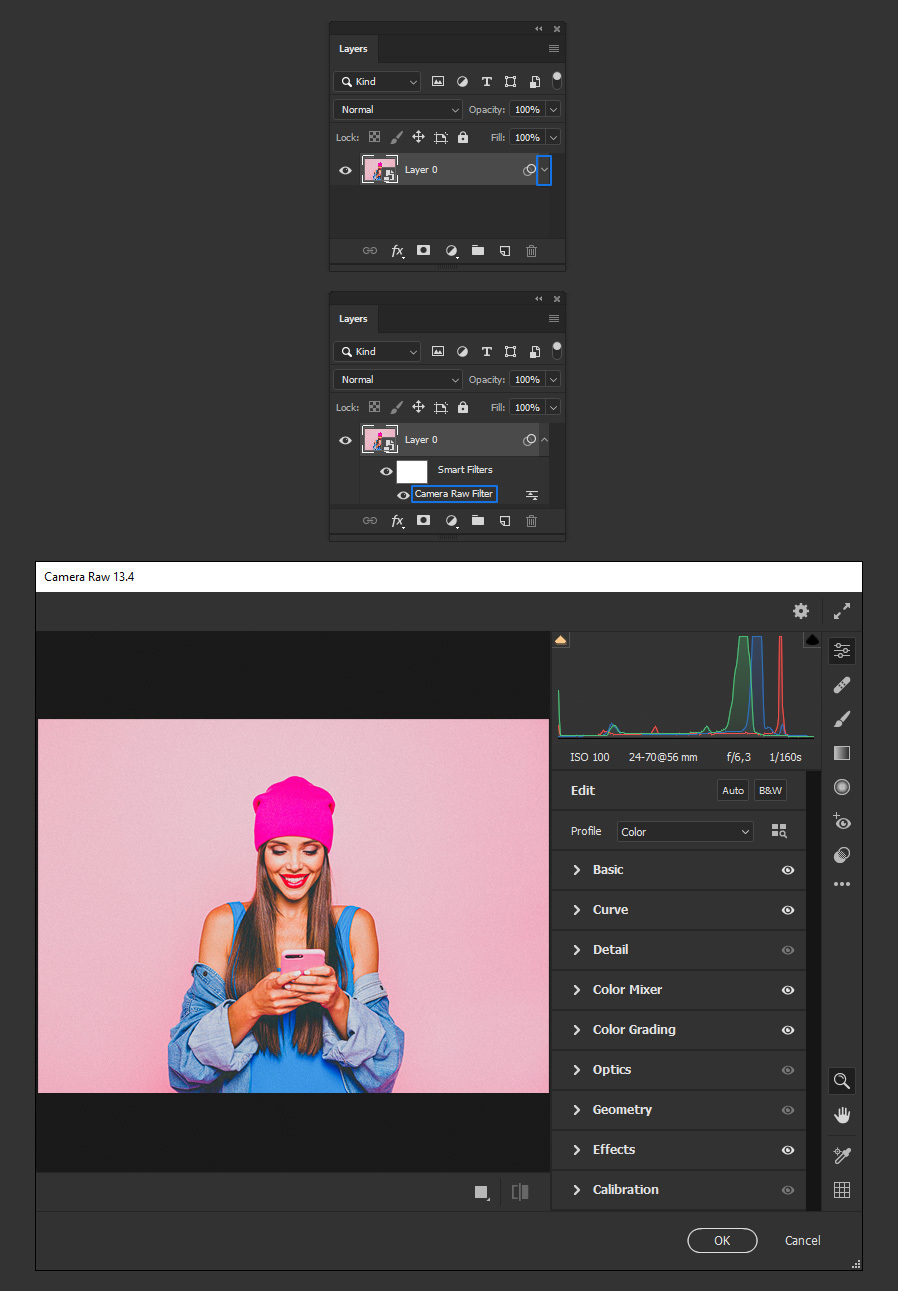
Go to Layer > Smart Objects > Convert to Smart Object.

Step 3
Go to Filter > Camera Raw Filter.
Step 4
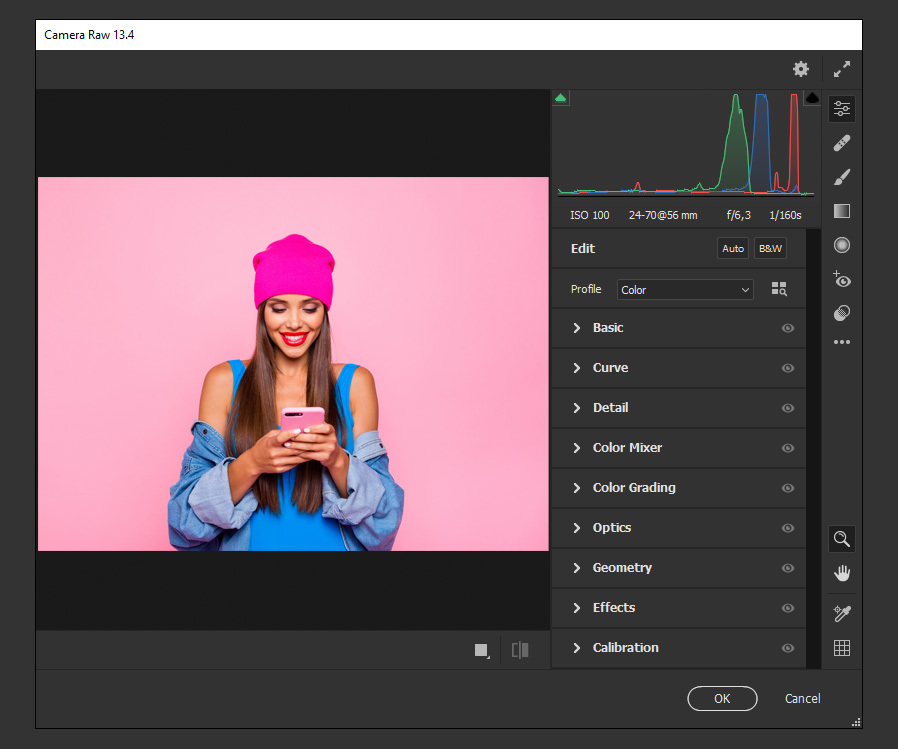
In the Camera Raw window, expand the Basic tab and apply the following settings.

Step 5
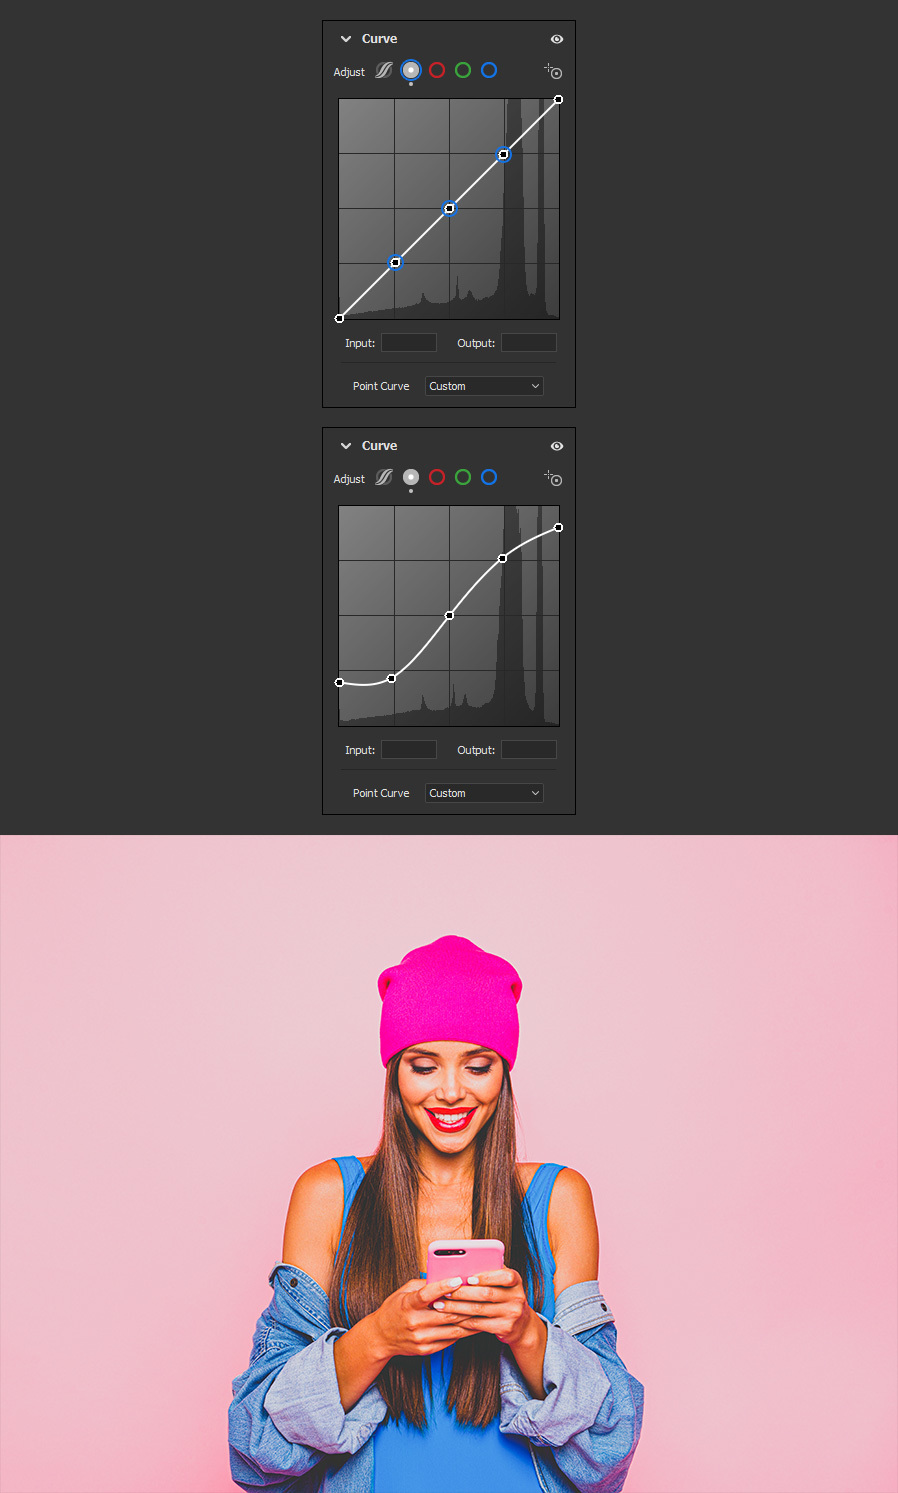
Expand the Curve tab and be sure to select the Point Curve. Add 3 new anchor points by clicking anywhere on the curve and then apply the following values to each of the points:
- 0-50
- 60-55
- 128-128
- 190-195
- 255-230
Step 6
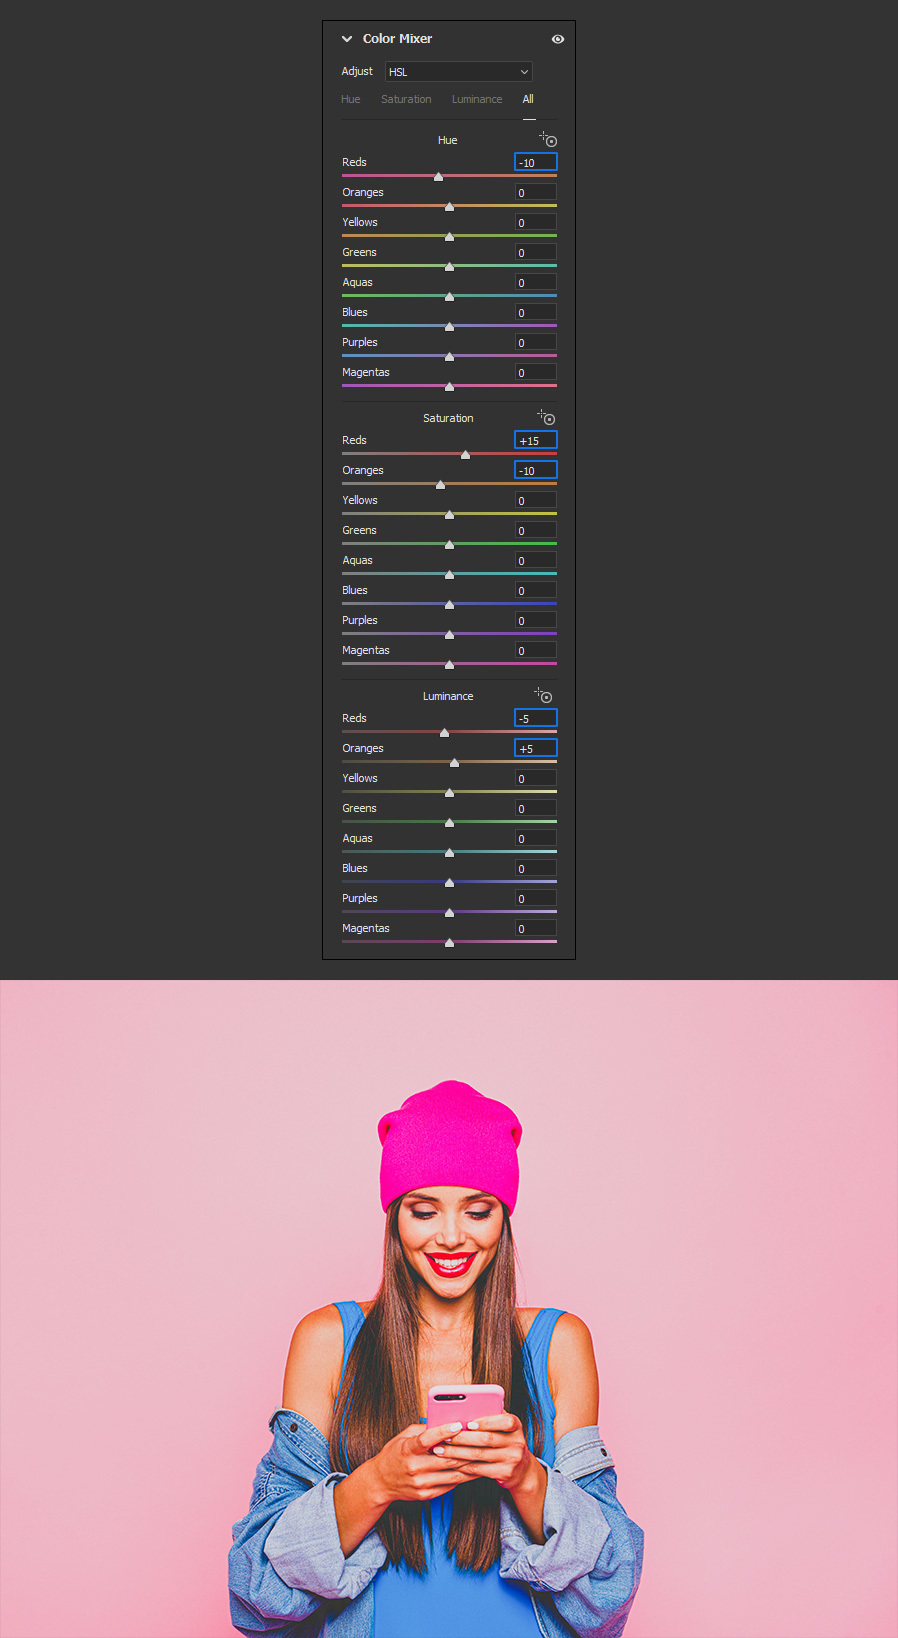
Next, expand the Color Mixer tab and apply the following values.
Step 7
Expand the Color Grading tab, select the Shadows option and apply the following values.
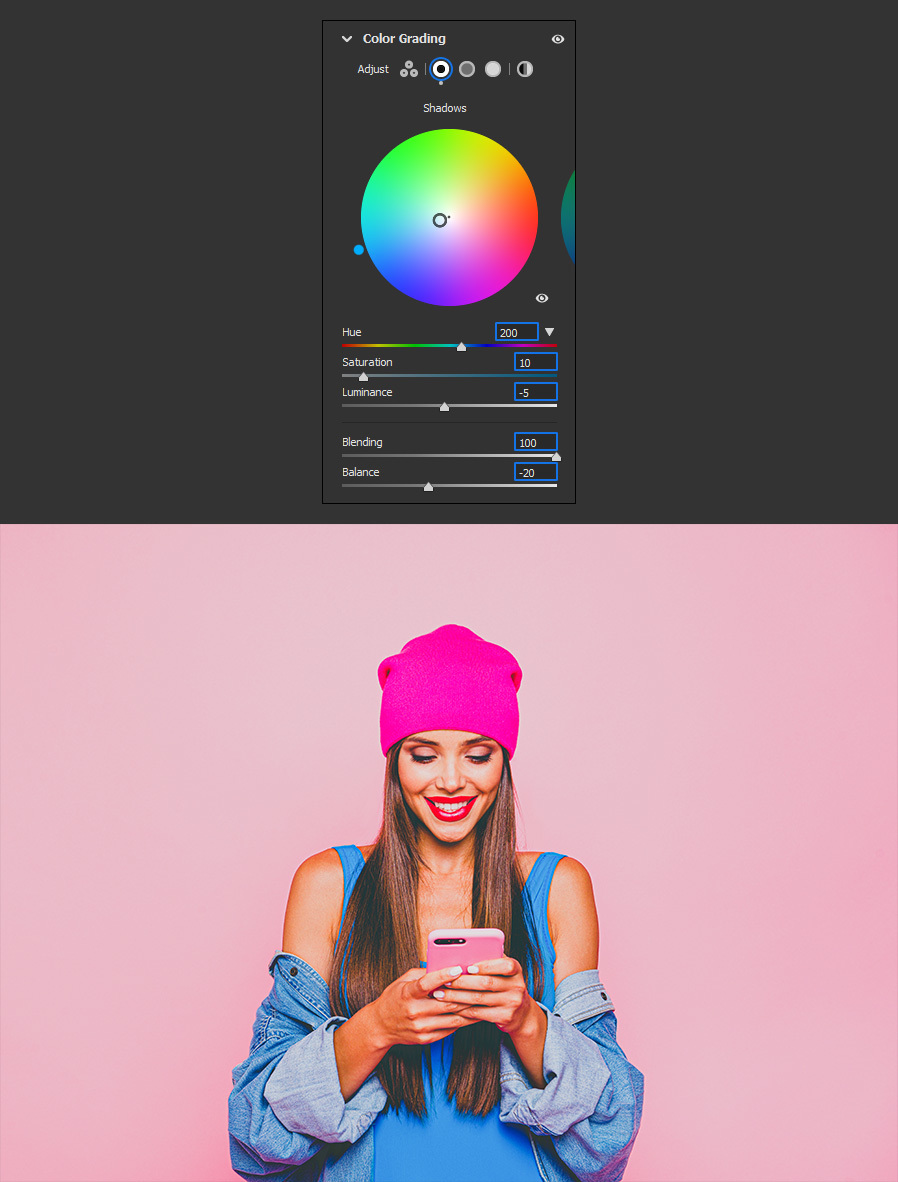
Step 8
Next expand the Effects tab, set the Grain value to 40, the Size to 50, the Roughness to 55 and click OK in the Camera Raw filter window.

A Final Tip
If you later want to adjust some of the effect settings, simply click on the down arrow of the image layer to reveal the layer effects and then double click on "Camera Raw Filter" to open the Camera Raw window, make your adjustments and then click Ok in the Camera Raw window.
