How to Make a Sports Themed Text Effect in Illustrator
Illustrator Text Effects
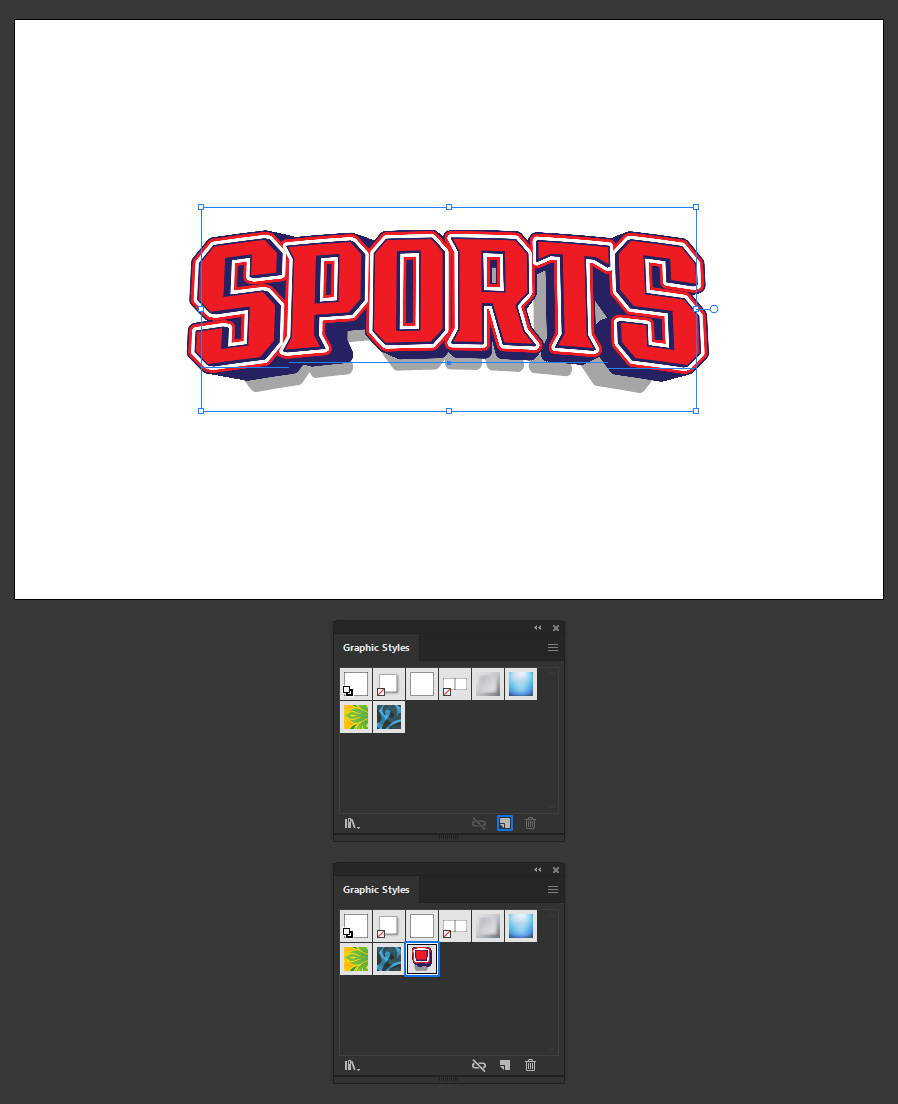
Usually when you need to give any text an effect you probably think on use Photoshop to make it. But in Illustrator you can also make a wide range of effects that can be reused over any other text without having to make the whole effect again by using Graphic Styles. So today, I will show you how easily you can make a Sports Themed Text Effect in Illustrator using only the Appearance panel and then making a Graphic Style with it so you can use it an unlimited number of times over any other text you want.
Step 1
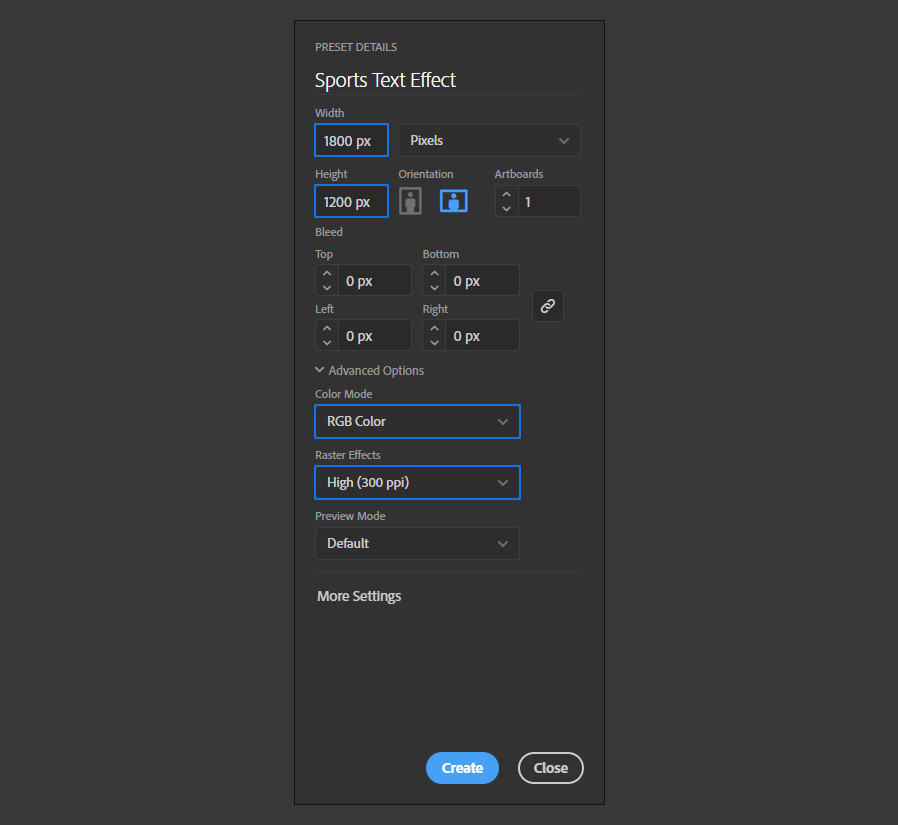
Open Illustrator and make a new file at any size you want. In this case, I will setup mine at 1800 x 1200 px.
Step 2
Select the Type Tool (T) and type your text using any font that you want. I will be using "Bronzier" at 350 pt.

Step 3
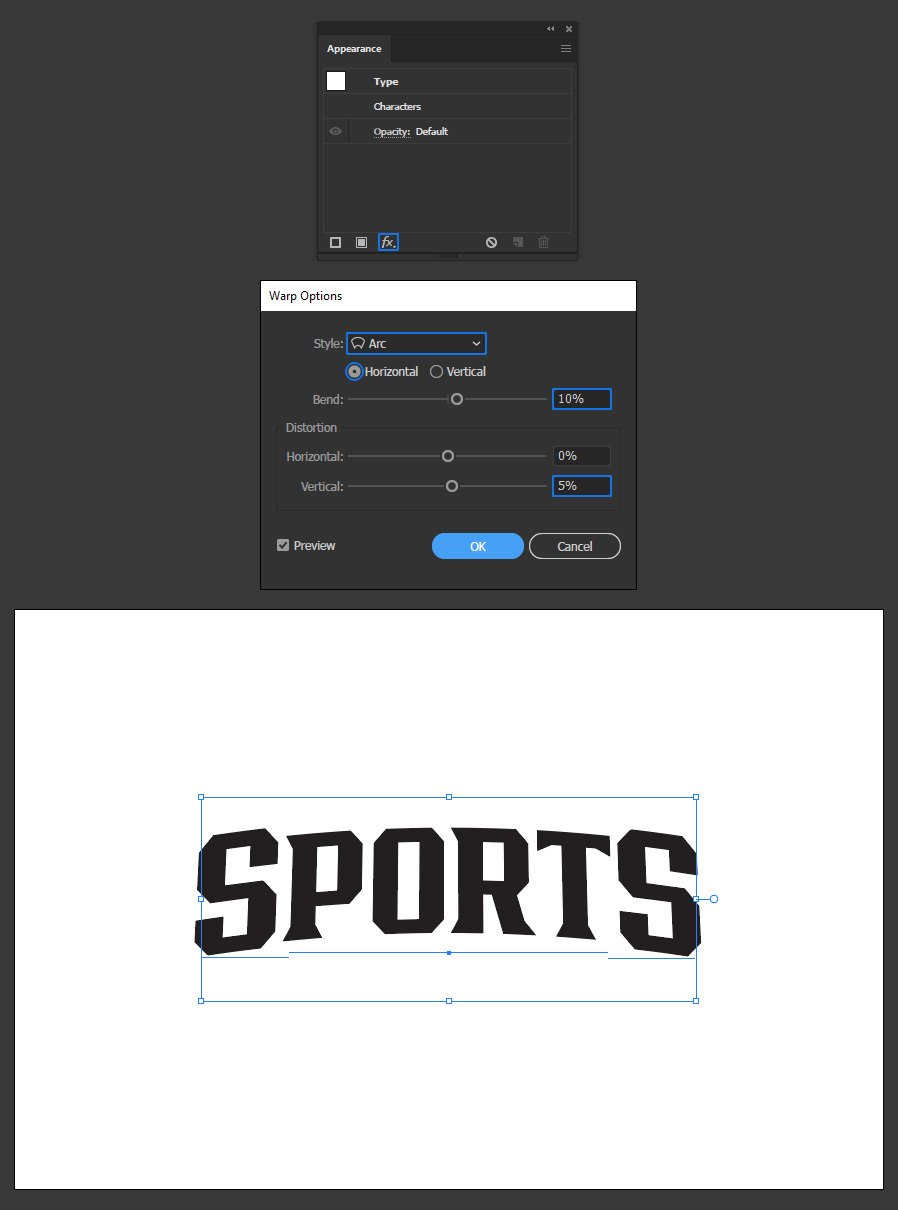
With the text selected, go to Window > Appearance and click on the "Add New Effect" icon. From the dropdown menu select Warp > Arc, apply the following settings and click OK.
Step 4
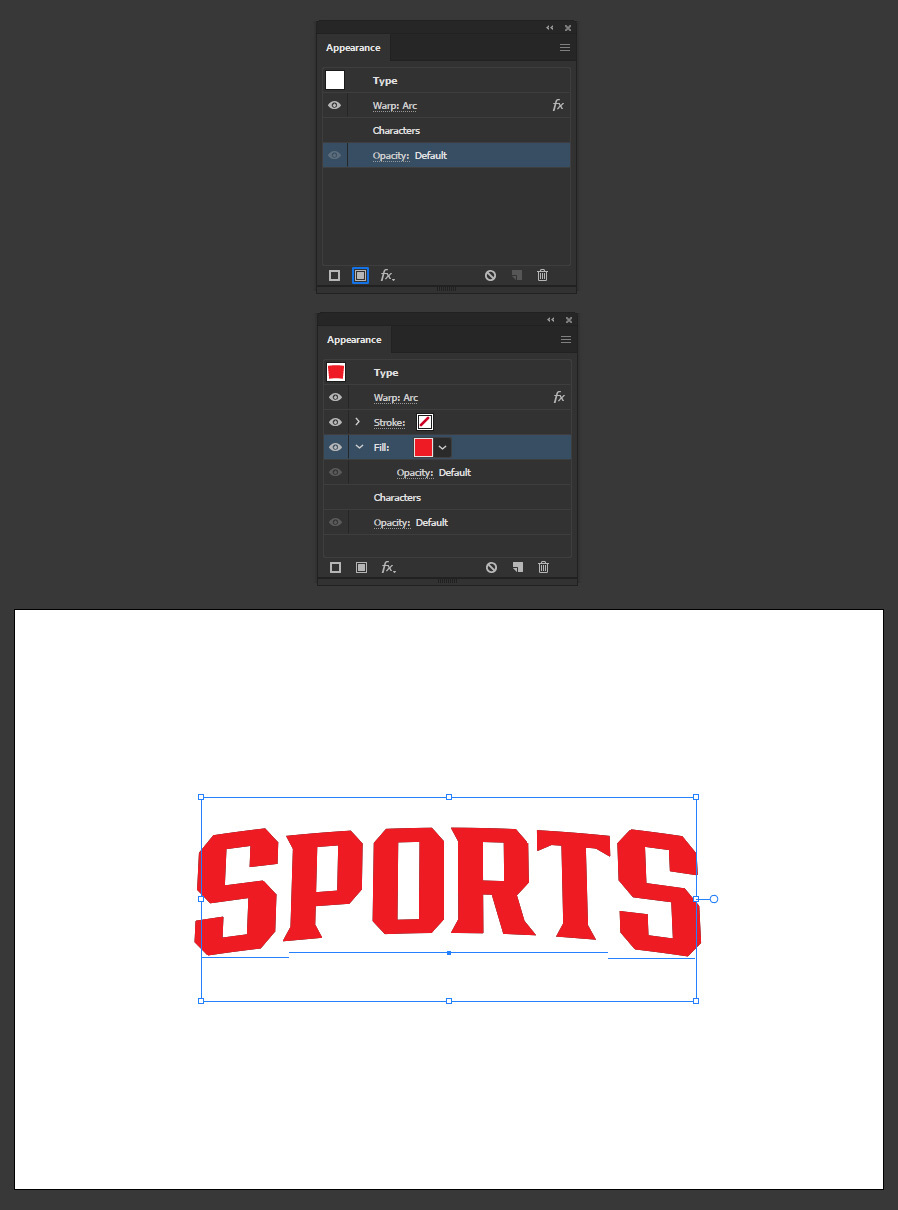
Click on the "Add New Fill" icon and set the fill color to #cc2128.
Step 5
With the fill layer selected click on the "Add New Effect" icon. From the dropdown menu select Path > Offset Path, apply the following settings and click OK.
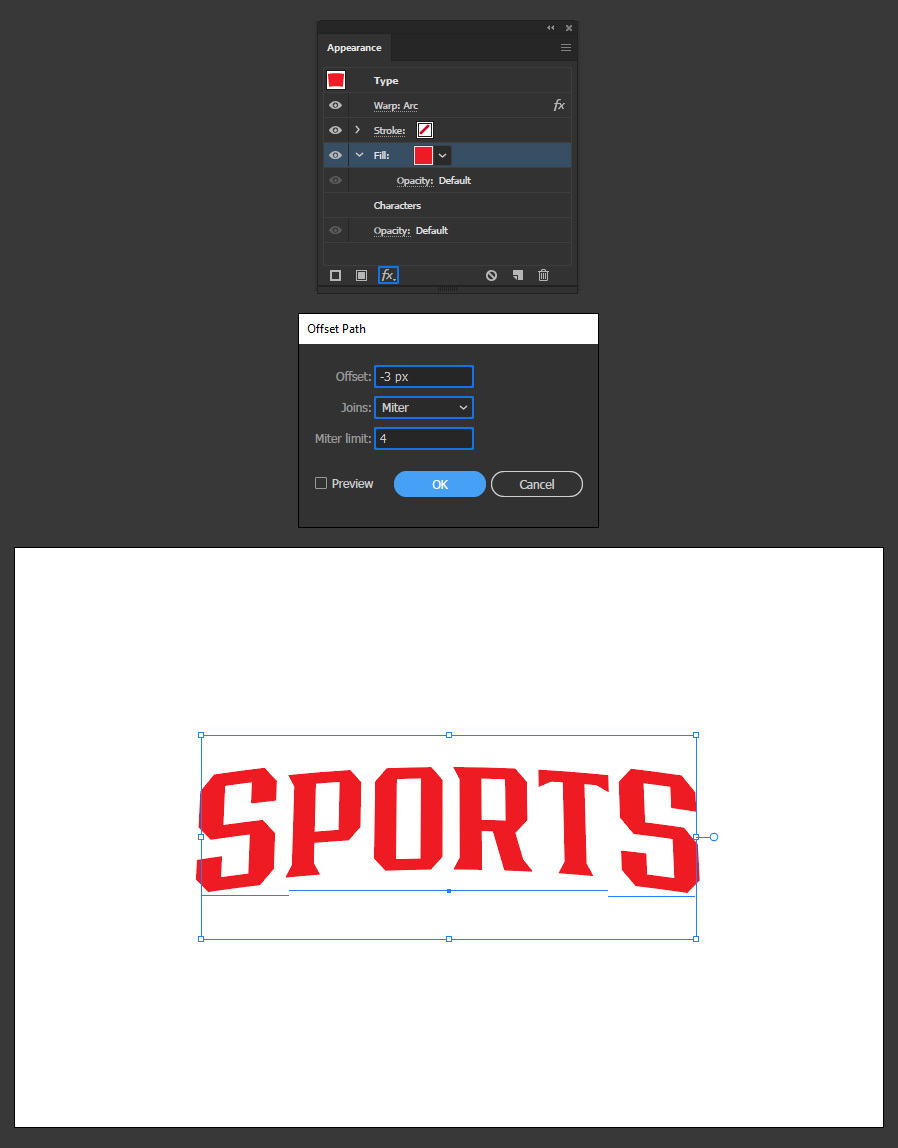
Step 6
Again, click on the "Add New Fill" icon and set the fill color to #292660.
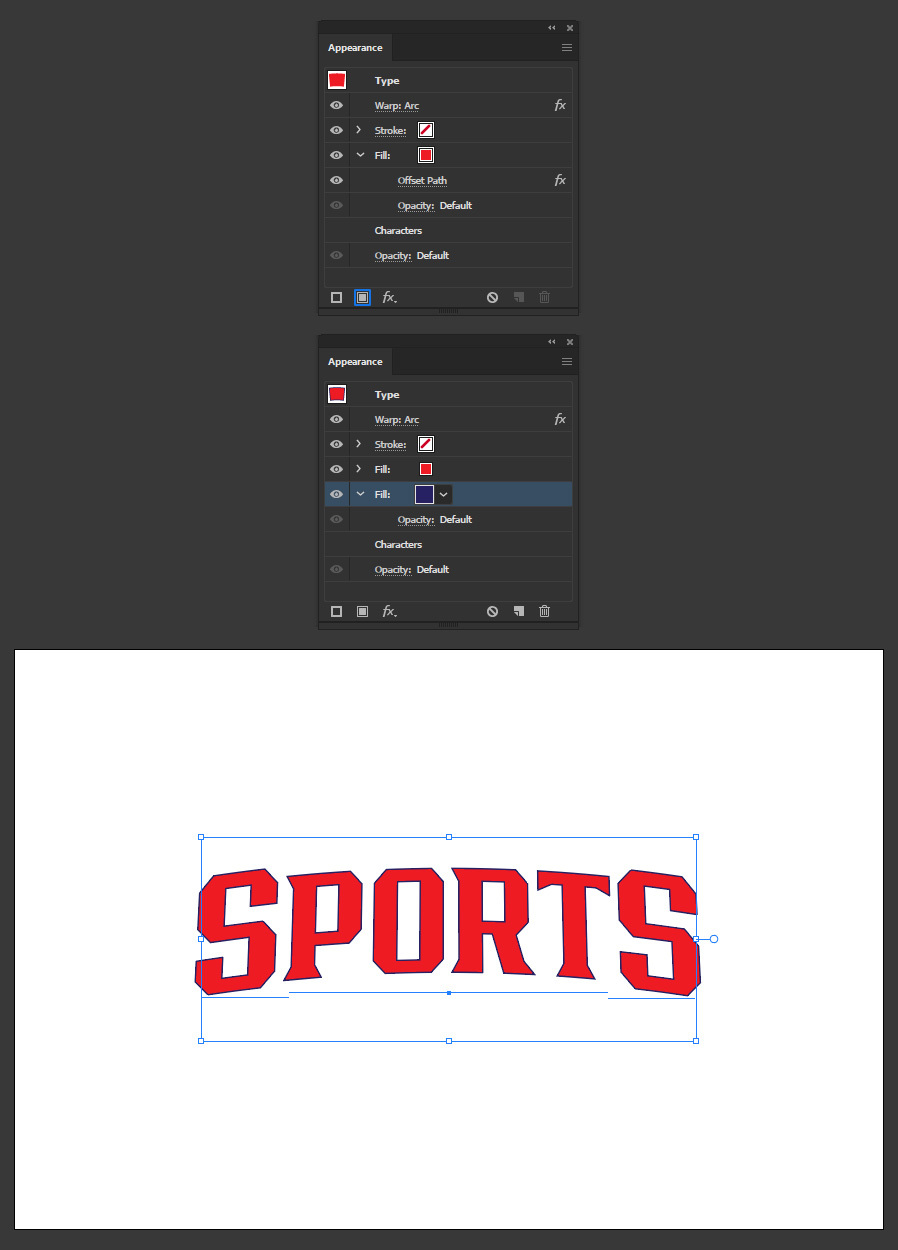
Step 7
Click on the "Add New Effect" icon. From the dropdown menu select Distort & Transform > Transform, apply the following settings and click OK.
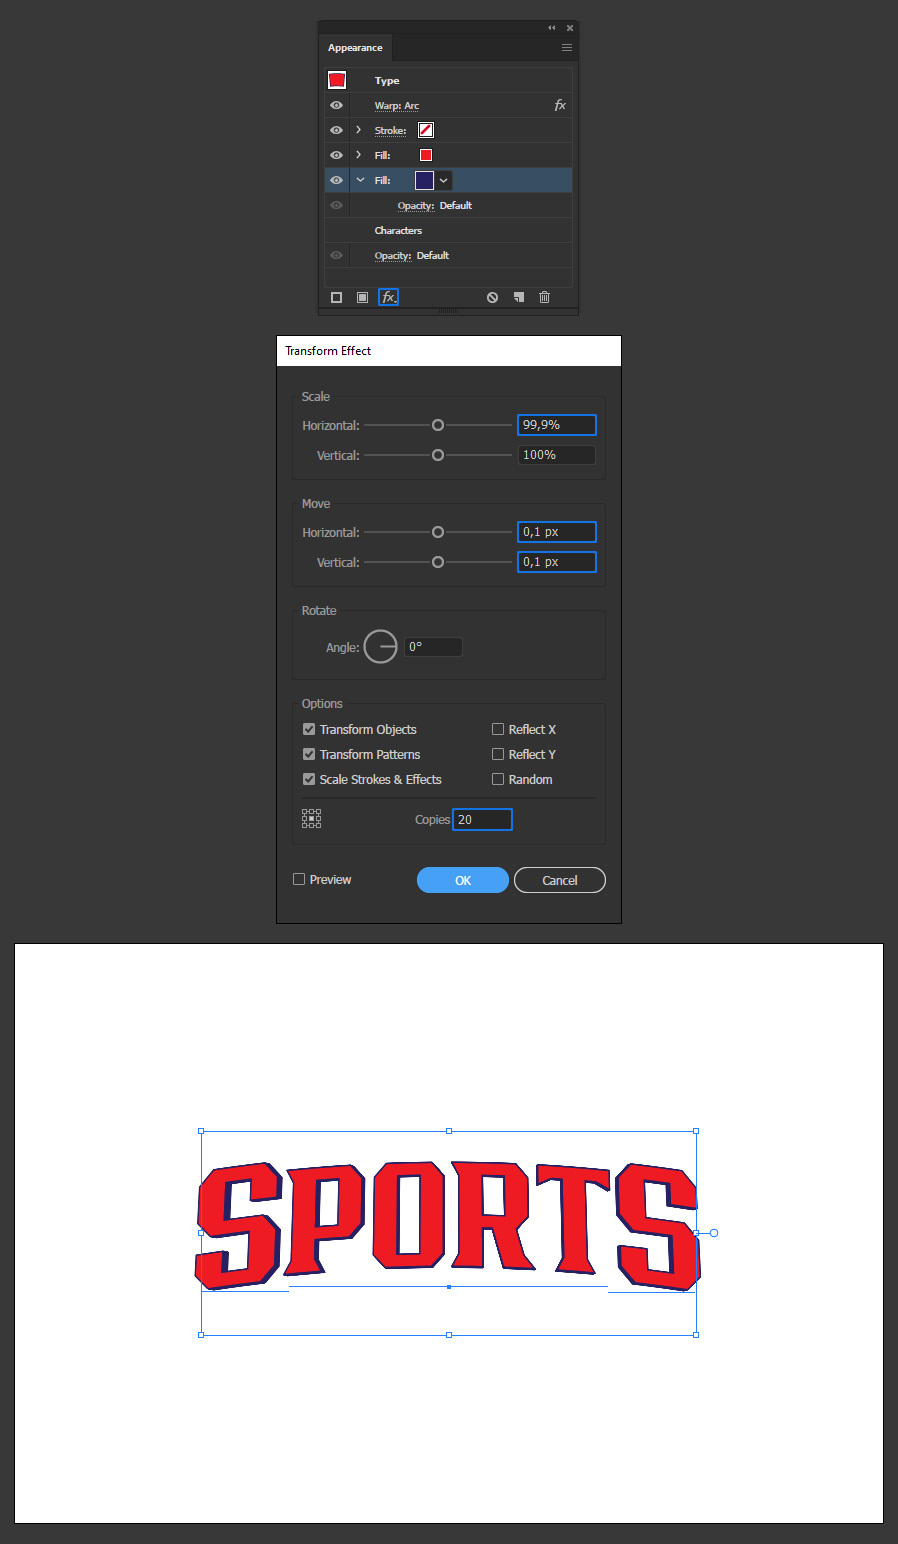
Step 8
Click on the "Add New Fill" icon and set the fill color to #ffffff.
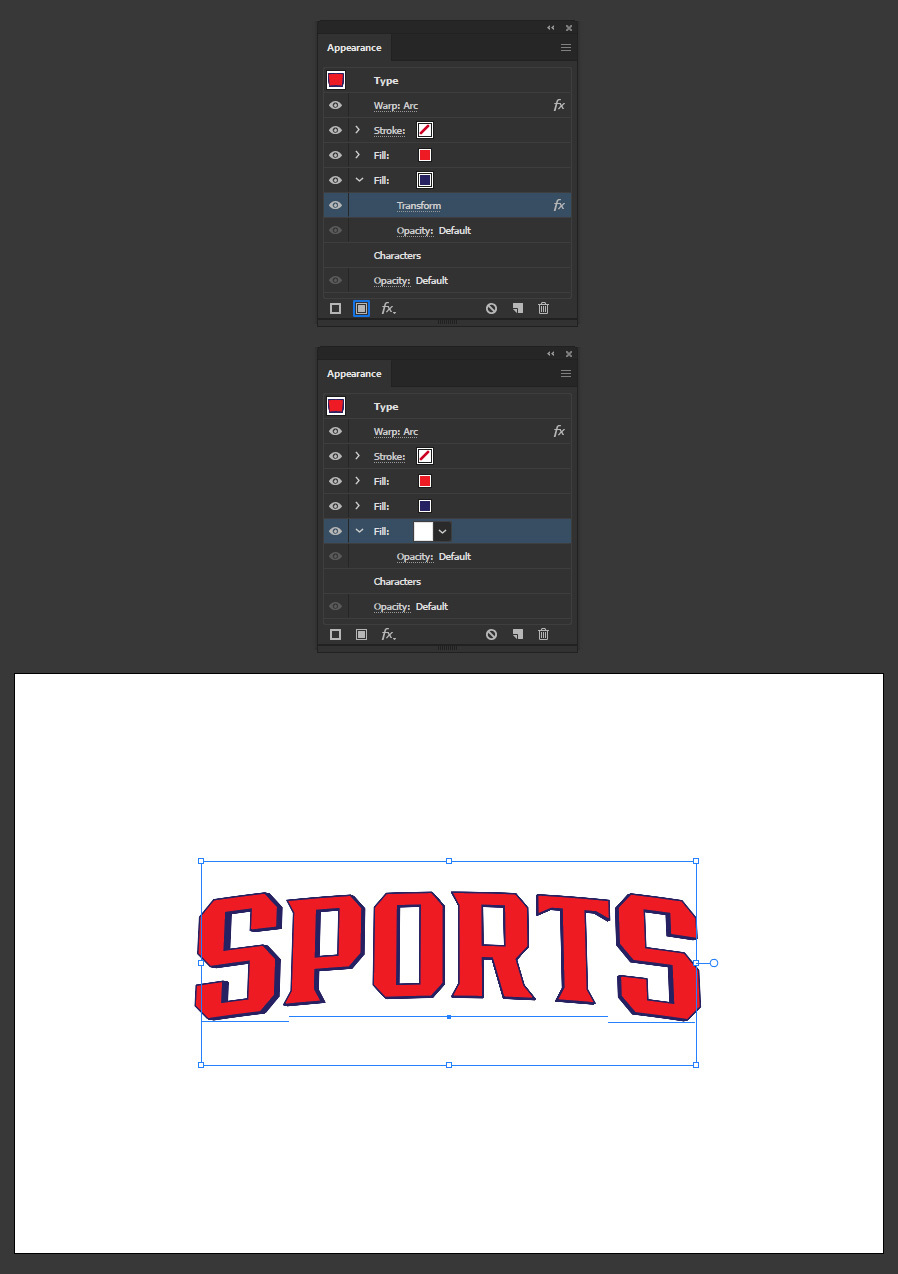
Step 9
Click on the "Add New Effect" icon. From the dropdown menu select Path > Offset Path, apply the following settings and click OK.
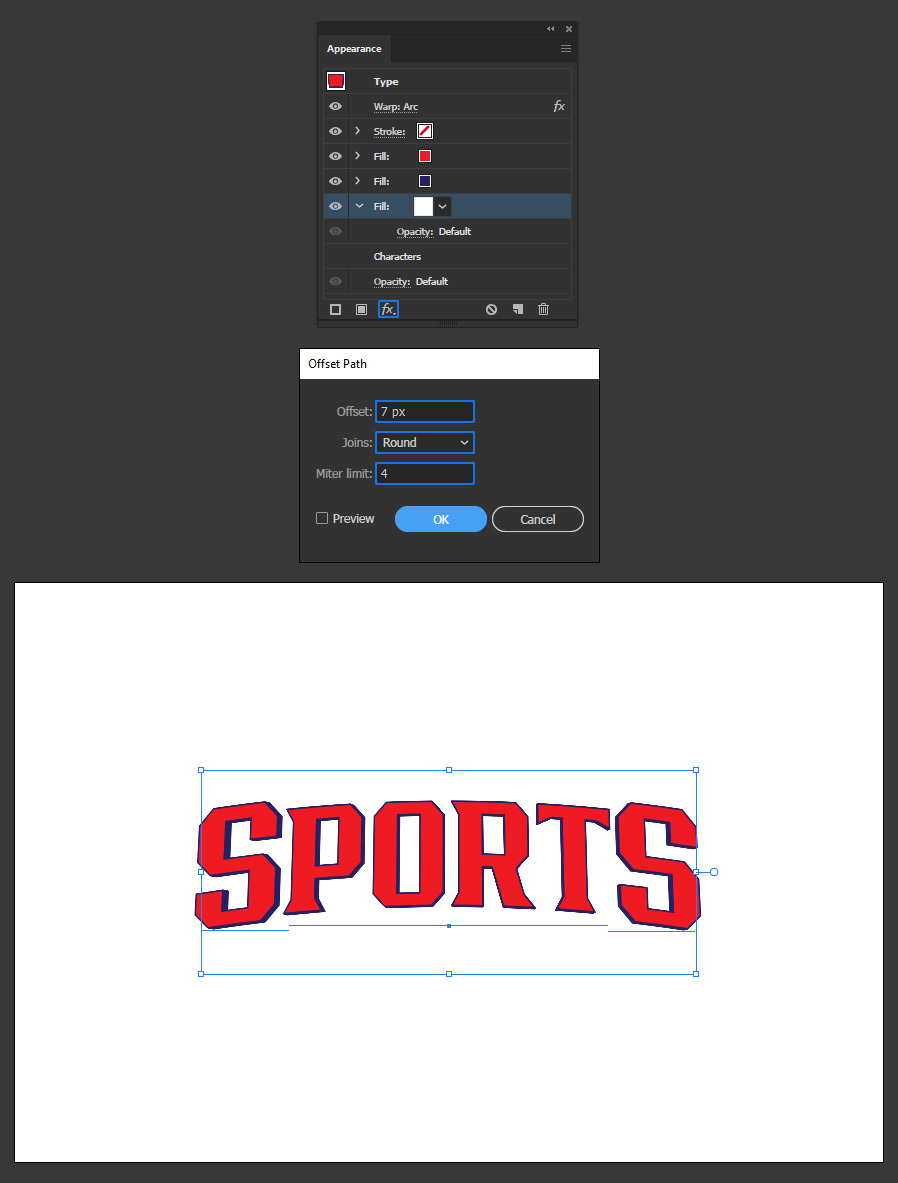
Step 10
Click again on the "Add New Effect" icon. From the dropdown menu select Distort & Transform > Transform, apply the following settings and click OK.
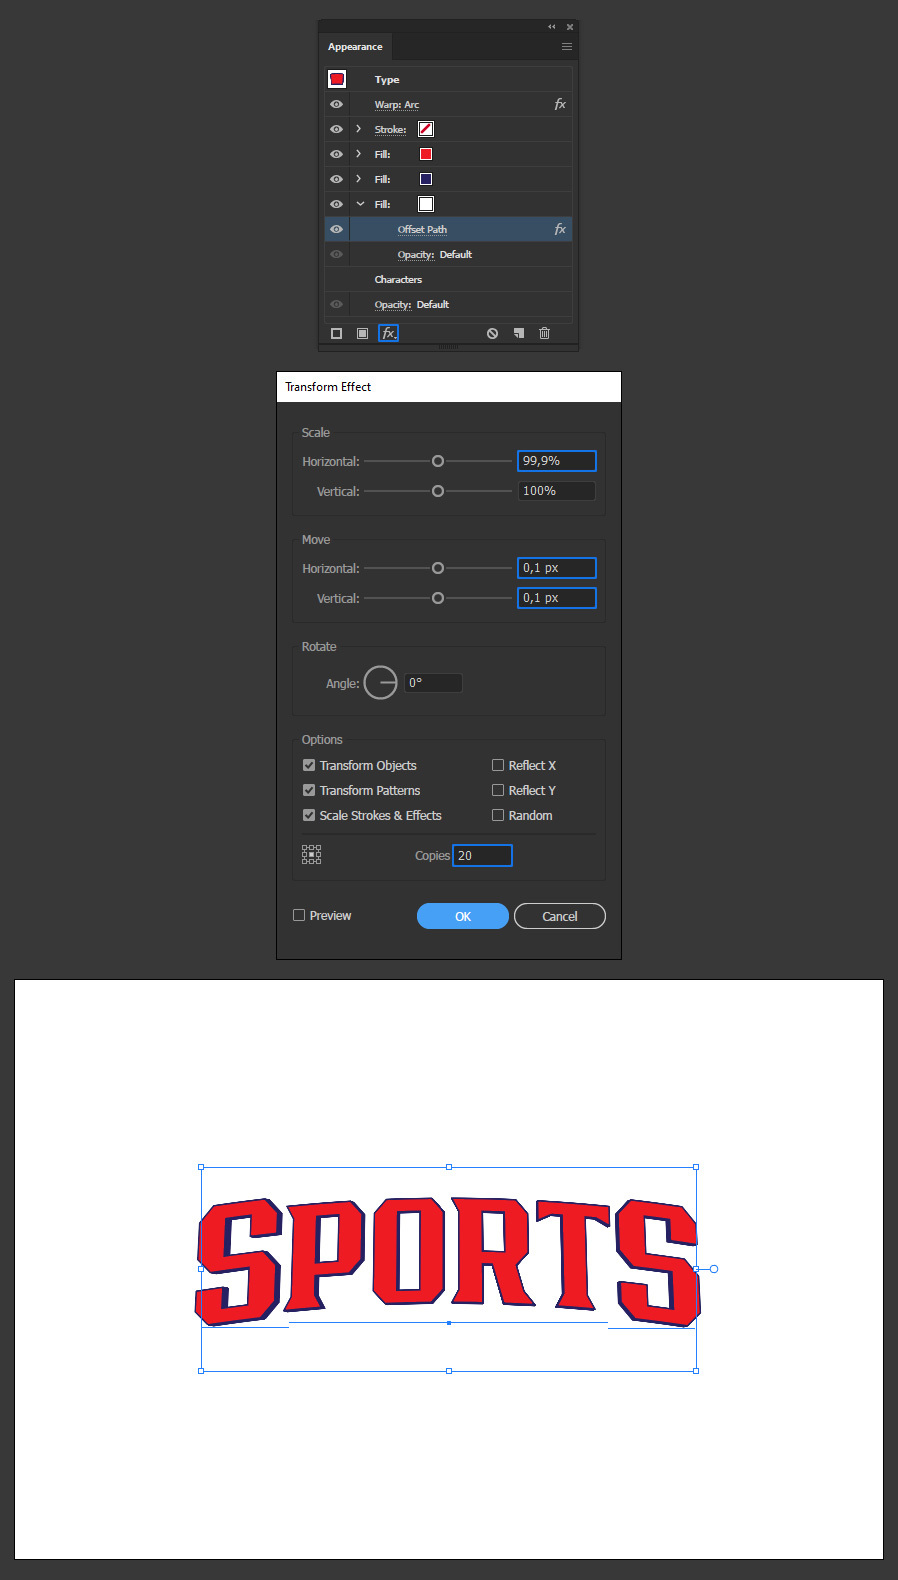
Step 11
Again, click on the "Add New Fill" icon and set the fill color to #cc2128.
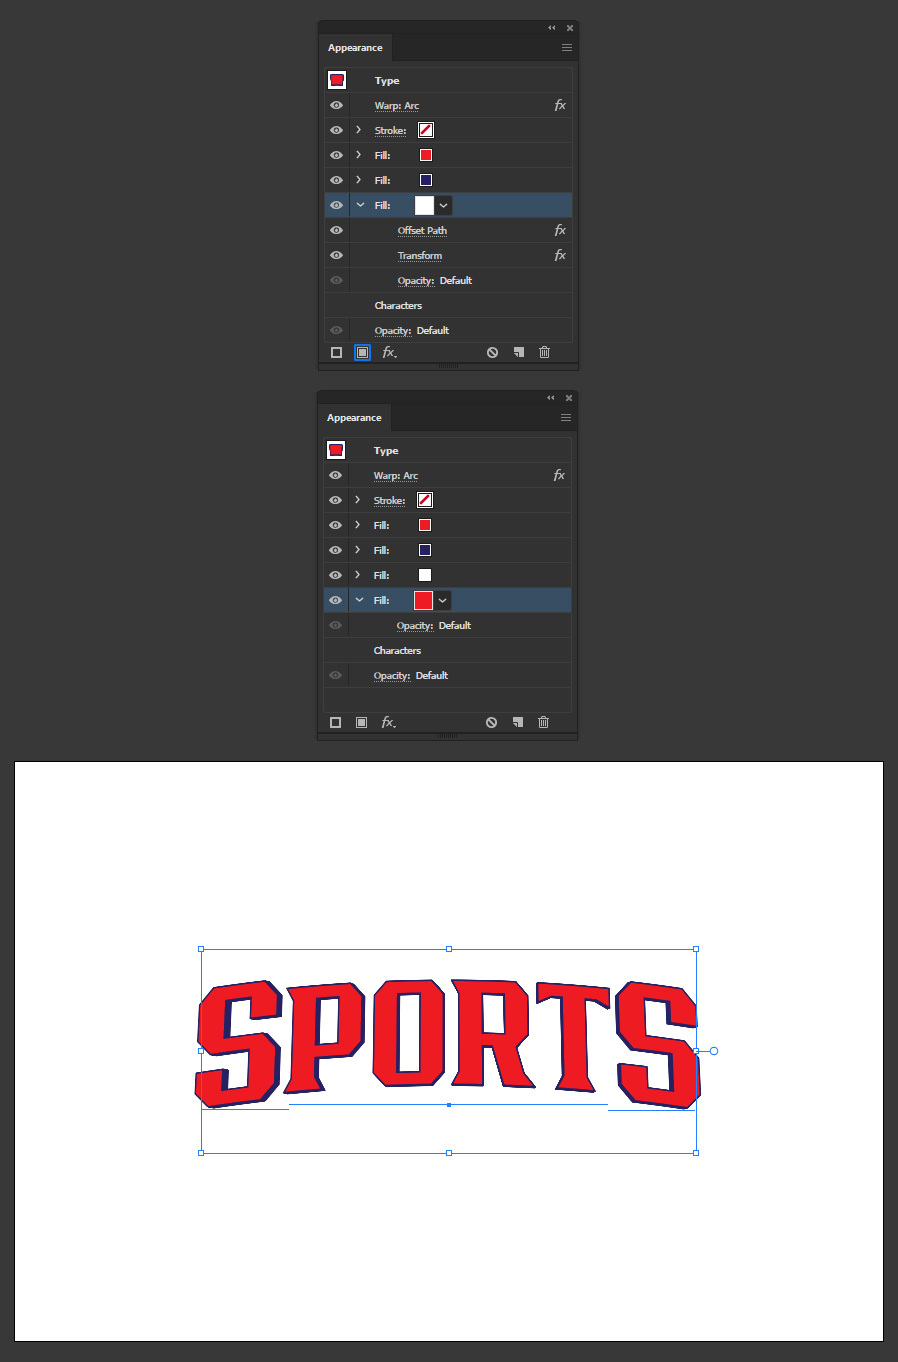
Step 12
Click on the "Add New Effect" icon. From the dropdown menu select Path > Offset Path, apply the following settings and click OK.
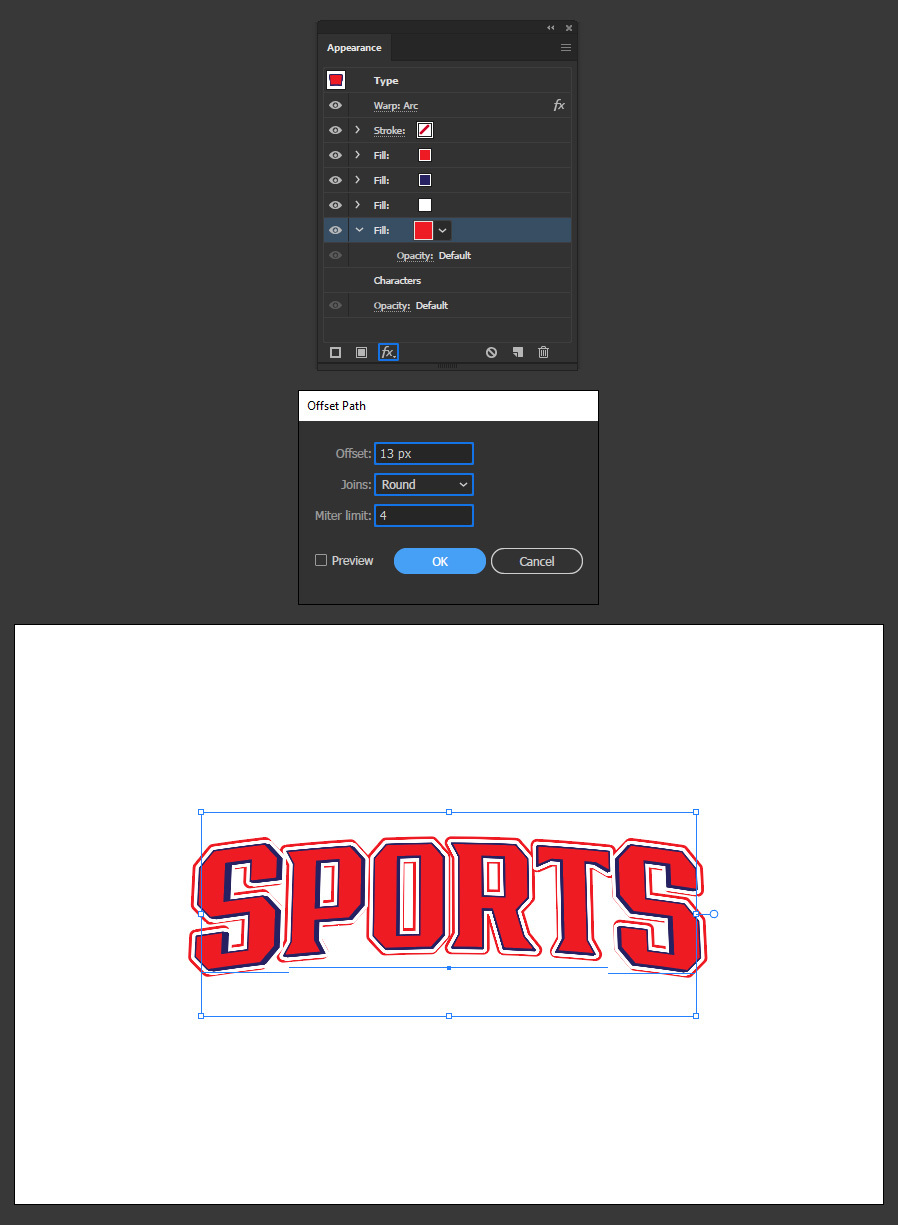
Step 13
Click on the "Add New Effect" icon. From the dropdown menu select Distort & Transform > Transform, apply the following settings and click OK.
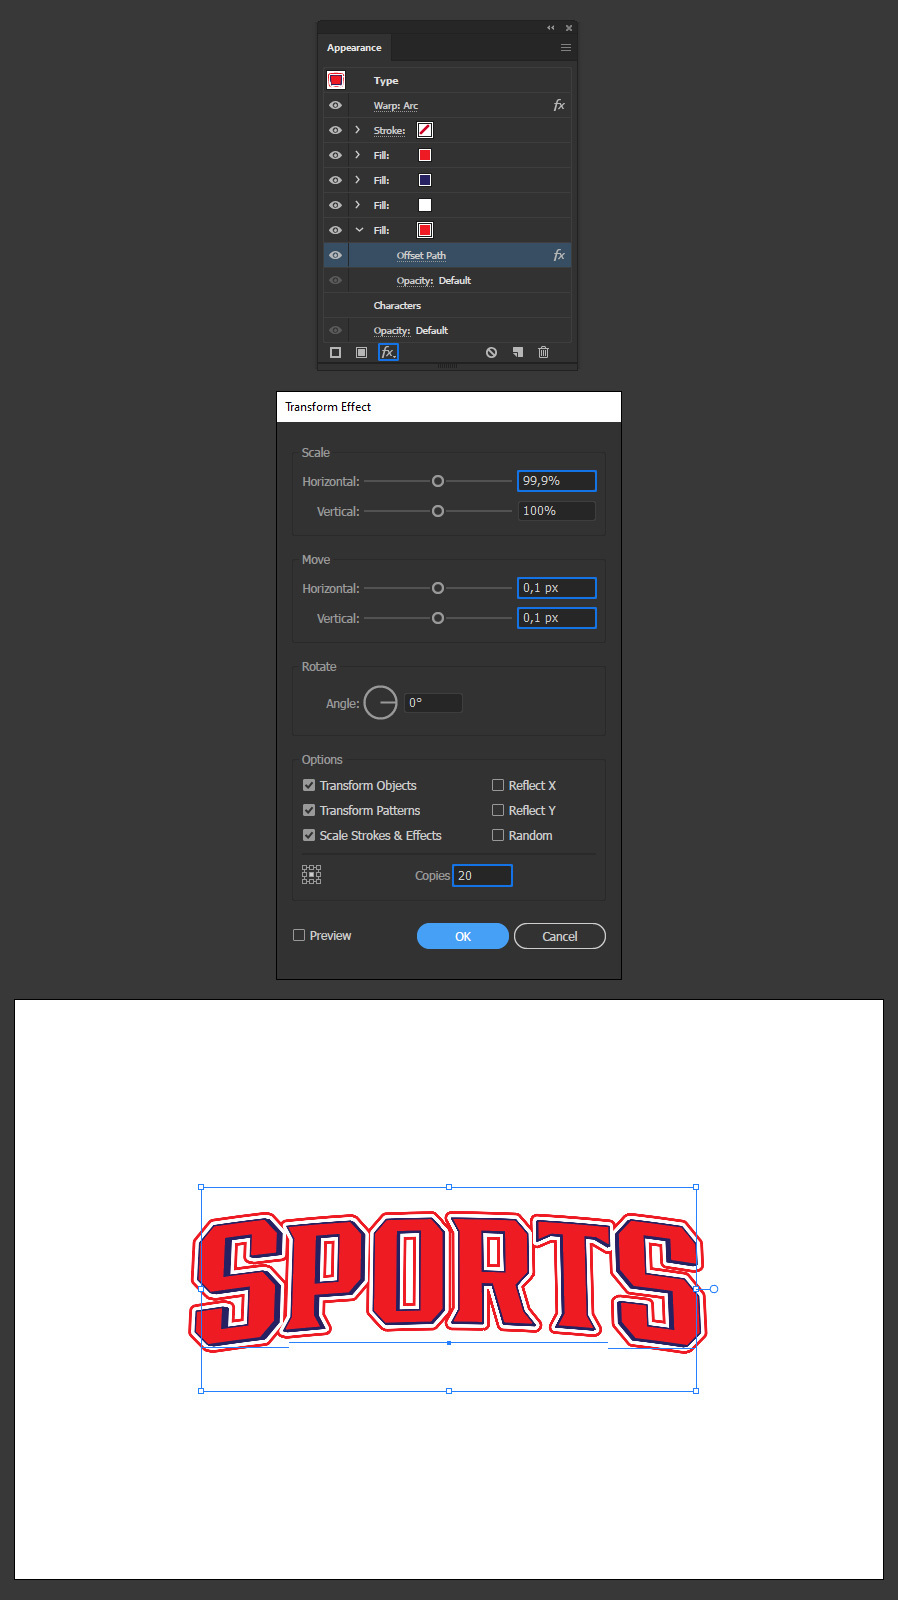
Step 14
Again, click on the "Add New Fill" icon and set the fill color to #292660.
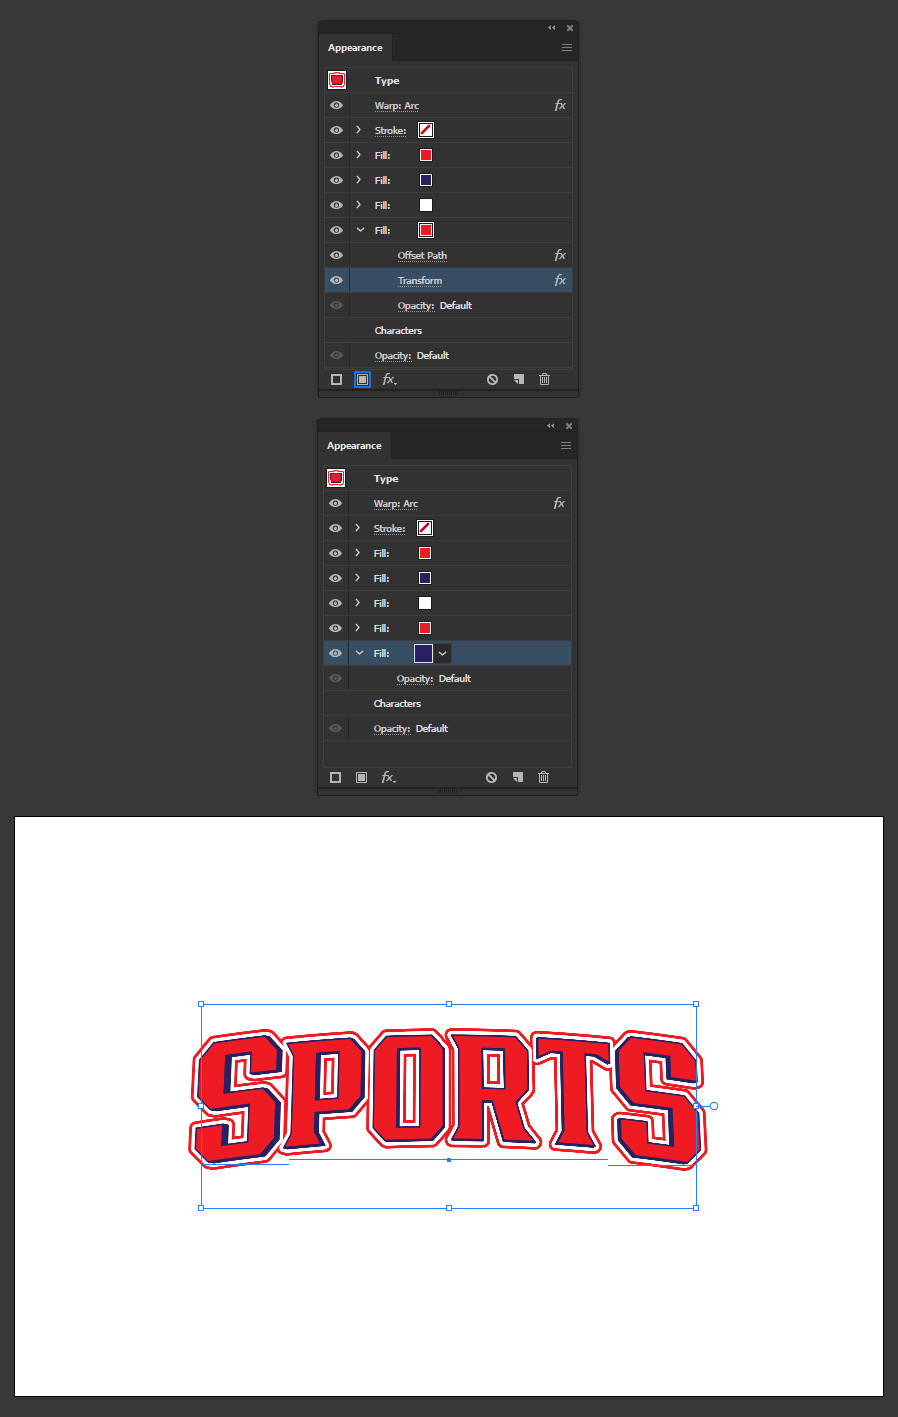
Step 15
Click on the "Add New Effect" icon. From the dropdown menu select Path > Offset Path, apply the following settings and click OK.
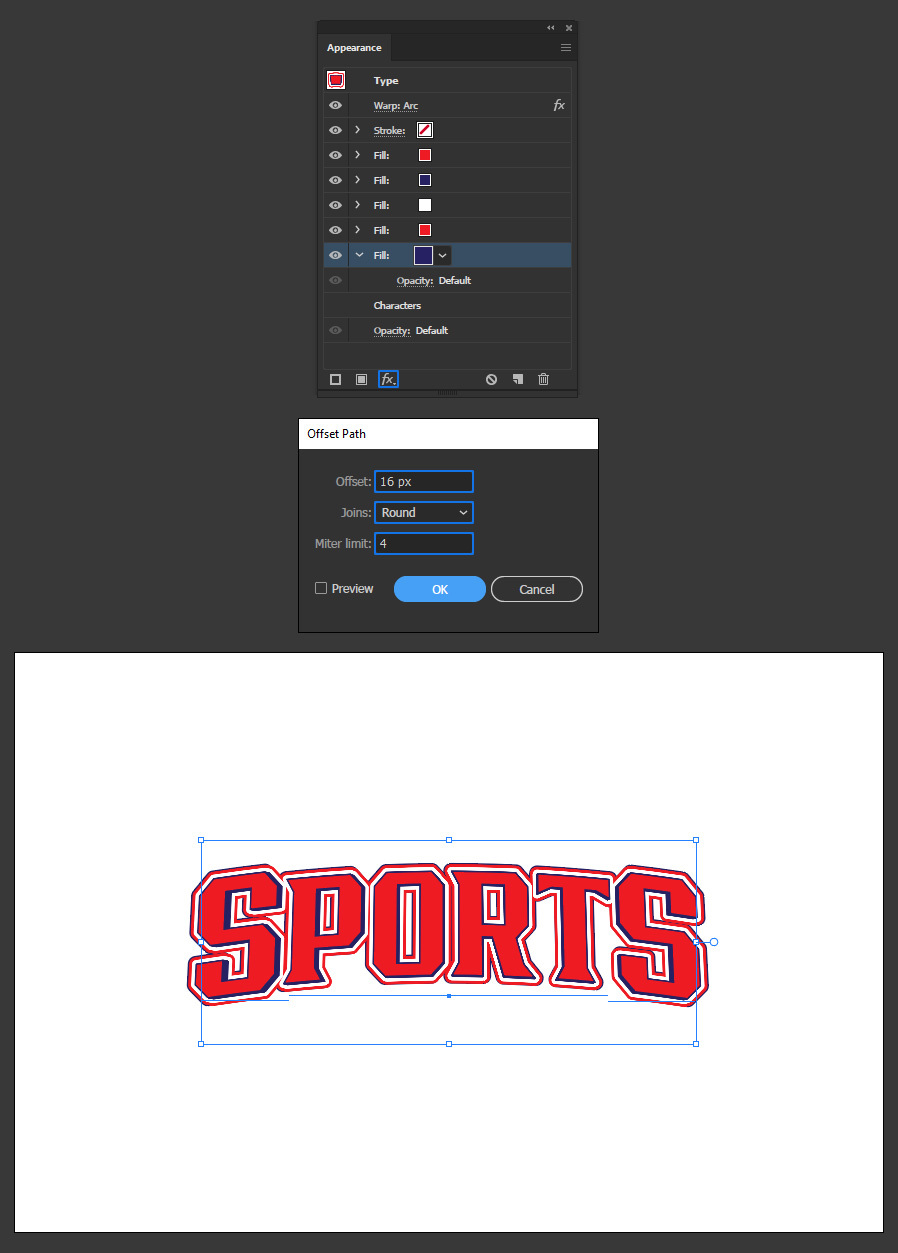
Step 16
Click on the "Add New Effect" icon. From the dropdown menu select Distort & Transform > Transform, apply the following settings and click OK.
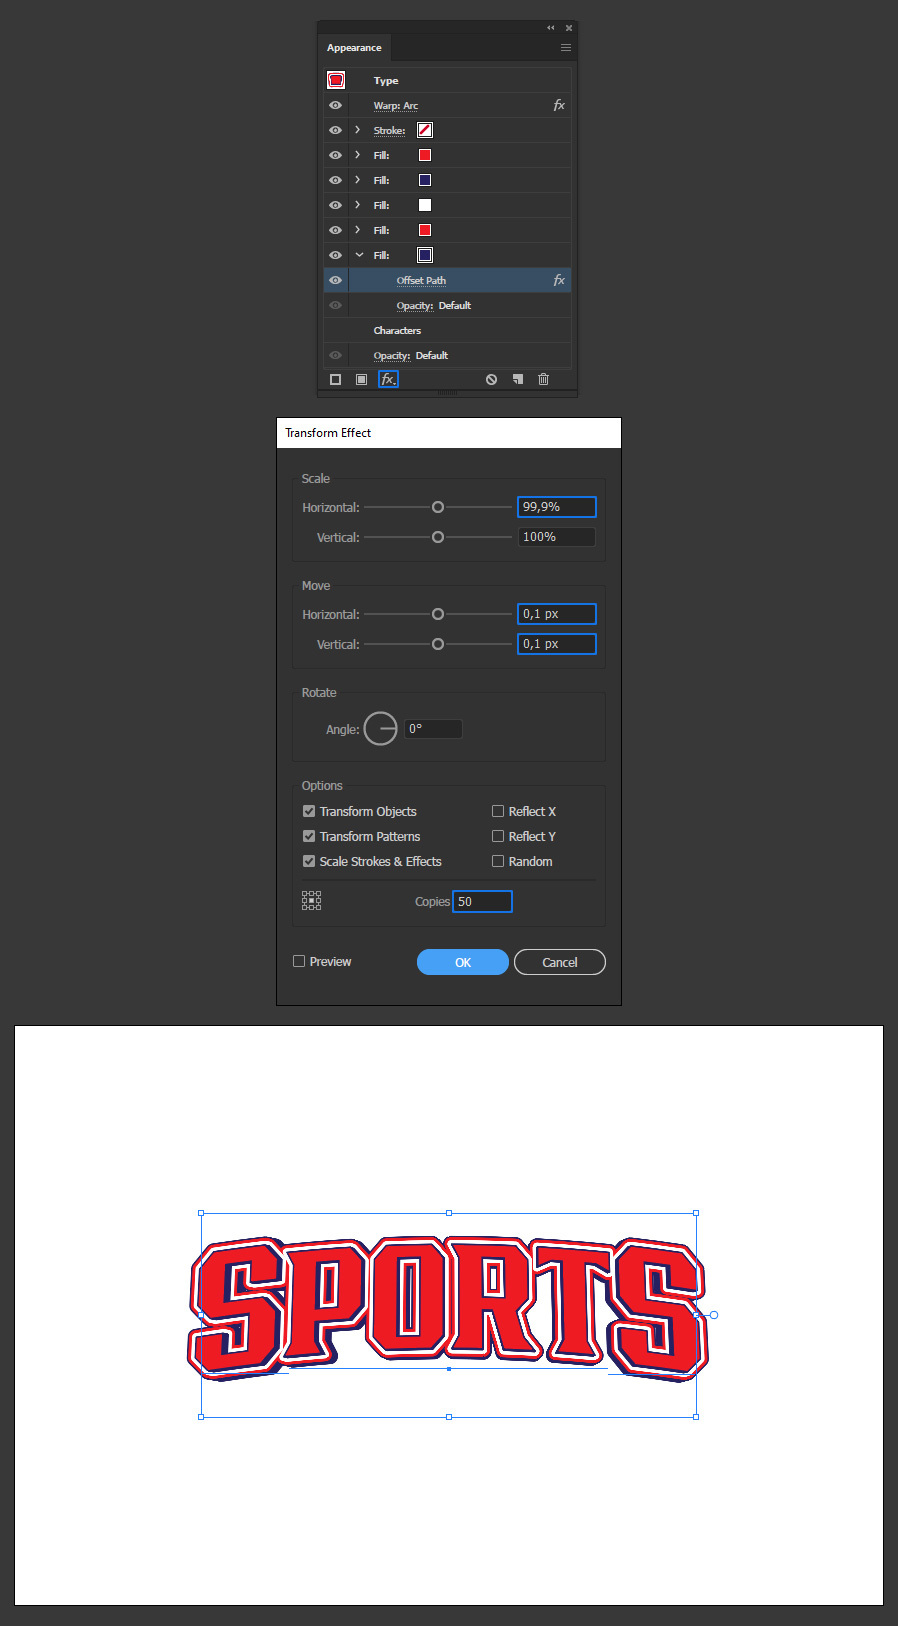
Step 17
Click again on the "Add New Effect" icon. From the dropdown menu select Distort & Transform > Transform, apply the following settings and click OK.
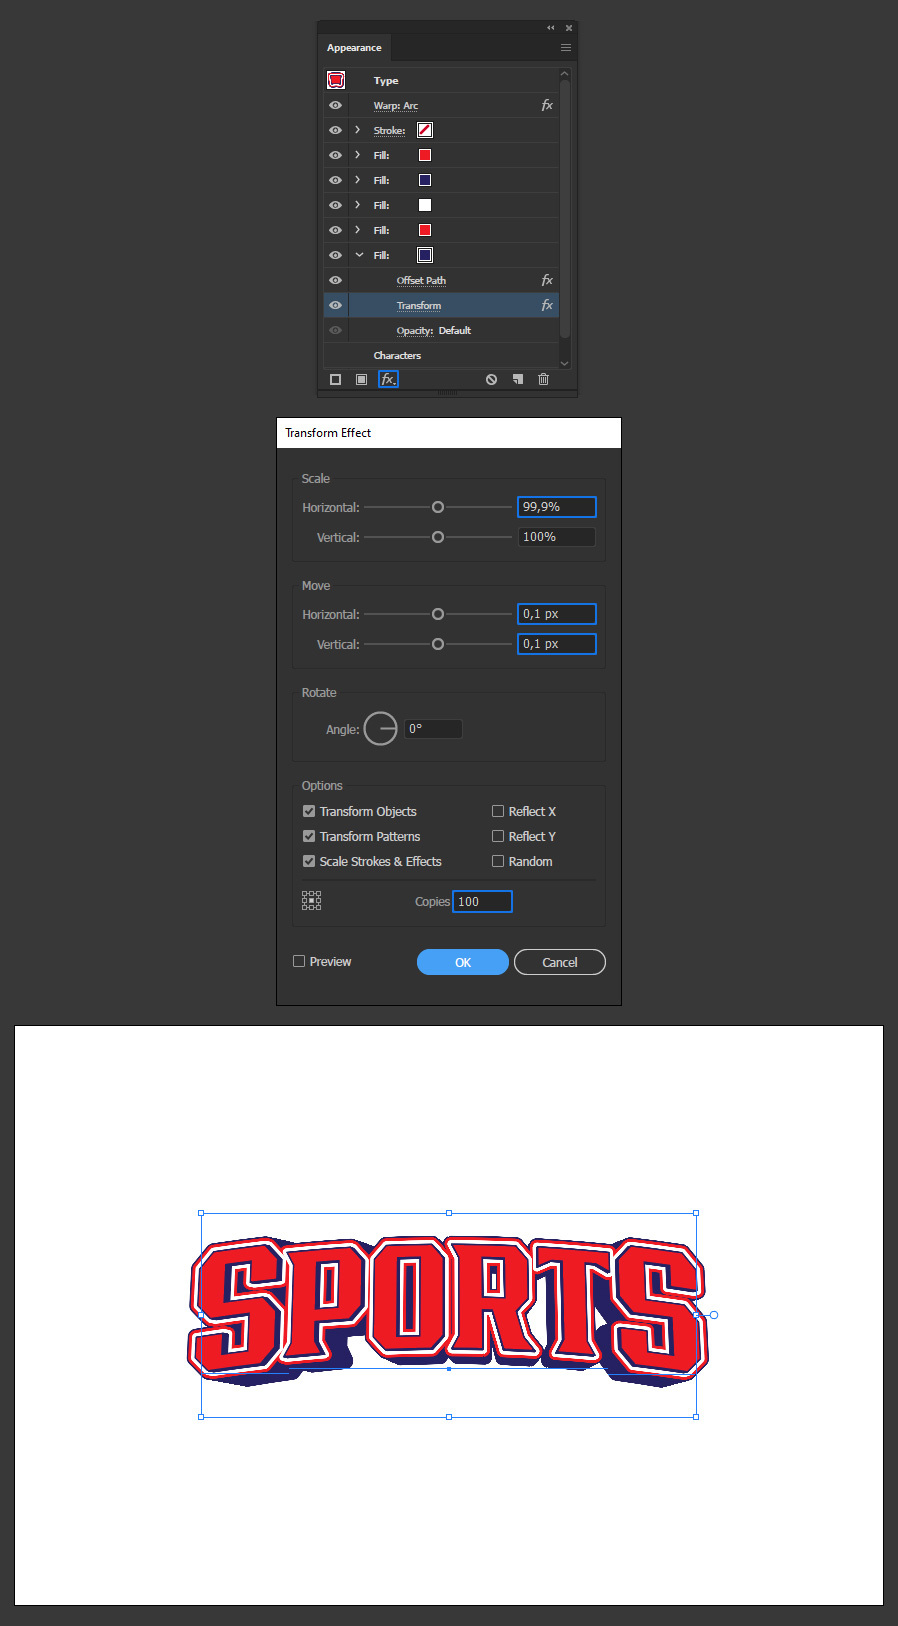
Step 18
Click on the "Add New Fill" icon and set the fill color to #000000.
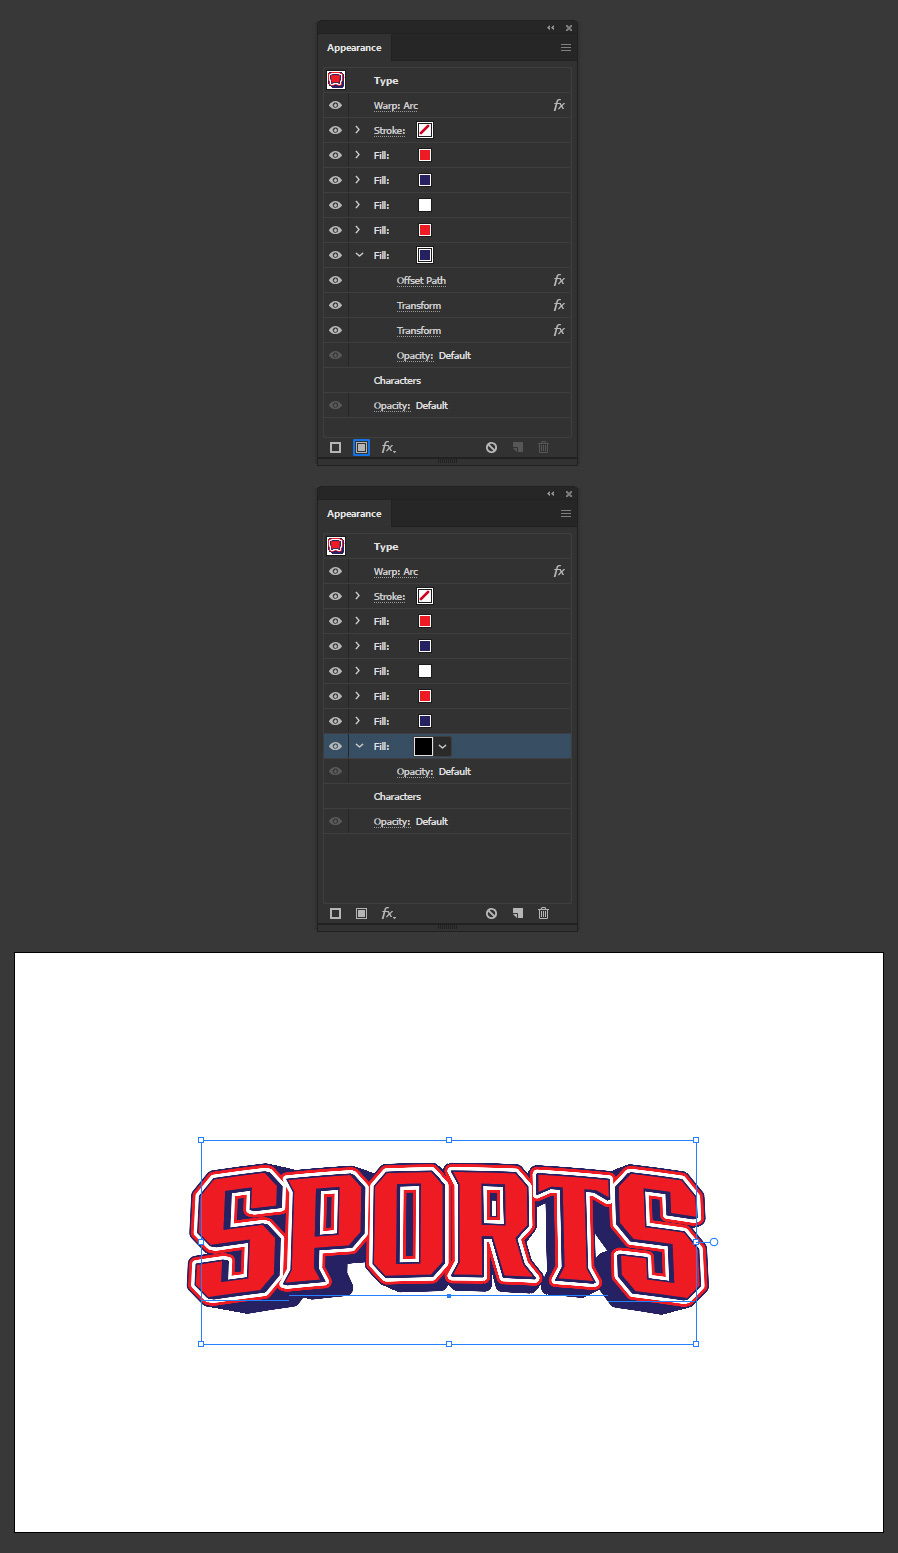
Step 19
Click on the "Add New Effect" icon. From the dropdown menu select Path > Offset Path, apply the following settings and click OK.
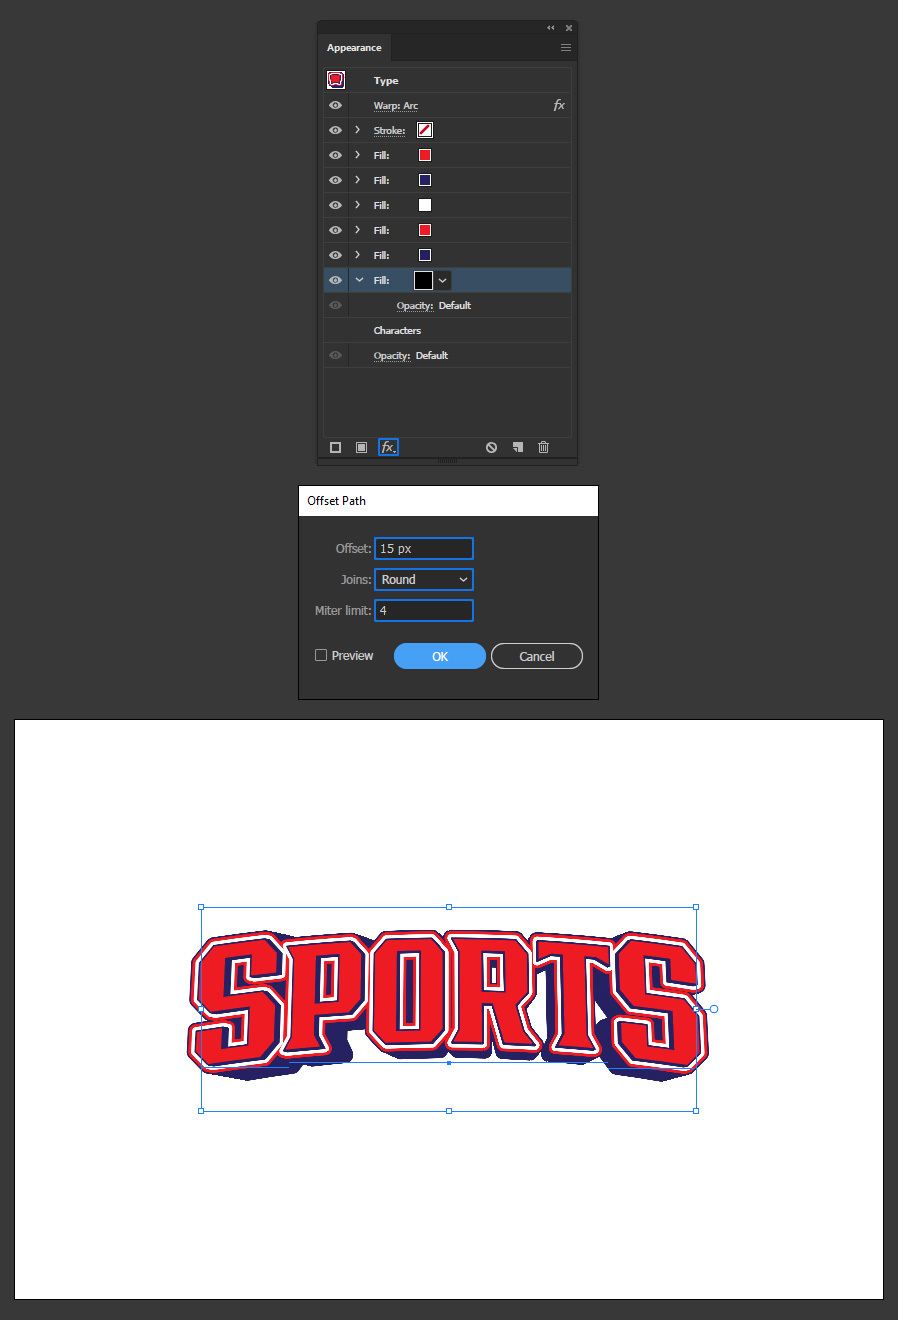
Step 20
Click on the "Add New Effect" icon. From the dropdown menu select Distort & Transform > Transform, apply the following settings and click OK.
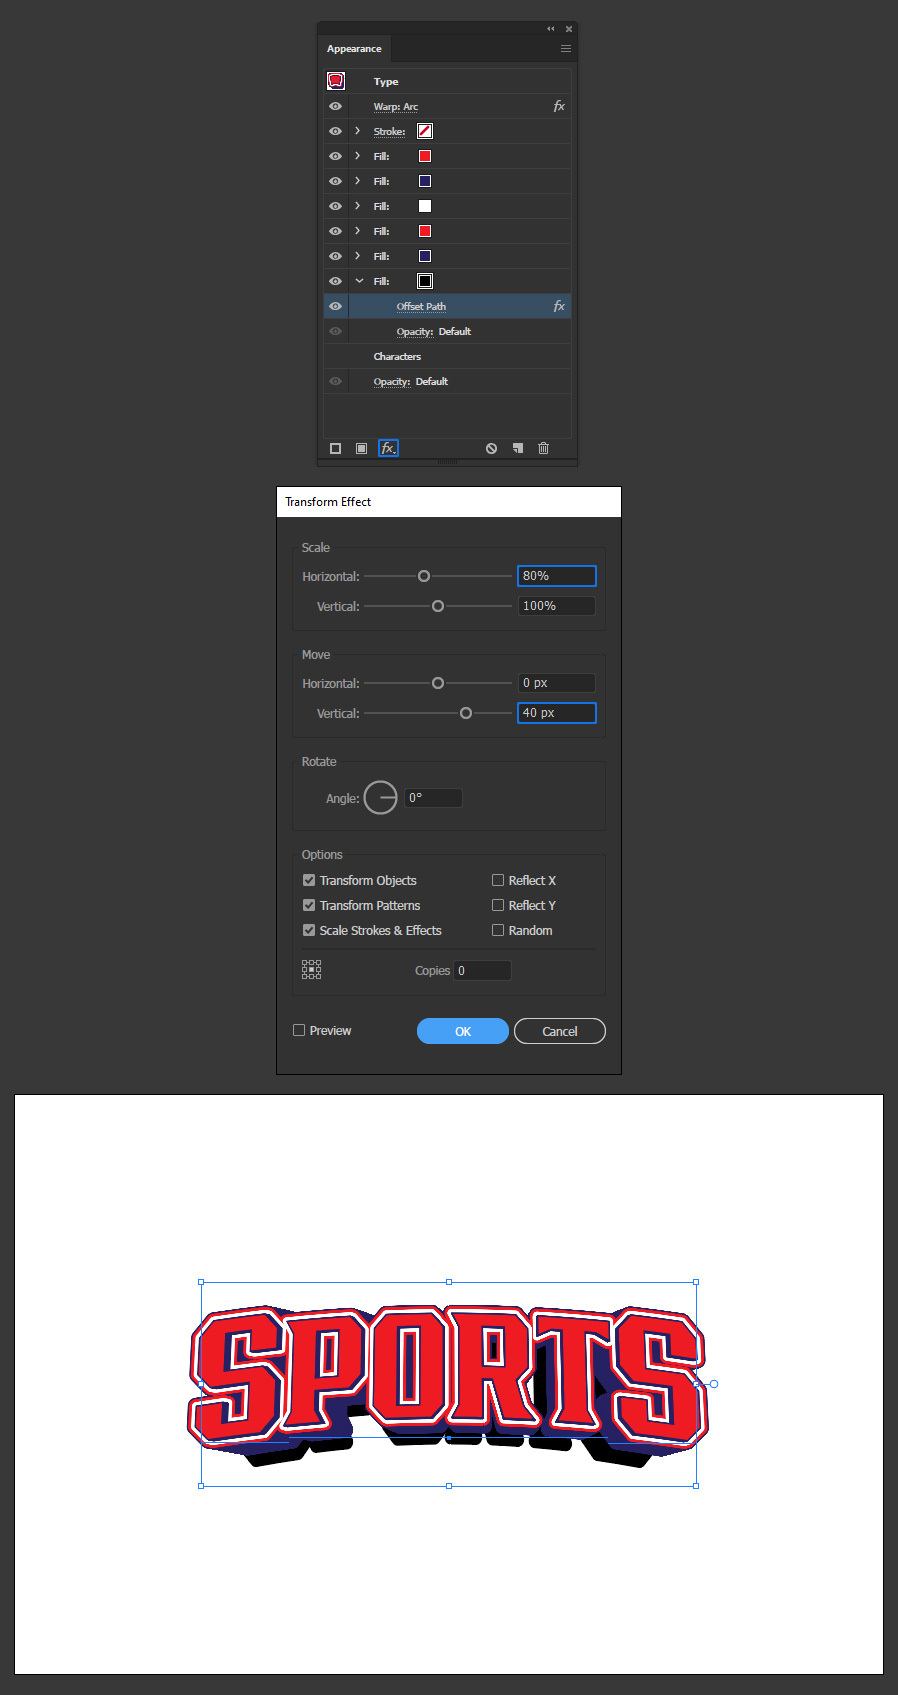
Step 21
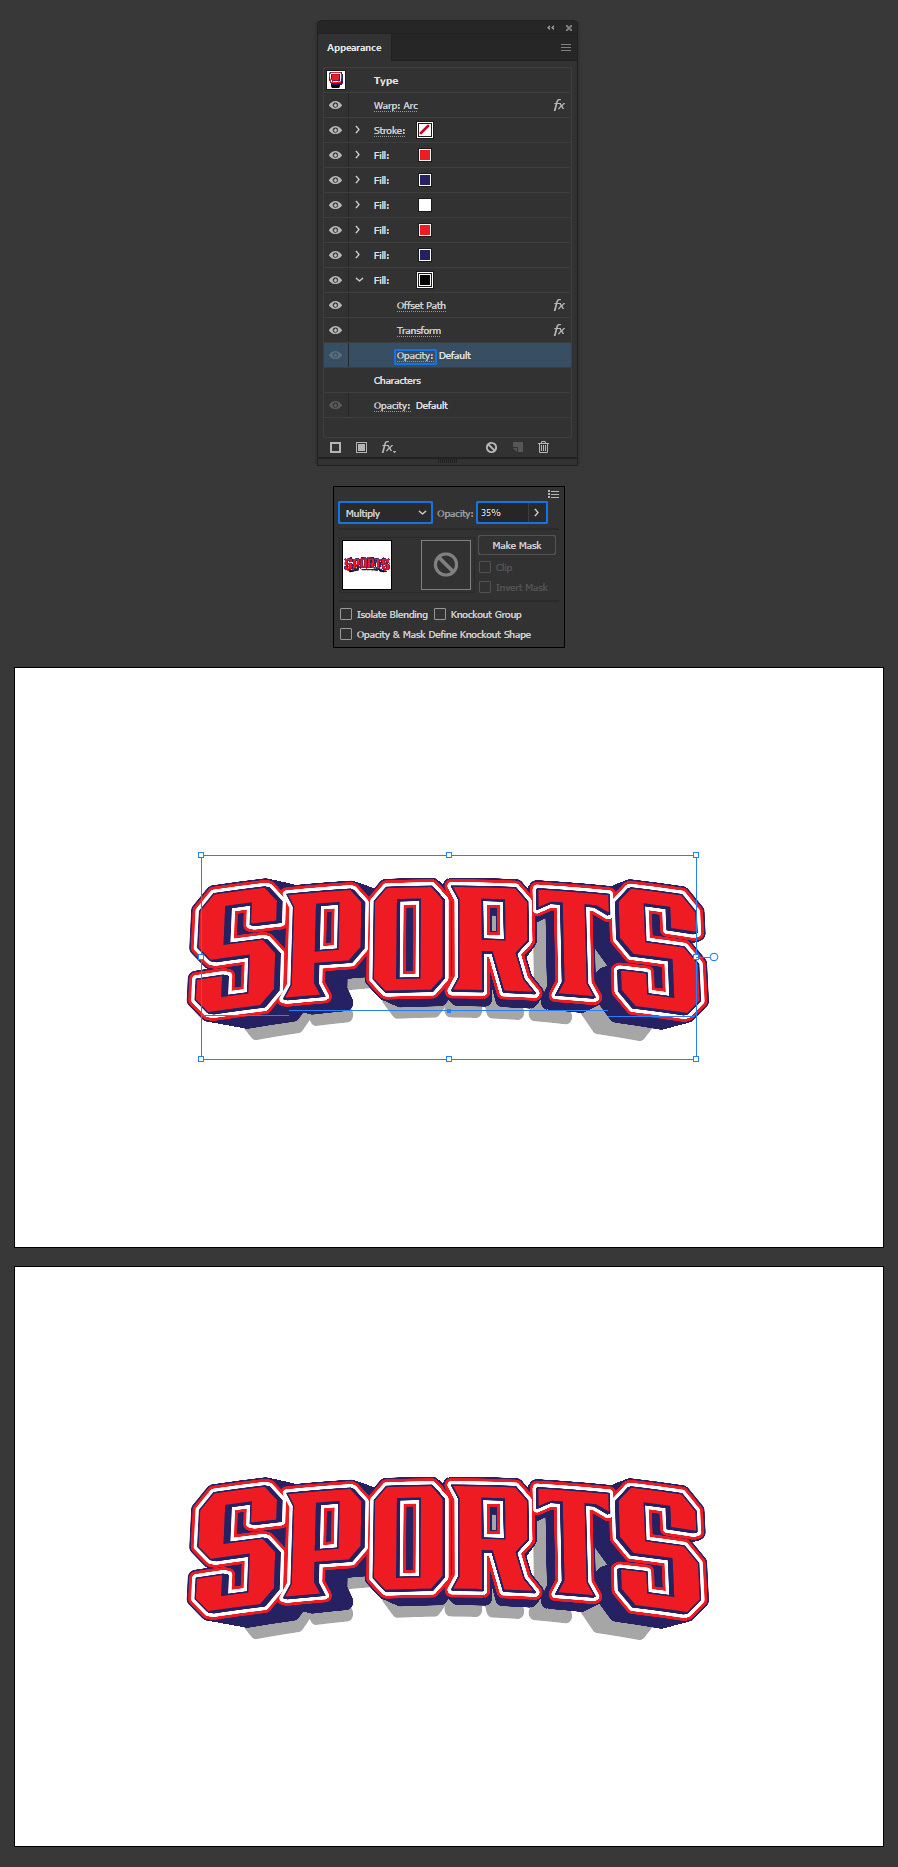
Lastly, click on "Opacity". Set the Blending Mode to "Multiply" and reduce the Opacity to about 35%.
A Final Note:
With the effect already made, a good idea is to save it as a Graphic Style to use it later over any other text without having to make the whole effect again. To do that, select your text, go to Window > Graphic Styles and then click on the "New Graphic Style" icon in the Graphic Styles panel. The next time you want to use this effect over any other text simply type your text and select the graphic style you just made from the Graphic Styles Panel.
