How to Make a Pink & Blue Effect in Photoshop
Photoshop Photo Effects
Besides the classic Orange & Teal photo effect, there are many different ones that you can make in Photoshop to make your photo looks entirely different from the original shot. Often used on urban pictures, the Pink & Blue effect is by far the most used one for these type of photographs on Instagram and other social media platforms and this is the effect that i will show you how to make in a very easy and quick way in Photoshop.
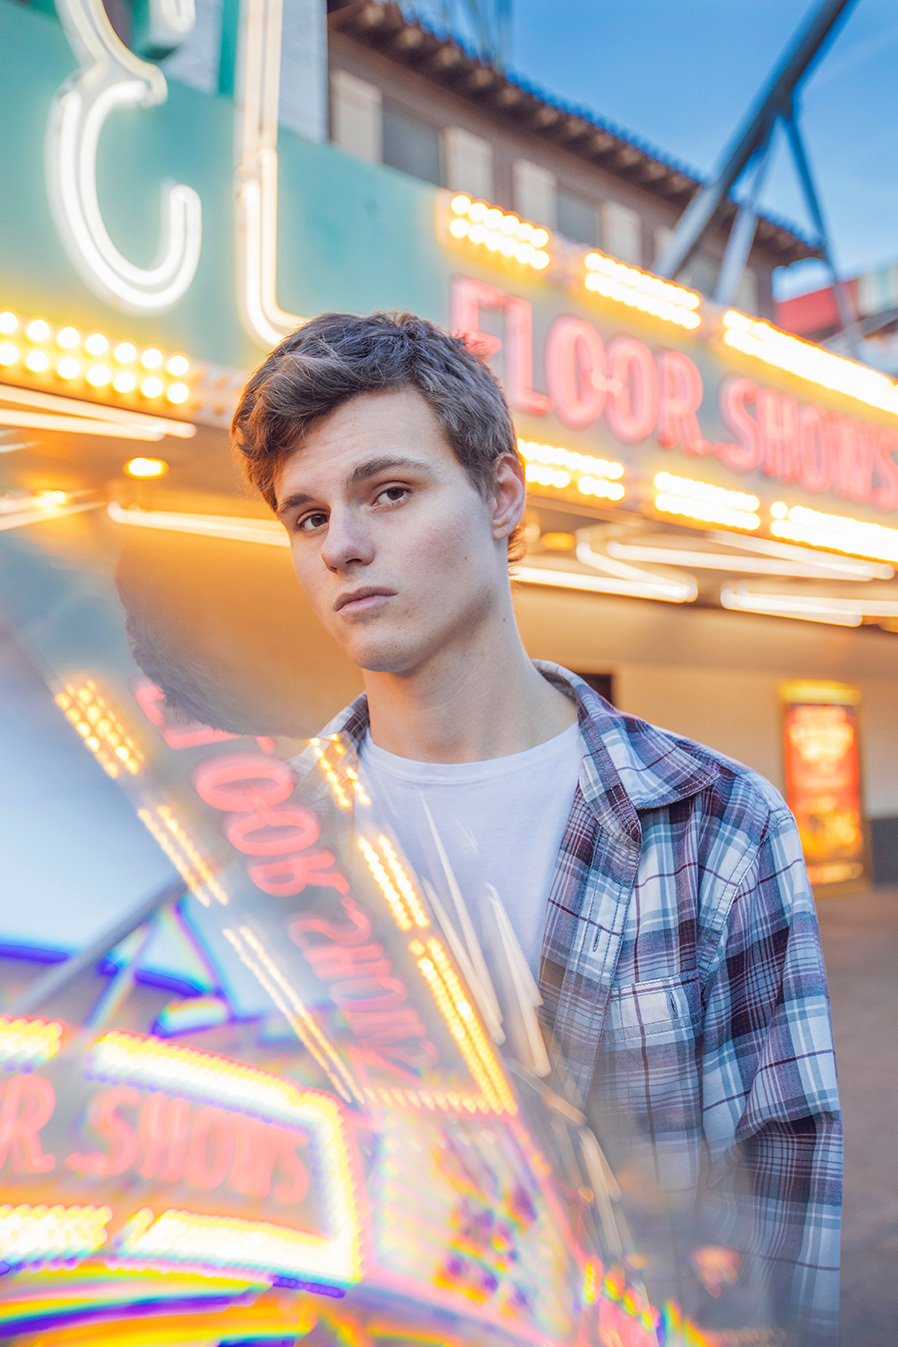
But before we begin, and if you want to follow this tutorial exactly as described, please download the following free image from Unsplash: Download
Step 1
Open the picture in Photoshop.
Step 2
Press "Ctrl+J" on your keyboard to make a copy of the Background layer.

Step 3
Go to Layer > Smart Objects > Convert to Smart Object.

Step 4
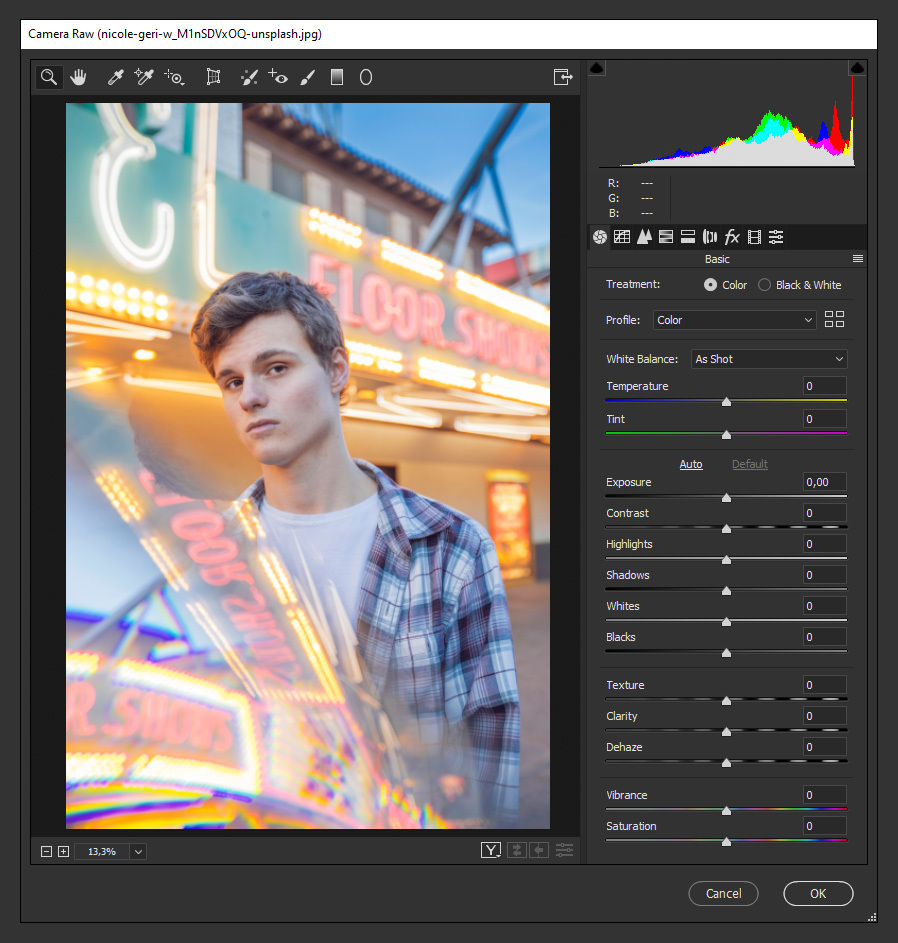
Go to Filter > Camera RAW Filter.
Step 5
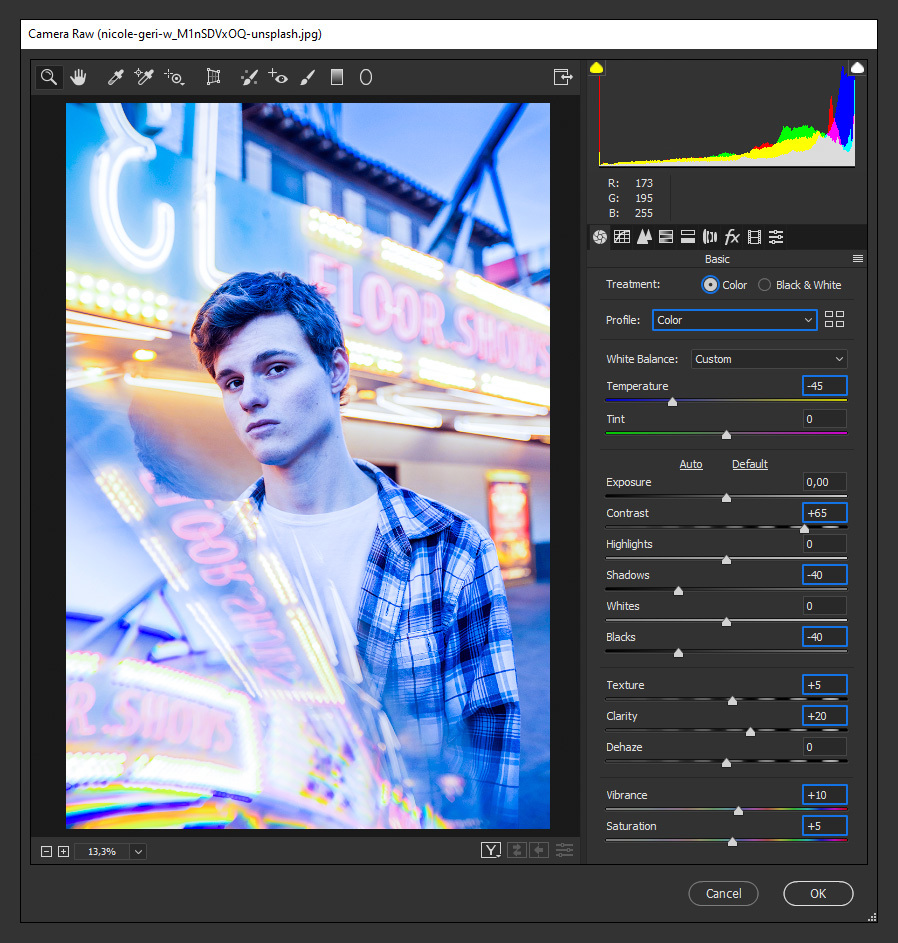
In the "Basic" tab, apply the following settings.
Step 6
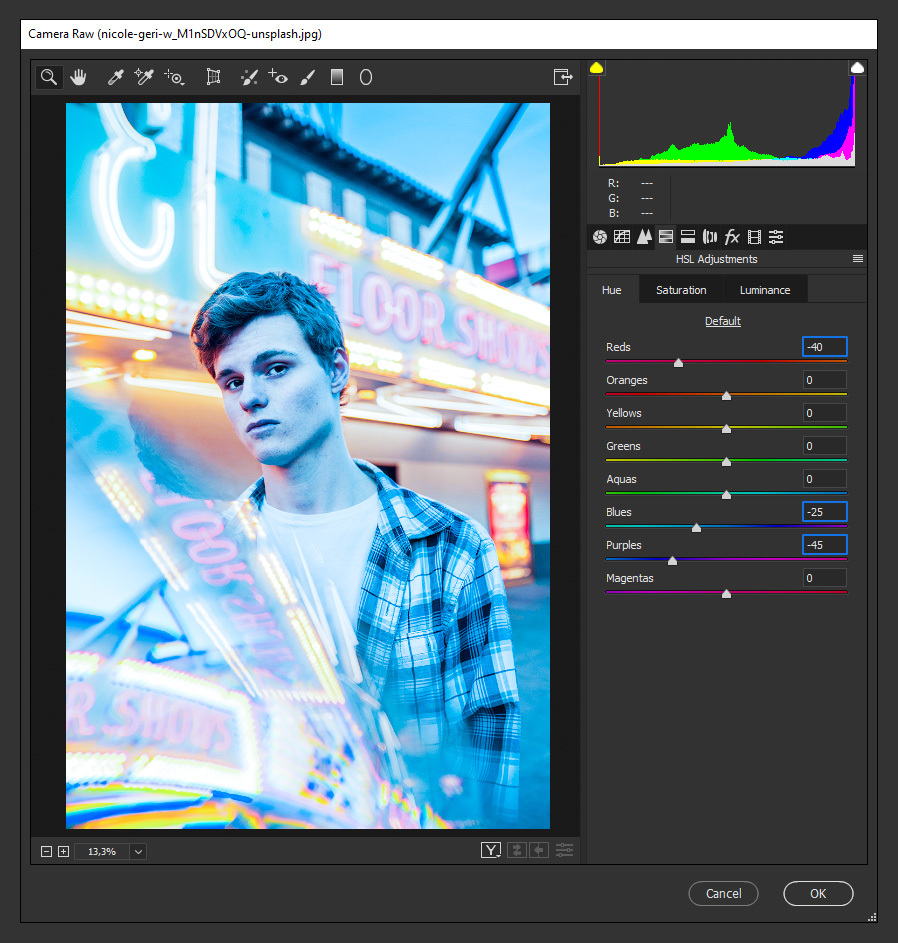
Click on the "HSL Adjustments" tab and under "Hue" use the following values.
Step 7
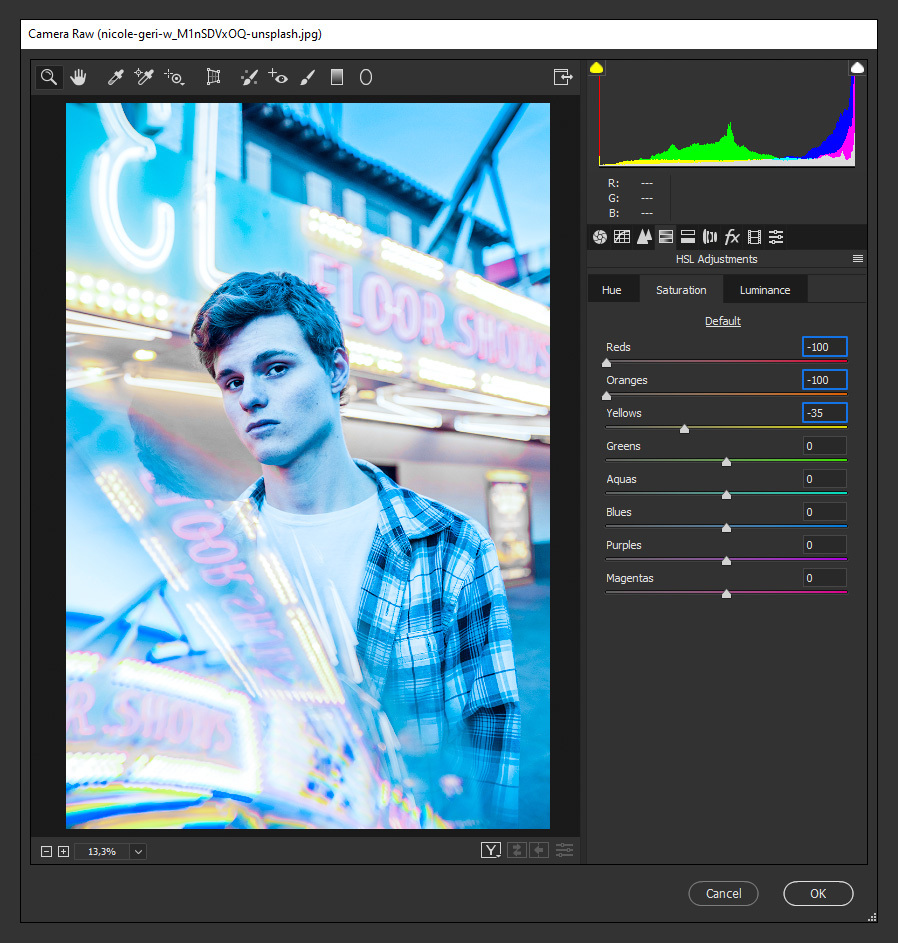
Click on the "Saturation" tab and apply these values.
Step 8
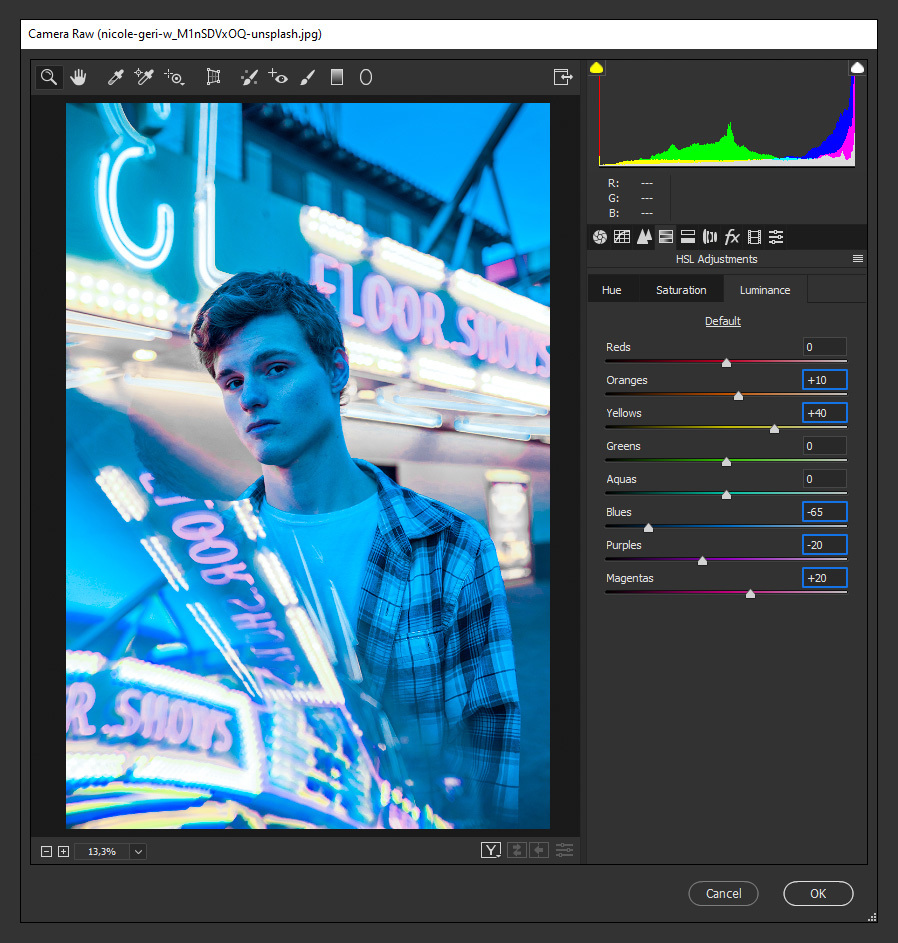
Now, select the "Luminance" tab and apply the following values.
Step 9
Lastly, click on the "Split Toning" tab,apply the following settings and click OK.

Some Final Notes
As you may see, making a Blue & Pink effect in Photoshop using the Camera RAW Filter is quick and easy. Even though the values shown in this tutorial are made for this image, they can be used as a base for your next project. As every image is unique, you can start with the values used on this tutorial and then make small adjustments for your specific photograph.


