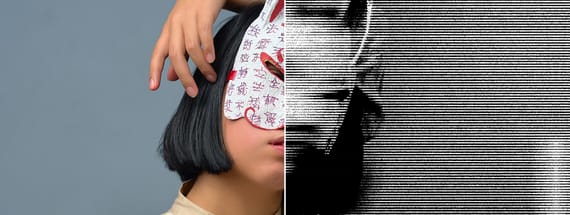
How to Make a Grungy Photocopy Scan Lines Effect in Photoshop
Photoshop Photo Effects
When you want to transform your photos into gritty and textured images, there are many different methods to achieve a vintage photocopy scan lines effect. Whether you're working on a design project, creating artwork, or simply aiming to add an edgy vibe to your photographs, in this tutorial I will show you a quick and easy way to create a grungy photocopy scan lines effect using a versatile toolset available in Photoshop. Using a single filter and the powerful Filter Gallery you will see how to manipulate your images to mimic the distinct characteristics of an old photocopy, complete with gritty textures and striking scan lines.
Step 1
Open your image in Photoshop.

Step 2
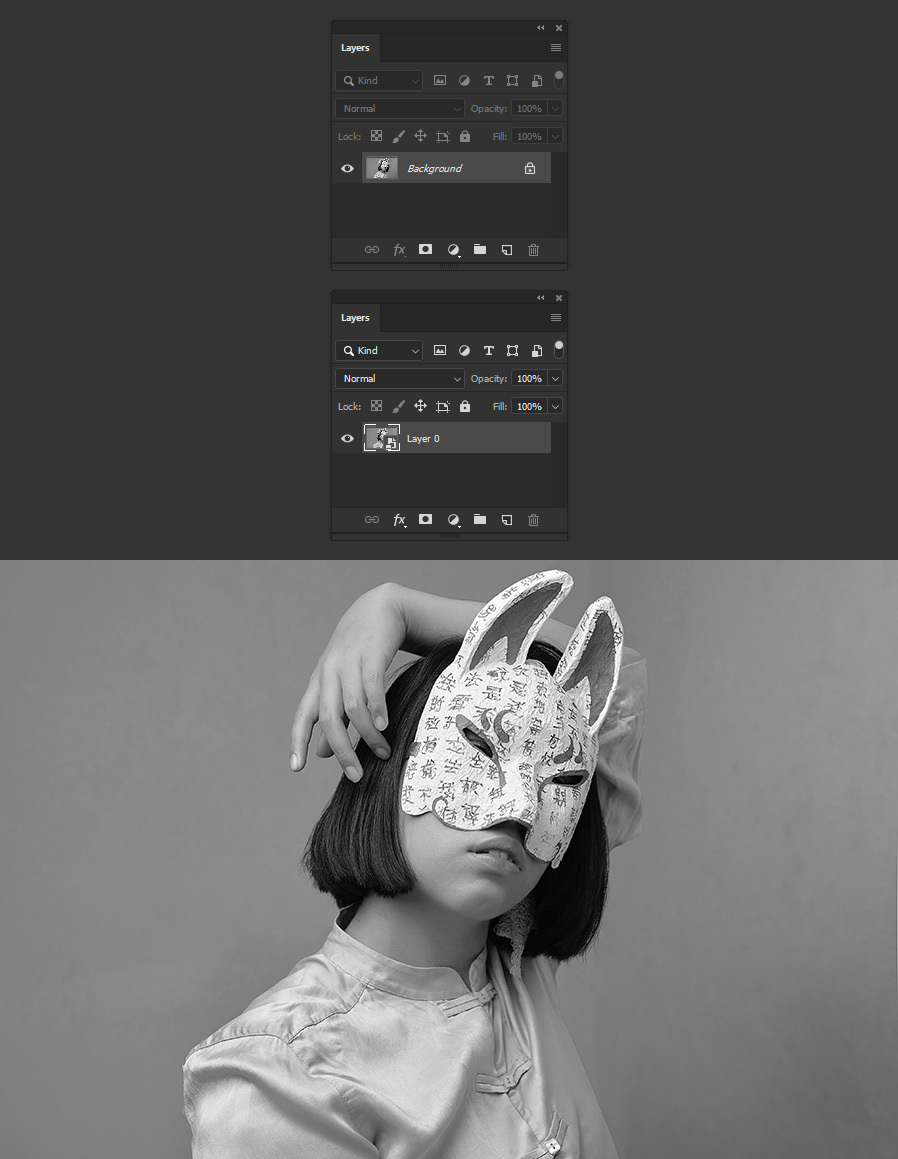
Go to Image > Adjustments > Desaturate.

Step 3
Go to Layer > Smart Objects > Convert to Smart Object.
Step 4
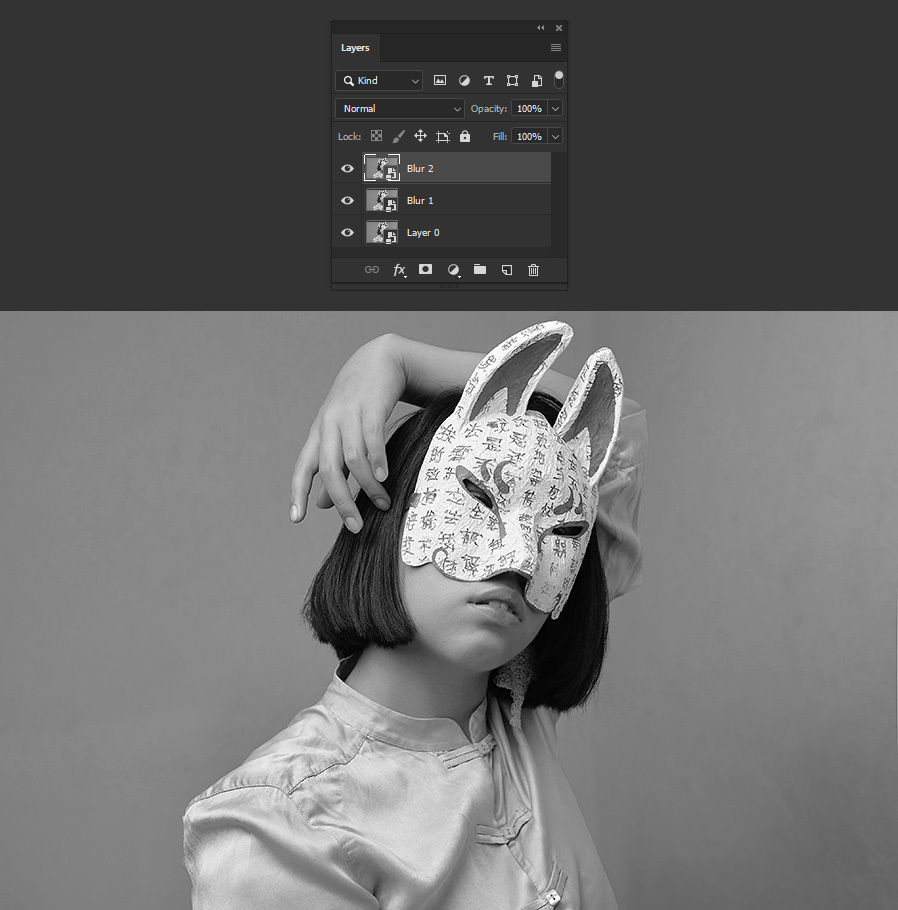
Press "Ctrl+J" on your keyboard twice to make 2 copies of the layer. Rename the layers to "Blur 1" and "Blur 2".
Step 5
Hide the "Blur 2" layer. Select the "Blur 1" layer and go to Filter > Blur > Motion Blur. Set the distance to about 200 px and click OK.
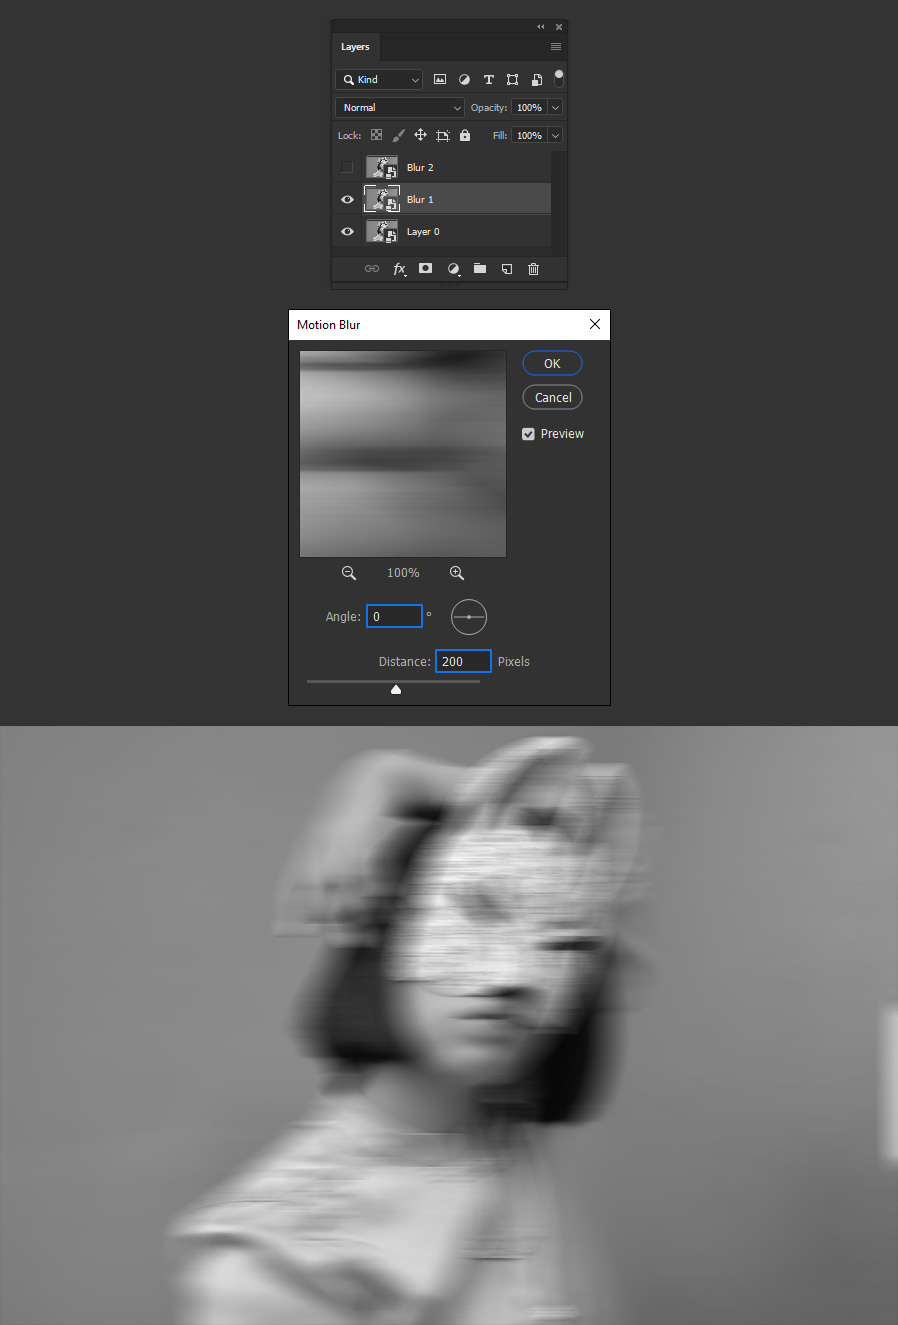
Step 6
Go to Layer > Layer Mask > Reveal All.

Step 7
Using a soft round brush, paint over the layer mask to hide the effect on a side of the image as shown.
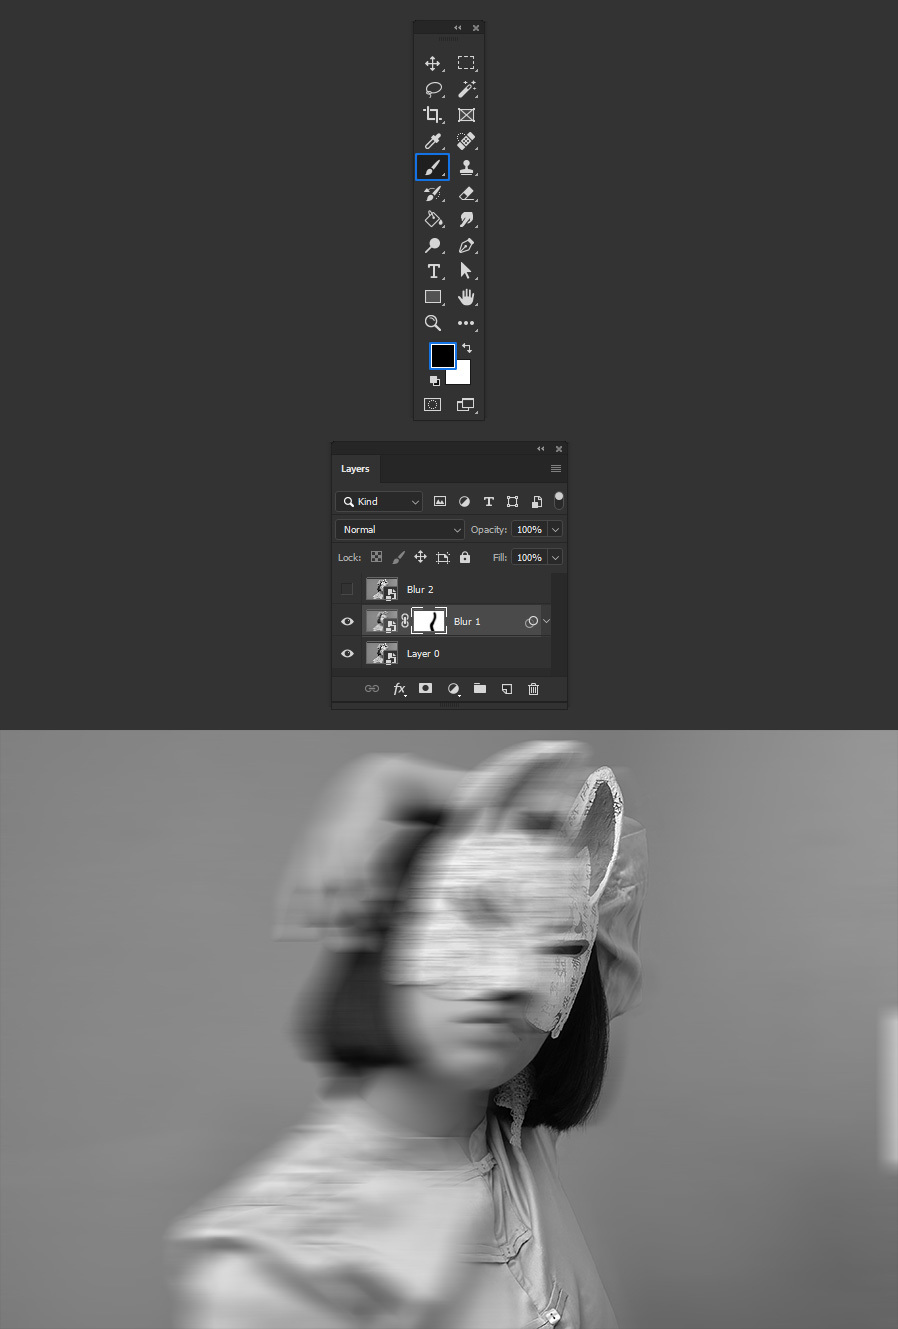
Step 8
Select the "Blur 2" layer and go to Filter > Blur > Motion Blur. Set the distance to about 350 px and click OK.
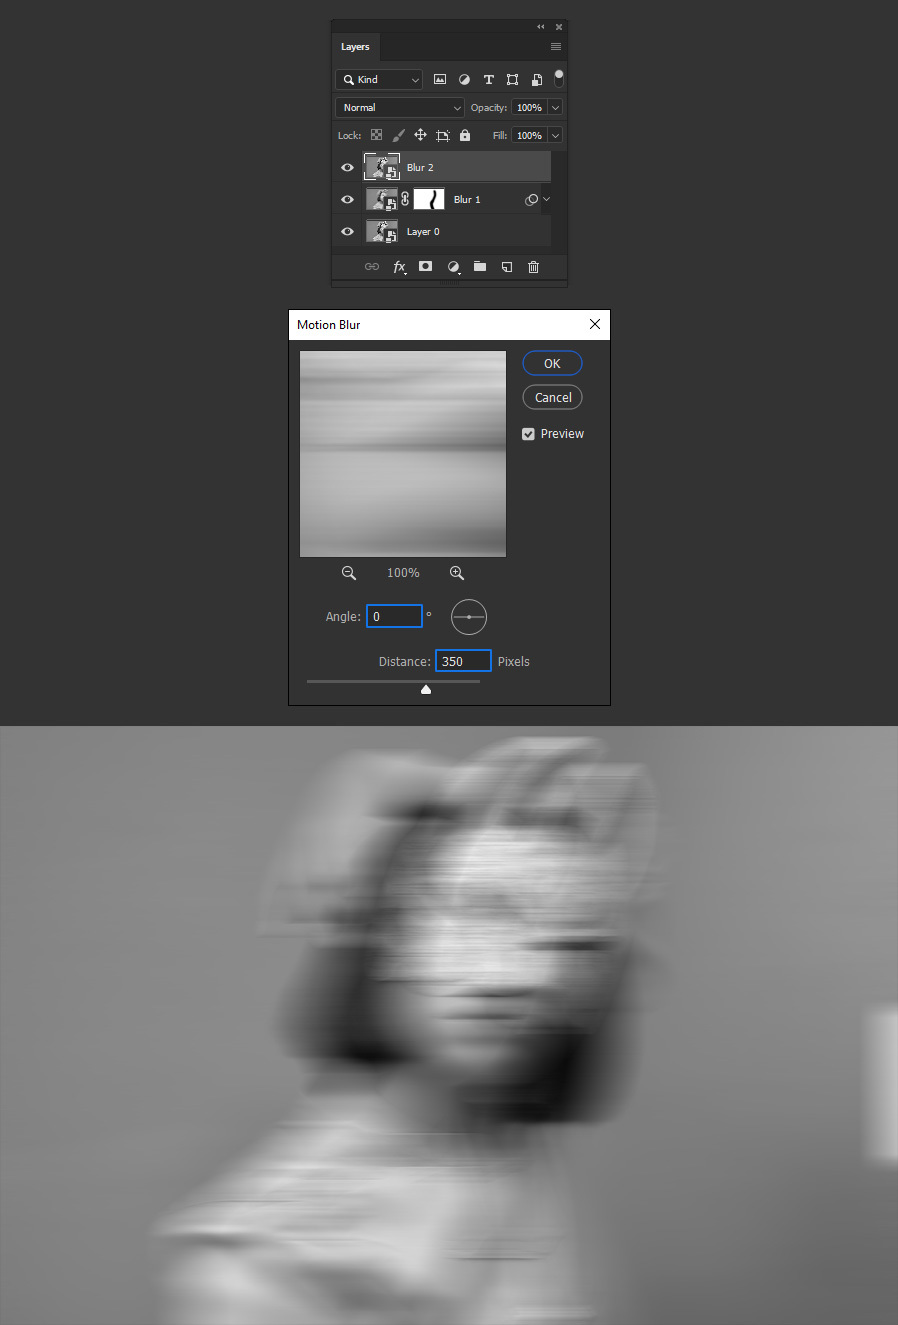
Step 9
Go to Layer > Layer Mask > Reveal All.
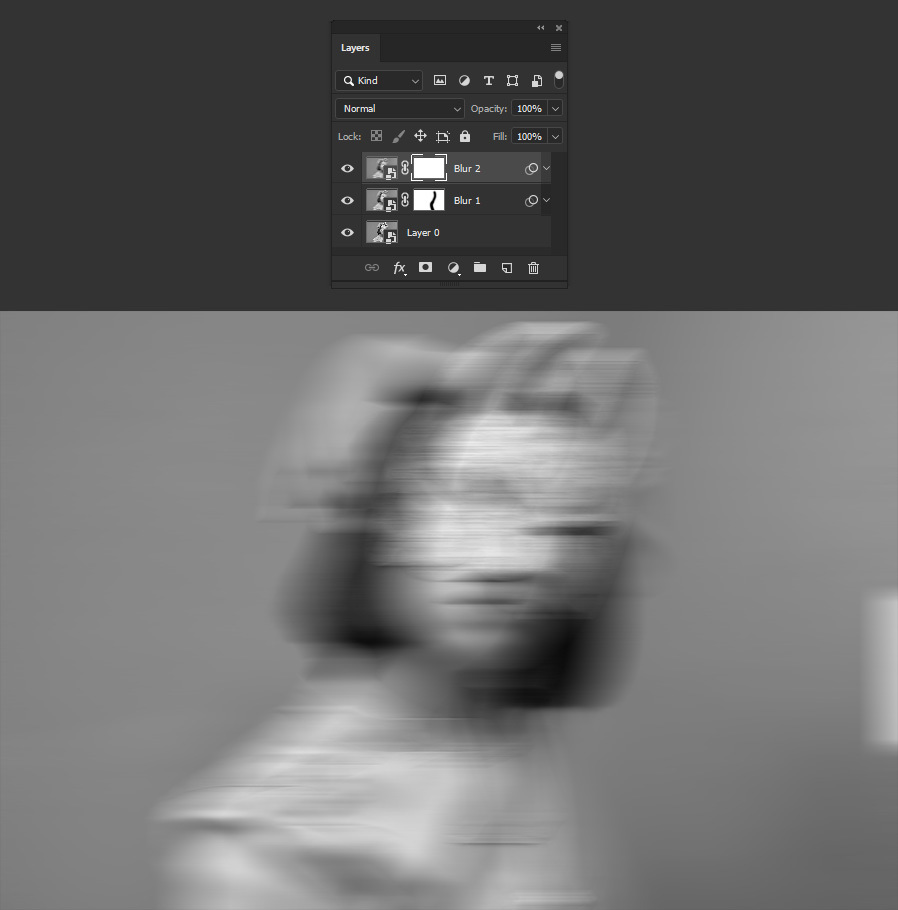
Step 10
Using a soft round brush, paint over the layer mask to hide the effect on a side of the image as shown.
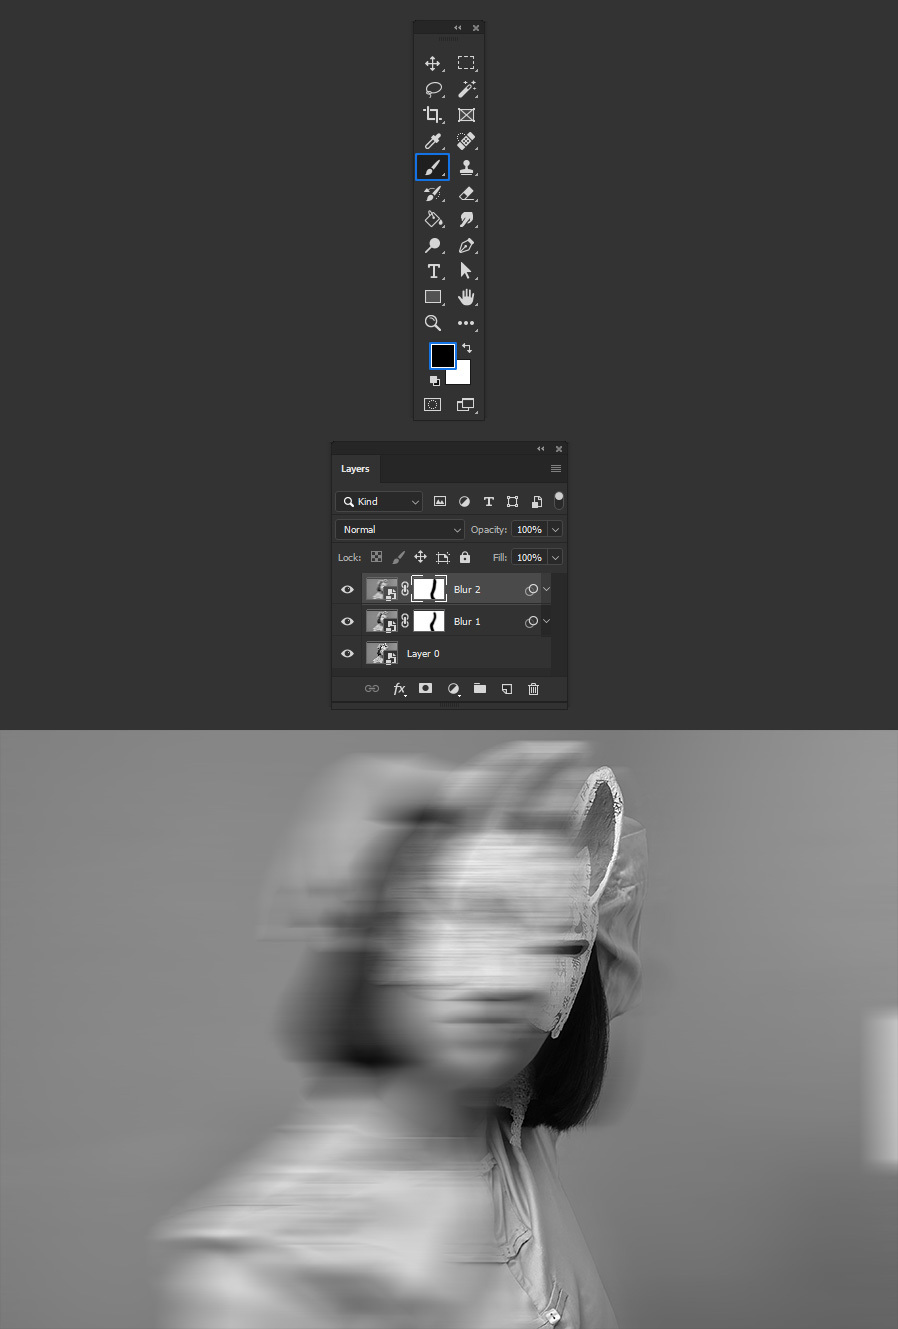
Step 11
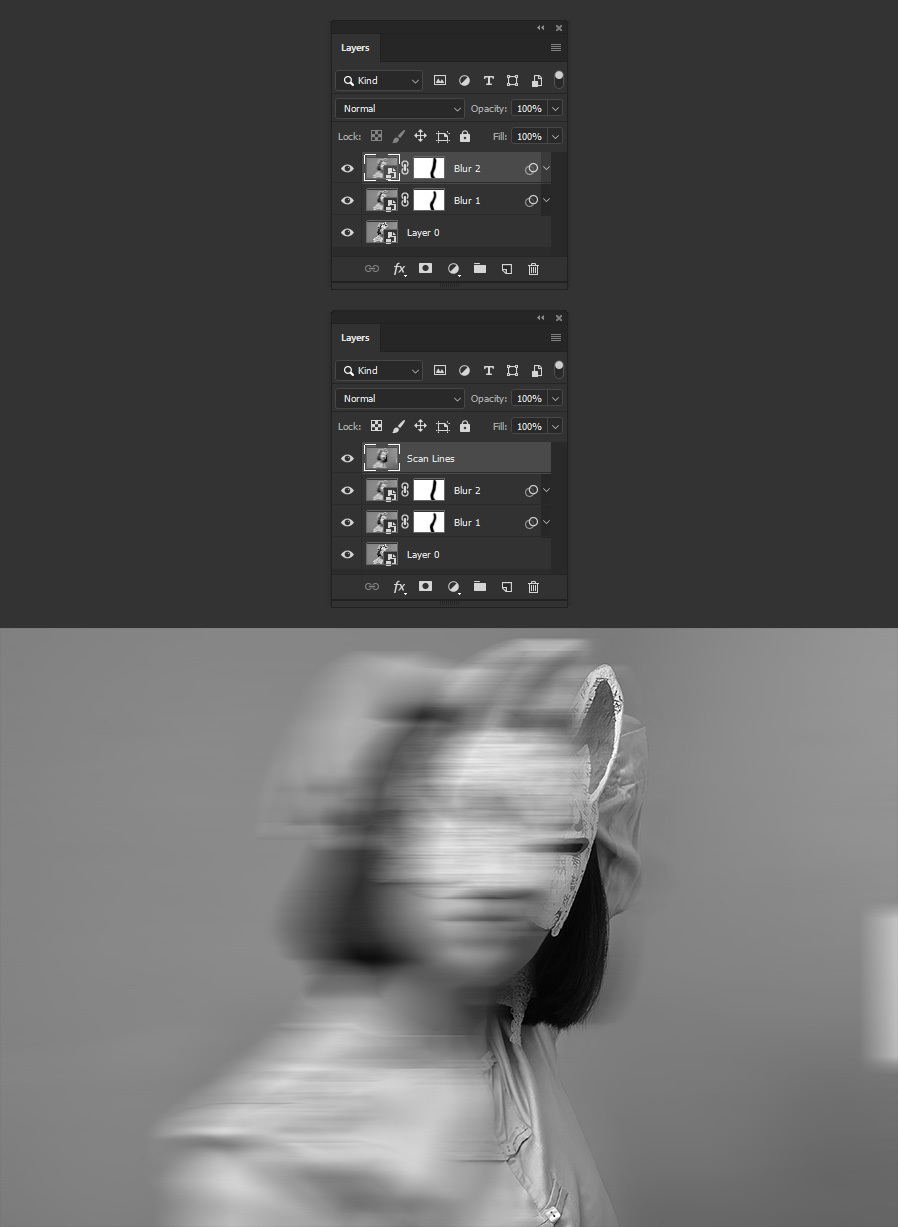
With the "Blur 2" layer selected, press "Ctrl+Shift+Alt+E" on your keyboar to make a flattened copy of the layers. Rename this layer to "Scan Lines".
Step 12
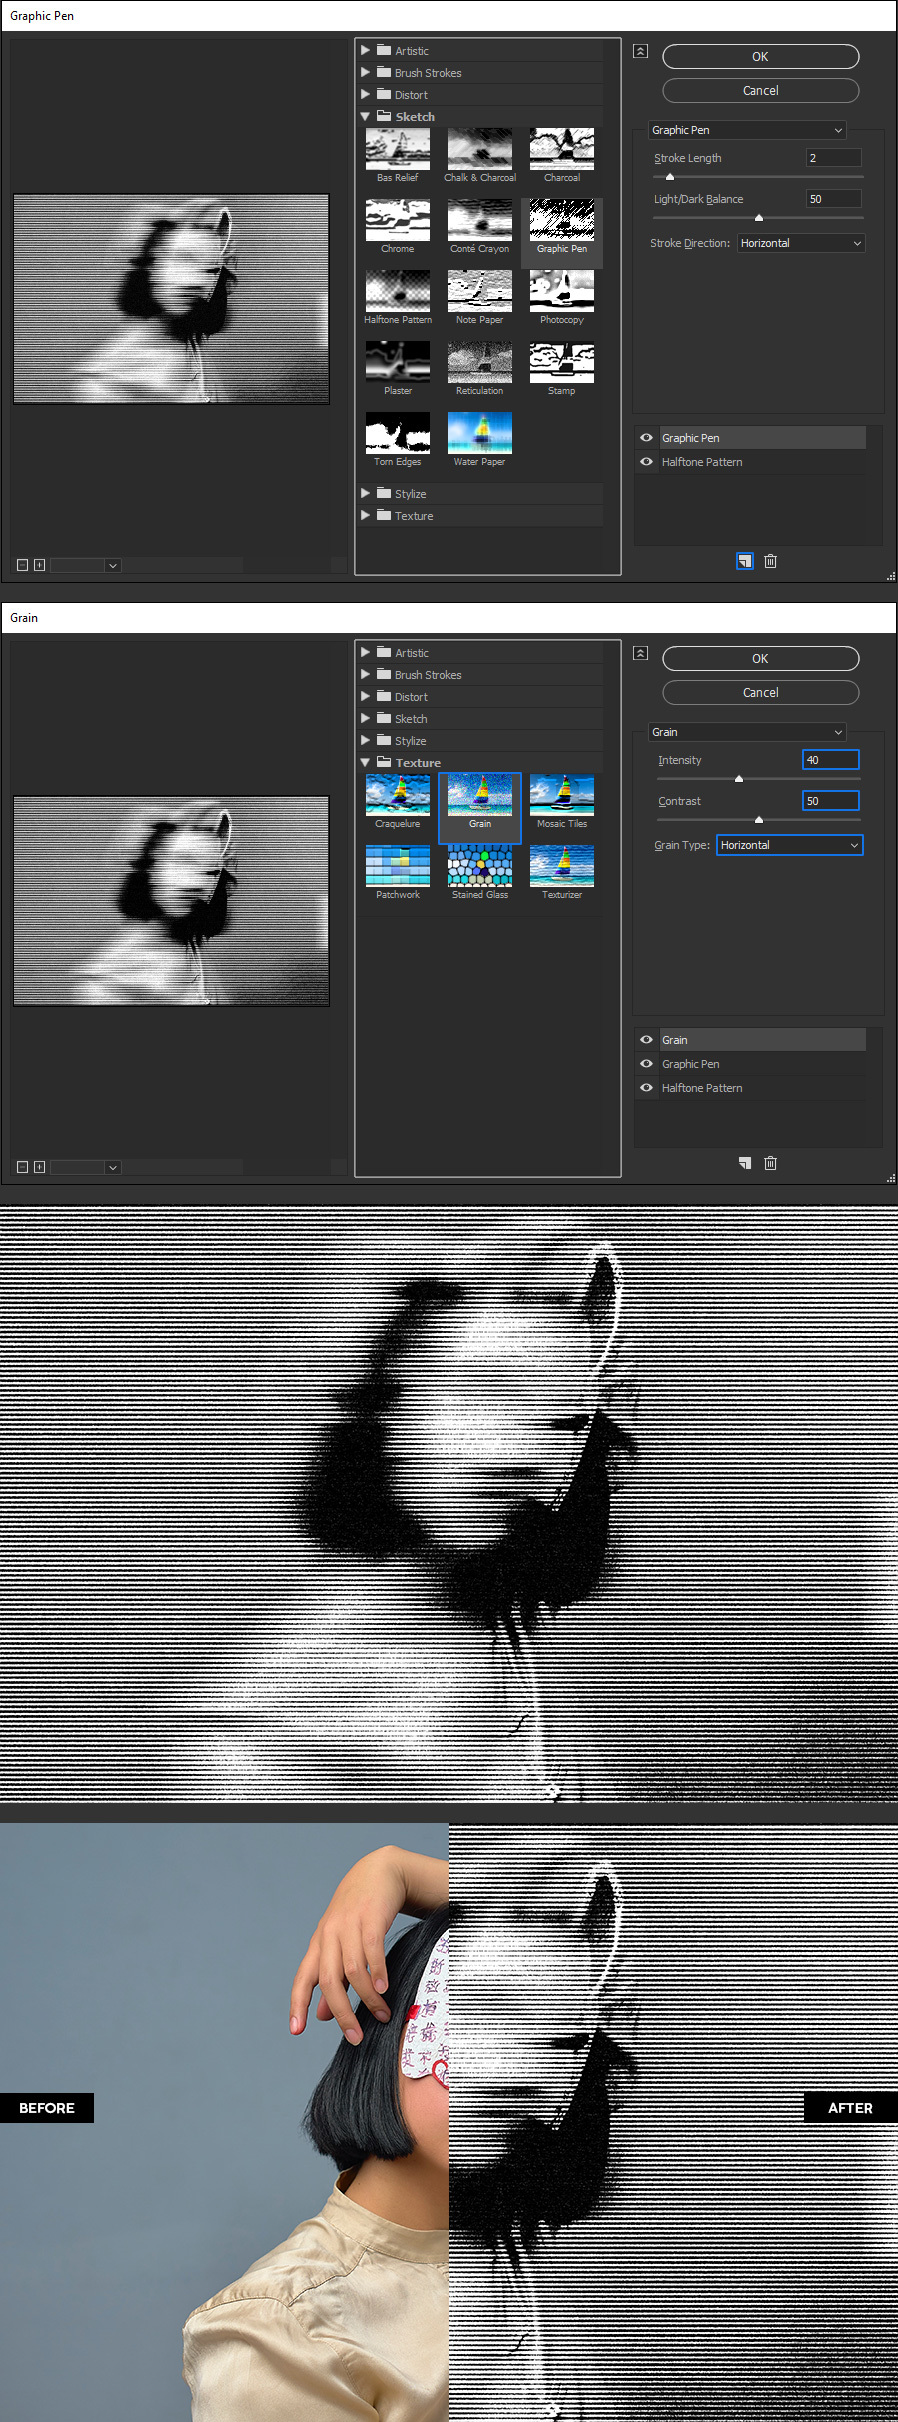
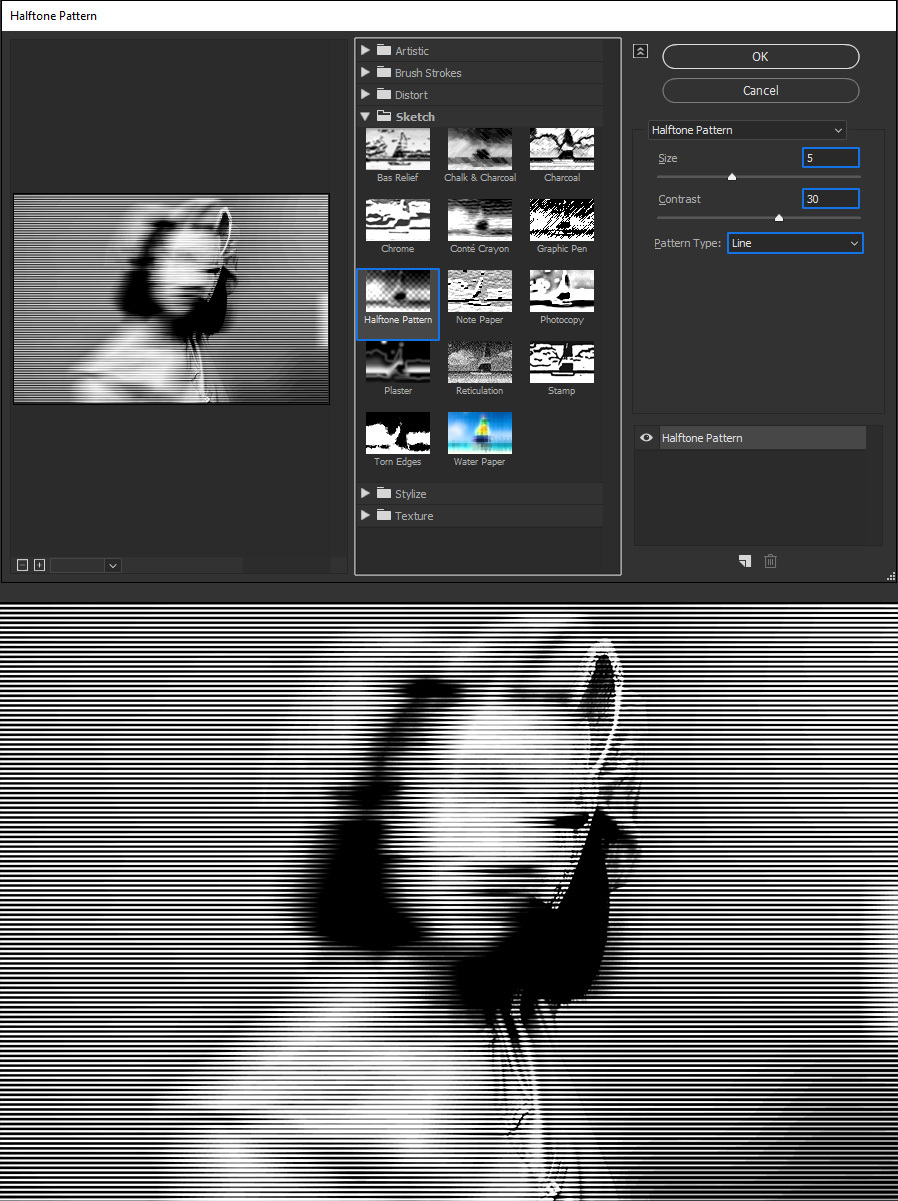
Go to Filter > Filter Gallery. Under "Sketch", select the "Halftone Pattern" effect and apply the following settings.
Step 13
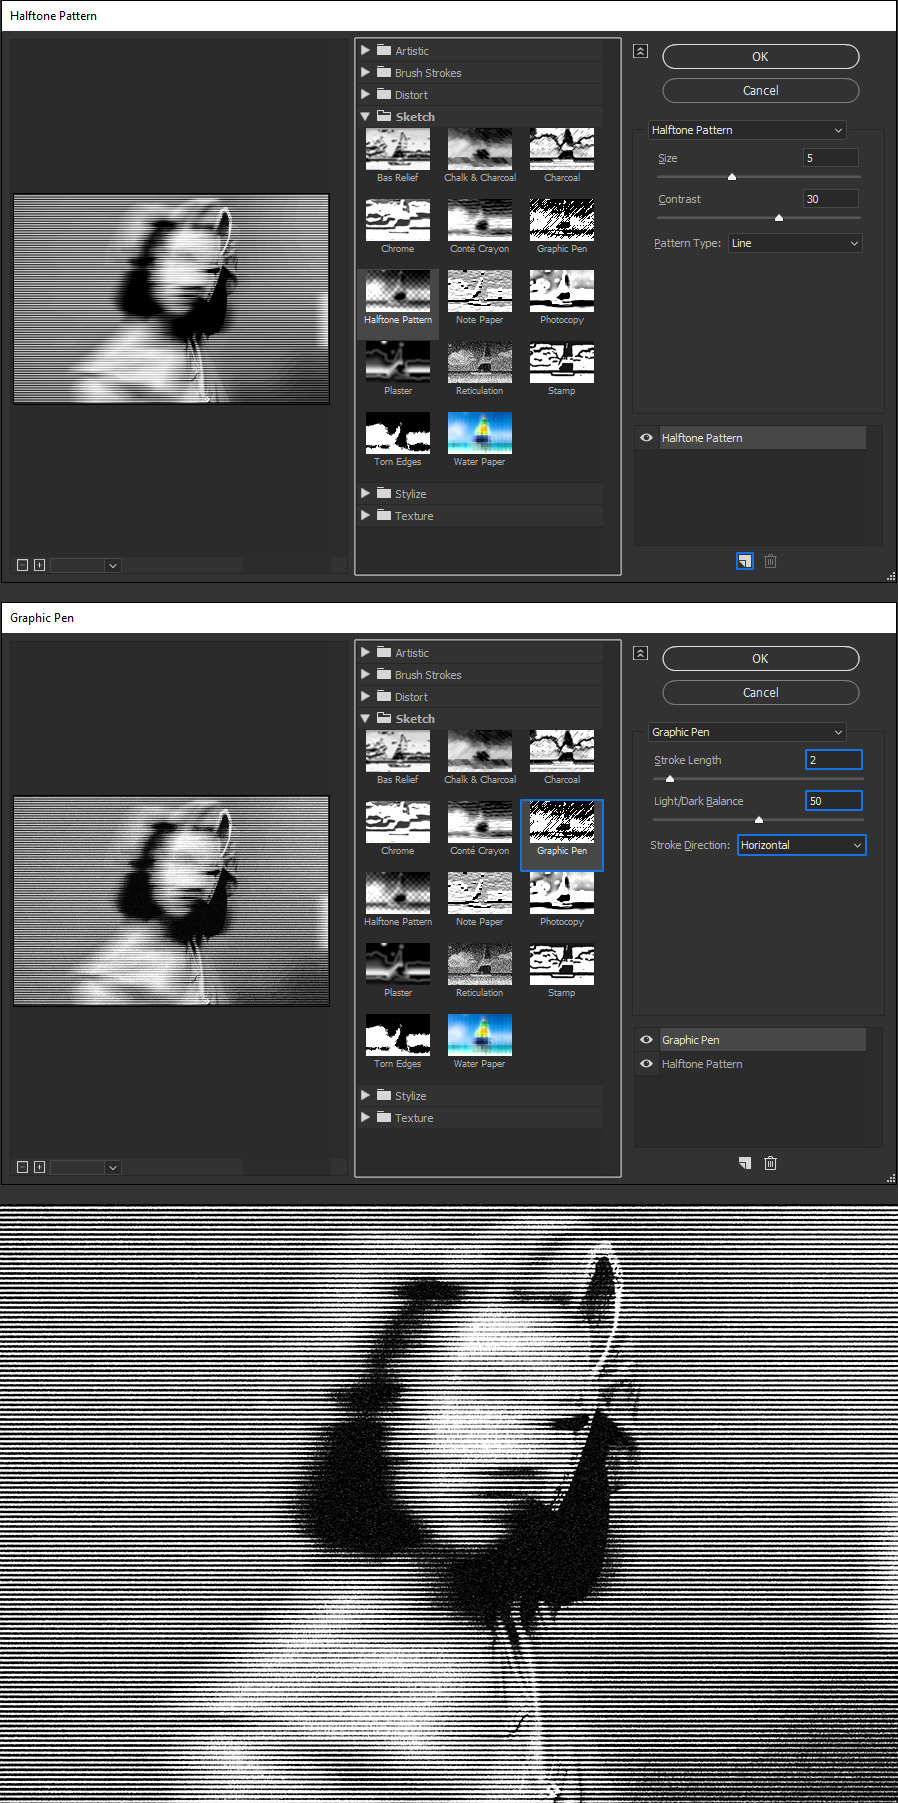
Click on the "New Effect Layer" icon, select the "Graphic Pen" effect and apply the following settings.
Step 14
Again, click on the "New Effect Layer" icon, under "Texture" select the "Grain" effect, apply the following settings and click OK in the Filter Gallery window.
