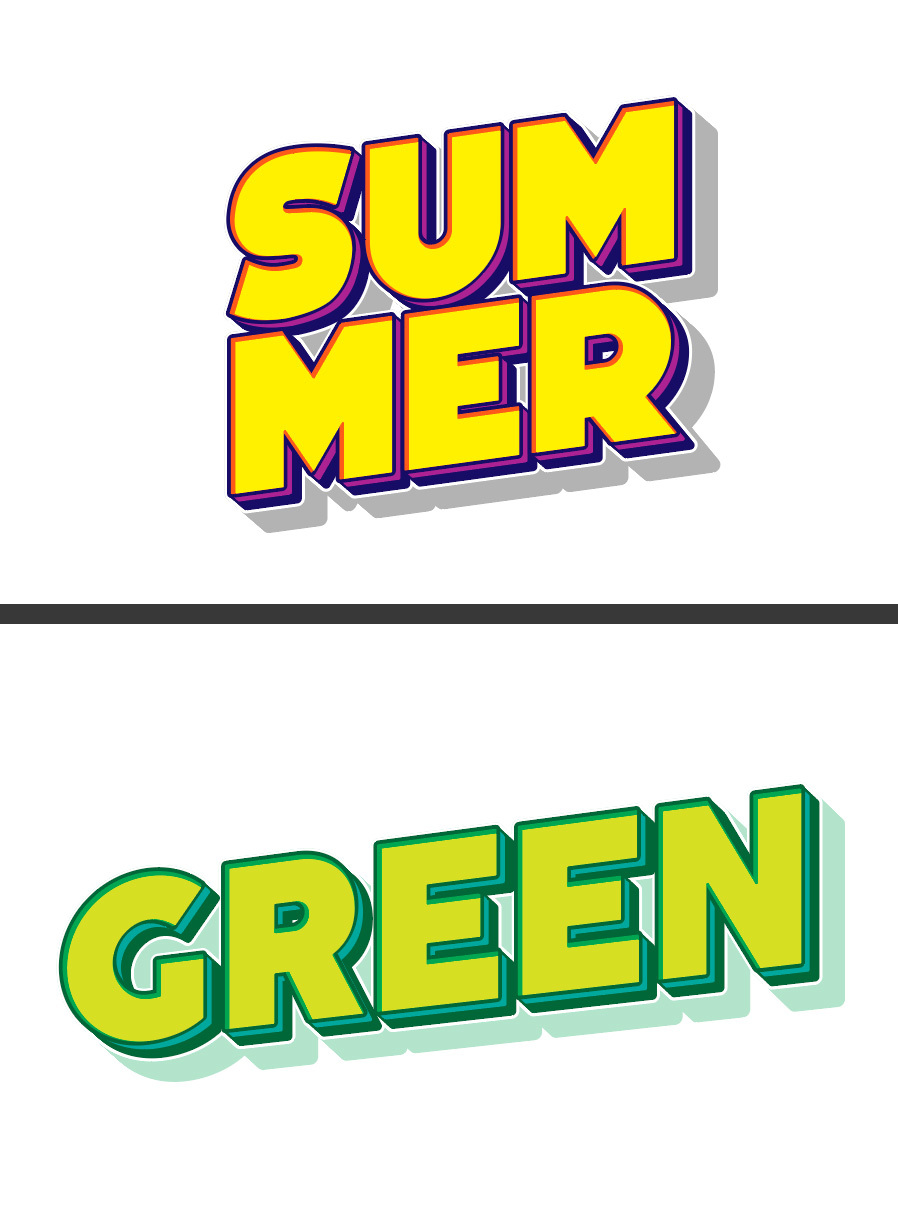
How to Make a Fully Editable Pop Text Effect in Illustrator
Illustrator Text Effects
Sometimes, when you're looking to create engaging text effects, you might instinctively reach for Photoshop as your preferred tool. However, Illustrator is an equally powerful and versatile alternative that could be just what you need. With Illustrator's amazing features, you can design stunning text effects, including a Fully Editable Pop Text Effect. The best part is that working in a vector format gives you scalability and flexibility for your designs. Today, I'll show you how easily you can create a pop text effect in Illustrator in under 5 minutes, with the ability to modify the text, font, size, and color even after completing the effect.
Step 1
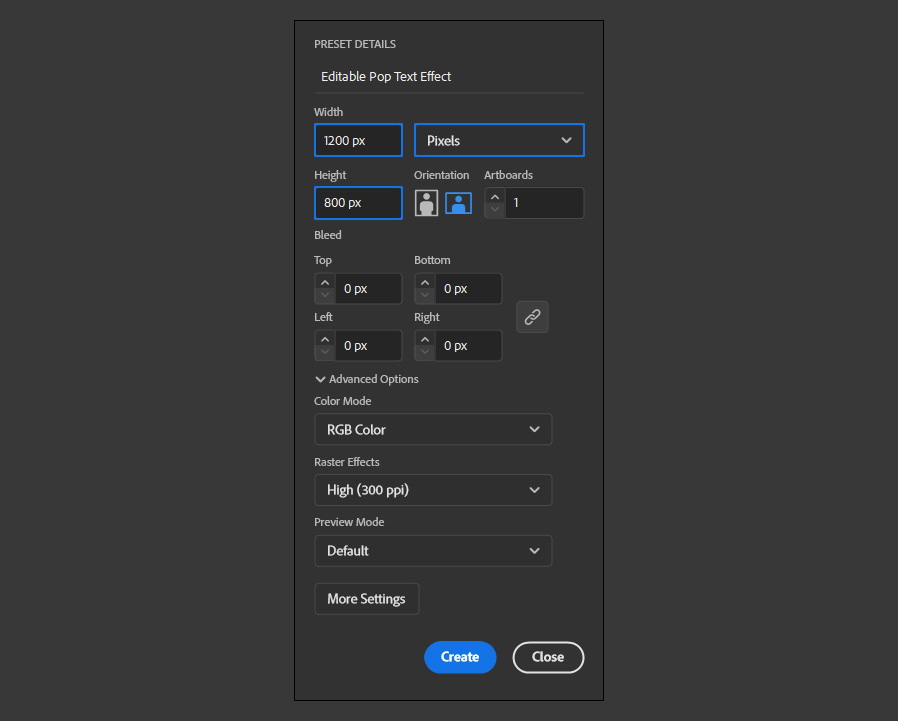
Open Illustrator and make a new file at any size you want. In this case I will make mine at 1200 x 800 px.
Step 2
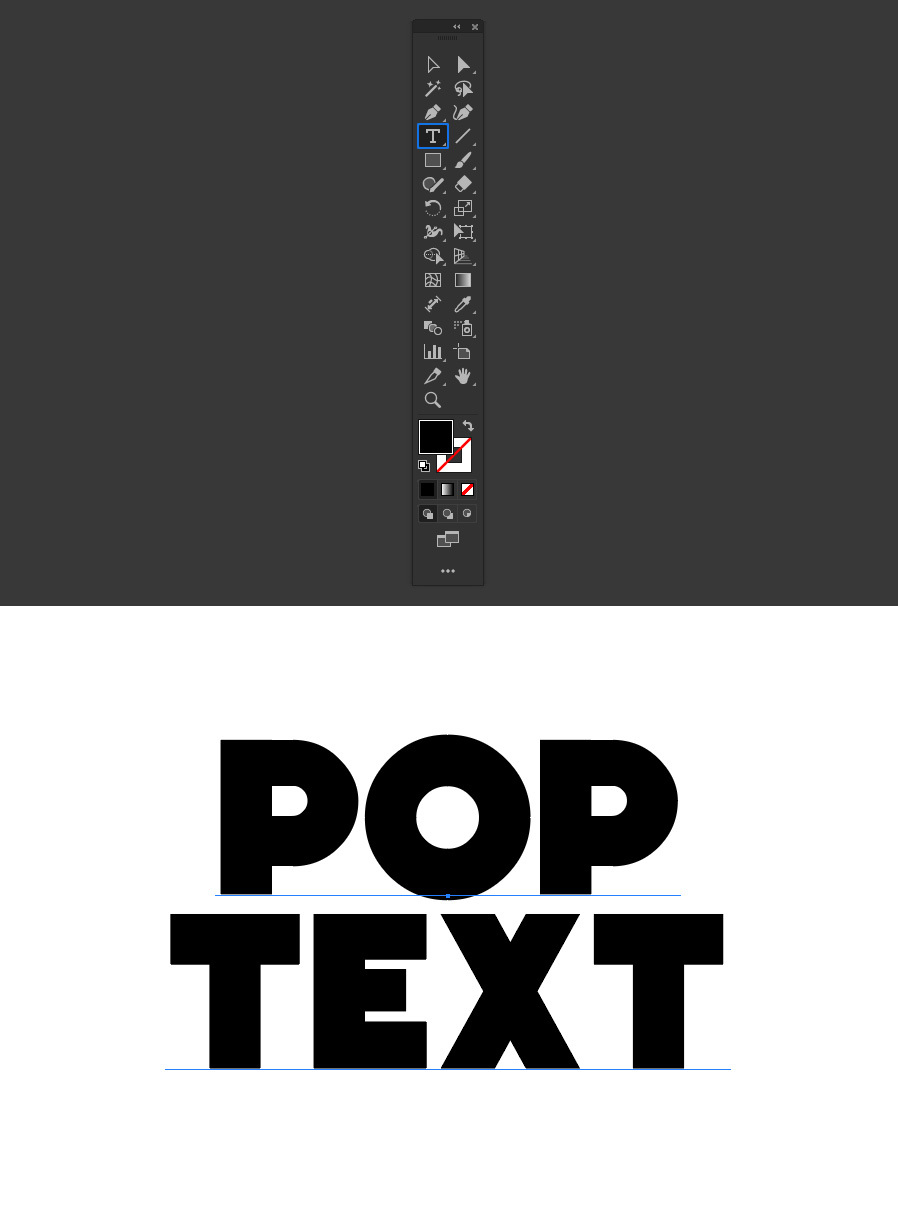
Select the Type Tool (T) and type your text using any font you want. Here I will be using Boldfinger at 300 pt.
Step 3
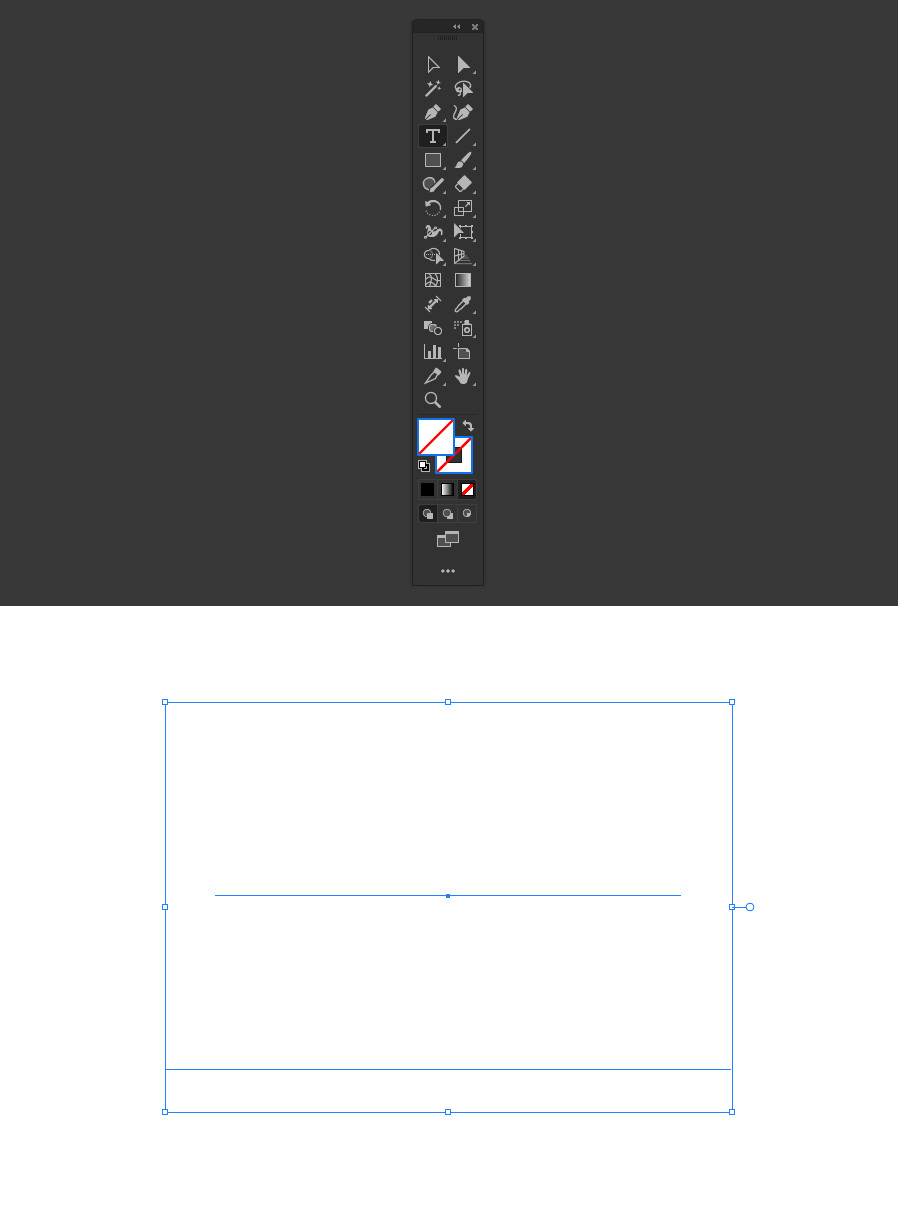
In the Toolbar, set both the Fill and Stroke to none.
Step 4
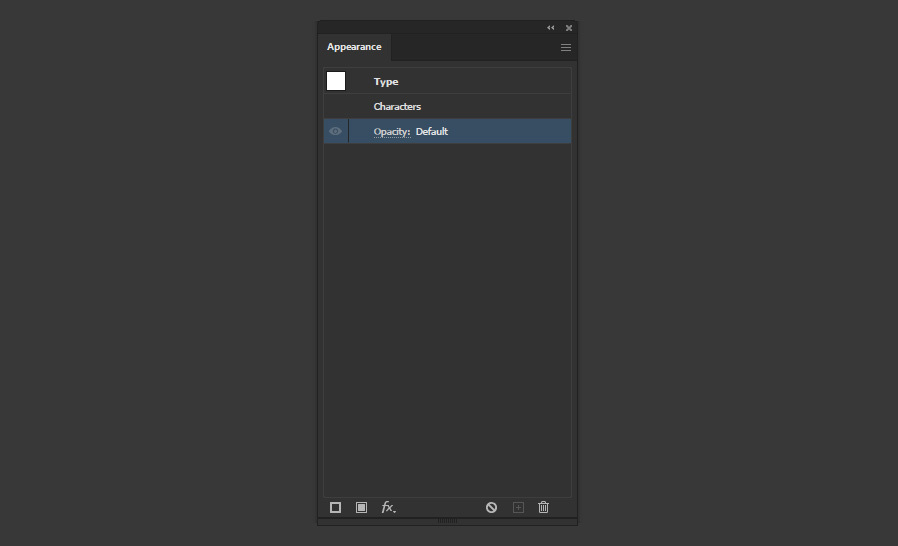
Go to Window > Appearance.
Step 5
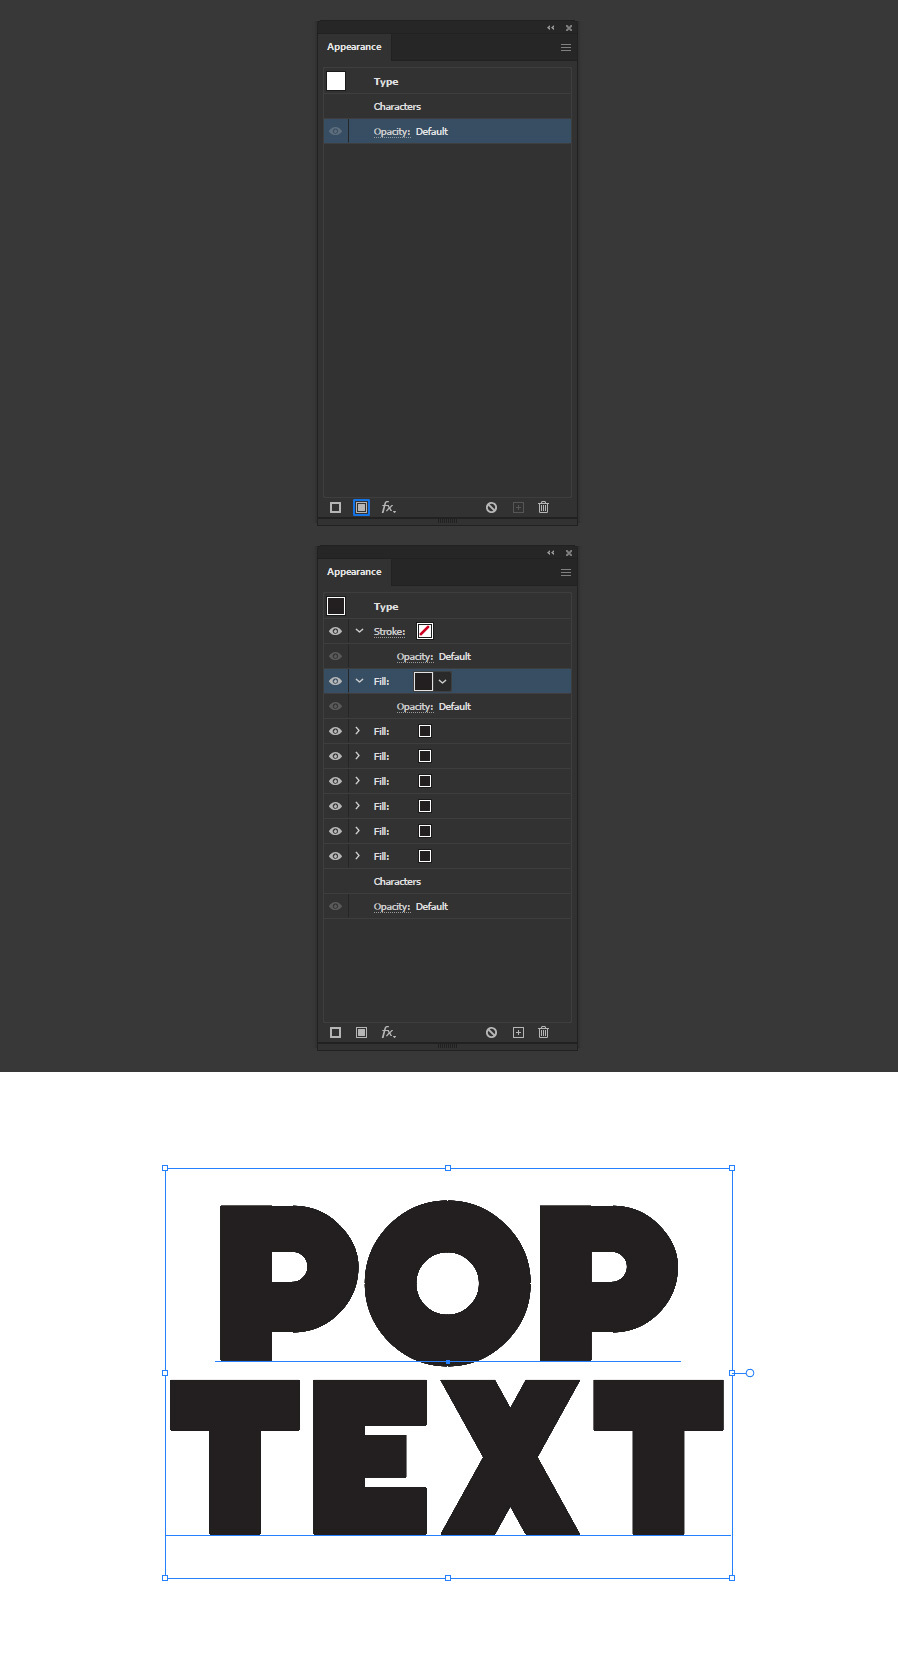
Add 7 new Fills by clicking 7 times on the "Add New Fill" icon.
Step 6
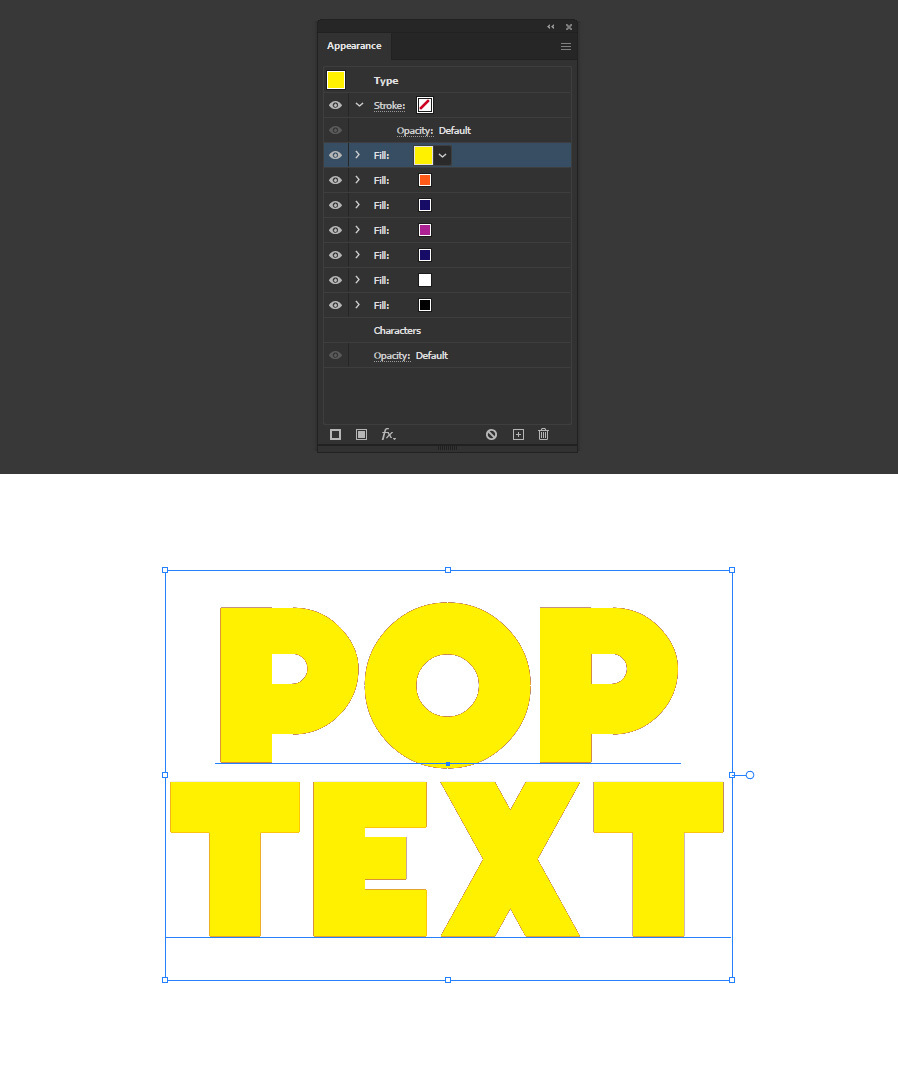
Set the fill colors to:
- ffff00
- f15a24
- 1b1464
- 93278f
- 1b1464
- ffffff
- 000000
Step 7
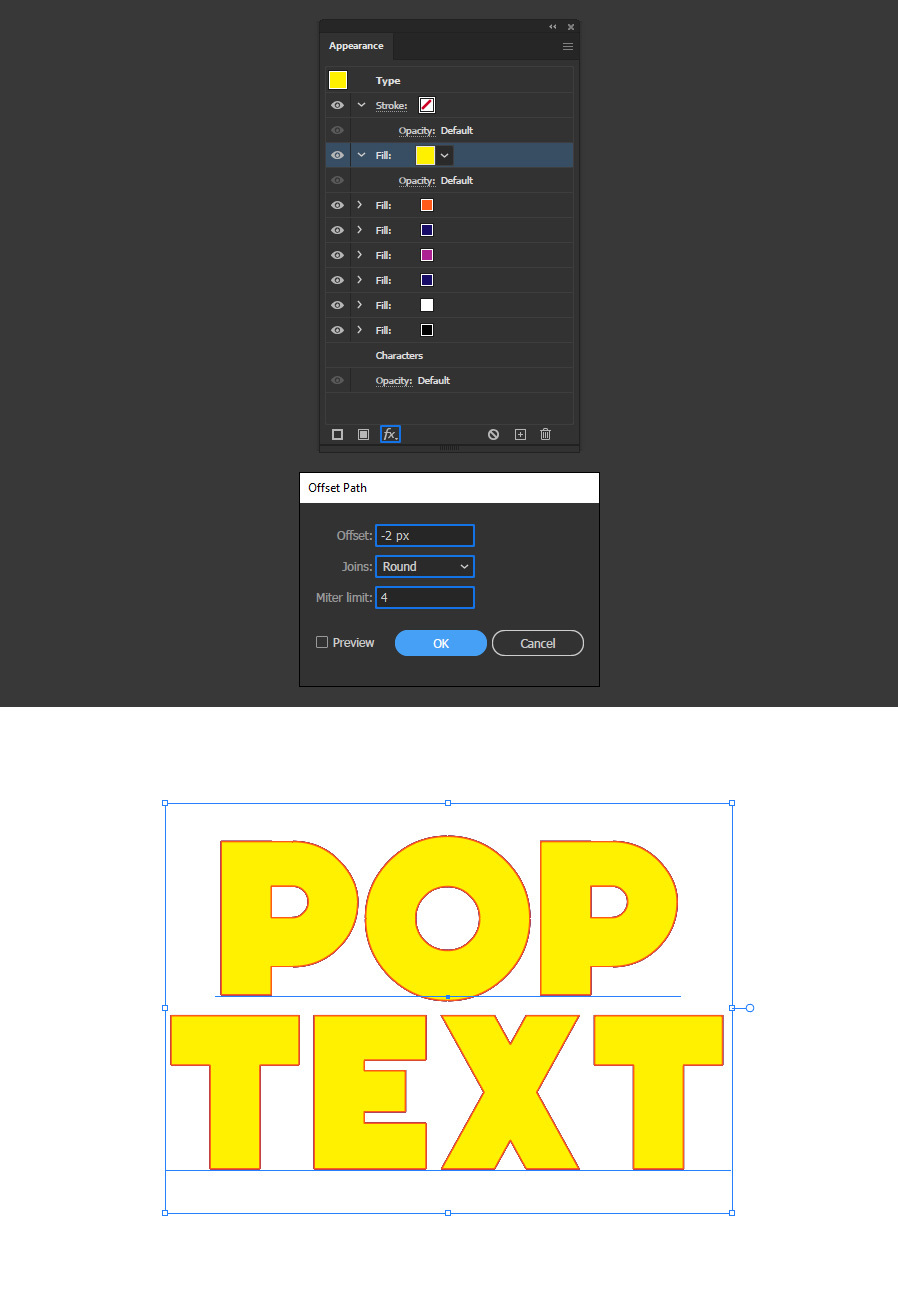
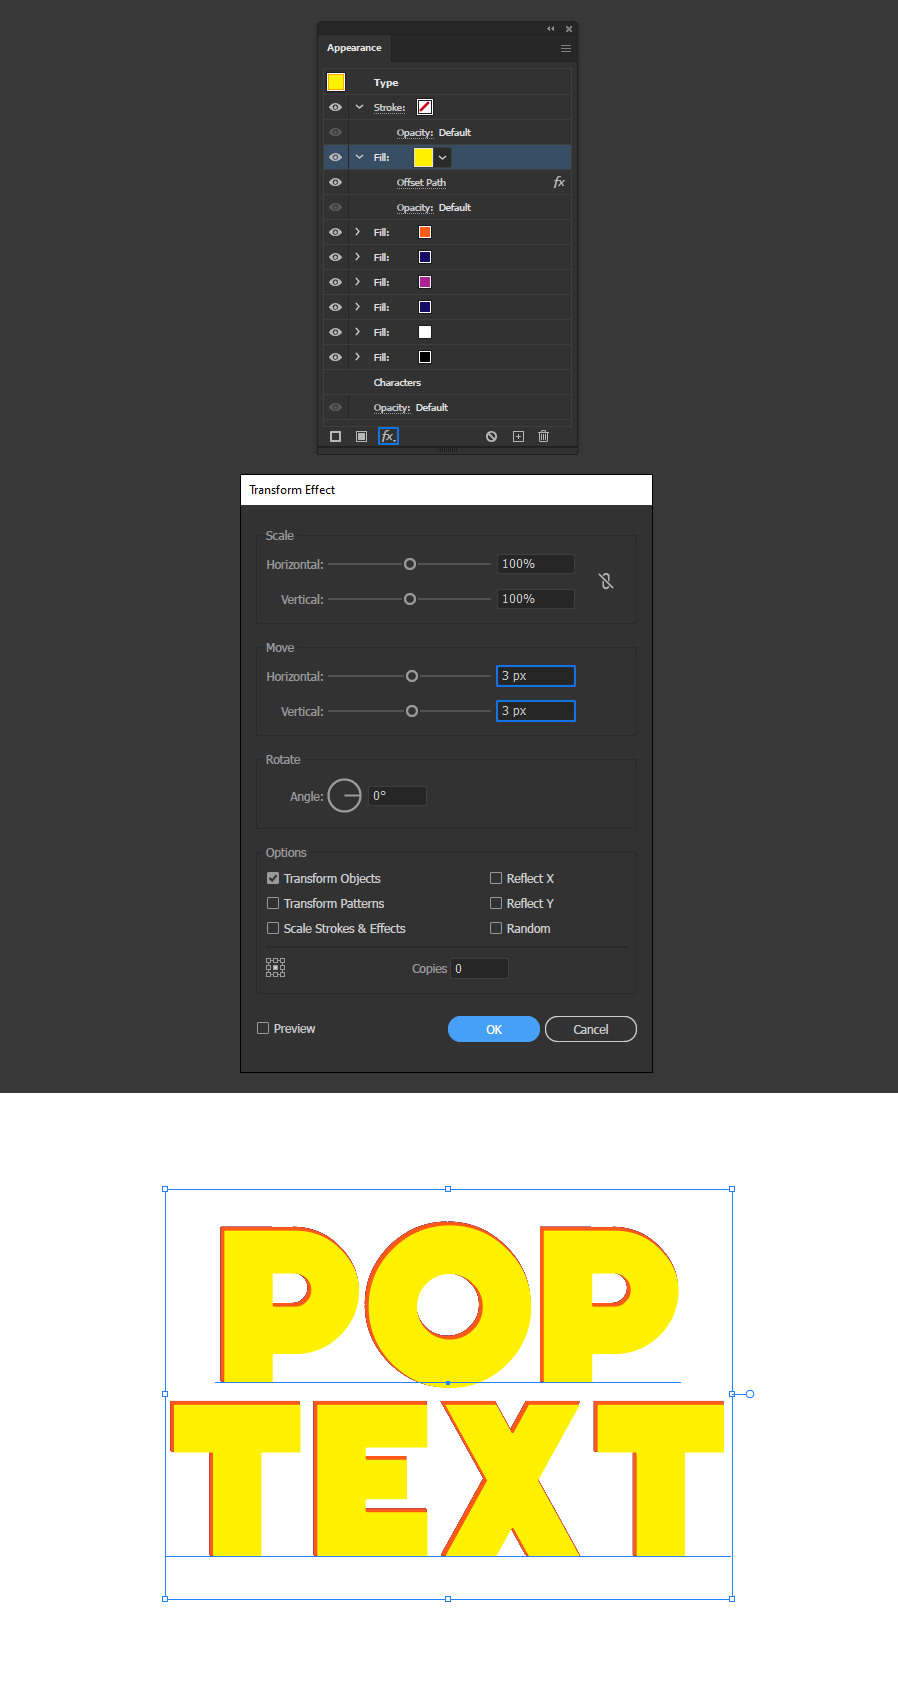
Select the first color . Click on the FX icon and from the dropdown menu select Path > Offset Path. Apply the following settings and click OK.
Step 8
Click on the FX icon again and from the dropdown menu select Distort & Transform > Transform. Apply the following settings and click OK.
Step 9
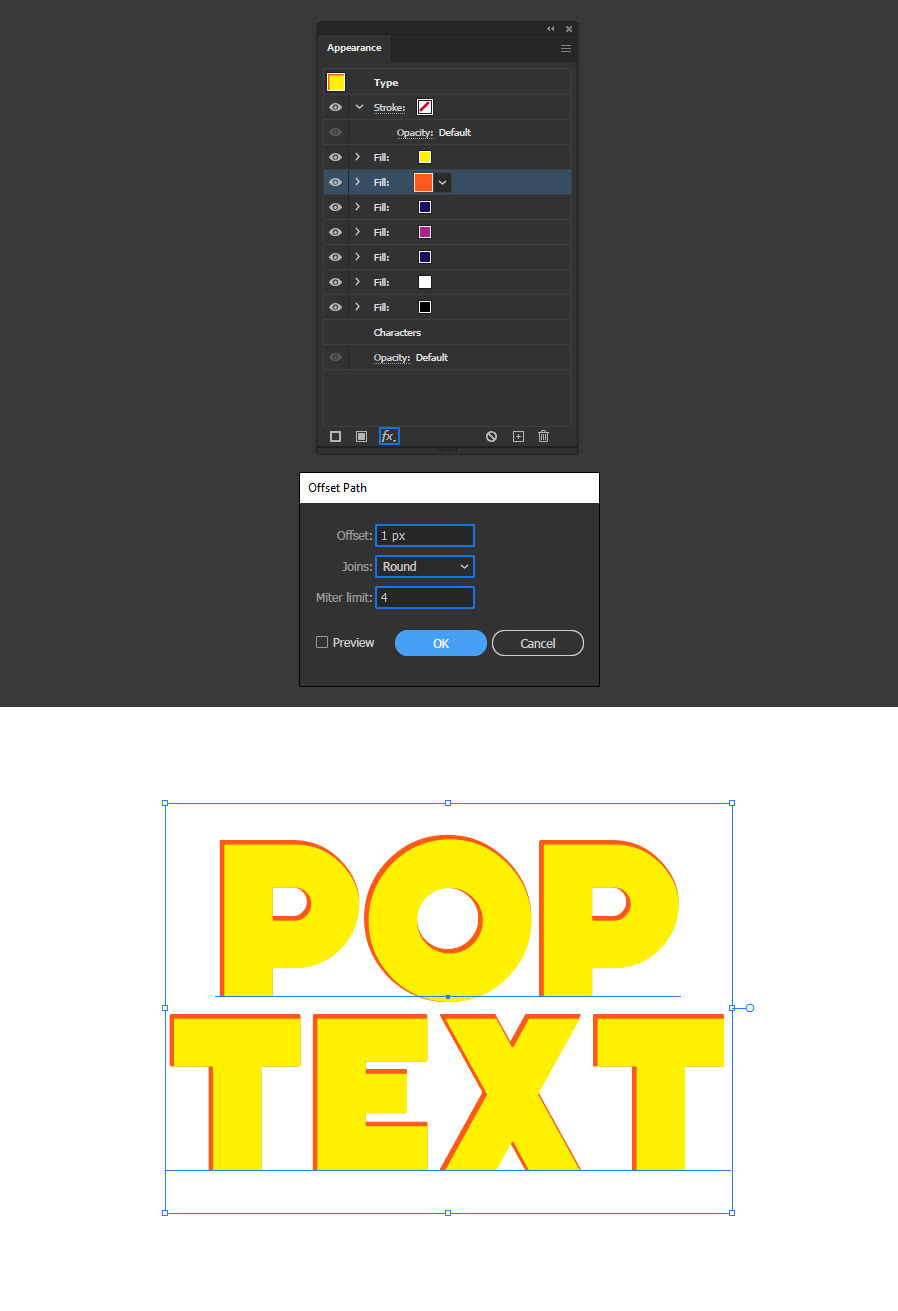
Select the second color. Click on the FX icon and from the dropdown menu select Path > Offset Path. Apply the following settings and click OK.
Step 10
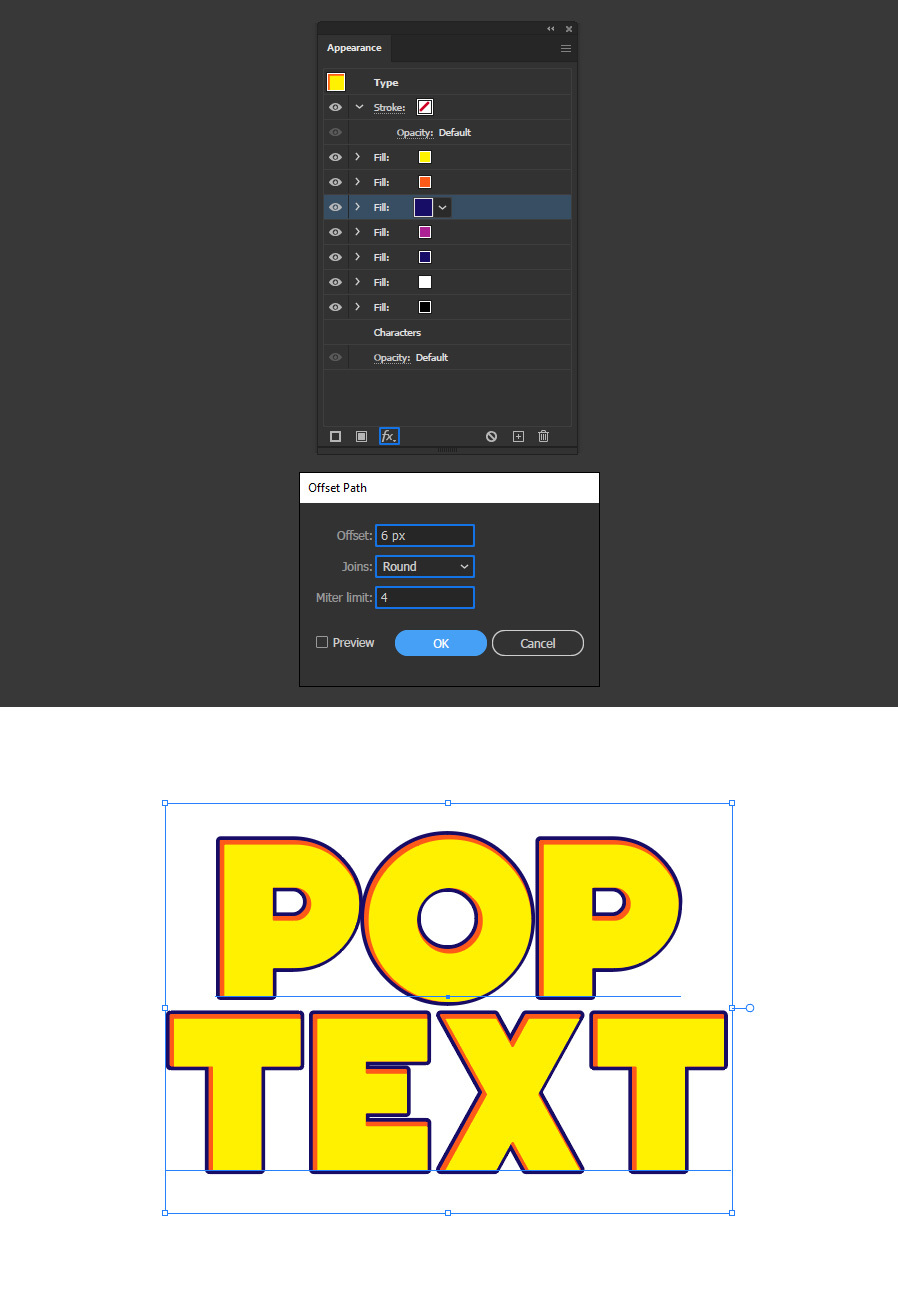
Select the third color. Click on the FX icon and from the dropdown menu select Path > Offset Path. Apply the following settings and click OK.
Step 11
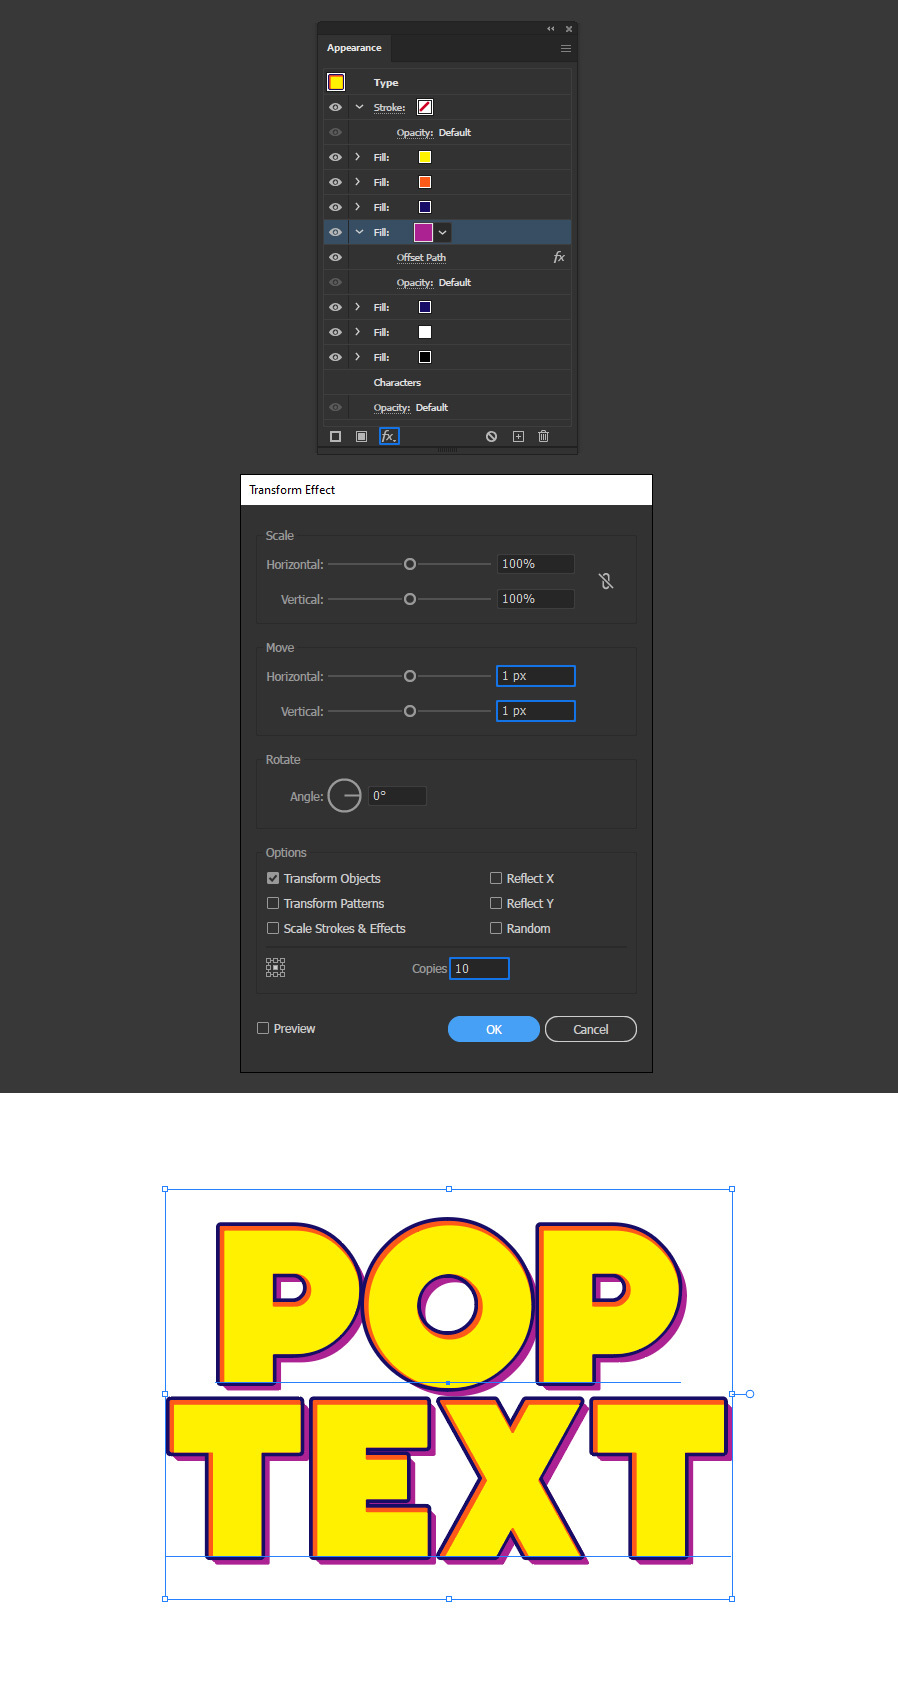
Select the fourth color. Click on the FX icon and from the dropdown menu select Path > Offset Path. Apply the following settings and click OK.

Step 12
With the fourth color still selected, click on the FX icon and from the dropdown menu select Distort & Transform > Transform. Apply the following settings and click OK.
Step 13
Select the fifth color. Click on the FX icon and from the dropdown menu select Path > Offset Path. Apply the following settings and click OK.
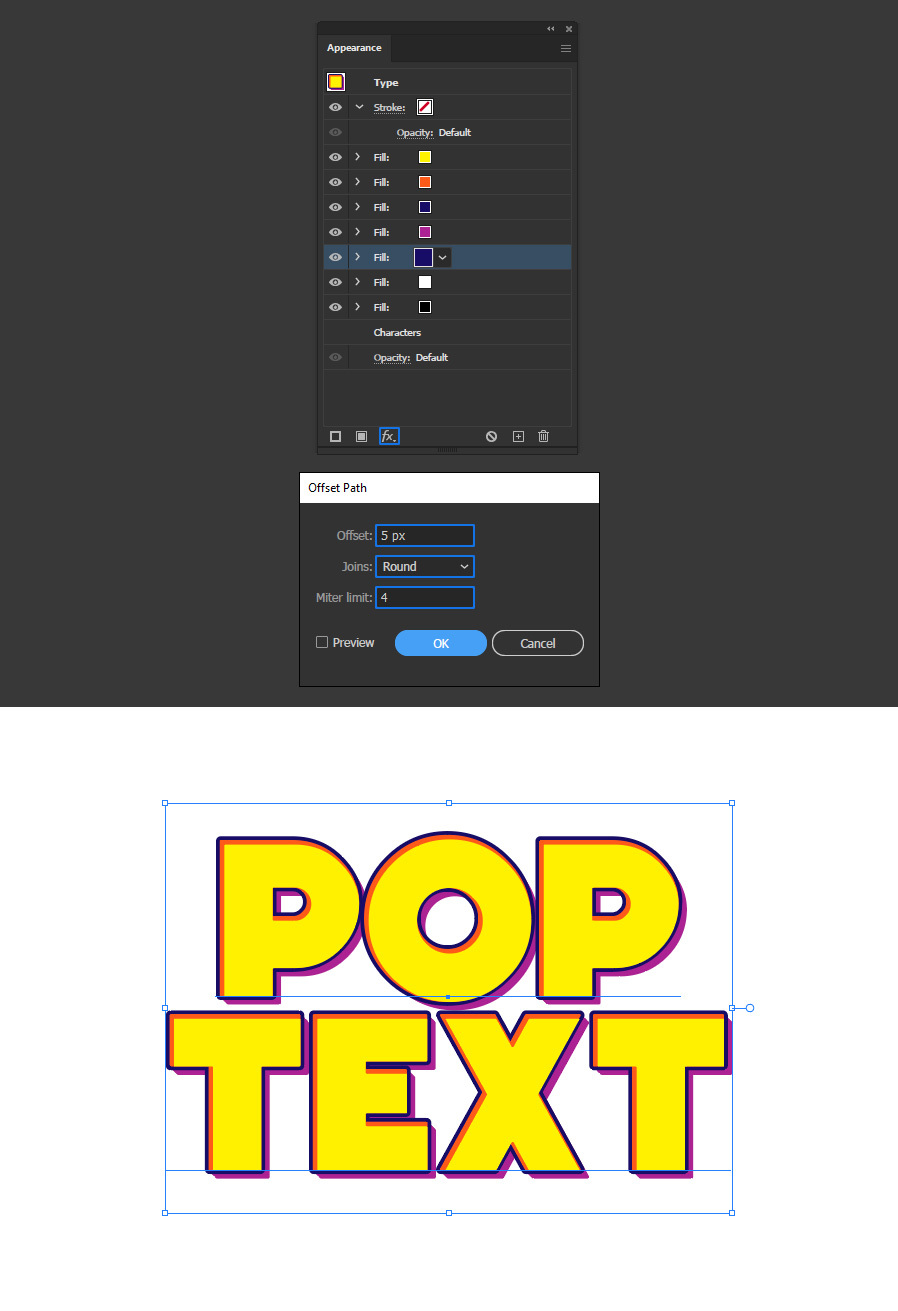
Step 14
With the fifth color still selected, click on the FX icon and from the dropdown menu select Distort & Transform > Transform. Apply the following settings and click OK.

Step 15
Select the sixth color. Click on the FX icon and from the dropdown menu select Path > Offset Path. Apply the following settings and click OK.
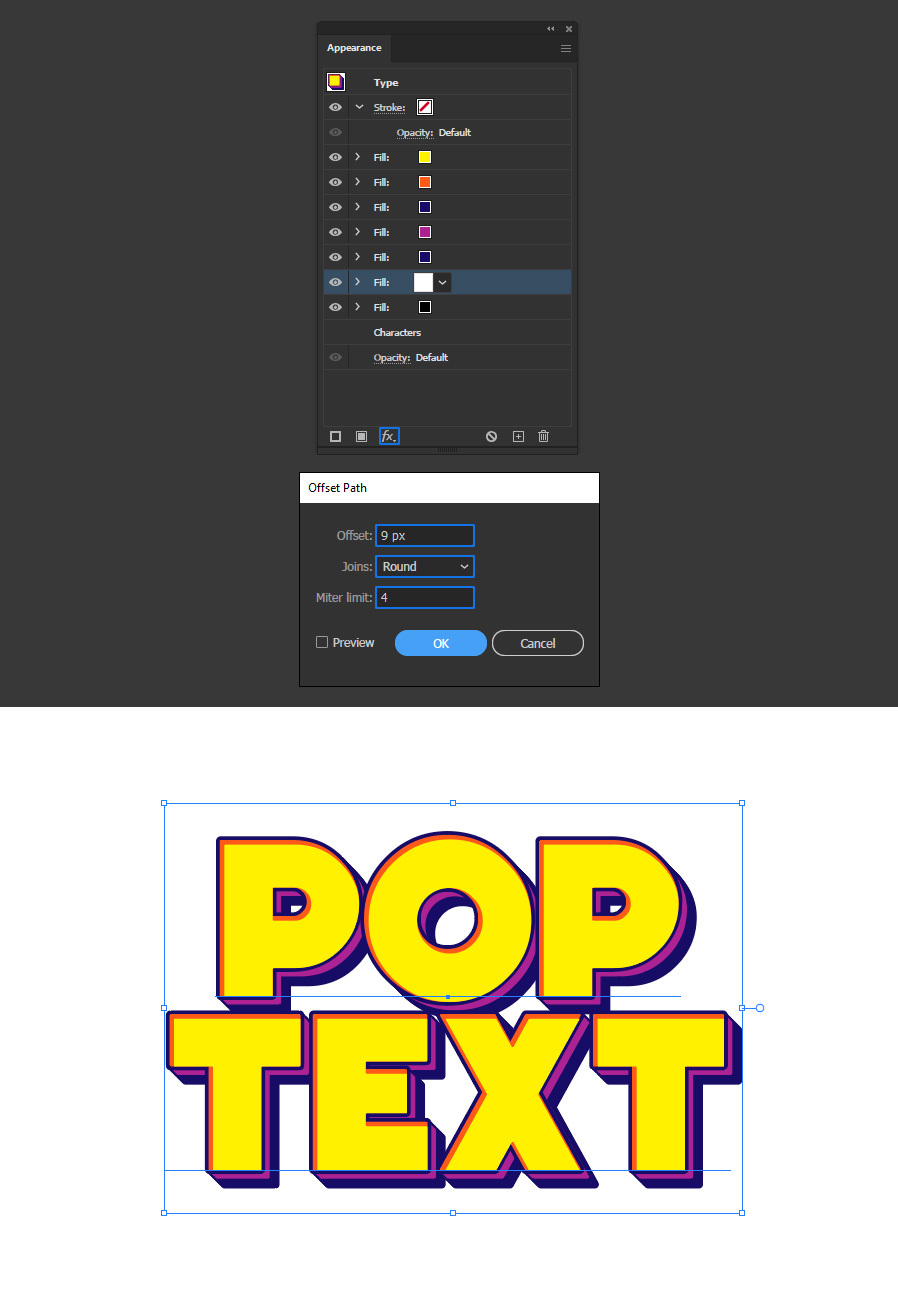
Step 16
With the sixth color still selected, click on the FX icon and from the dropdown menu select Distort & Transform > Transform. Apply the following settings and click OK.
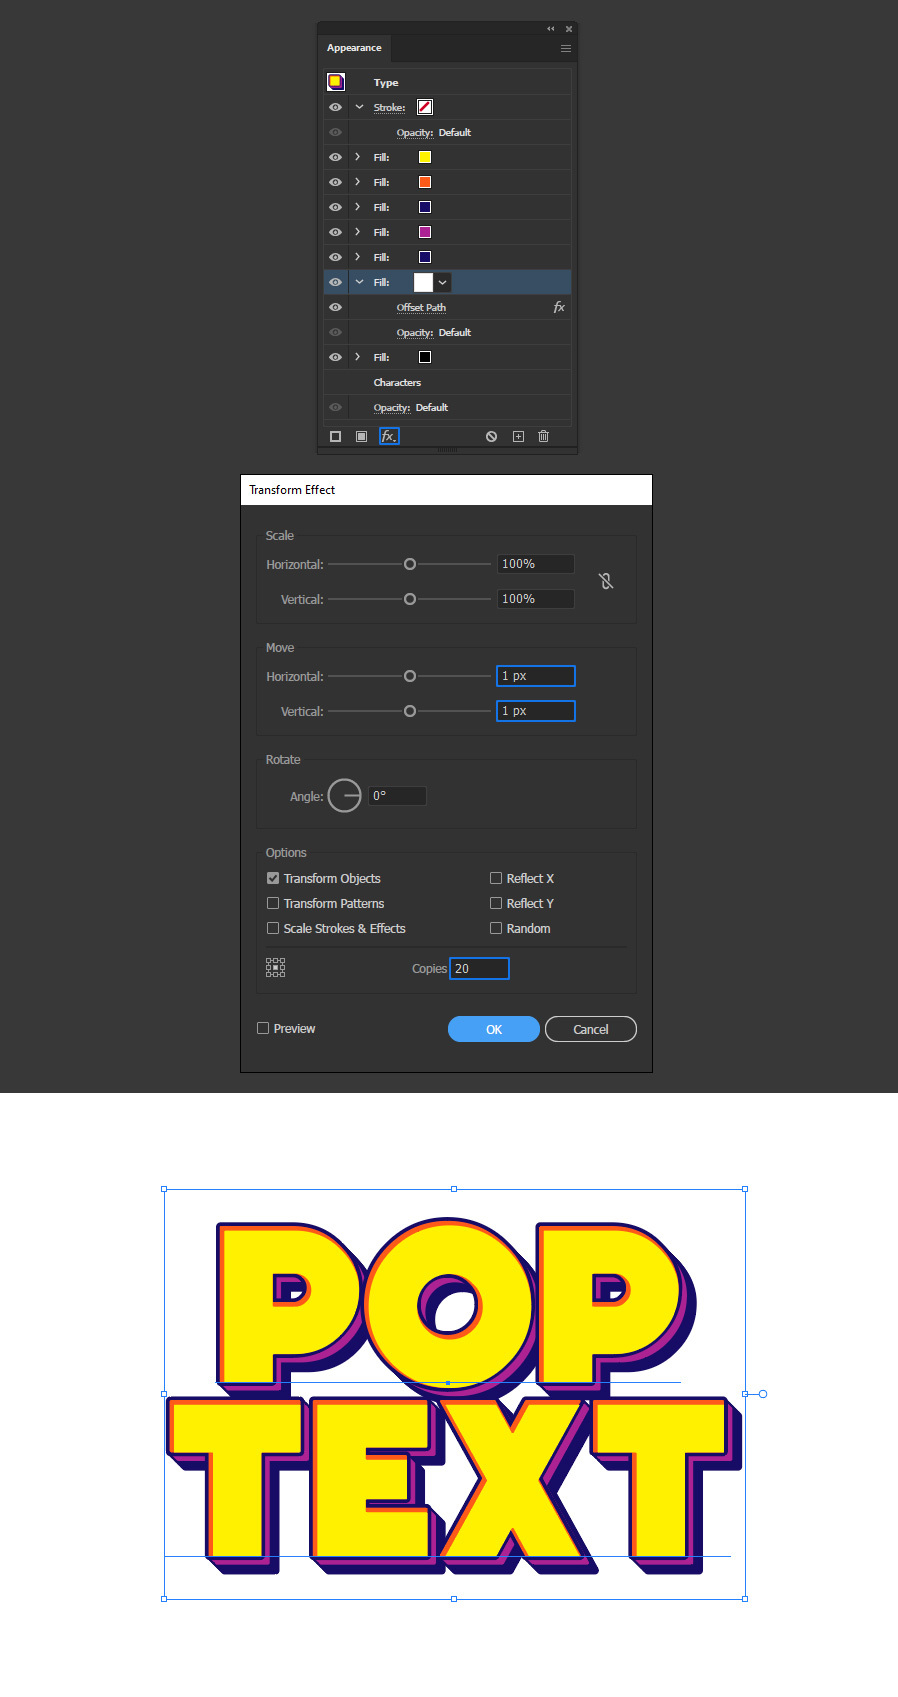
Step 17
Select the last color. Click on the FX icon and from the dropdown menu select Path > Offset Path. Apply the following settings and click OK.

Step 18
With the last color still selected, click on the FX icon and from the dropdown menu select Distort & Transform > Transform. Apply the following settings and click OK.
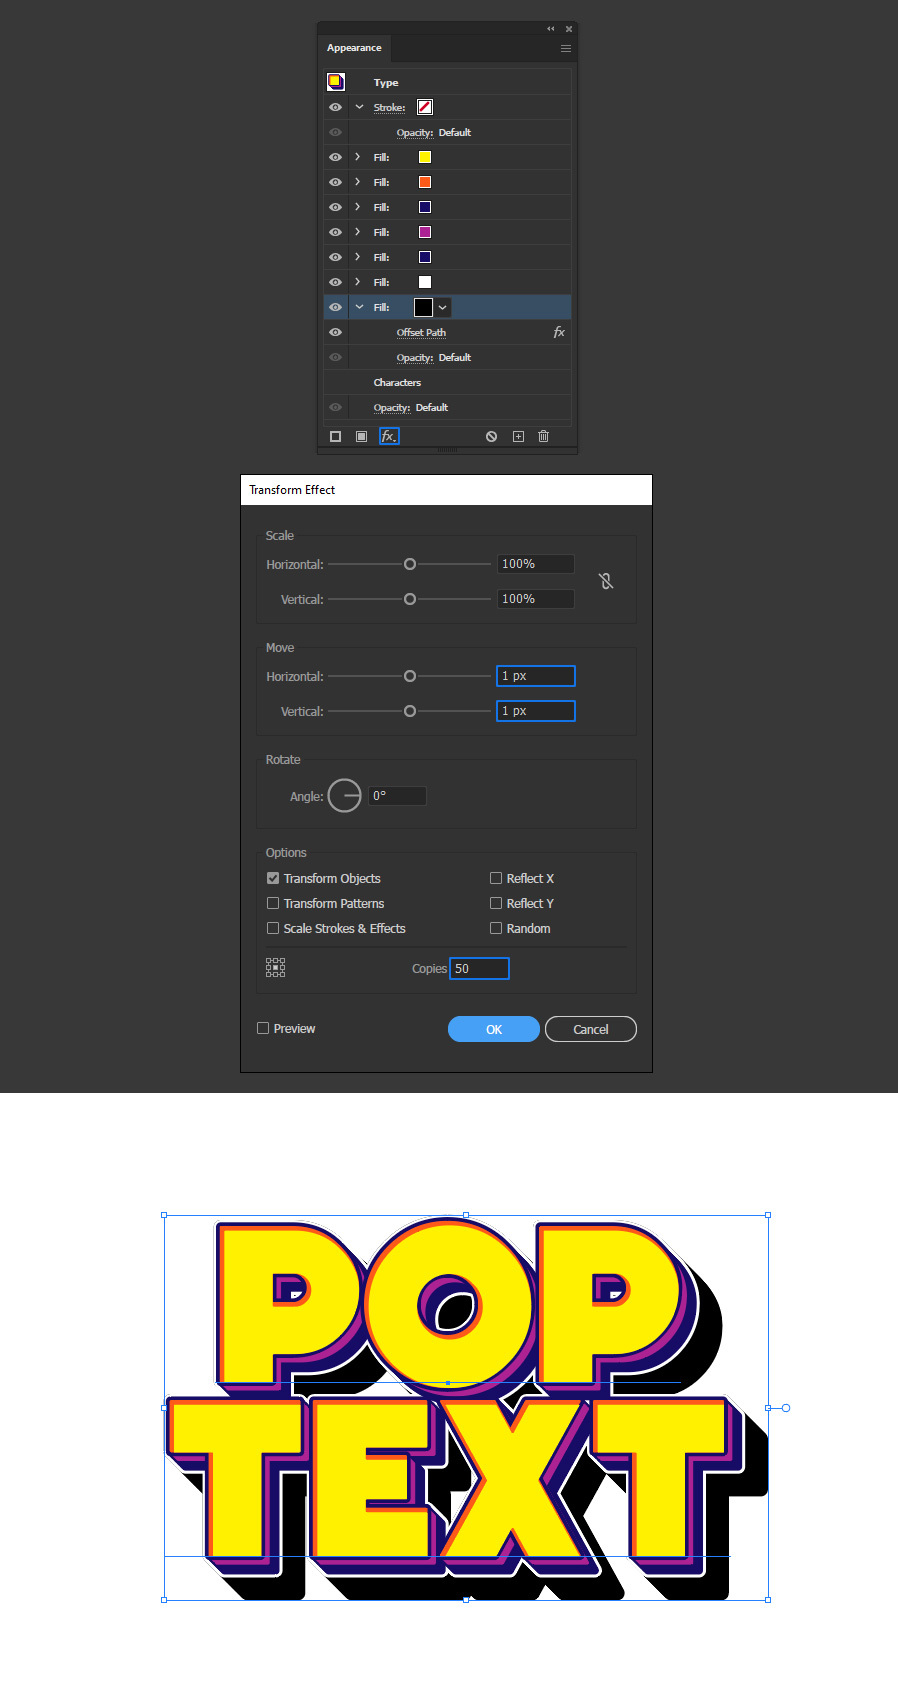
Step 19
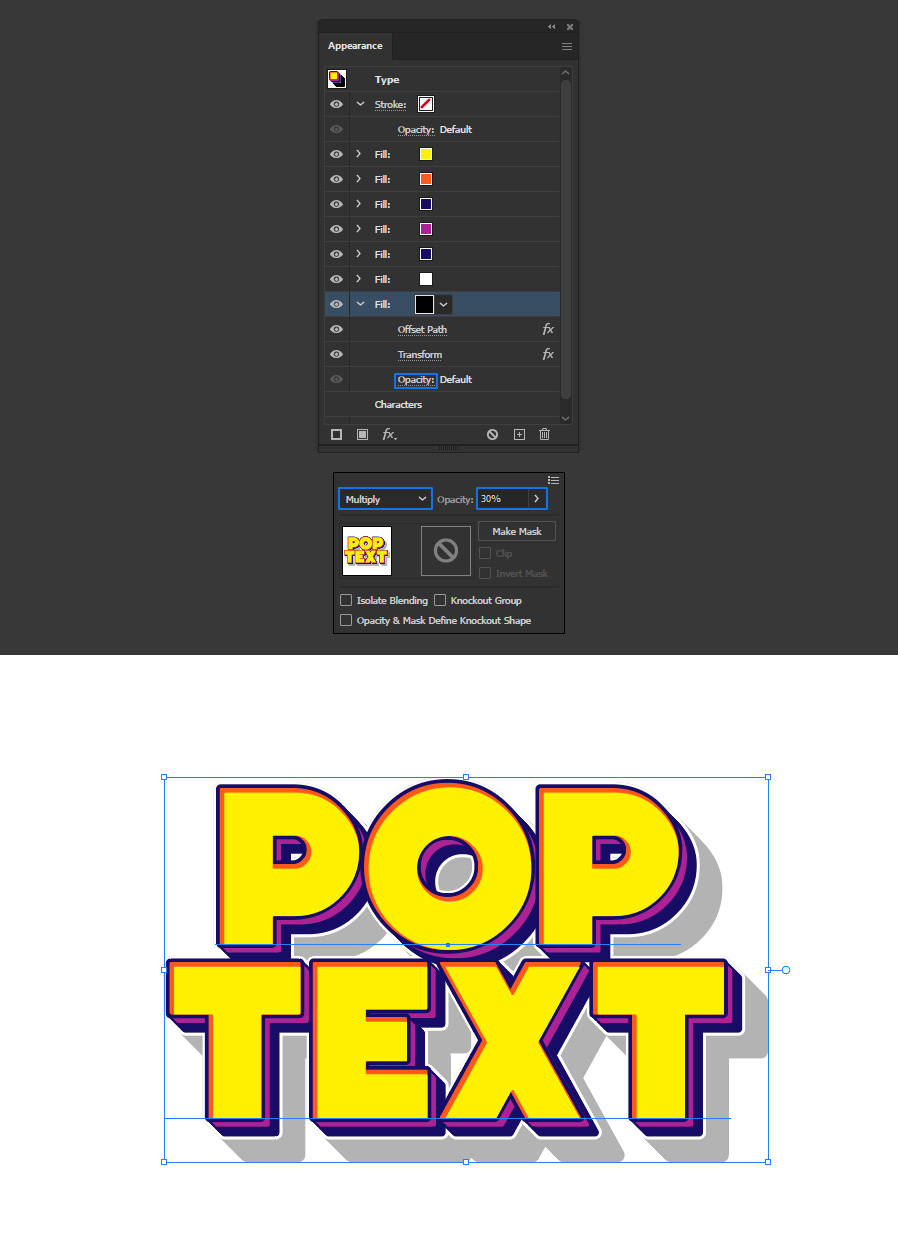
In the Appearance Panel, click over "Opacity". Set the mode to Multiply and lower the Opacity to about 30%.
Step 20
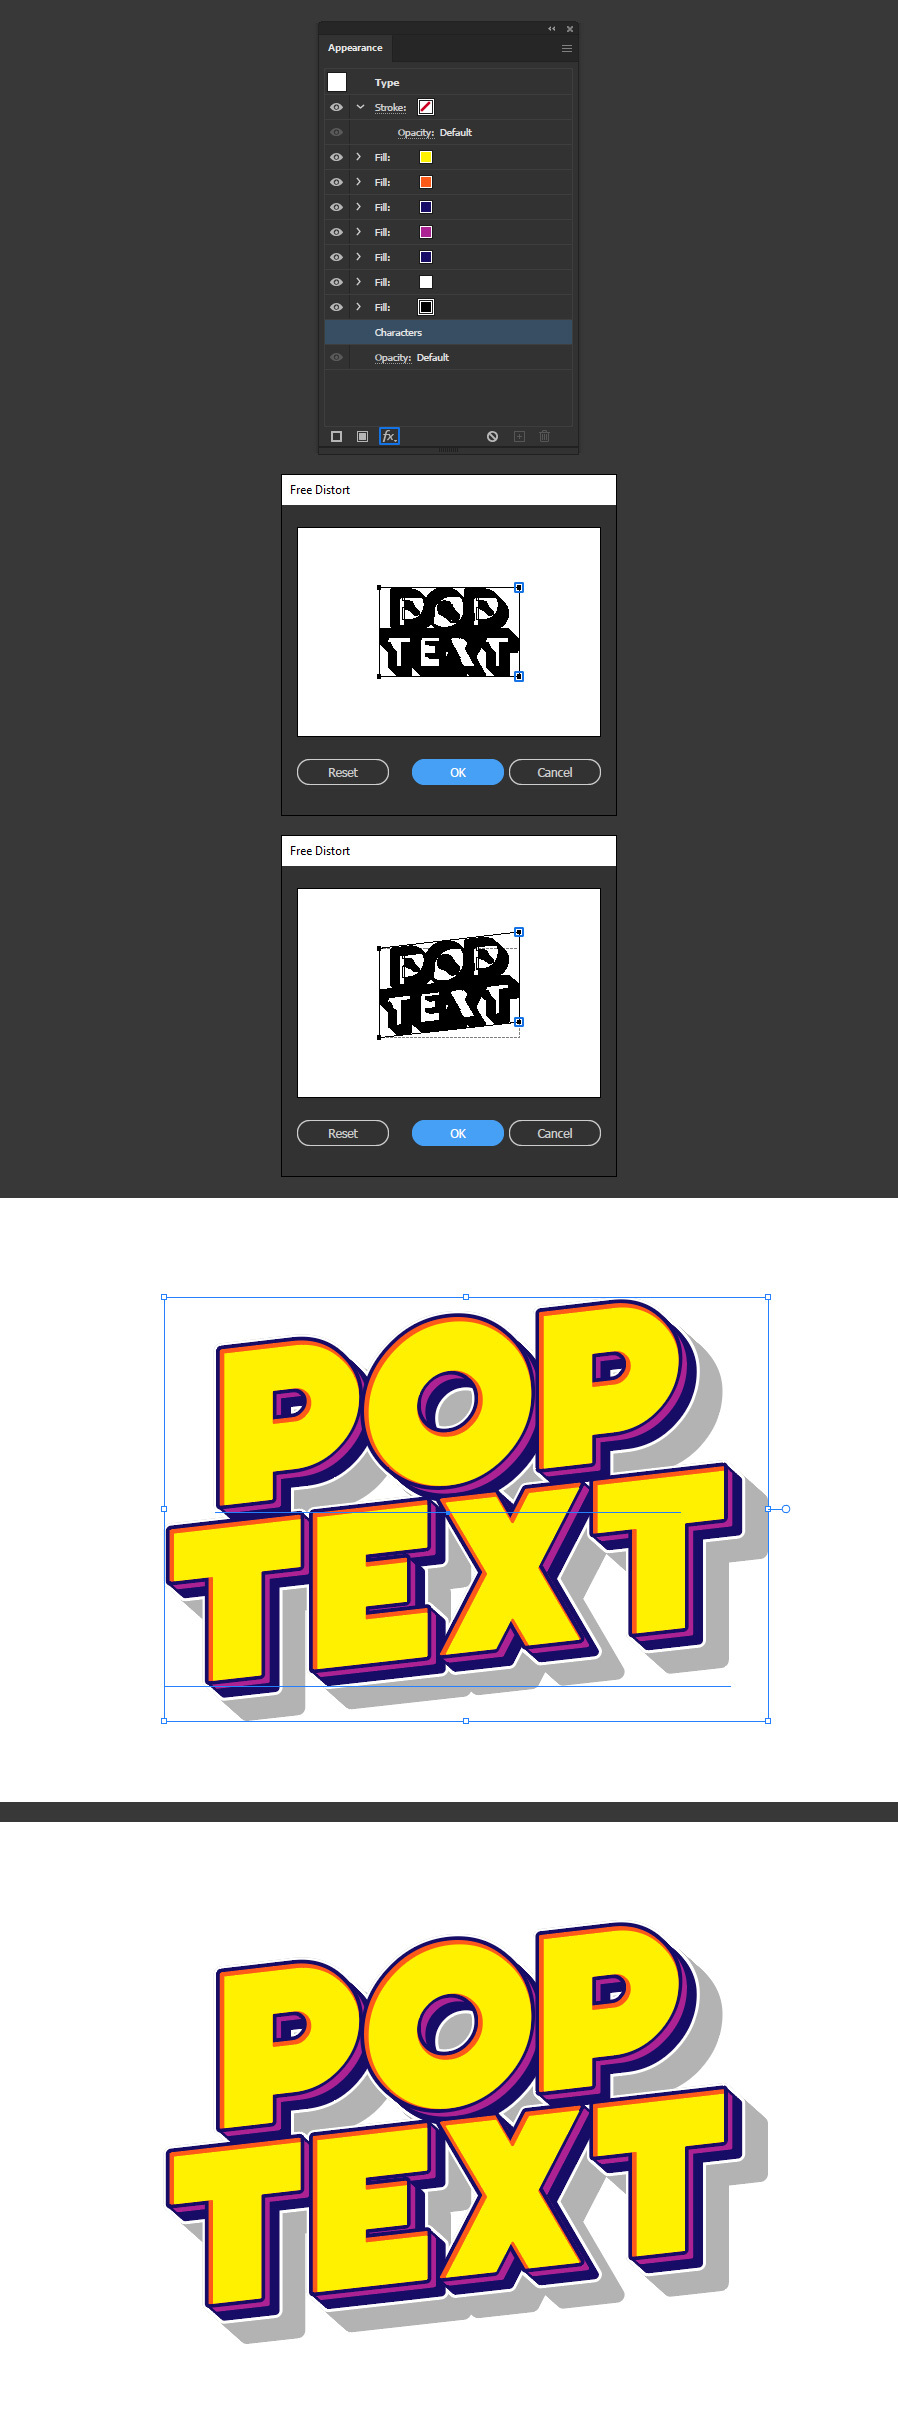
In the Appearance Panel, select "Characters" and then click on the FX icon and from the dropdown menu select Distort & Transform > Free Distort. In the Free Distort window, drag the 2 right anchor points up a bit and click OK.
Conclusion:
With the effect finished, you can now edit your text as you normally do in Illustrator, change the font, the size and if you want, you can edit all the colors in the Appearance Panel and even change the distortion effect to get even more effect variations.
