How to Make a Dimmed Gray Effect in Photoshop
Photoshop Post-Processing
Creating a dimmed gray effect in Photoshop may seem a bit challenging, but it is actually very simple. This powerful post-processing technique can dramatically enhance your photos. By using only the Camera Raw filter in Photoshop, you can easily achieve a sophisticated, muted aesthetic that is perfect for adding a moody, atmospheric touch to your images, making it ideal for portraits, urban landscapes, and artistic compositions.
Keep in mind that every image is unique, so the settings I will show you here should be taken as a basis for all of your images and yours may require some minimal values adjustments on each of the settings. And before we begin, if you want to follow this tutorial exactly as described, please download the following free image from Unsplash: Download.
Step 1
Open your image in Photoshop.

Step 2
Go to Filter > Camera Raw Filter.
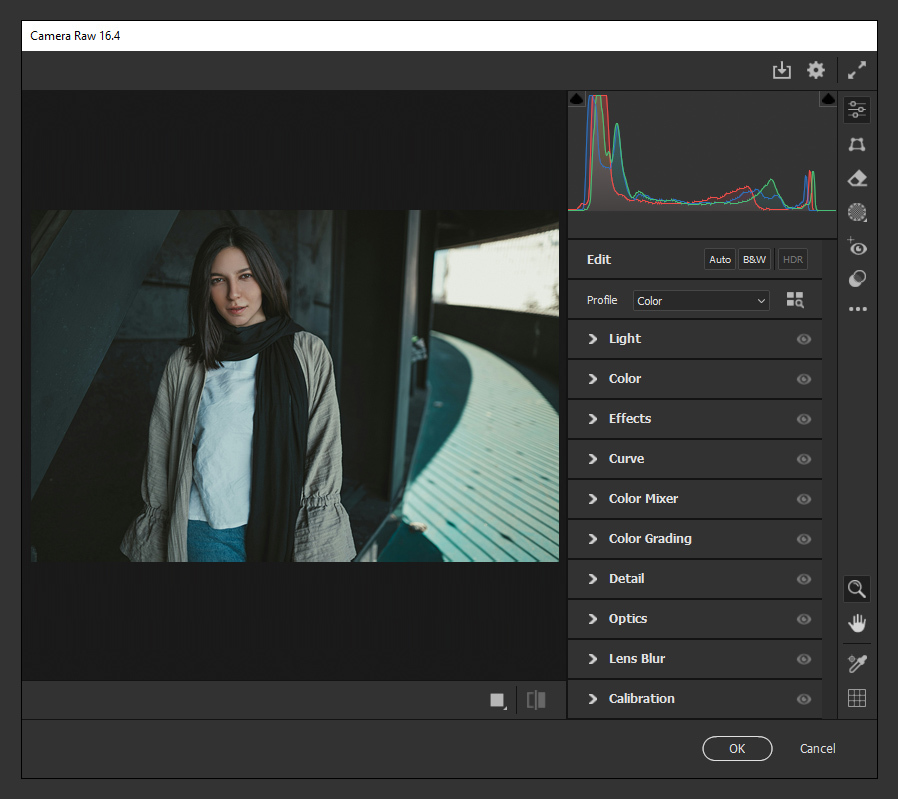
Step 3
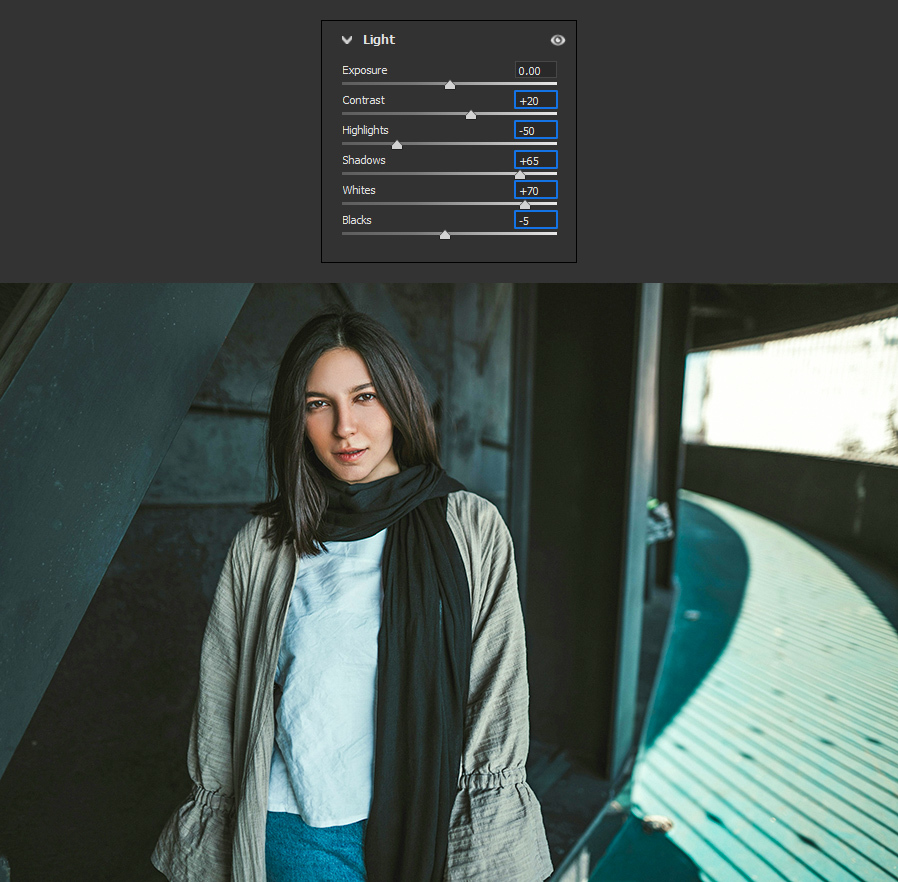
Expand the "Light" panel and apply the following settings.
Step 4
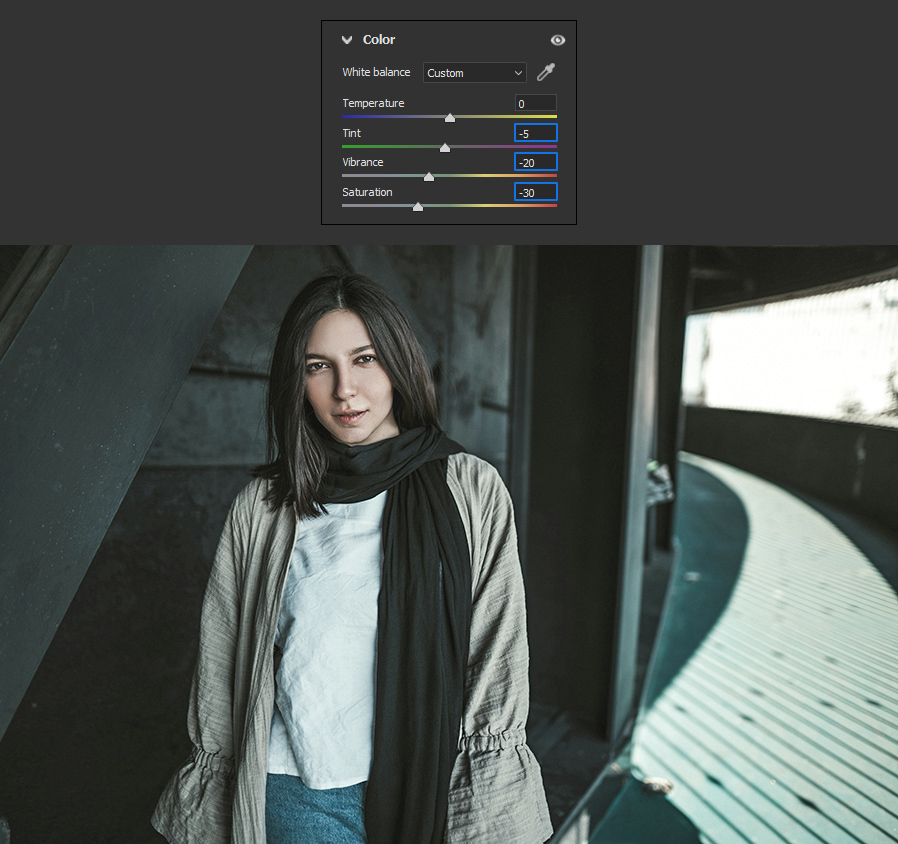
Next, expand the "Color" panel and apply the following settings.
Step 5
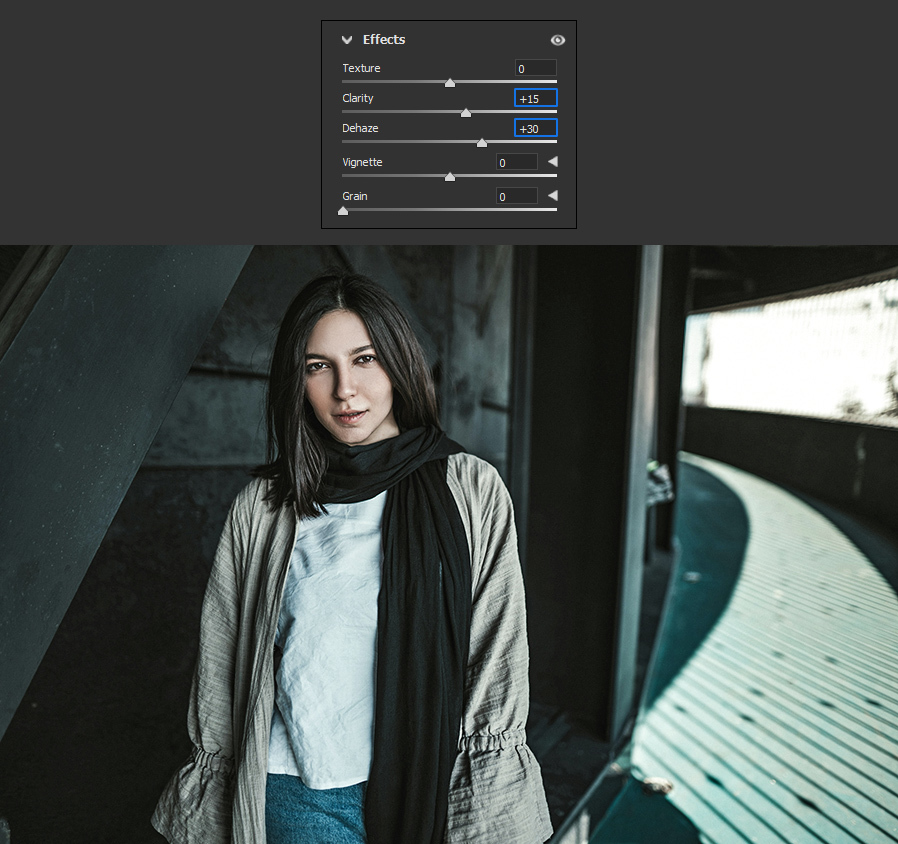
Now expand the "Effects" panel and apply the following settings.
Step 6
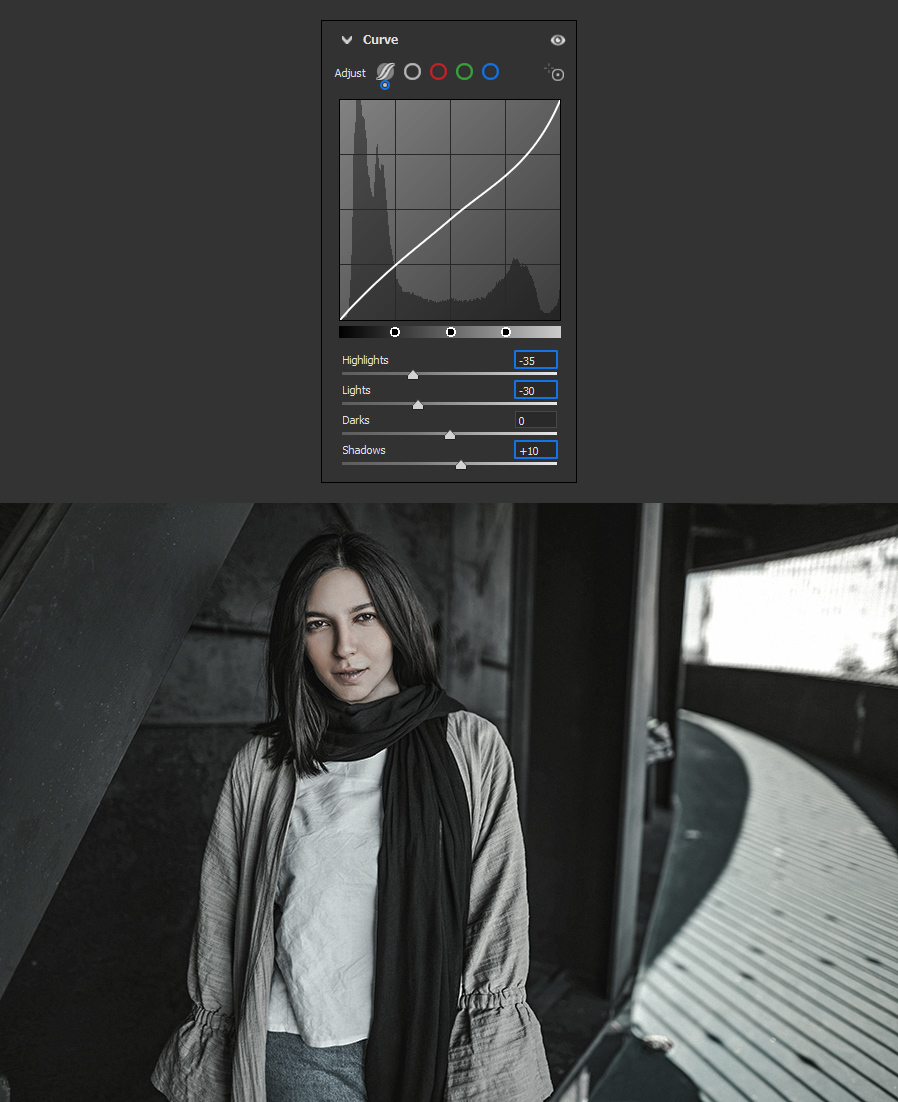
Expand the "Curve" panel. Be sure to select the "Parametric Curve" and apply the following settings.
Step 7
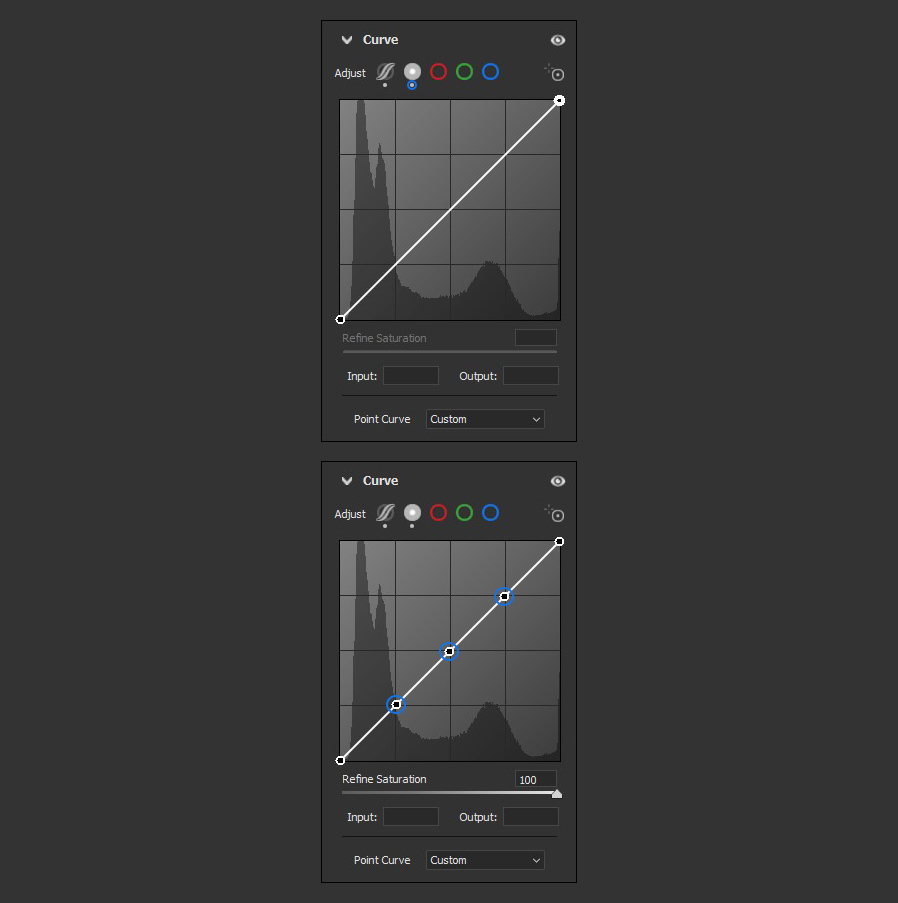
Still in the Curve panel, select the "Point Curve" and add 3 new control points by clicking anywhere inside the curve graphic.
Step 8
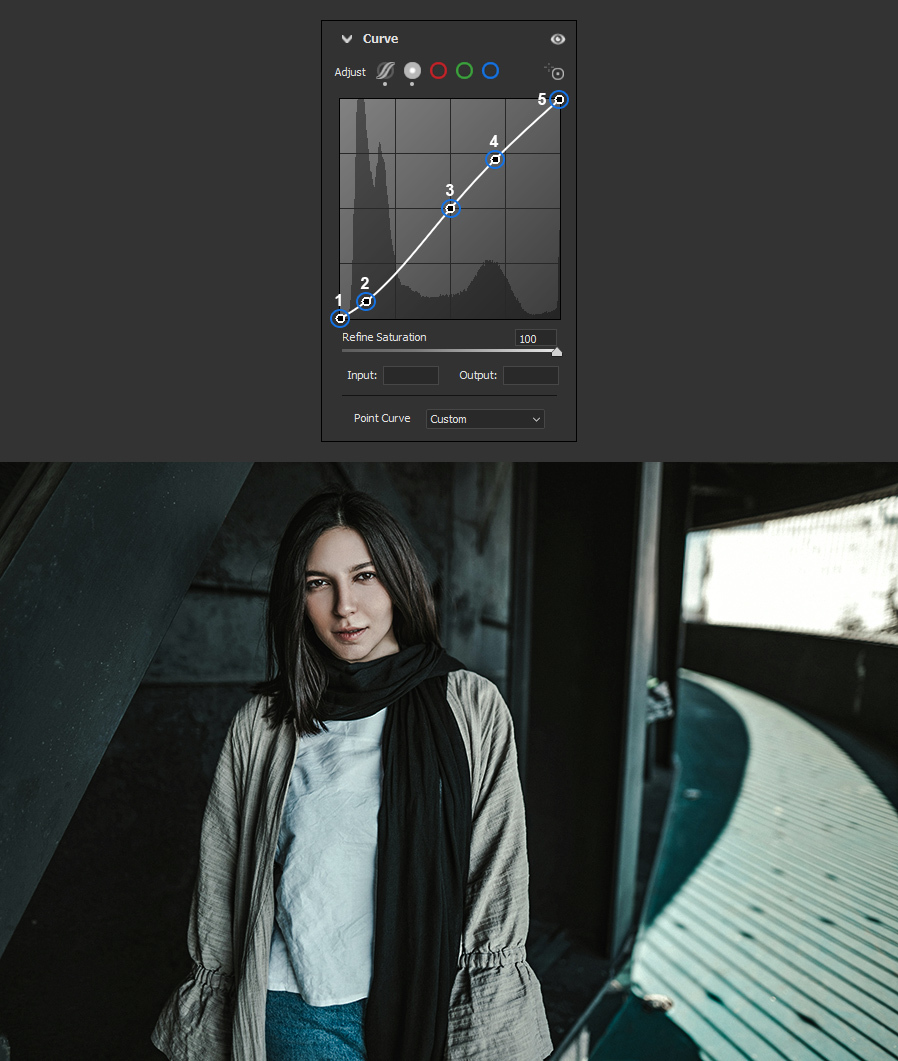
Set the following Input and Output values for each point:
- 0 - 0
- 30 - 20
- 128 - 128
- 180 - 185
- 255 - 255
Step 9
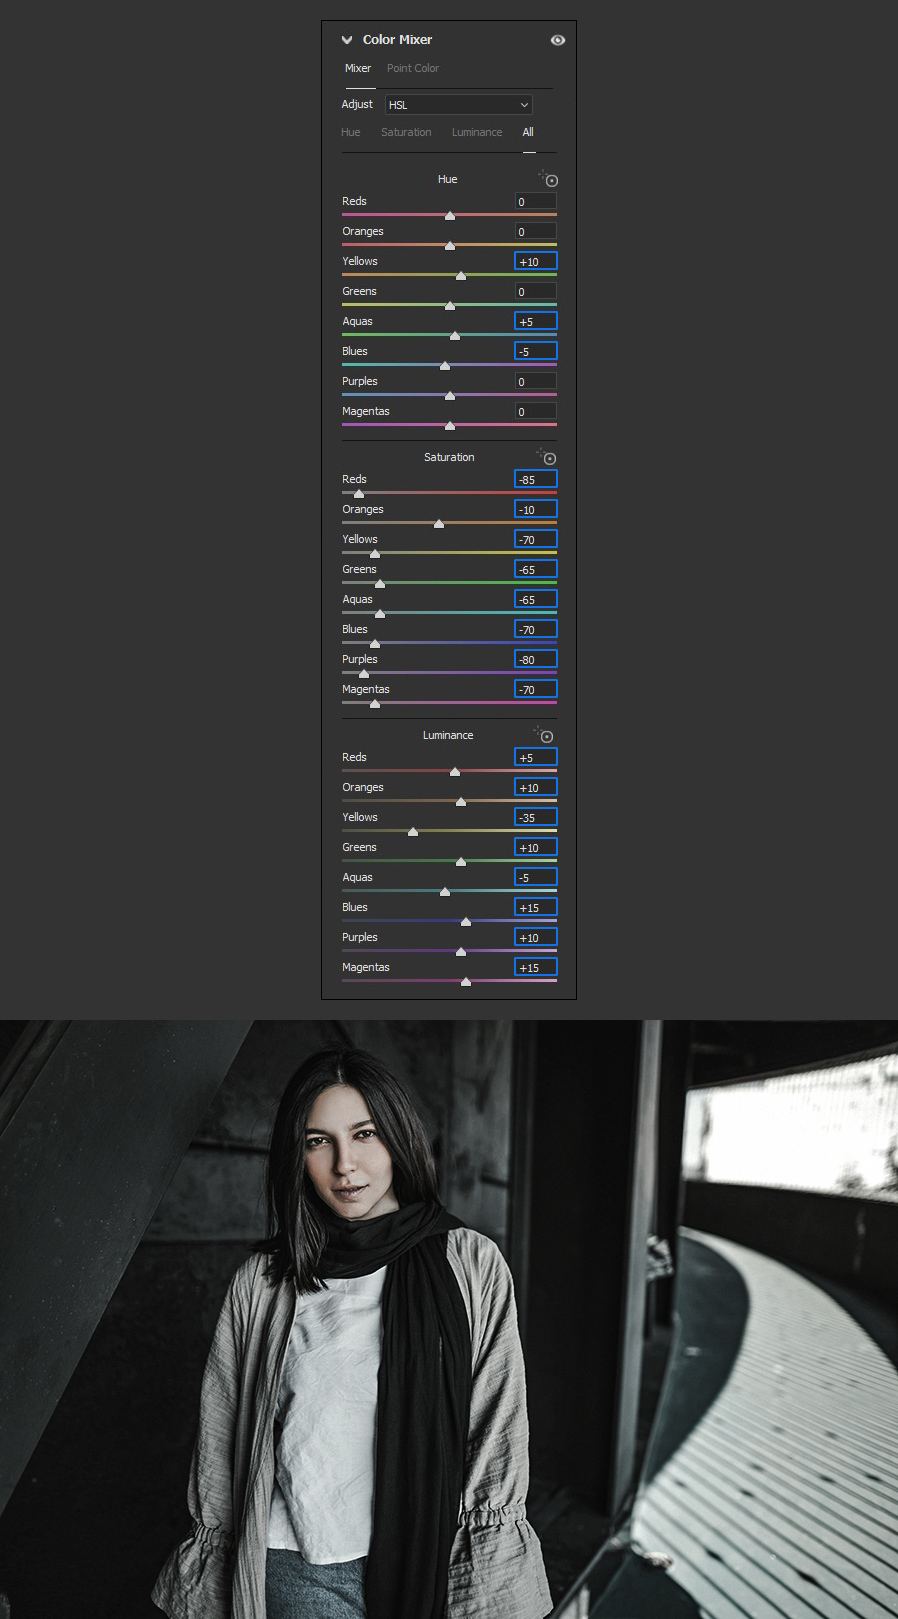
Next, expand the "Color Mixer" panel and apply the following settings.
Step 10
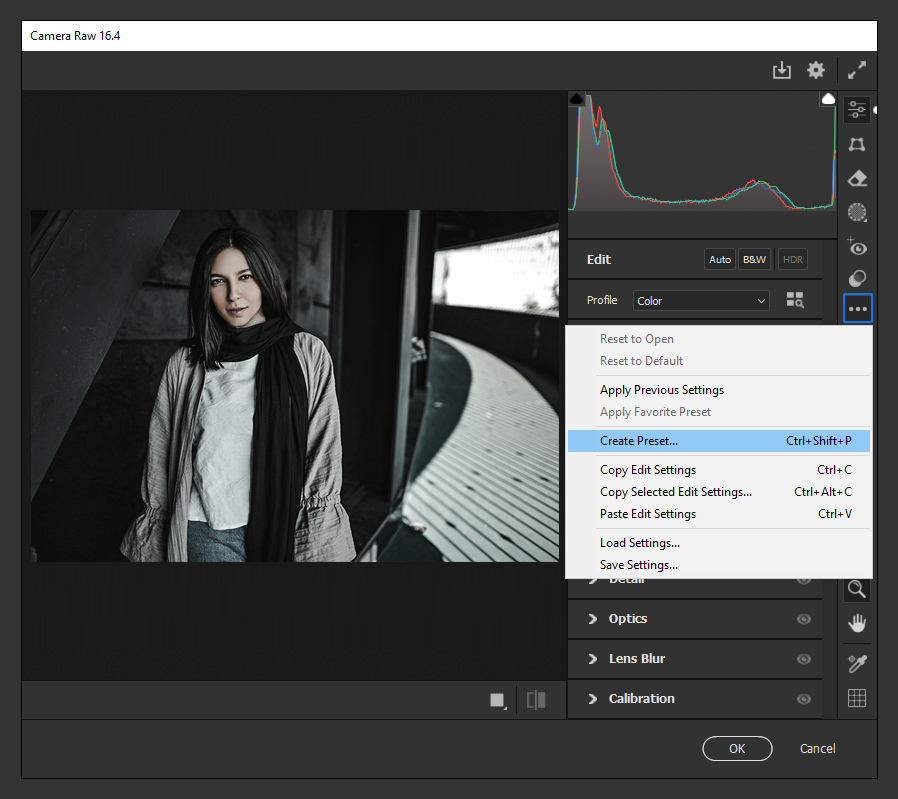
Before applying the effect to the image, we will save all these settings as a new preset to use it later over any other image. To do that, click on the "More Image Settings" icon and from the dropdown menu select "Create Preset".
Step 11
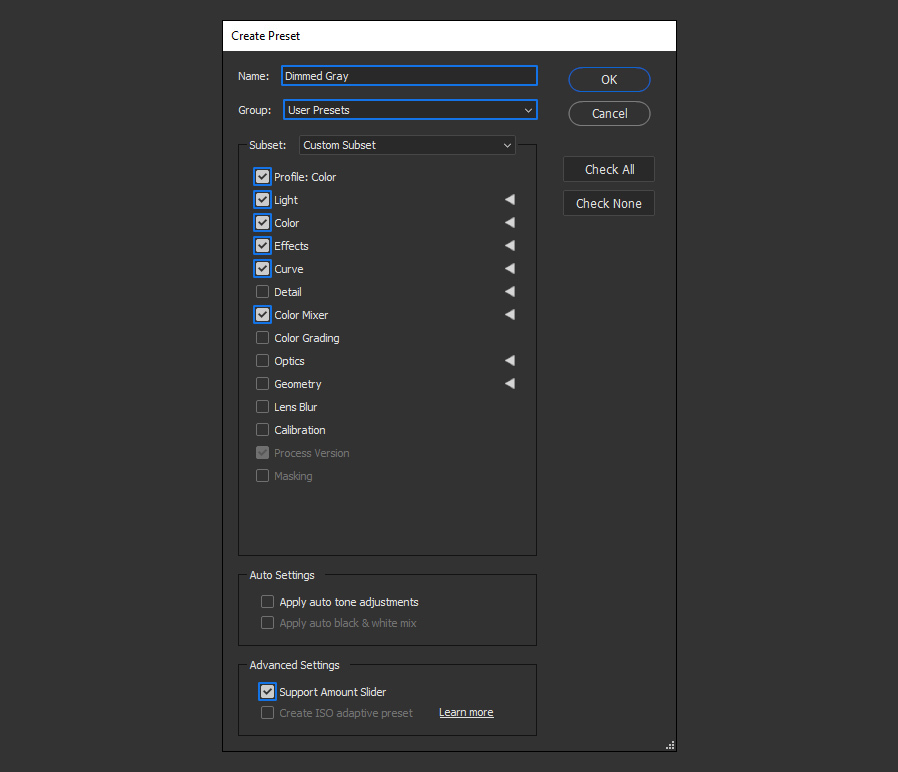
In the Create Preset window, give your new preset a name, select the following options and click OK.
Step 12
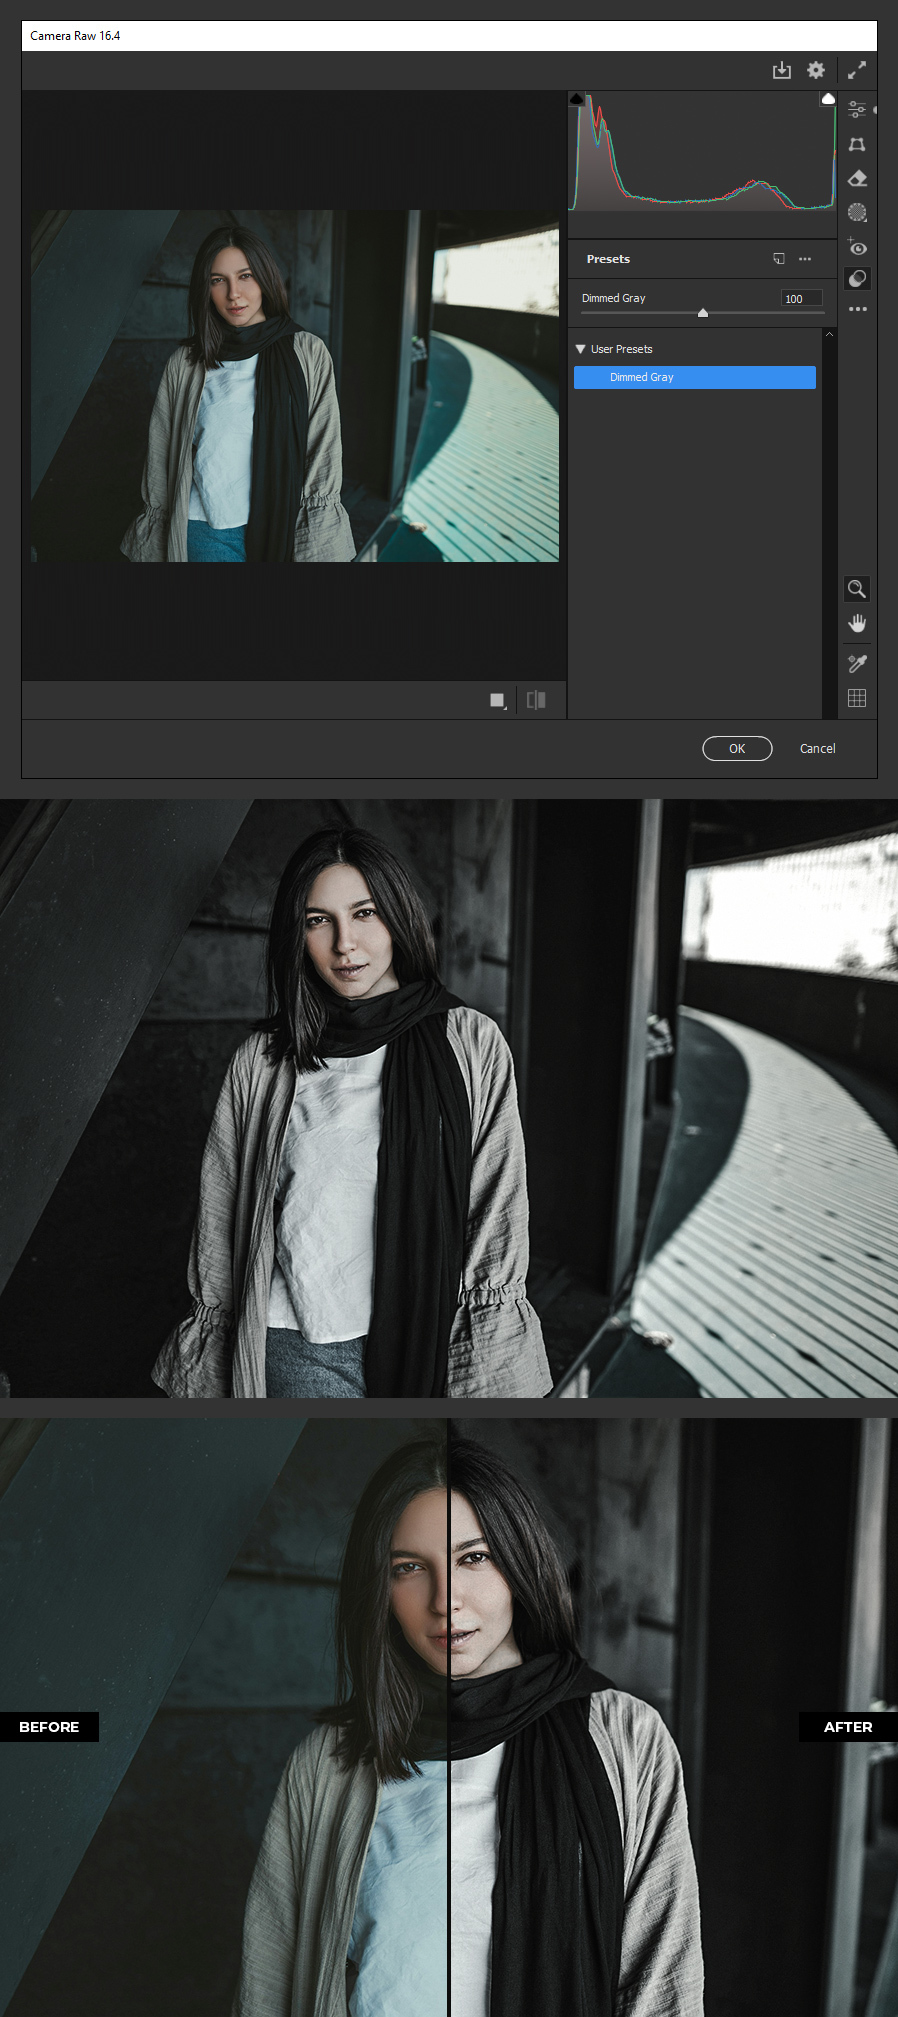
Lastly, simply click OK in the Camera Raw Filter window.
A Final Note:
The next time you want to use this photo effect on any of your pictures, simply open your image in Photoshop and go to Filter > Camera Raw Filter. Go to the Presets tab and select the "Dimmed Gray" preset we've made in this tutorial, then simply click OK in the Camera Raw window to apply the effect to your image.


