How to Make a Boho Look in Photoshop in 5 Minutes
Photoshop Photo Effects
You probably saw a lot of images with a bohemian style used over almost any type of photo that you can think of. An there are many different methods to achieve that look in Photoshop using various adjustment layers, channels, curves, etc. But today, I will show you how you can achieve that Boho look in Photoshop in 5 minutes using the powerful Camera RAW plugin that you can adjust to fine tune your image once the main effect is made. Please, keep in mind that every image is unique, so the settings I will show you here should be taken as a basis for all of your images and it may require some different values on each setting depending on your photo.
But before we begin, and if you want to follow this tutorial exactly as described, please download the following image from Adobe: Download.
Step 1
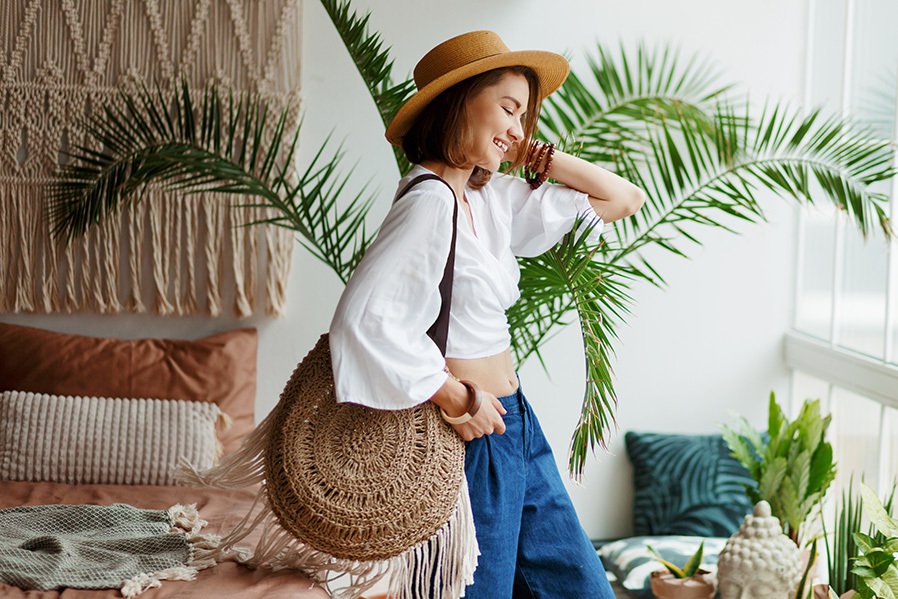
Open your image in Photoshop.
Step 2
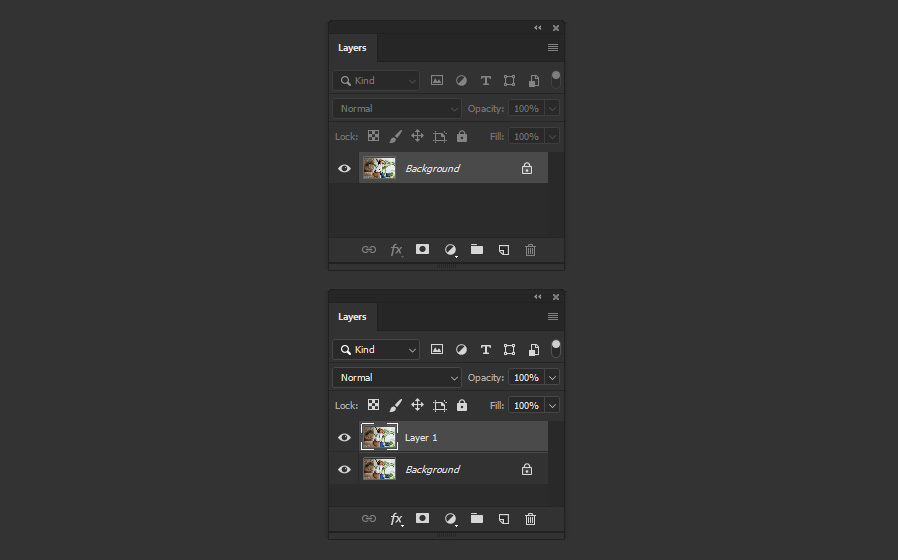
Press Ctrl+J on your keyboard to duplicate the current layer.
Step 3
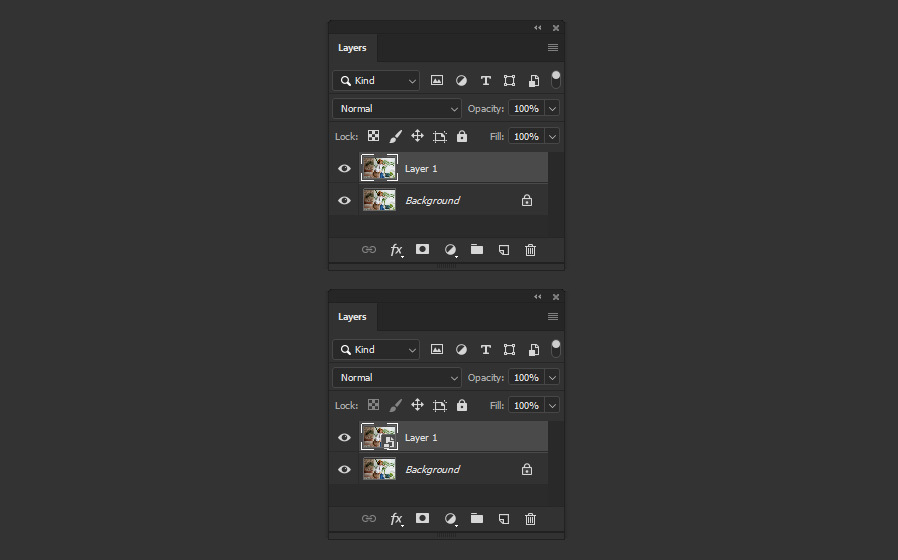
Go to Layer > Smart Objects > Convert to Smart Object.
Step 4
Go to Filter > Camera Raw Filter.

Step 5
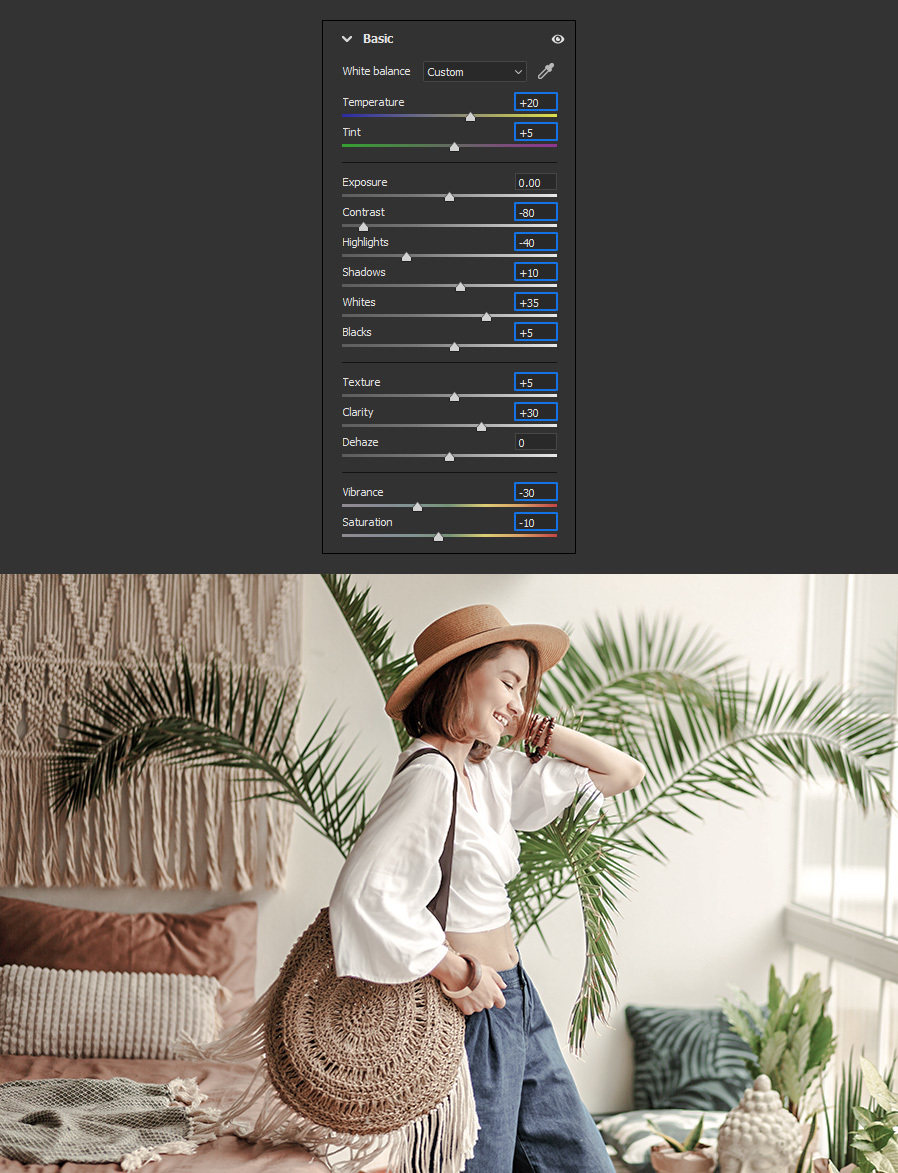
In the Camera Raw window expand the Basic tab and apply the following settings.
Step 6
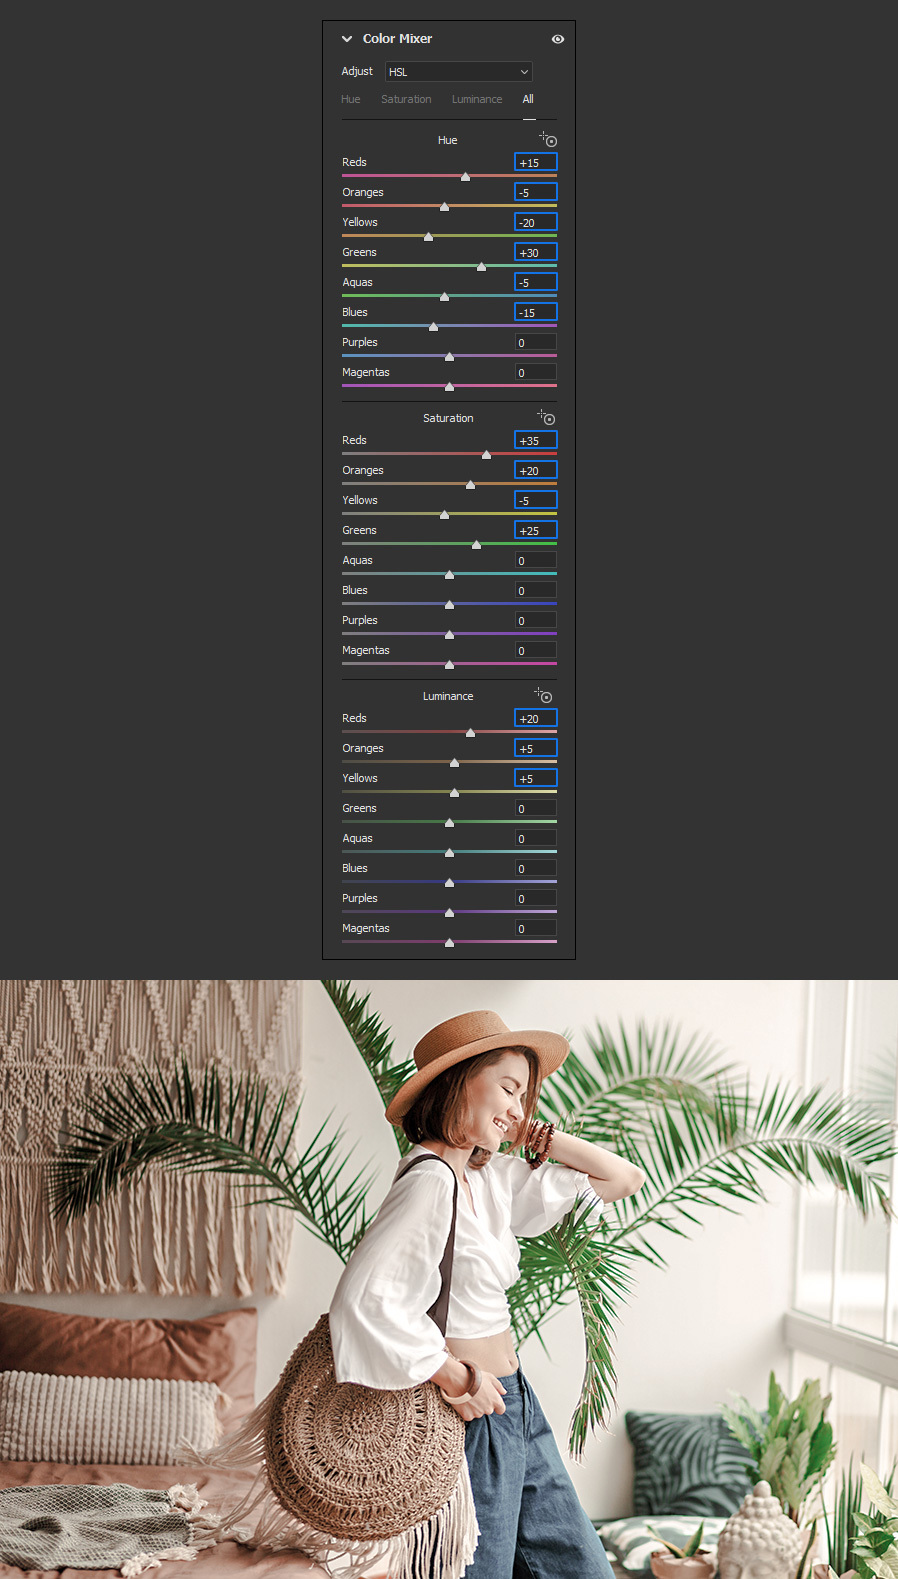
Expand the Color Mixer tab and apply the following settings.
Step 7
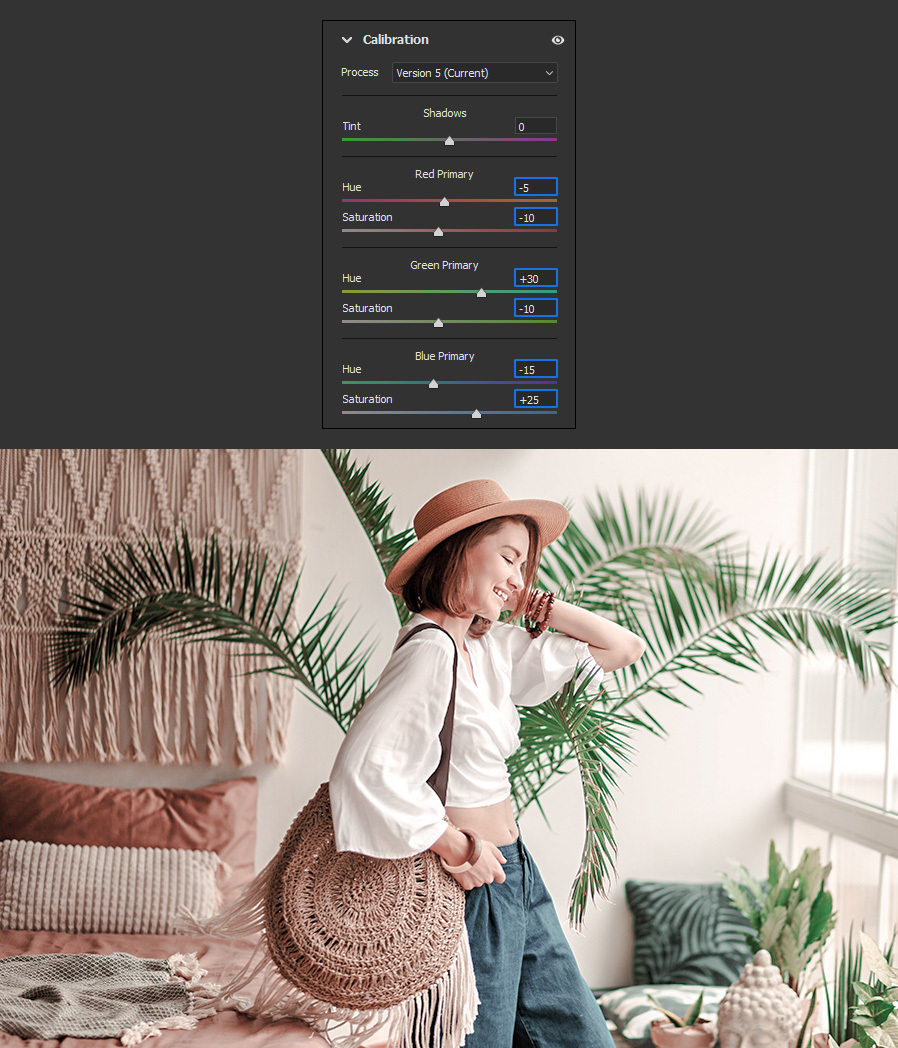
Expand the Calibration tab, apply the following values and click OK in the Camera RAW window.
Step 8
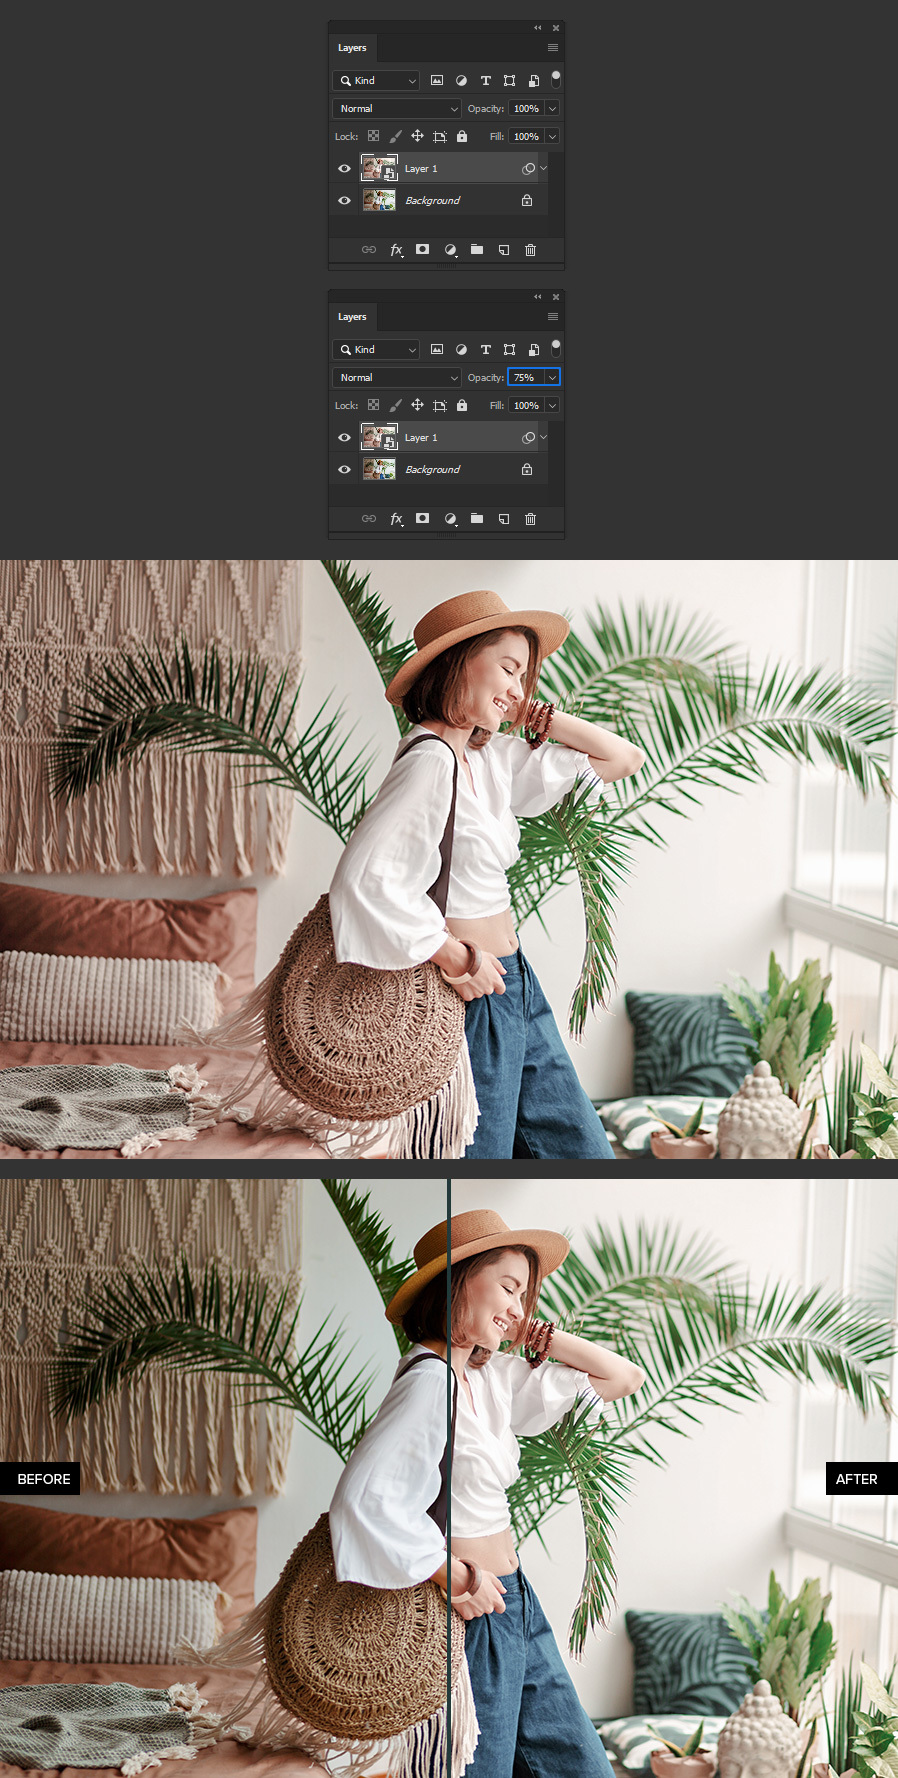
Lastly, decrease the layer Opacity to about 75% to bring back some of the original photo colors.
A Final Tip
If you later want to adjust some of the effect settings, simply click on the down arrow of the image layer to reveal the layer effects and then double click on "Camera Raw Filter" to open the Camera Raw window, make your adjustments and then click Ok in the Camera Raw window.


