How to Emulate a Lomo Effect in Lightroom
Lightroom Lomo Effect
Besides helping photographers to organize their photos, Lightroom is a great tool to edit and process photos in a non-destructive way. Just like Illustrator or Photoshop, there are different ways to achieve a certain effect in Lightroom, and today I will show you how easy is to emulate a Lomo photo effect. This effect, which is still a very popular one, is inspired by photographs taken with a "Lomo Kompakt Automat" camera back in 1984. The photos produced by the Lomo LC-A have a unique coloring due the color reproduction is not exactly a "true-to-life" one, so you have freedom to make it look just like you want it, and not exactly how is supposed to be.
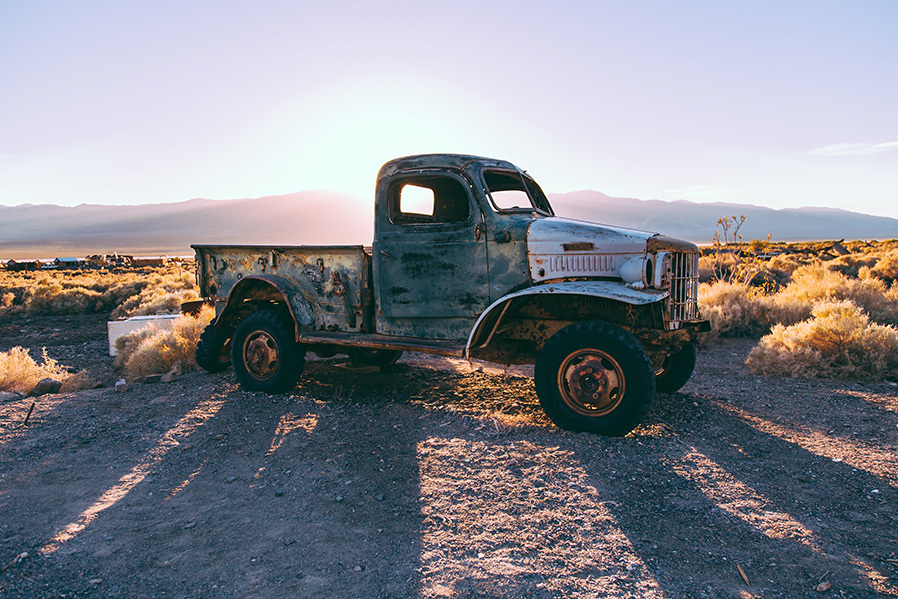
But before we begin, and if you want to follow this tutorial exactly as described, please download the following free image from Unsplash: Download
Step 1
Open your image in Lightroom.
Step 2
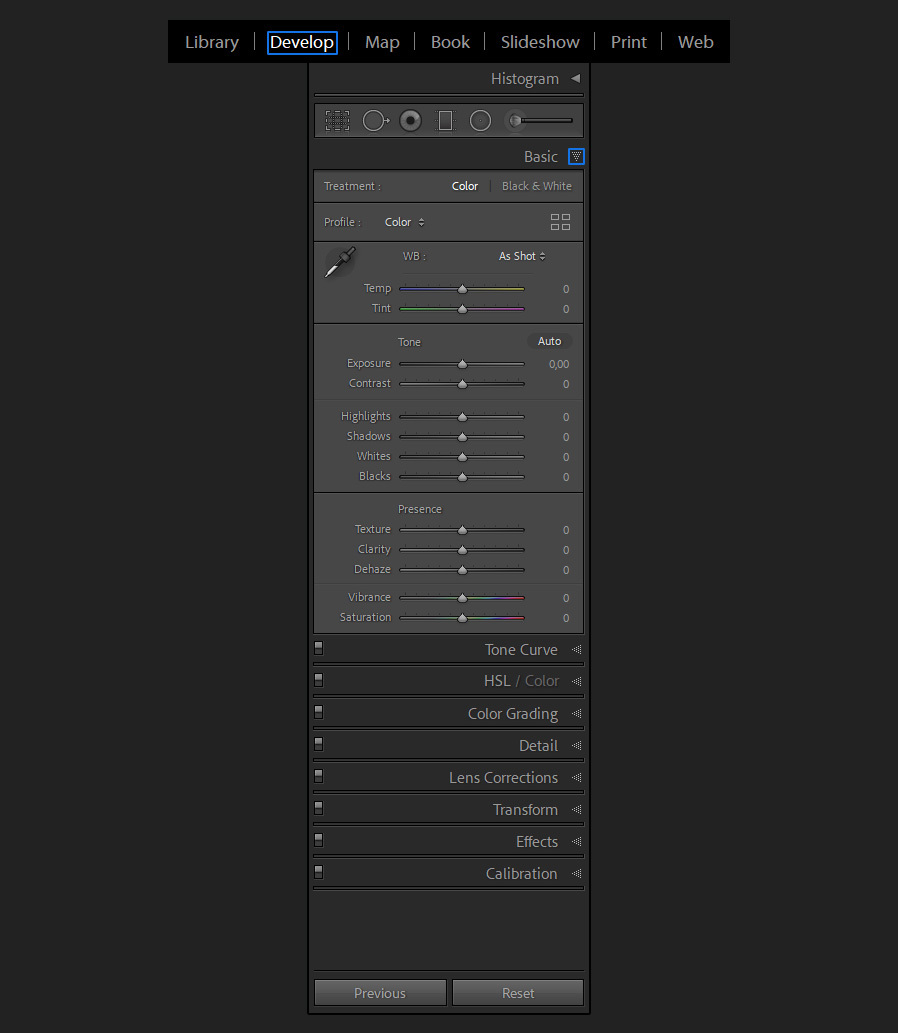
Under the Develop tab, expand the Basic module.
Step 3
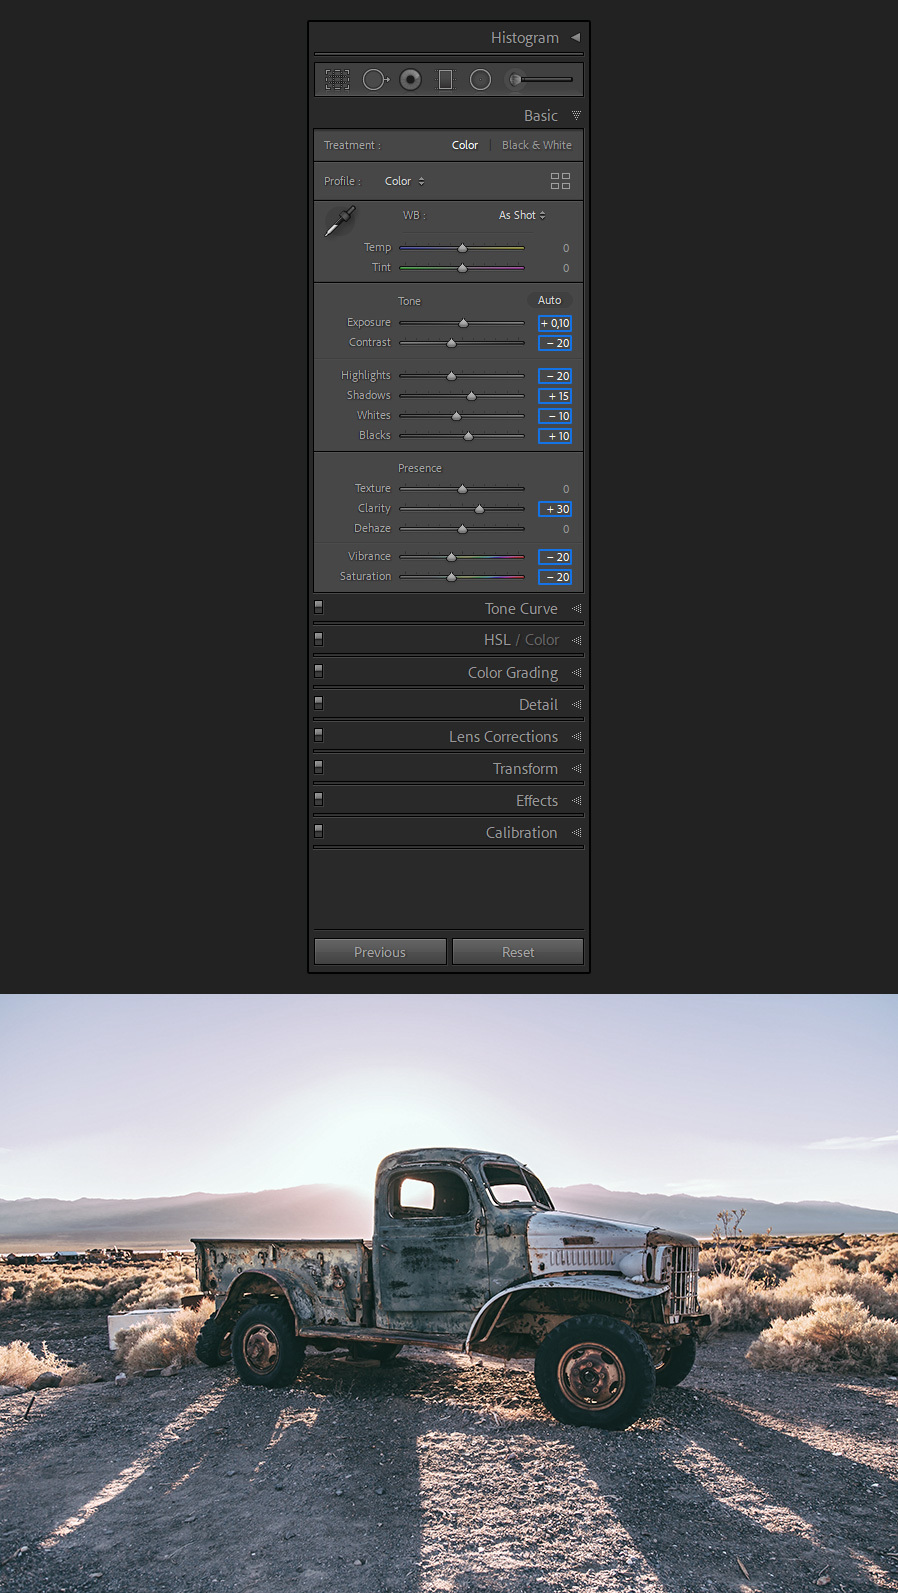
In the Basic module apply the following values to flatten a bit the photo.
Step 4
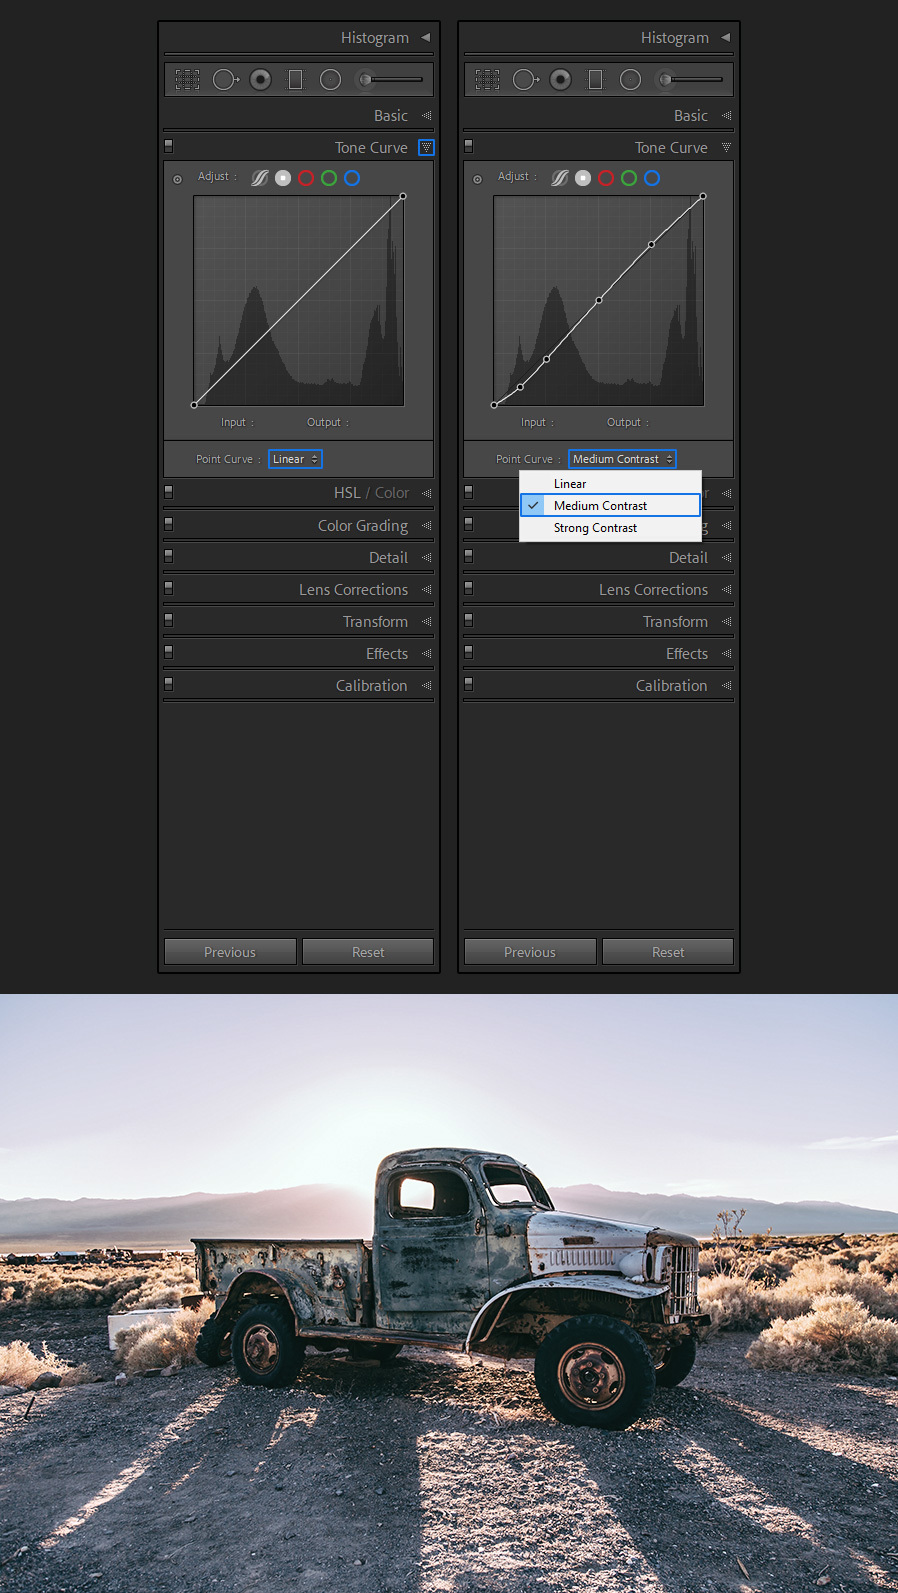
Expand the Tone Curve module. Under Point Curve, select "Medium Contrast" from the dropdown menu.
Step 5
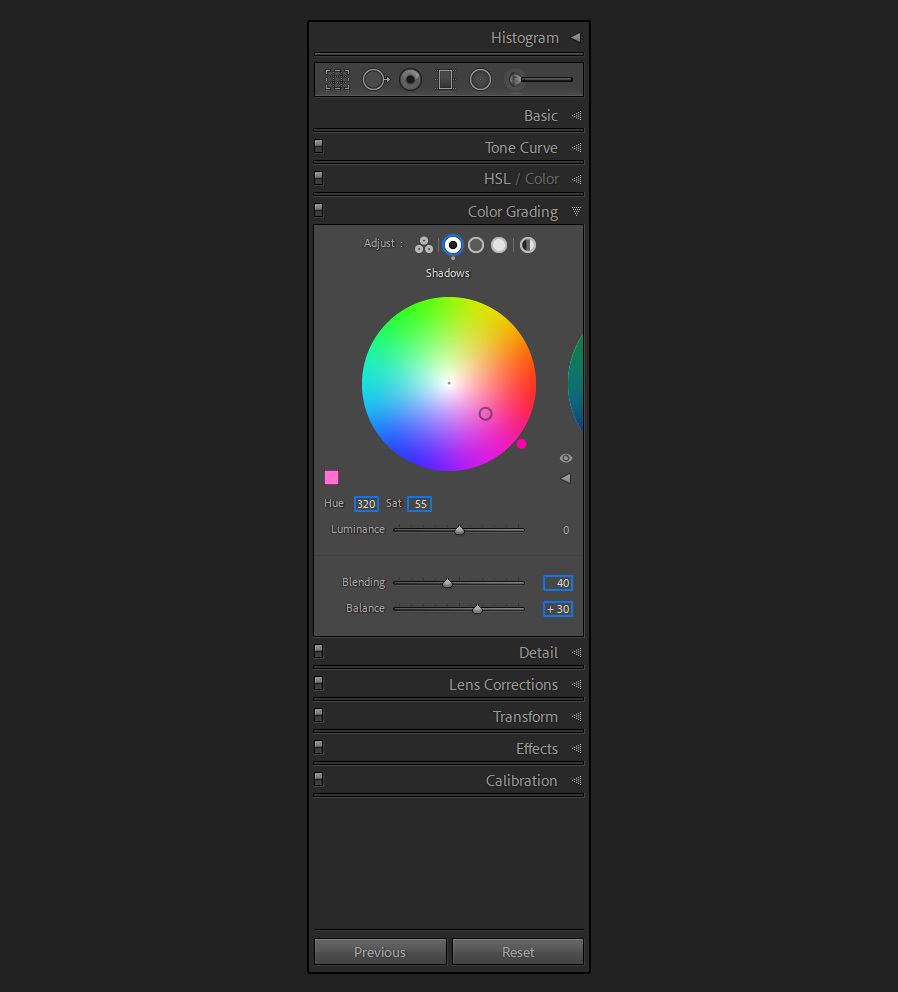
Expand the Color Grading module, select the Shadow option and apply the following values.
Note: as the Lomo effect give us some coloring freedom, you can set any color that you like for your shadows.
Step 6
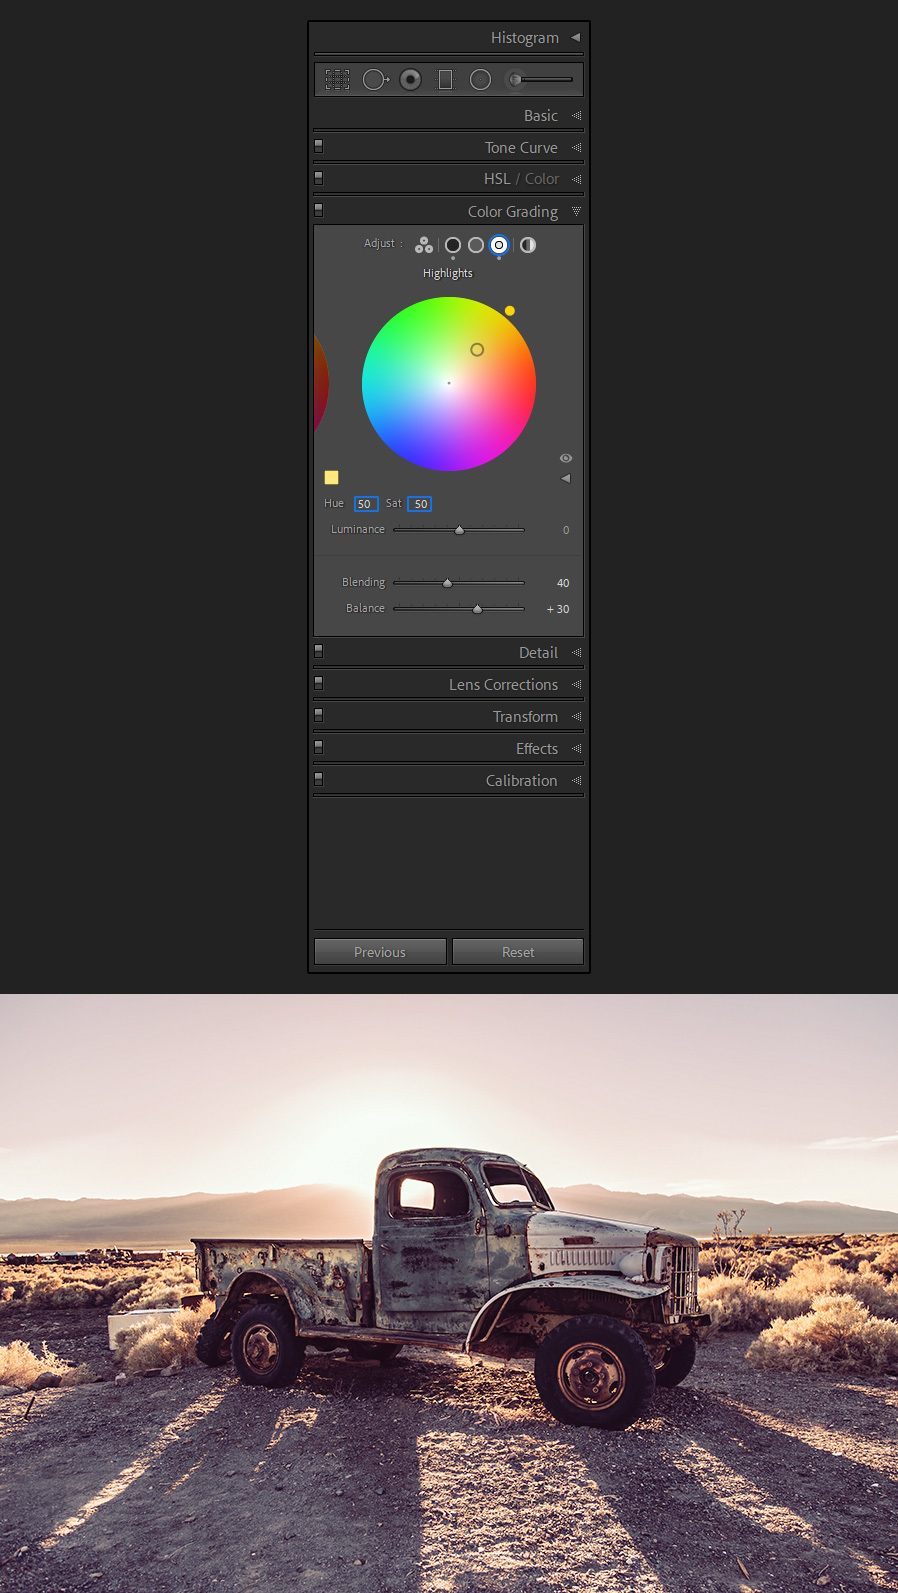
Still on the Color Grading module, select the Highlights and apply the following values.
Note: as the Lomo effect give us some coloring freedom, you can set any color that you like for your highlights.
Step 7
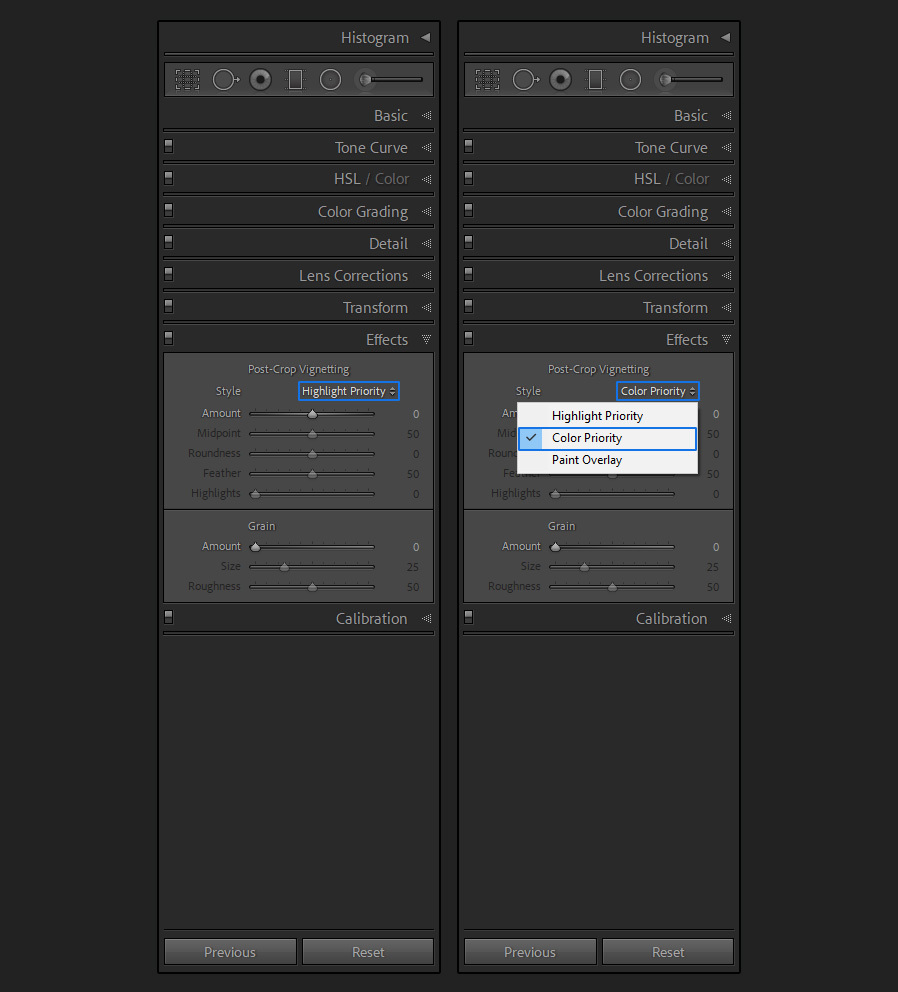
Expand the Effects module and under Style, select "Color Priority" from the dropdown menu.
Step 8
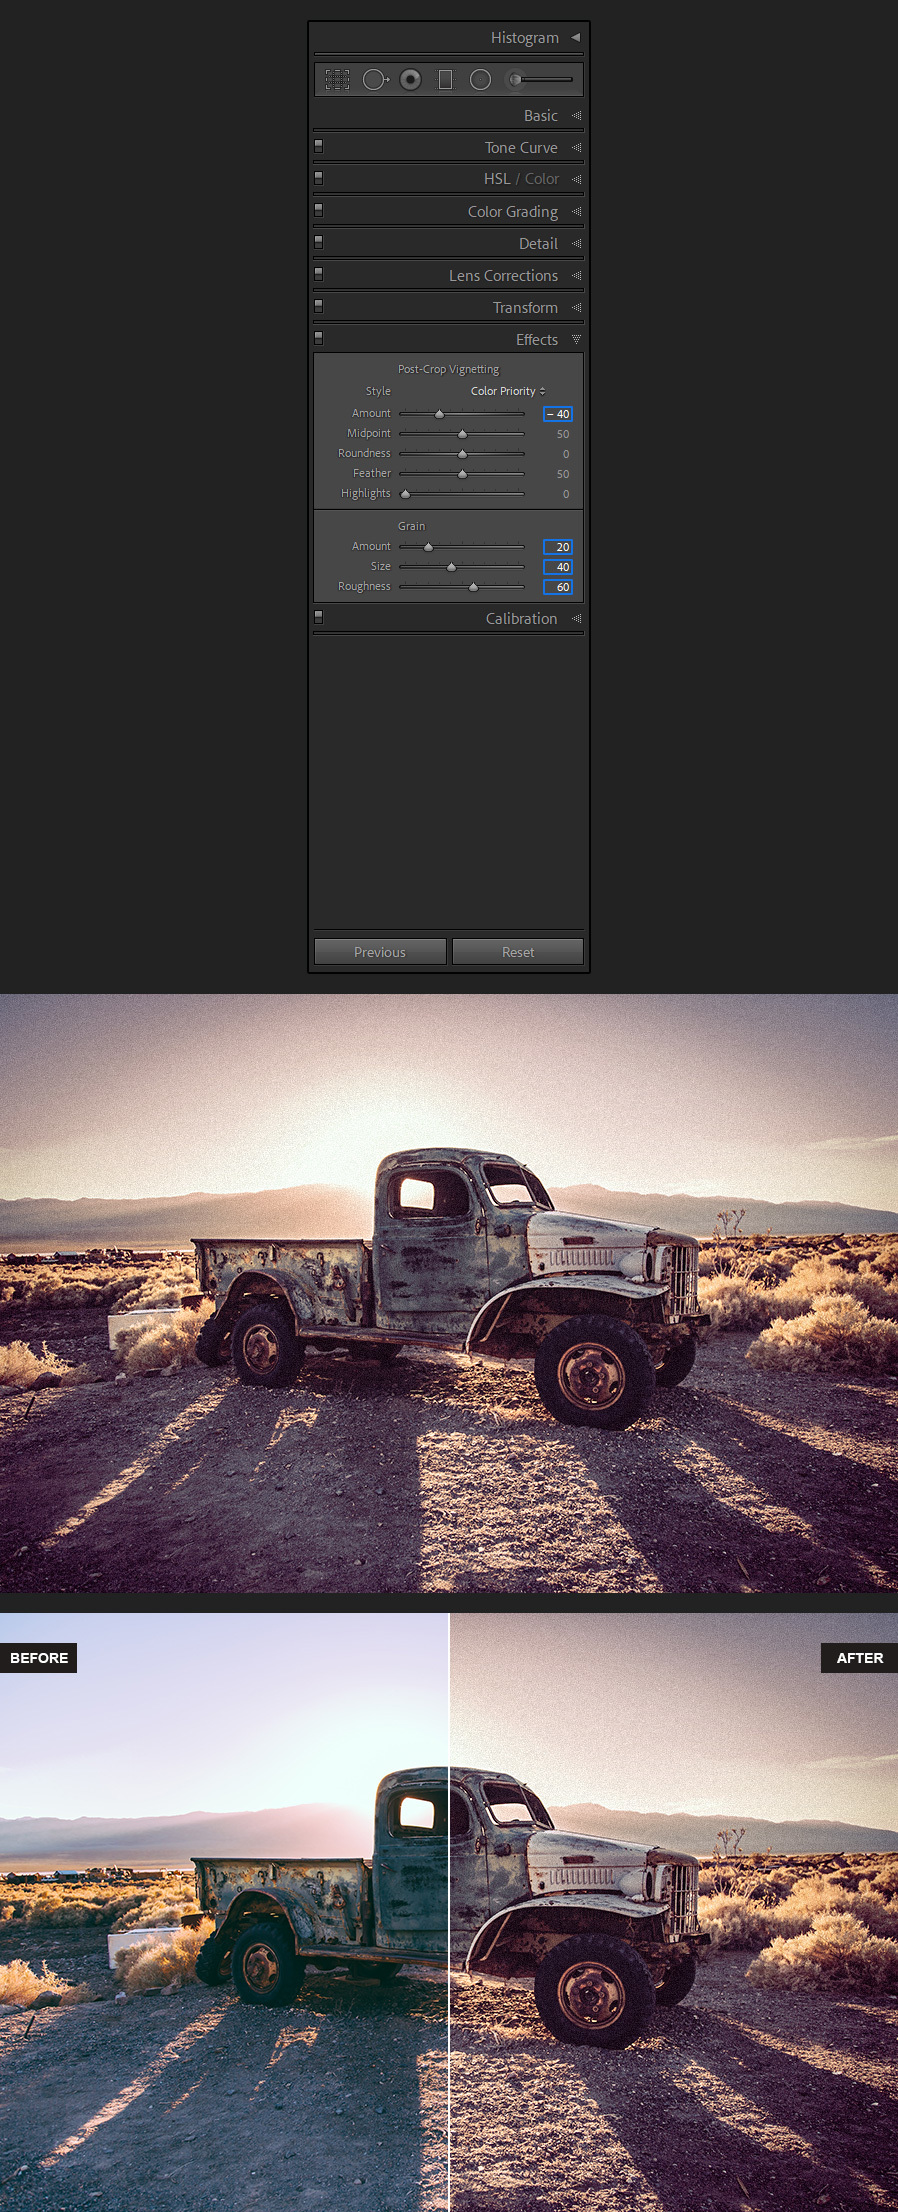
Still in the Effects Module, and to finish the Lomo effect, apply the following settings.
Step 9
With the Lomo effect made, a good idea is to save it as a Preset to be used later with any other image you want. To do this, click the "+" sign in the Presets panel and select "Create Preset".
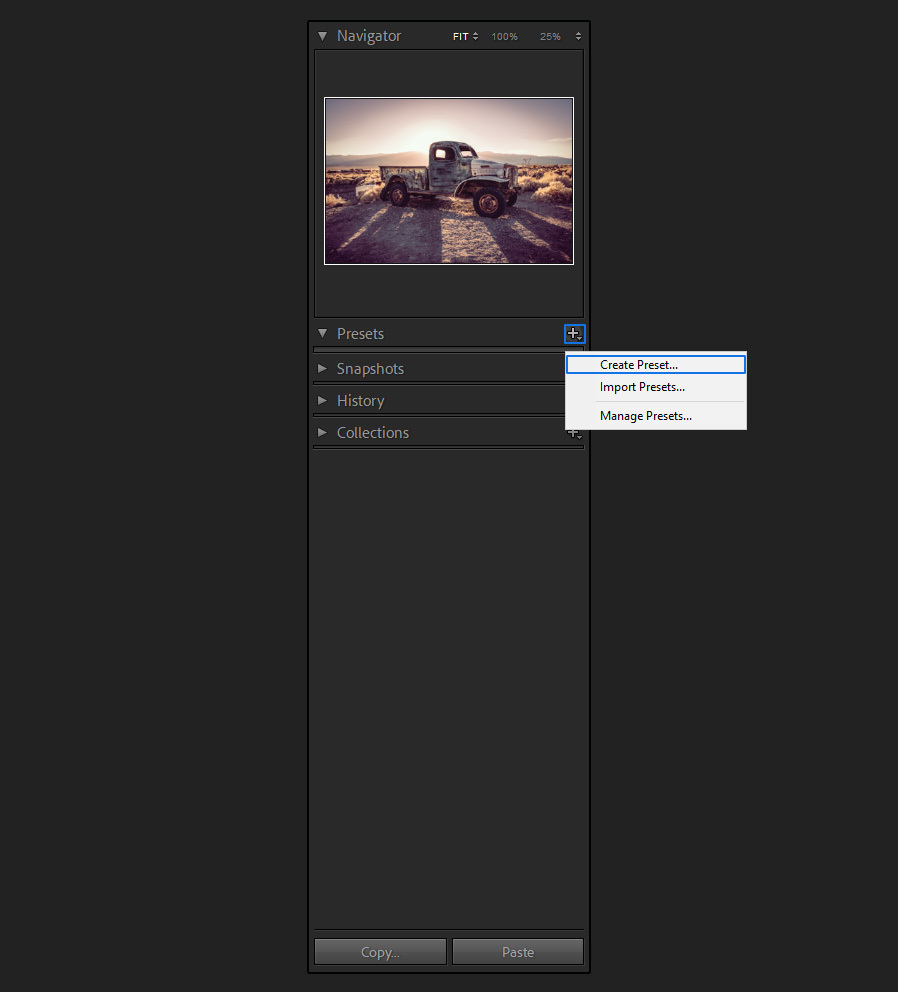
Step 10
Give the new preset a name, check the following settings and click "Create". Now, your new preset is available on your Presets panel ready to be used on your next photo.


