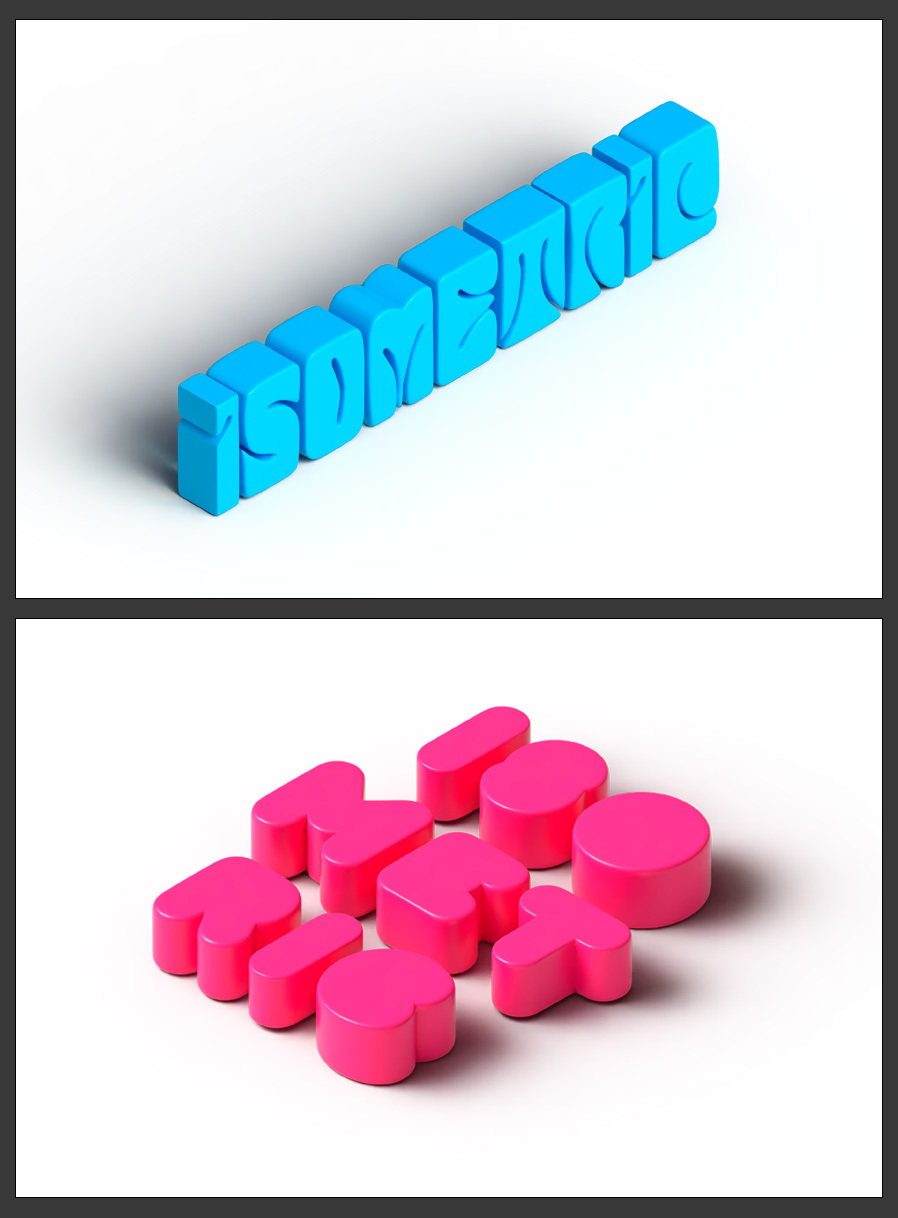
How to Easily Make an Editable Isometric 3D Text in Illustrator
Illustrator 3D Text Effects
In the latest Illustrator version, there are a few new and updated tools that will make your work easier than ever. Among those tools, there is a new one called "3D and Materials" - a new and improved version of the classic "Extrude and Bevel" tool (which is still available). It comes with a 3D panel and many different settings that will make the job easier when it comes to convert a flat design into a 3D one. So today, I will show you how we can use the new 3D panel in Illustrator to make a fully editable isometric 3D text in less than 5 minutes.
Step 1
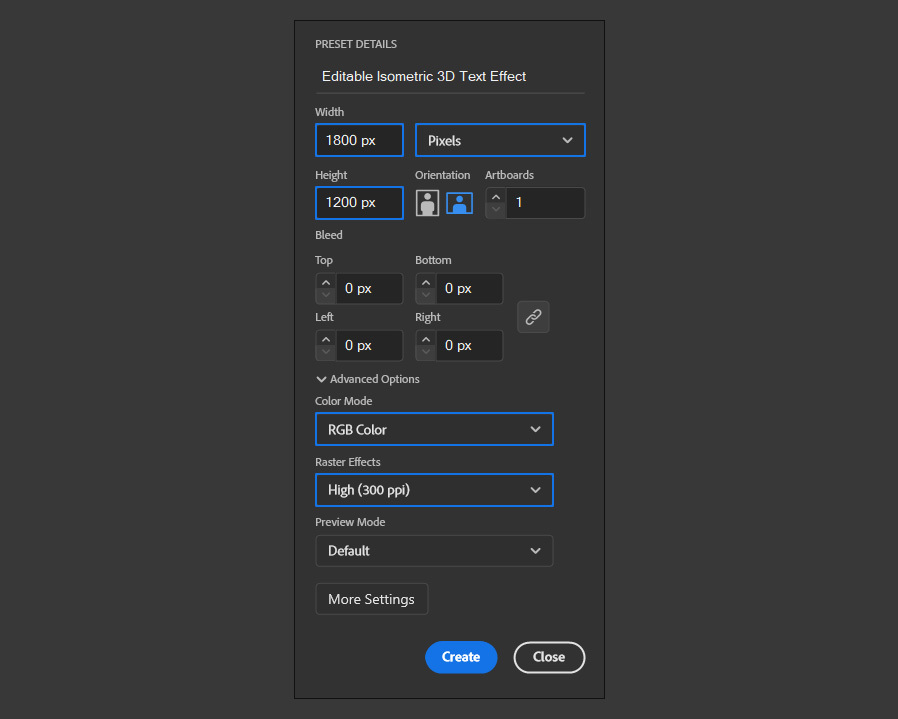
Open Illustrator and make a new file at any size you want. In this case, I will make mine at 1800 x 1200 px.
Step 2
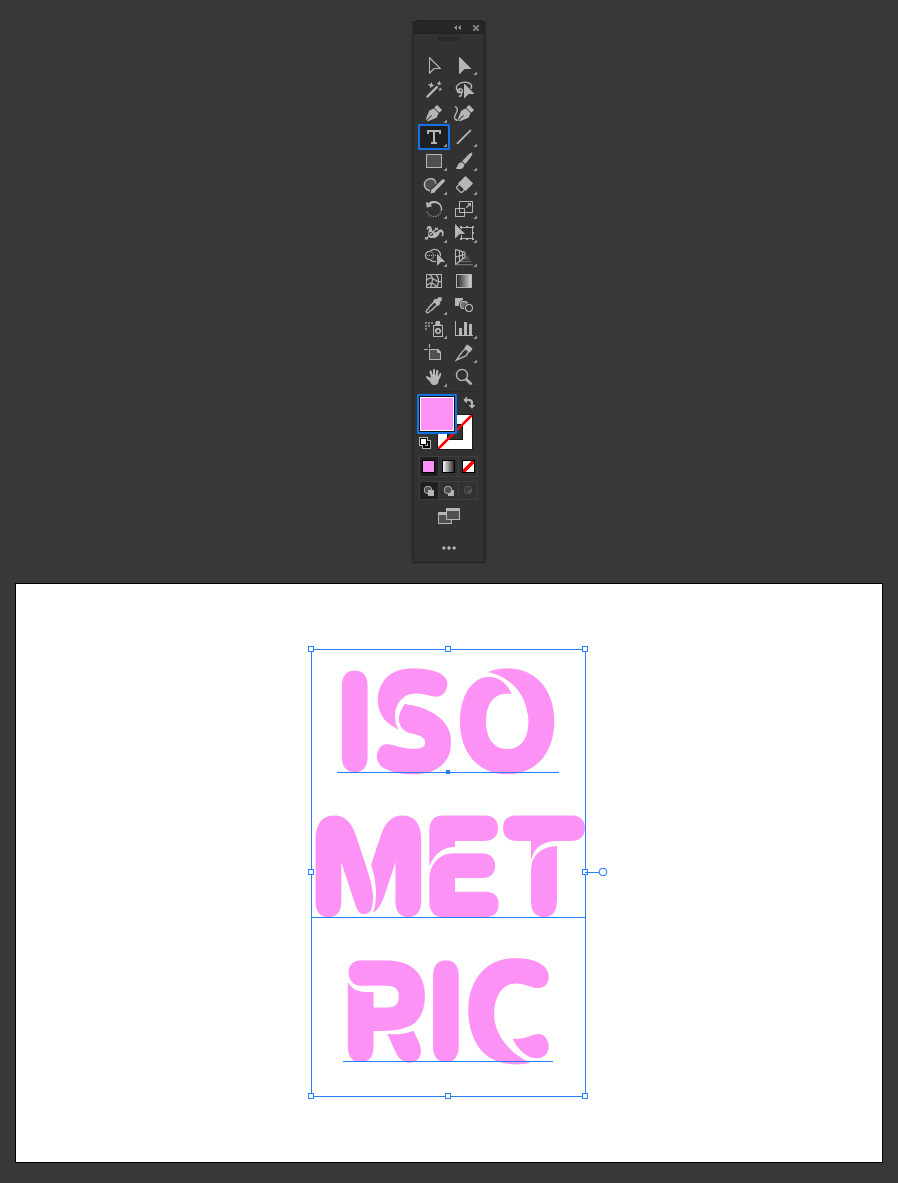
Select the Type Tool (T) and type your text using any font and color you want. I will be using the "Omegle Regular" typeface at 150 pt with the color set to #e491f2.
Step 3
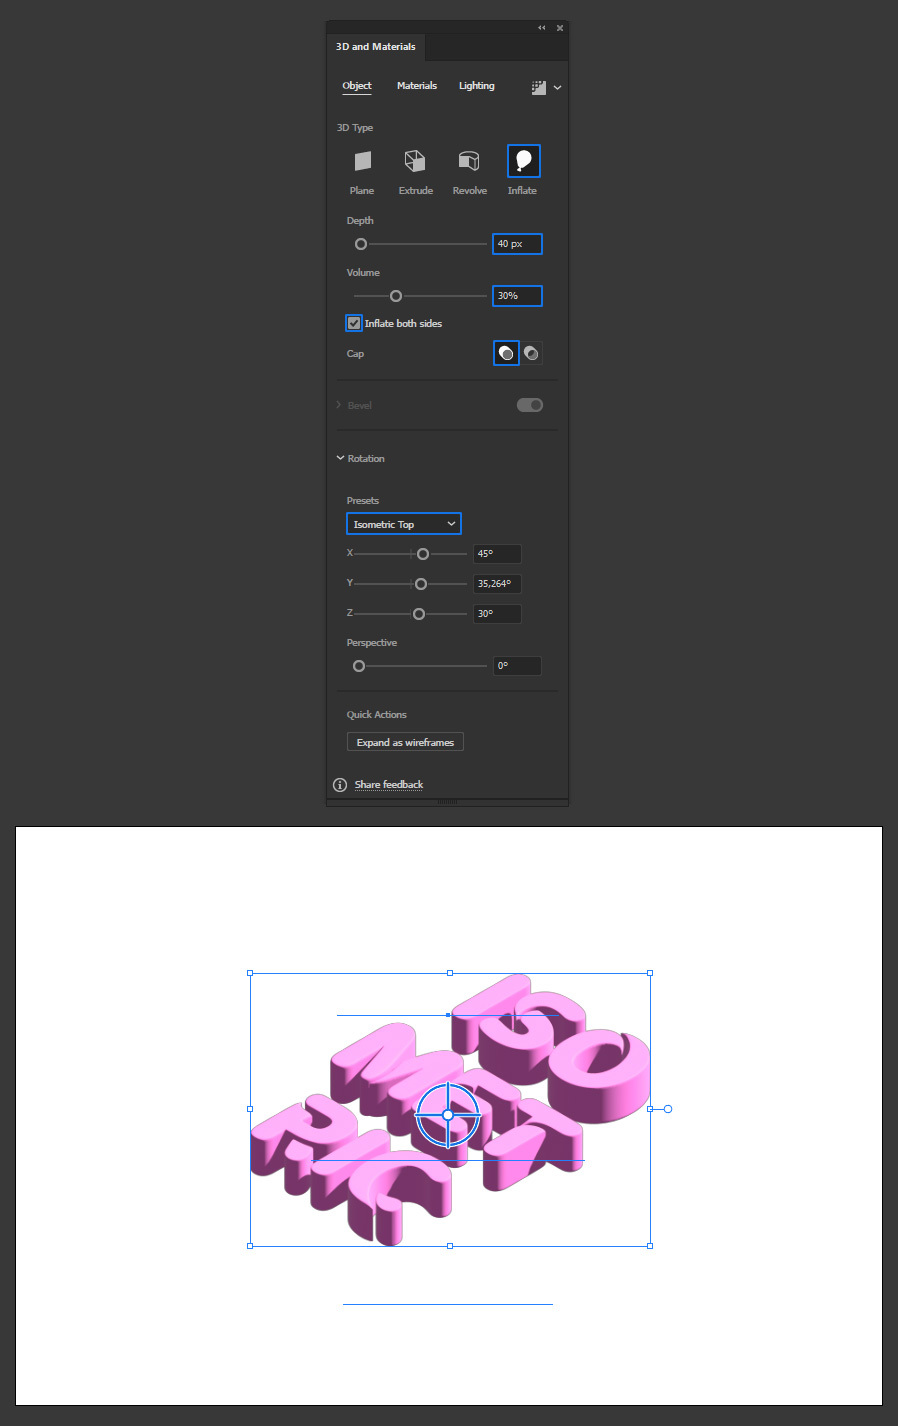
With the text selected go to Effect > 3D and Materials > Inflate.

Step 4
In the Inflate panel apply the following settings.
Step 5
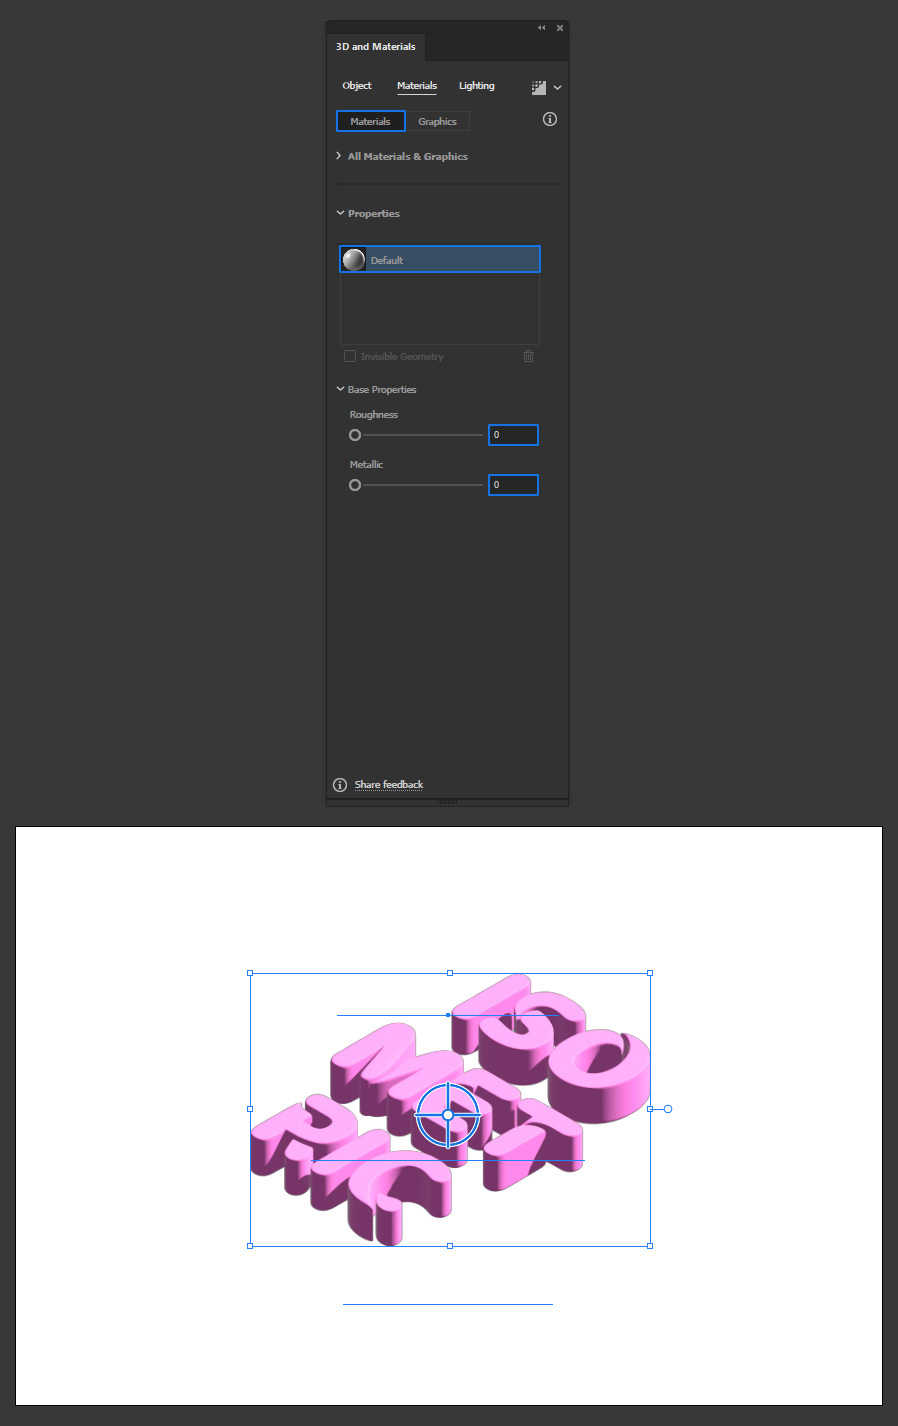
Select the "Material" panel and apply the following settings.
Step 6
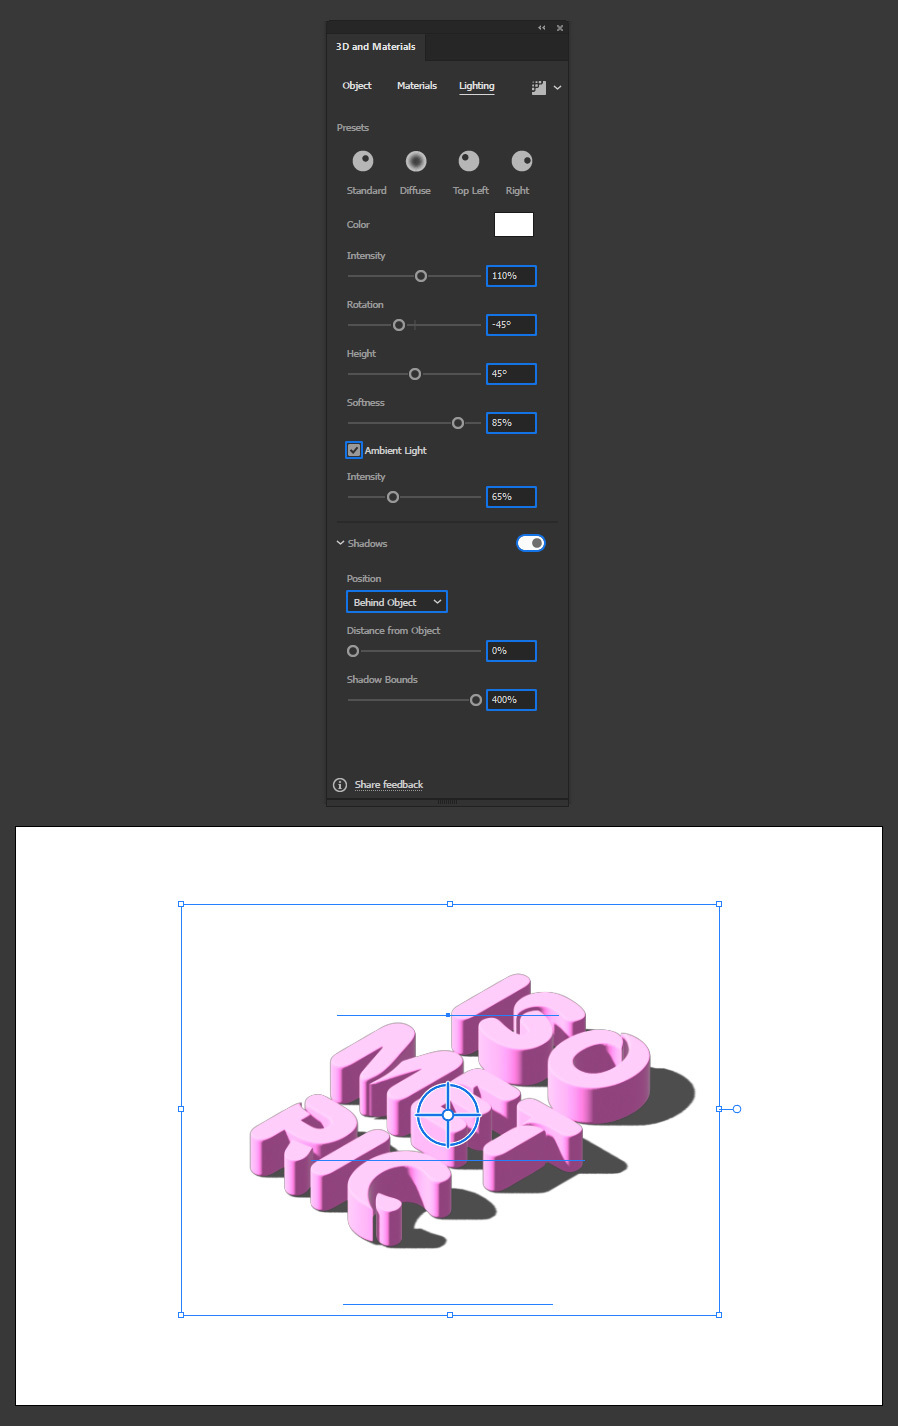
Next, select the "Lighting" panel and apply the following settings.
Step 7
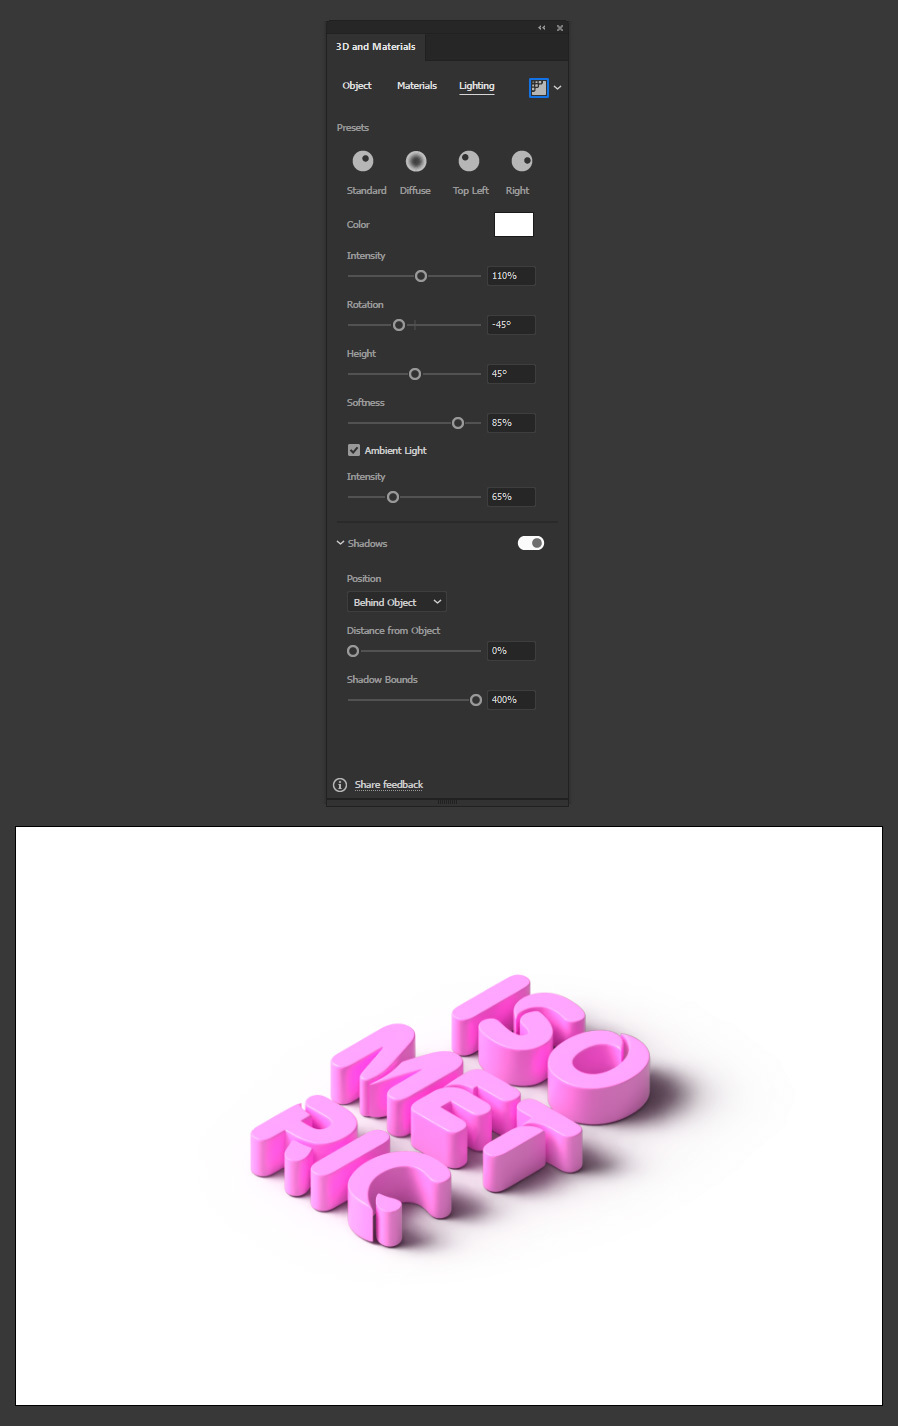
Lastly, click on the "Render with Ray Tracing" icon.
Conclusion
Now that you know how to make an editable Isometric 3D text in Illustrator, you can follow the same steps of this tutorial but using different settings for each of the panels to make your project unique. If you later want to change the text color, font, or size simply select the text with the Type Tool and edit your text as you normally do in Illustrator.
