How to Easily Make a Cartoon Effect From Any Photo in Photoshop
Photoshop Photo Effects
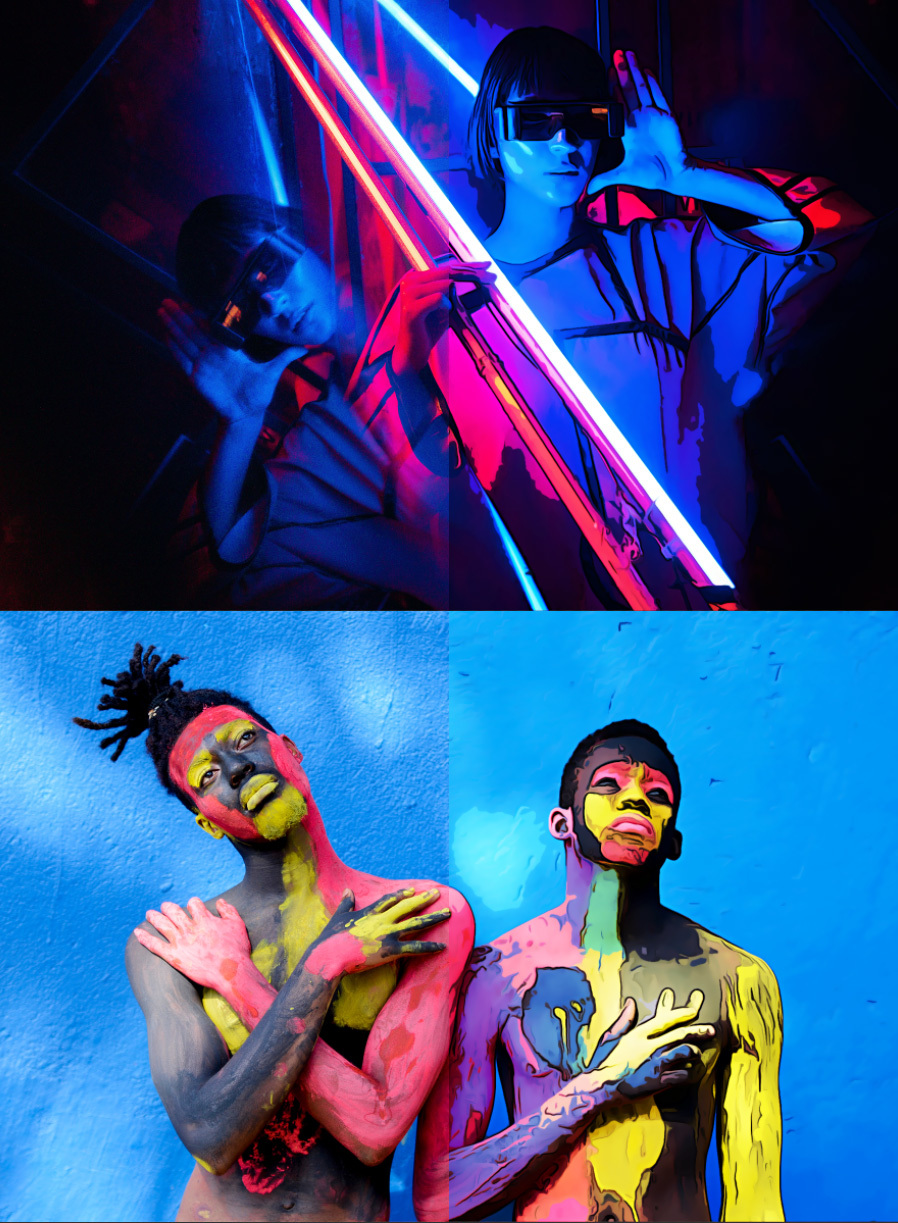
As we already know, in Photoshop there are many different ways to achieve a certain effect. Some methods can require a bit more of work, while some others are simpler and follows an easy process. Giving any image a cartoon-like effect is not the exception to the rule; it can be made in a lot of different ways. But today, I would like to show you a very easy process that will give your image (in fact, any image) a cartoon effect using only 1 single layer.
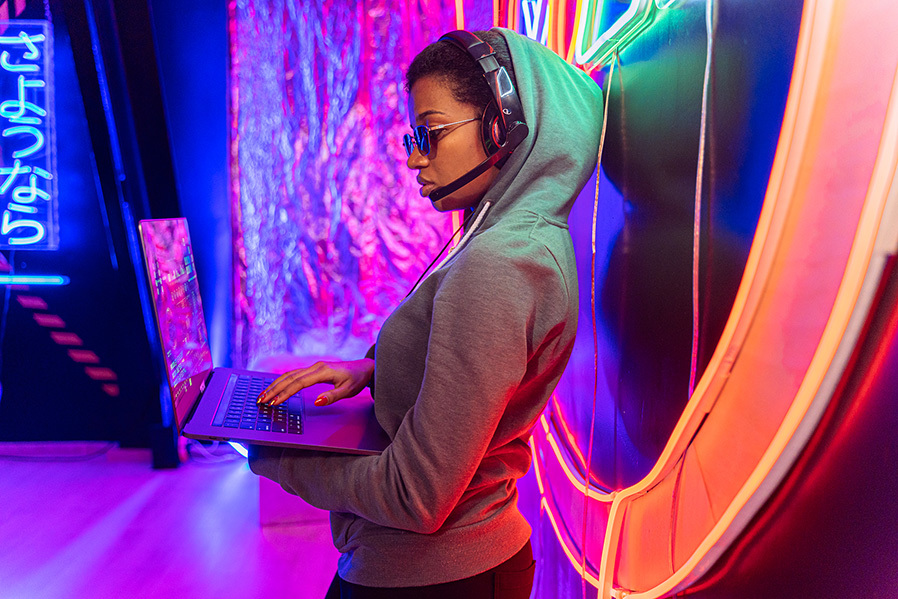
But before we begin, and if you want to follow this turorial exactly as described, please download the following free image from Pexels: Download.
Step 1
Open your image in Photoshop.
Step 2
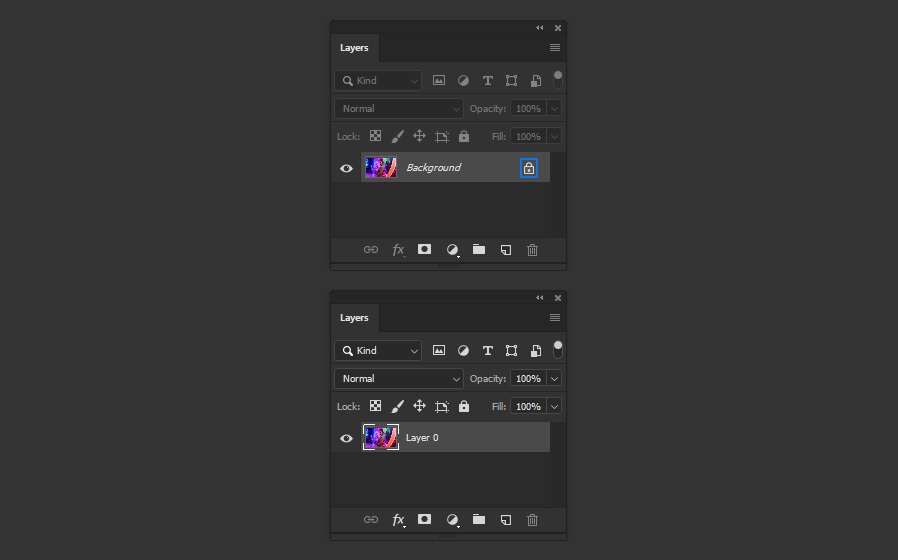
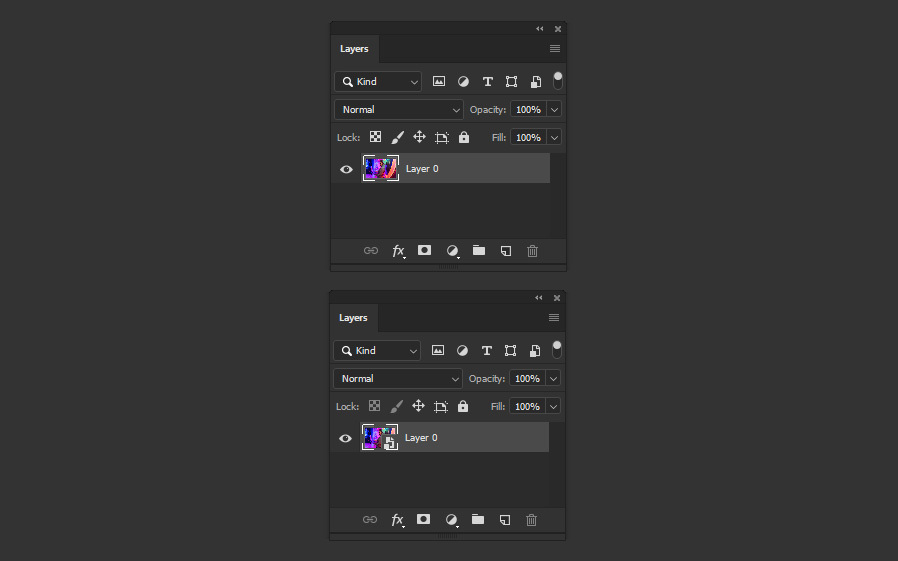
In the Layers Panel, click on the padlock icon to unlock the layer.
Step 3
Go to Layer > Smart Objects > Convert to Smart Object.
Step 4
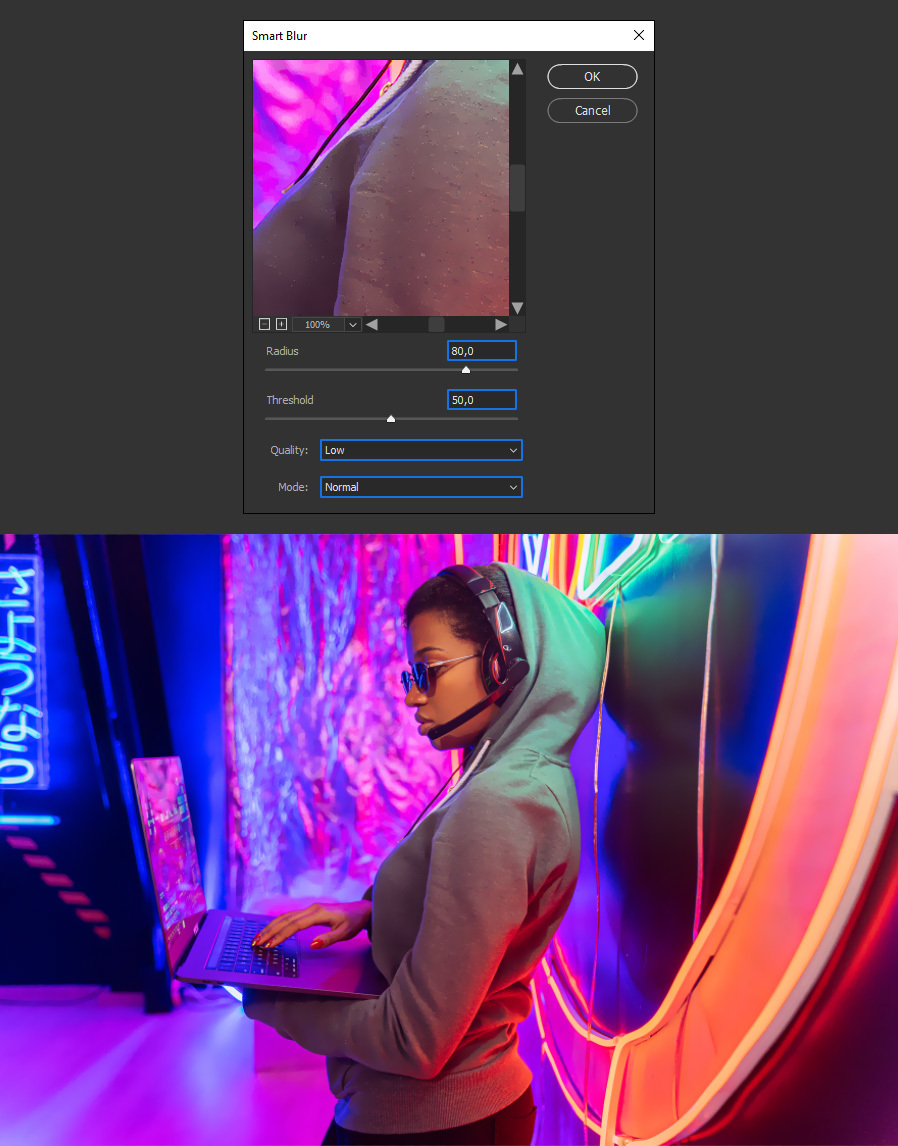
Go to Filter > Blur > Smart Blur. Apply the following settings and click OK.
Step 5
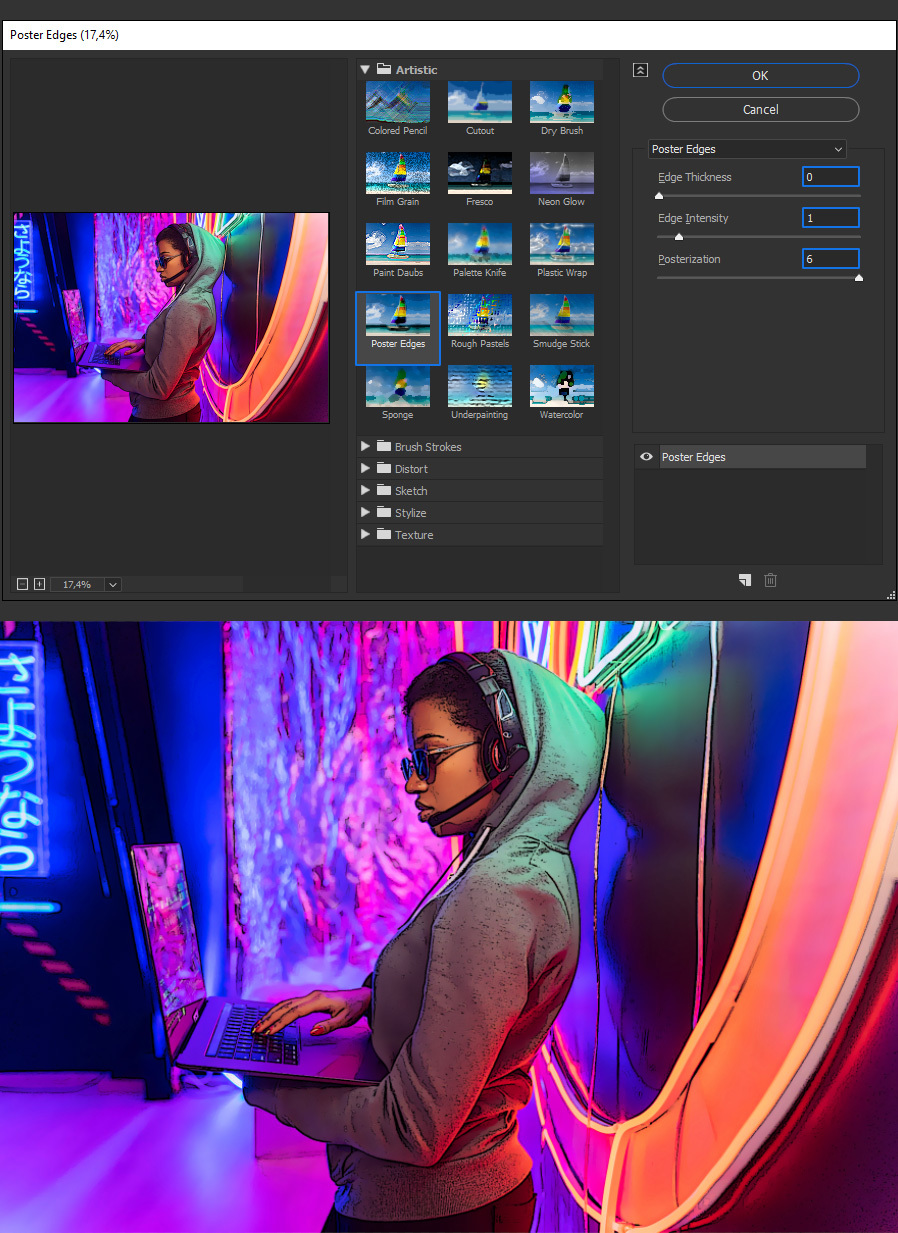
Go to Filter > Filter Gallery. Locate the "Poster Edges" effect under the Artistic tab, apply the following settings and click OK.
Step 6
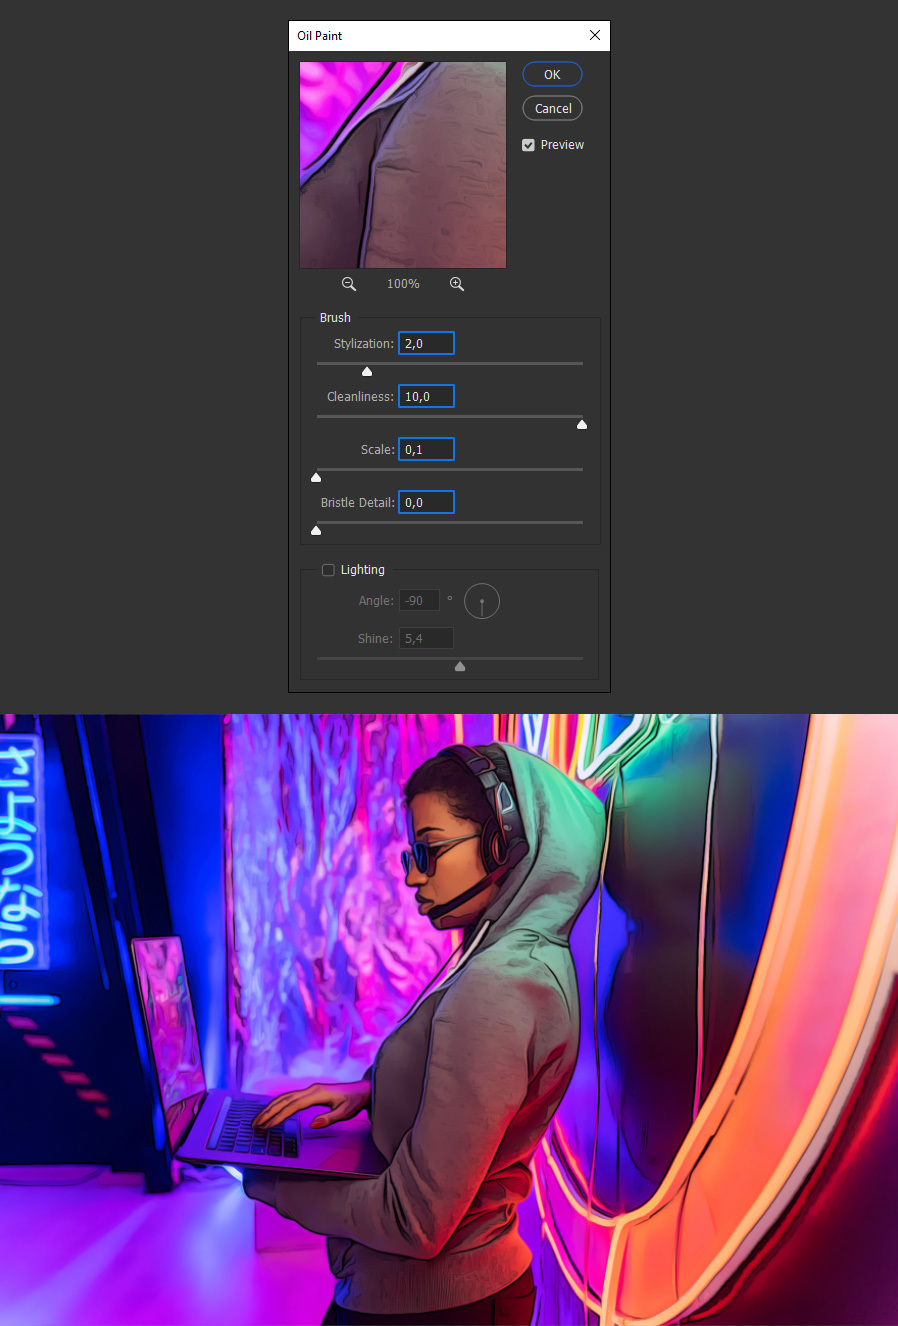
Go to Filter > Stylize > Oil Paint. Apply the following settings and click OK.
Step 7
Go to Filter > Sharpen > Unsharp Mask. Apply the following settings and click OK.
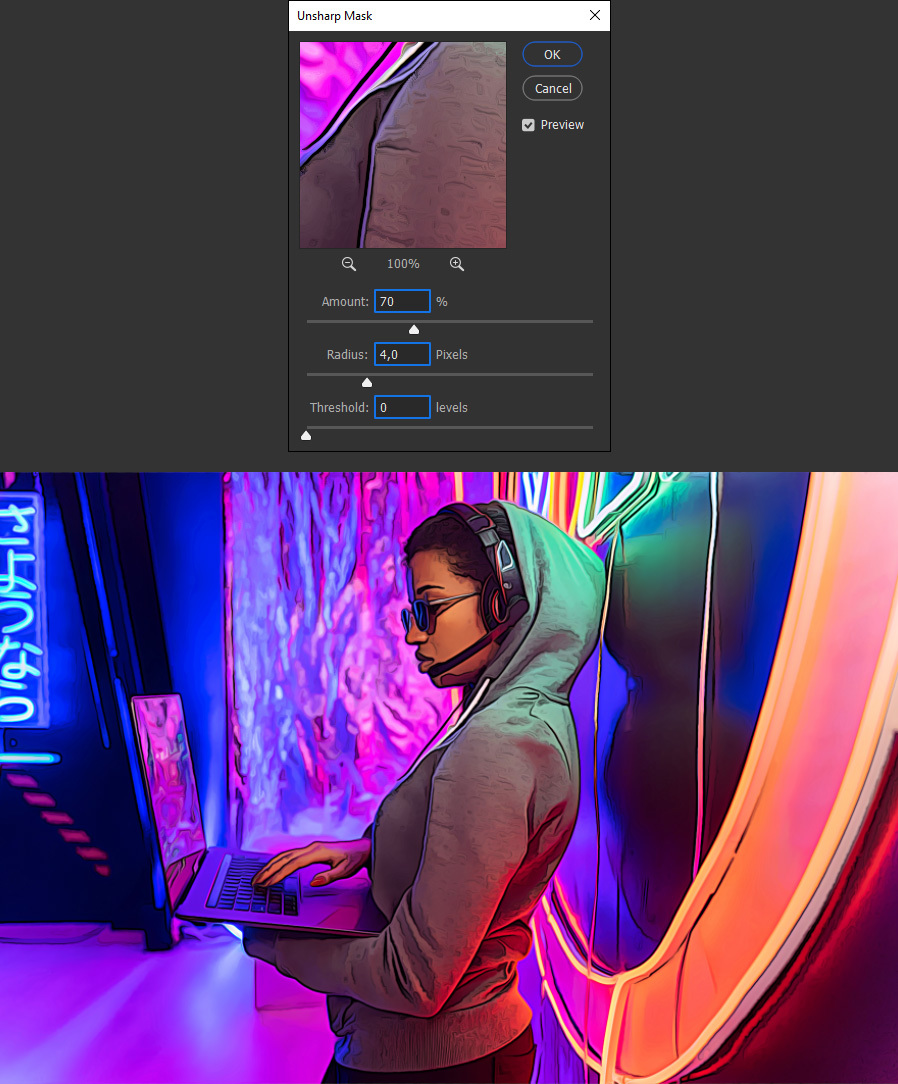
Step 8
Go to Filter > Blur > Smart Blur. Apply the following settings and click OK.
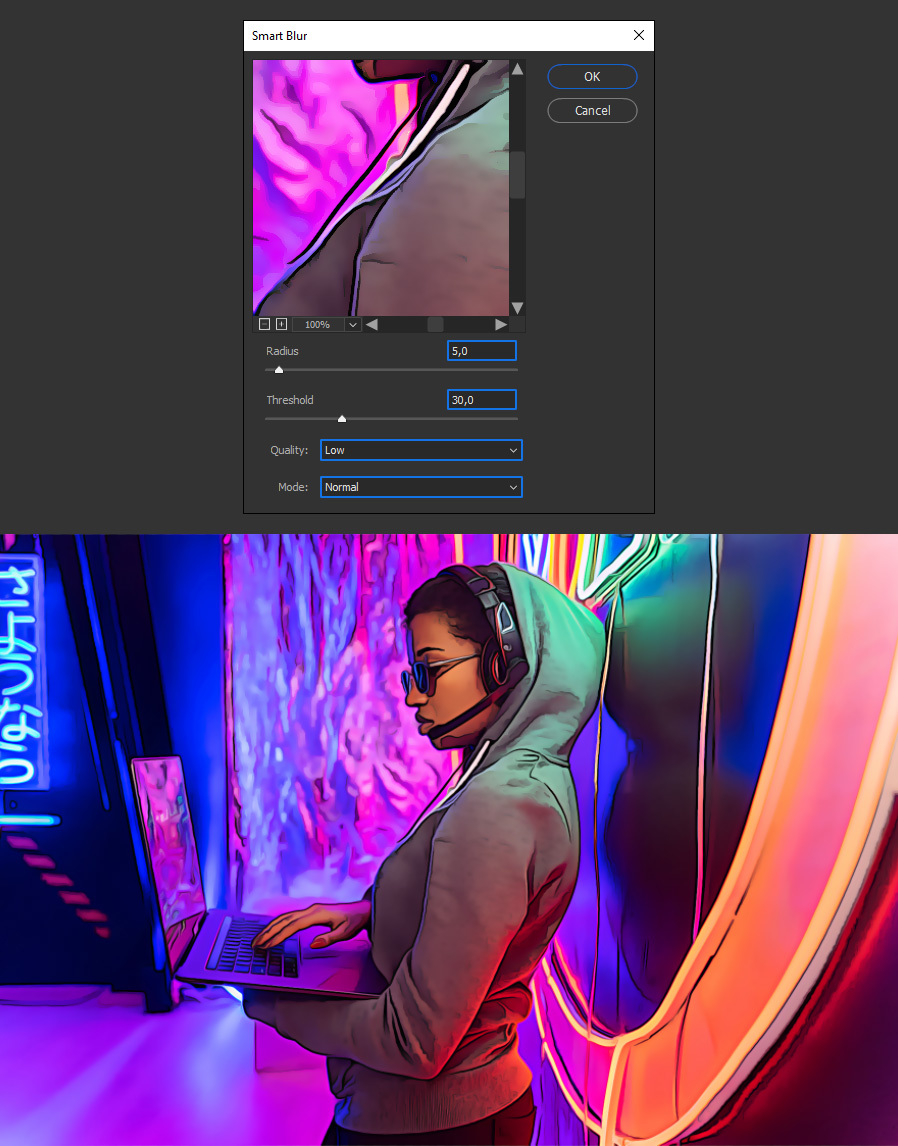
Step 9
Go to Filter > Filter Gallery. Locate the "Cutout" effect under the Artistic tab, apply the following settings and click OK.
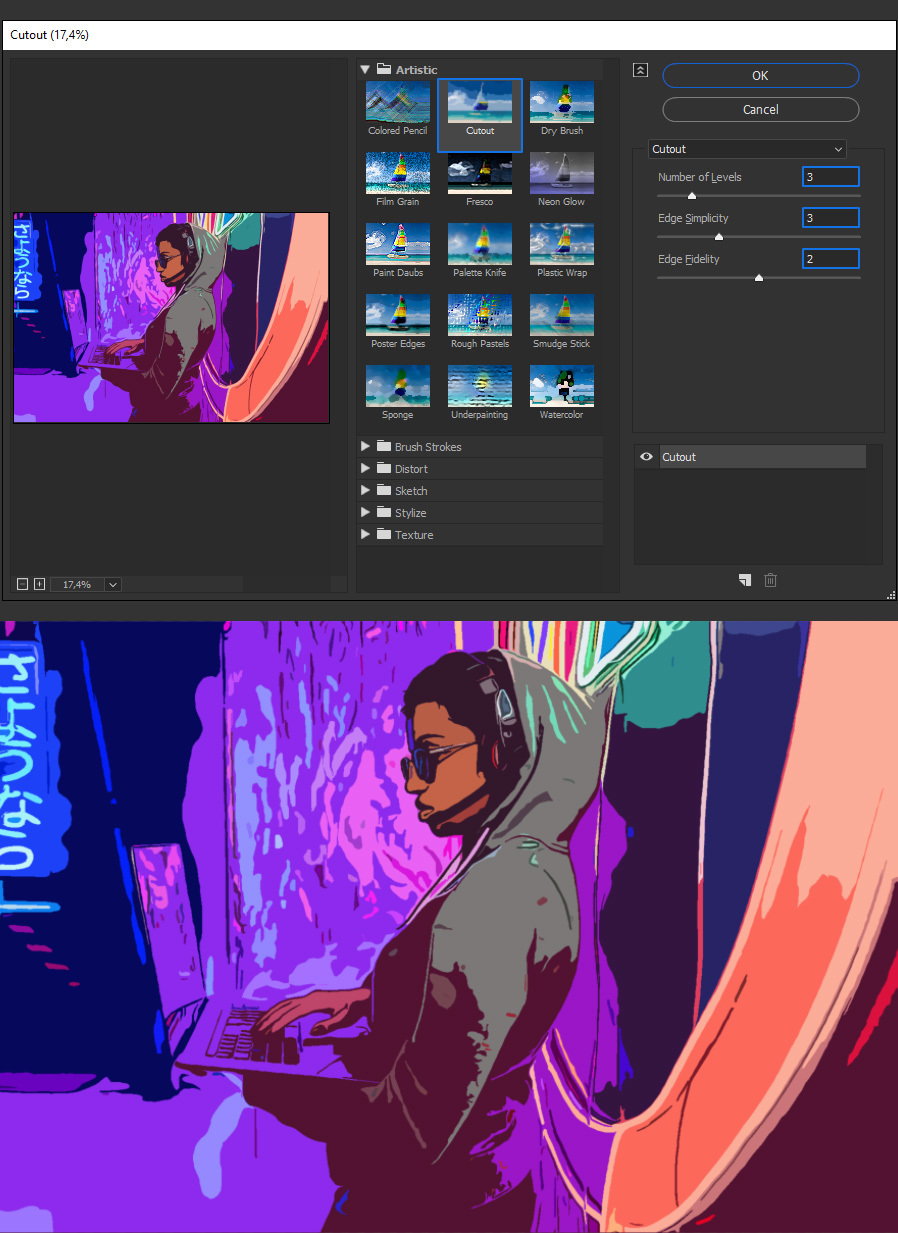
Step 10
Click on the arrow down of the Layers Panel to reveal the layer effects and double click on the "Edit Filter Blending Options" icon on the first effect on the list.
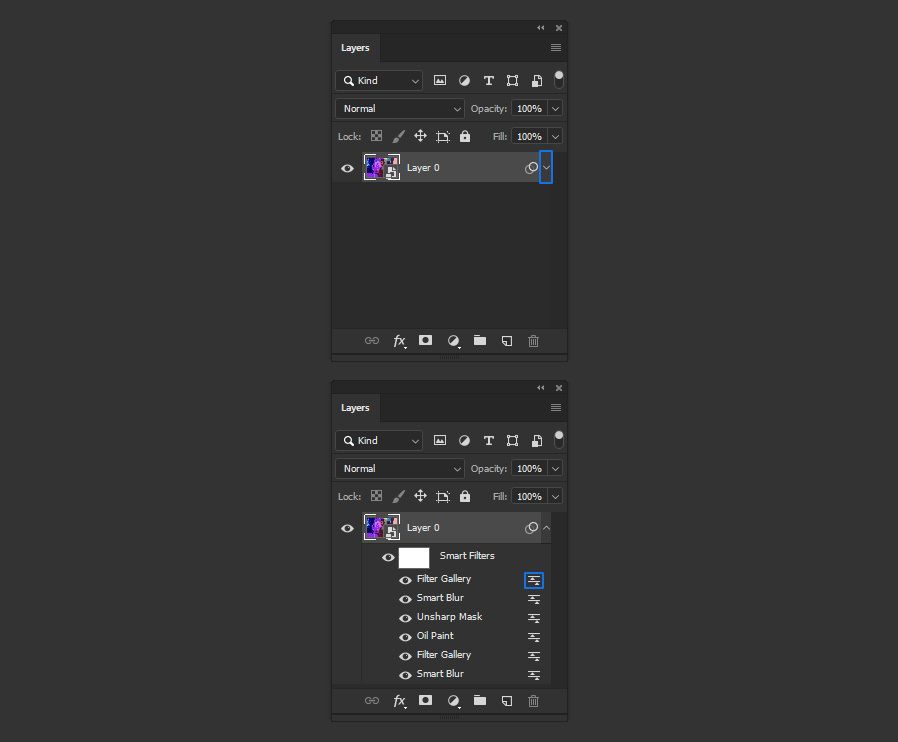
Step 11
In the Blending Options window, set the Mode to "Hard Light", bring down the Opacity to around 70% and click OK.

Step 12
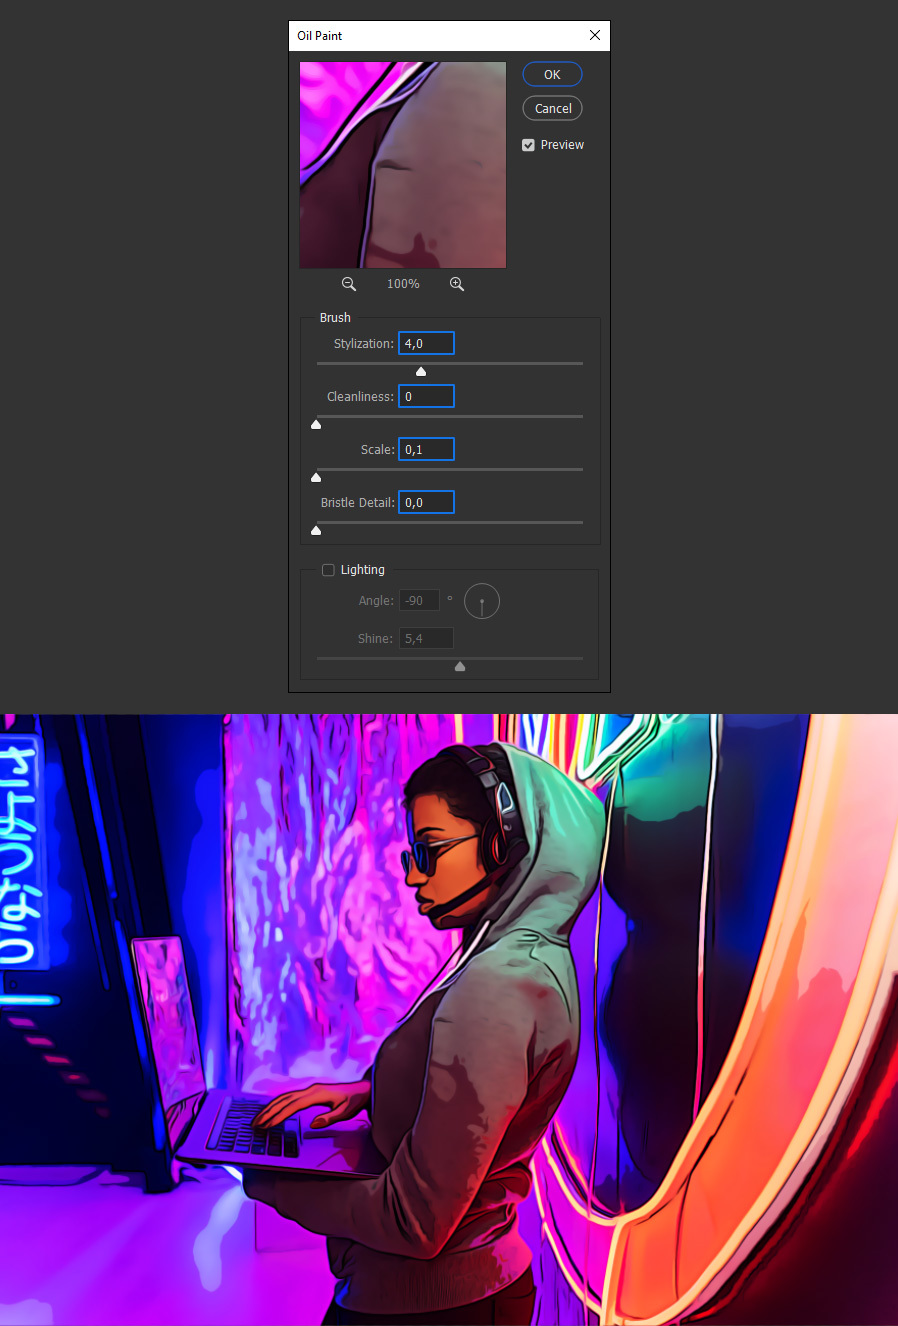
Go to Filter > Stylize > Oil Paint. Apply the following settings and click OK.
Step 13
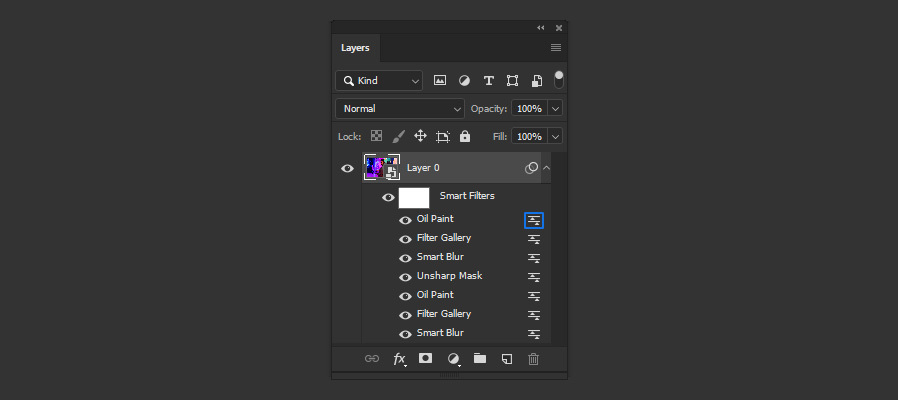
Double click on the "Edit the Filter Blending Options" icon on the first effect on the list.
Step 14
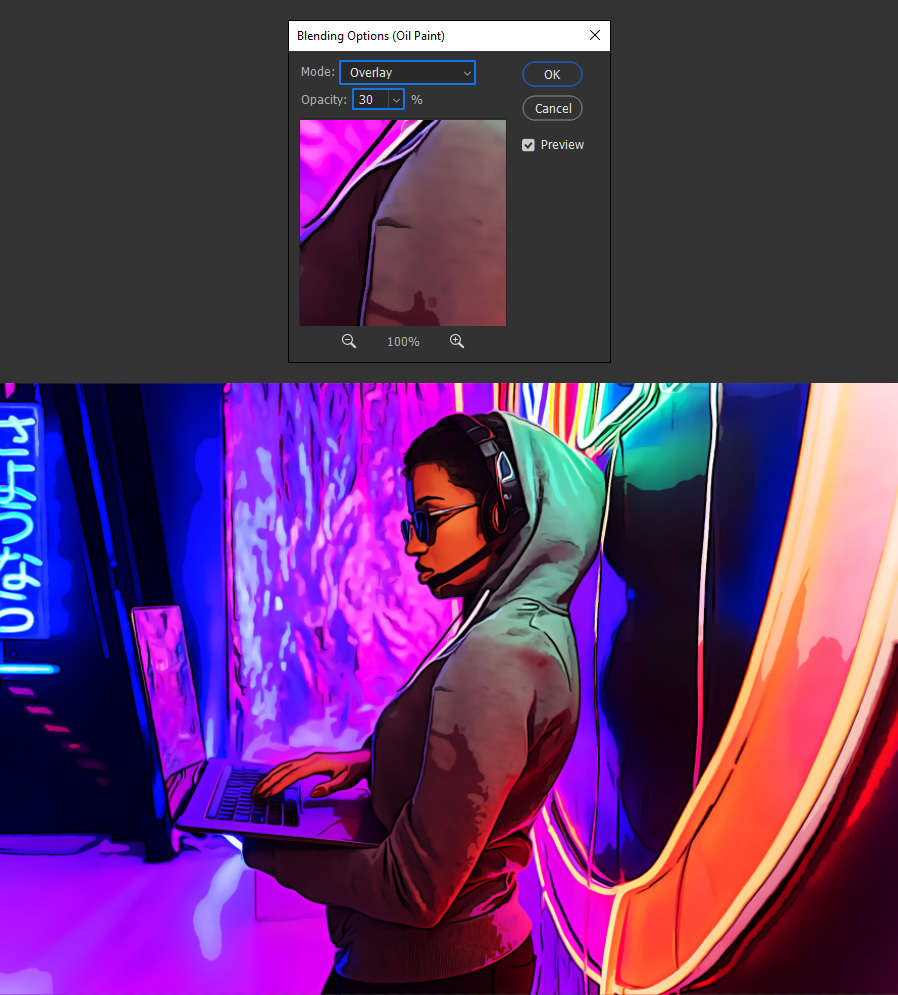
Set the Mode to "Overlay", bring down the Opacity to around 30% and click OK.
Step 15
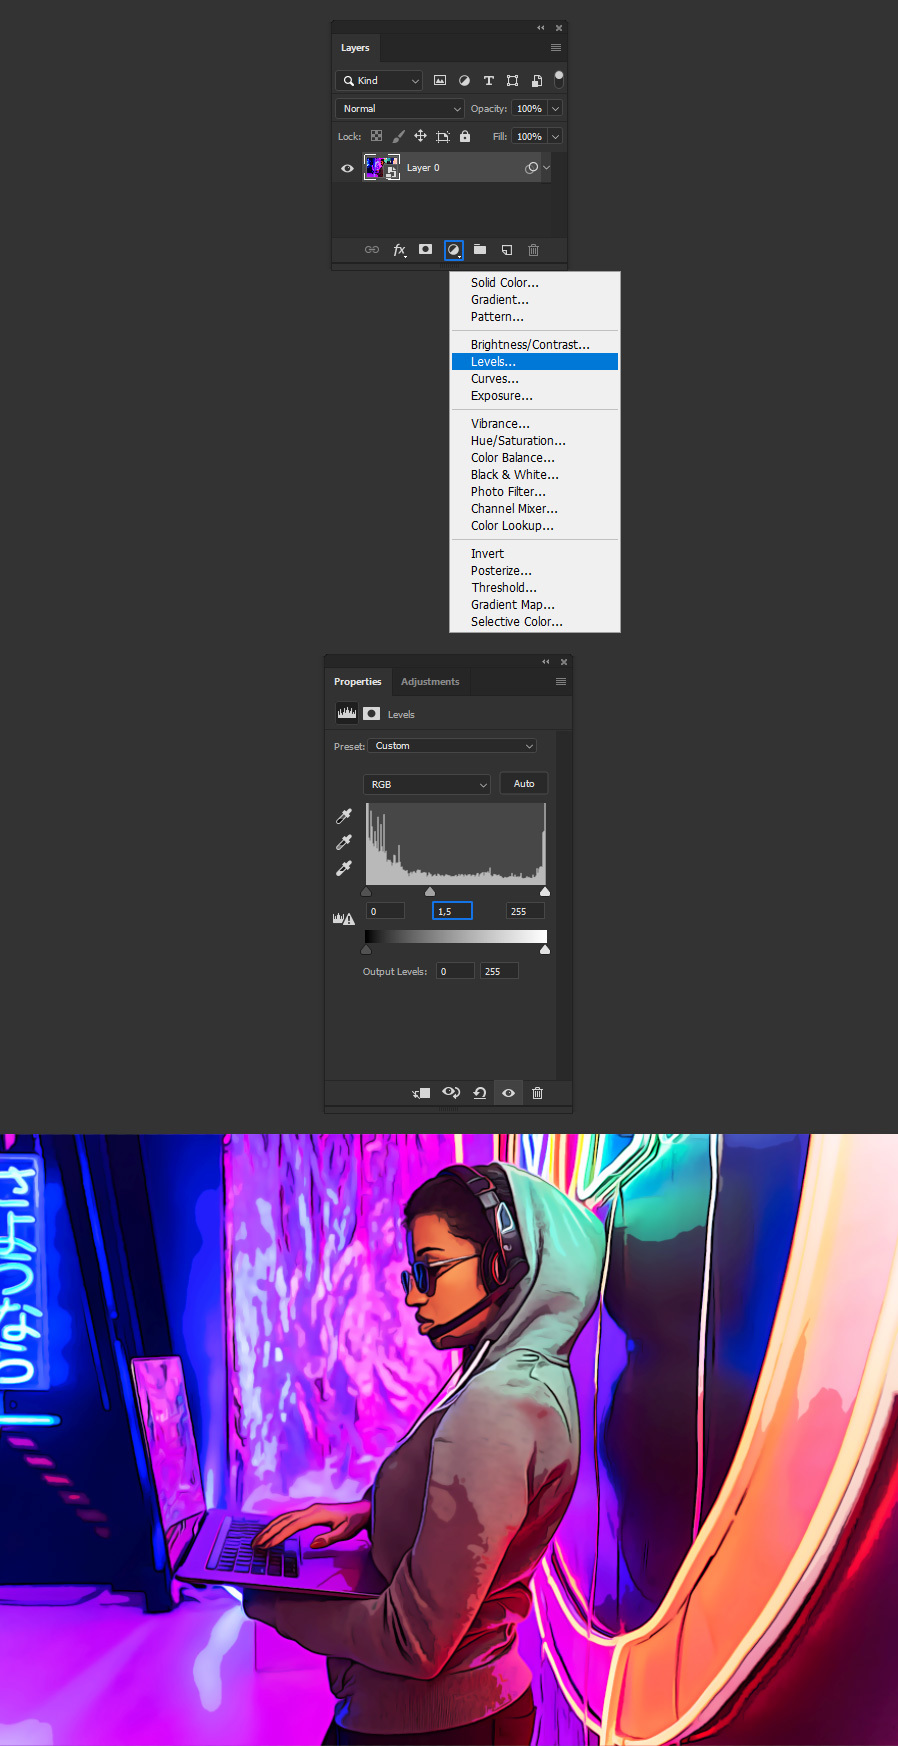
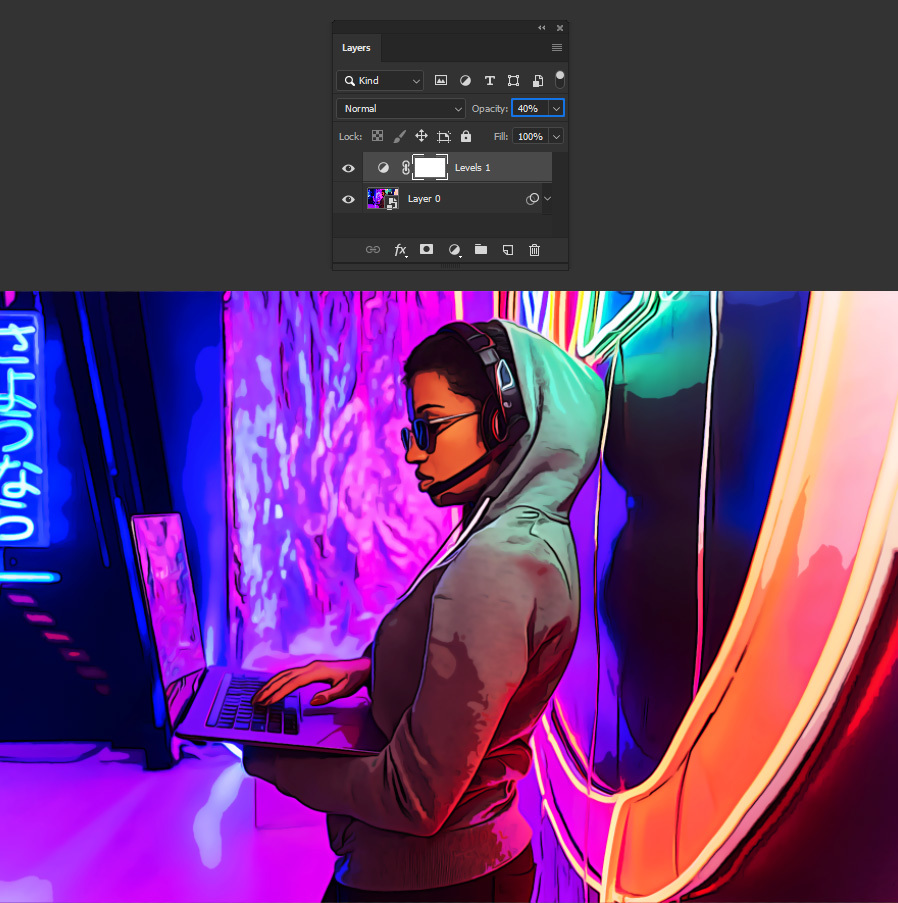
Click on the "Create New Fill or Adjustment Layer" icon in the Layers Panel, from the dropdown menu select "Levels" and set the Midtone Input Level to 1,5.
Step 16
Lastly, bring down the Levels layer Opacity to 40%.
Some Final Notes:
As we first converted the image into a Smart Object, is easy to use this effect on any other image. Simply double click on the layer thumbnail, in the new opened document place your image, save and close the smart object and you will have your new image with a cartoon effect without effort.
