How to Easily Improve a Urban Image in Photoshop
Photoshop Post-Processing Techniques
Improving a picture taken on a urban enviroment it is a very easy task that can be made in Photoshop by using only the Camera RAW Filter. Although the values you use will depend on your particular image, the values you will see here in this tutorial can be used as a good basis for any urban image, and then you can adjust these values to fine-tune your image because we will use a non-destructive process.
But before we begin, and if you want to follow this tutorial exactly as described, please download the following image from Pexels: Download.
Step 1
Open your image in Photoshop.

Step 2
Go to Layer > Smart Objects > Convert to Smart Object.
Note: We only do this just in case you want to go back and change some settings after the effect has been applied.
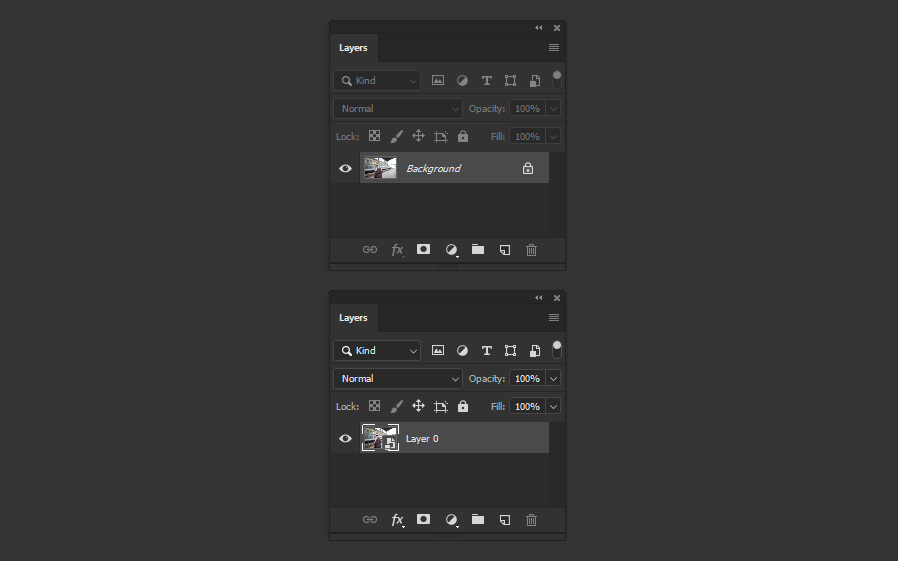
Step 3
Go to Filter > Camera Raw Filter.
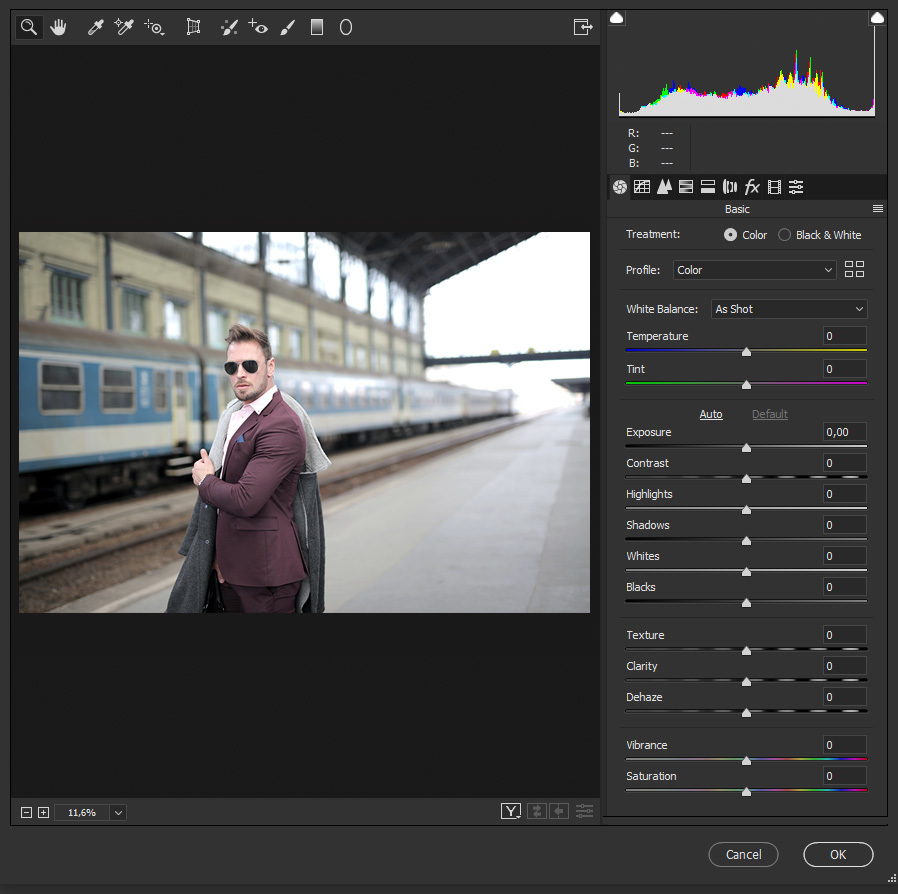
Step 4
In the Basic tab, apply the following values.
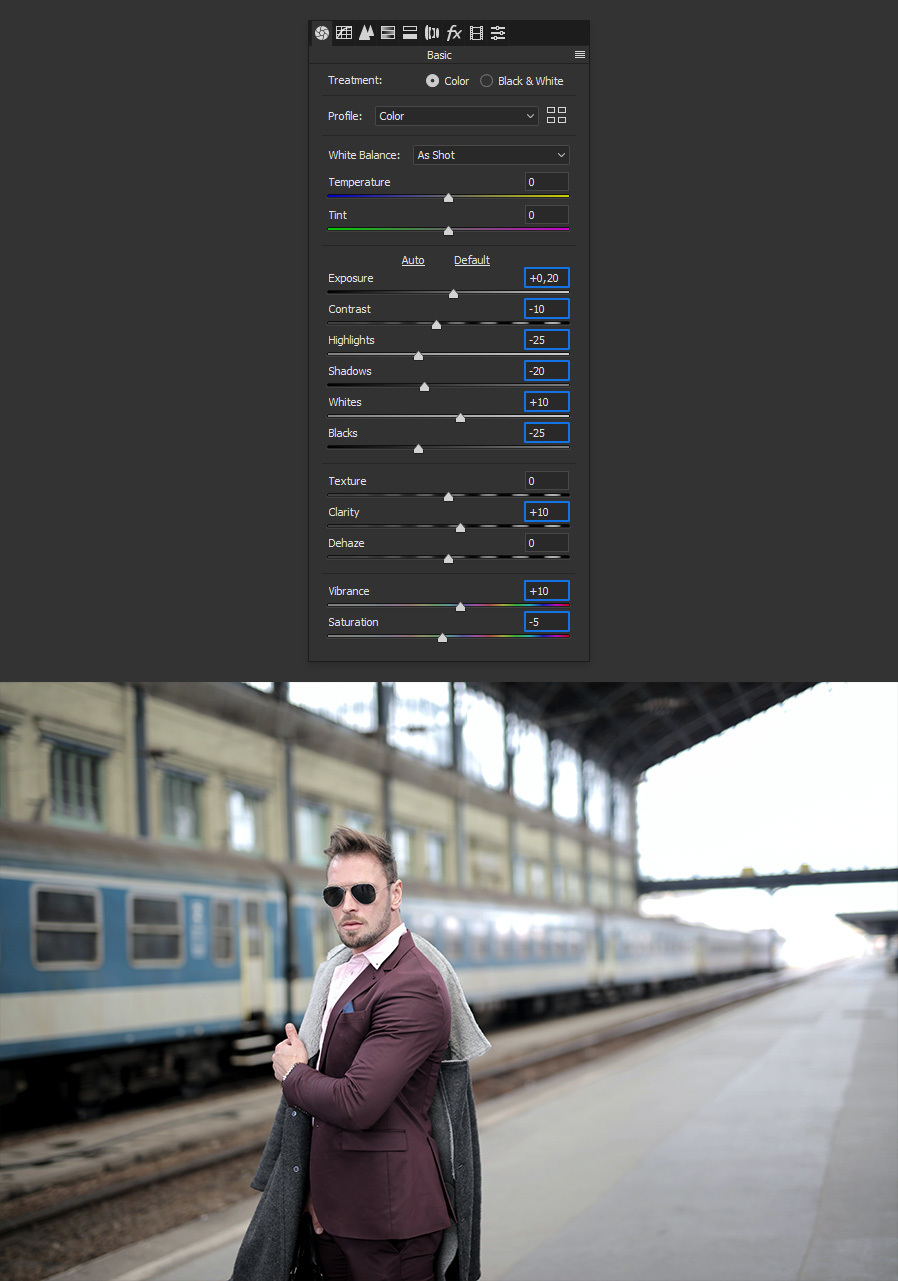
Step 5
Go to the Tone Curve tab, and under Parametric apply the following settings.
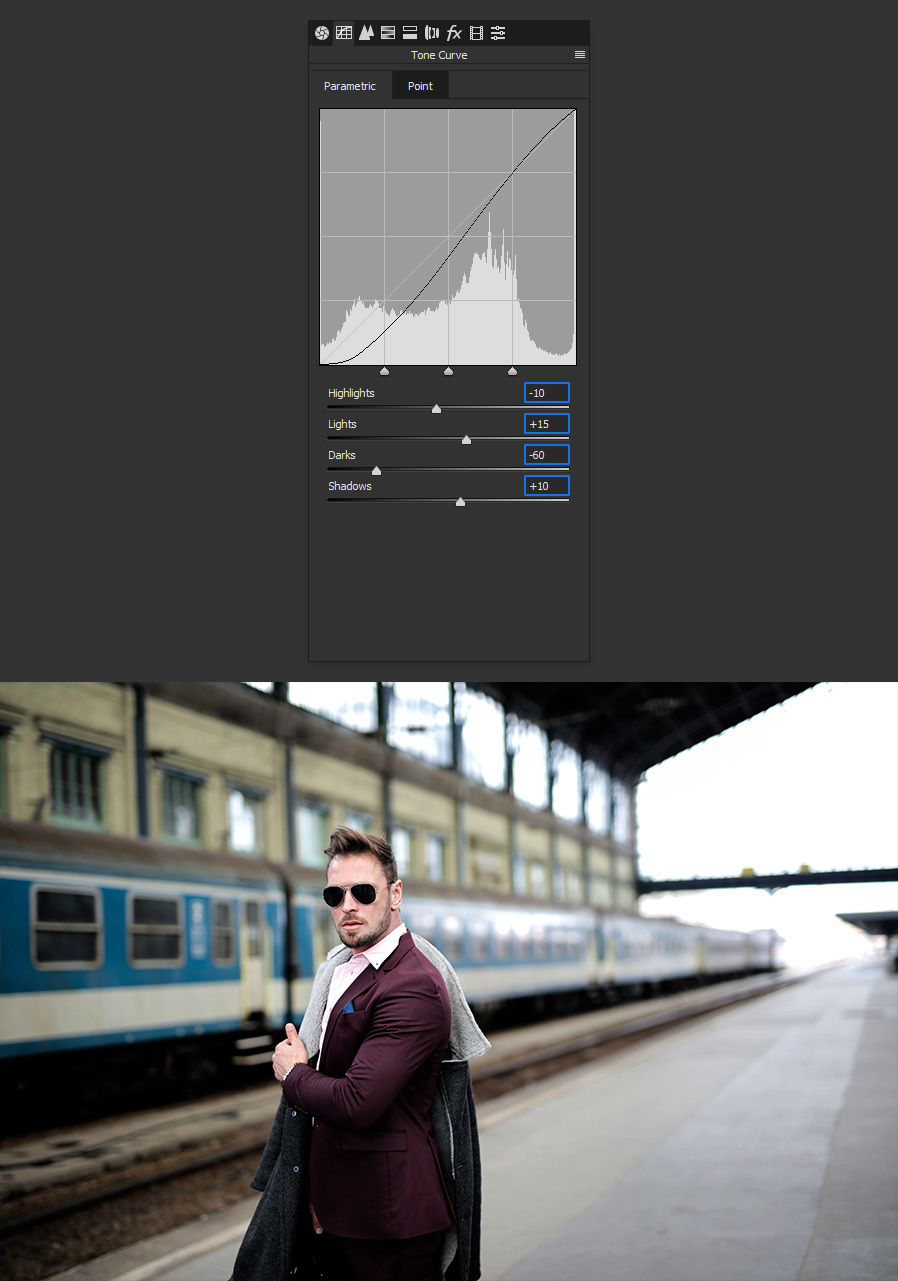
Step 6
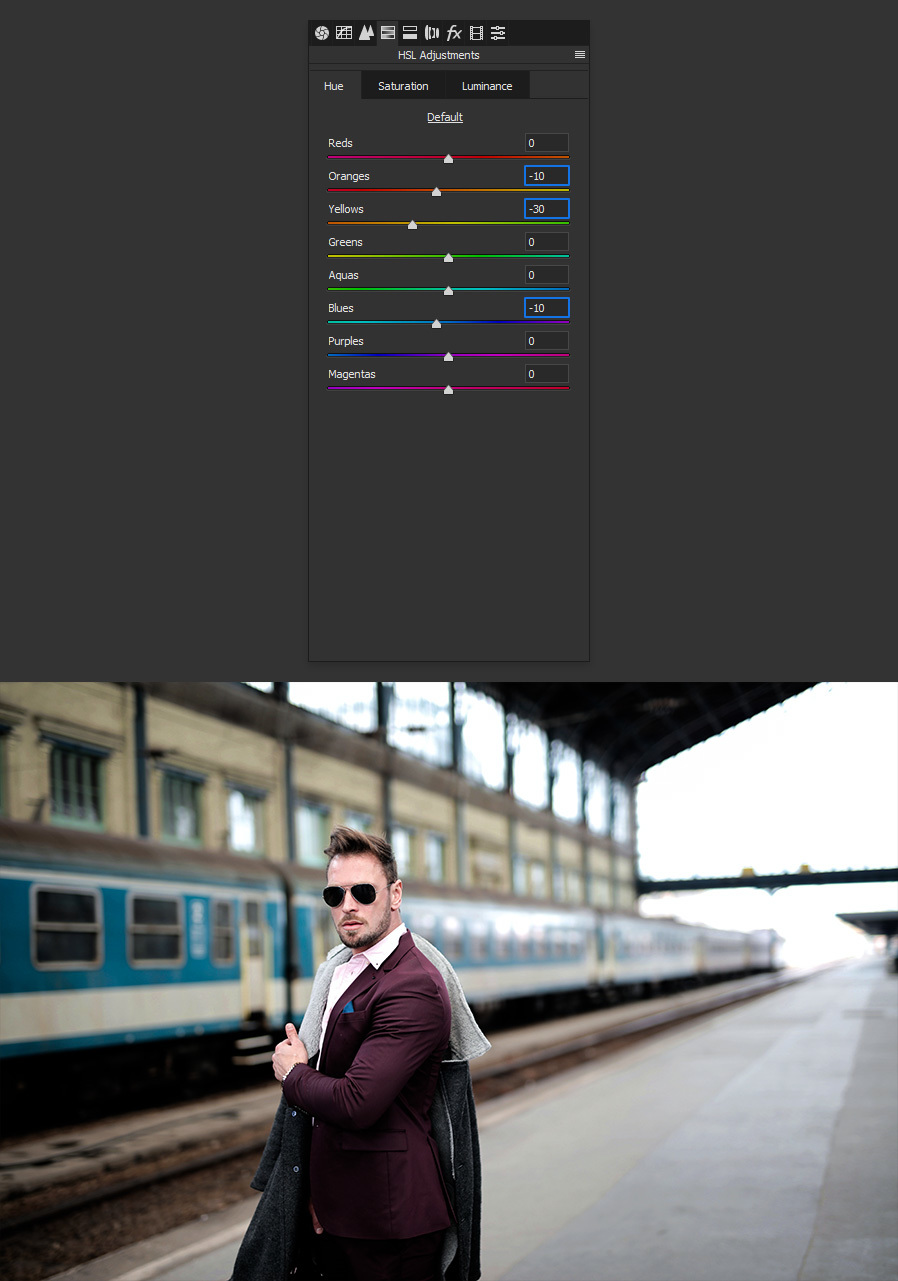
Go to the HSL Adjustments tab and under Hue apply the following values.
Step 7
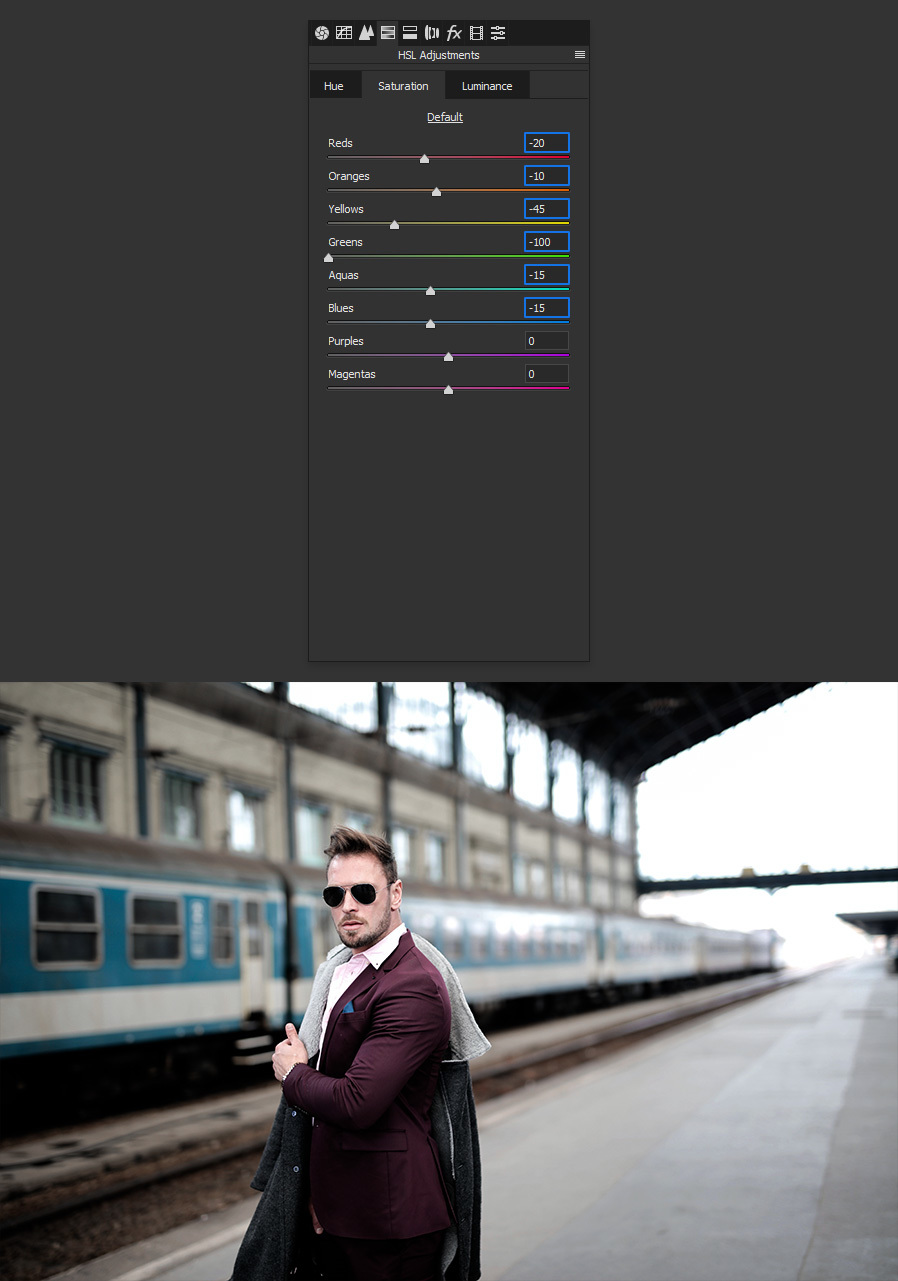
Now, click on the Saturation tab under the HSL Adjustments and apply the following values.
Step 8
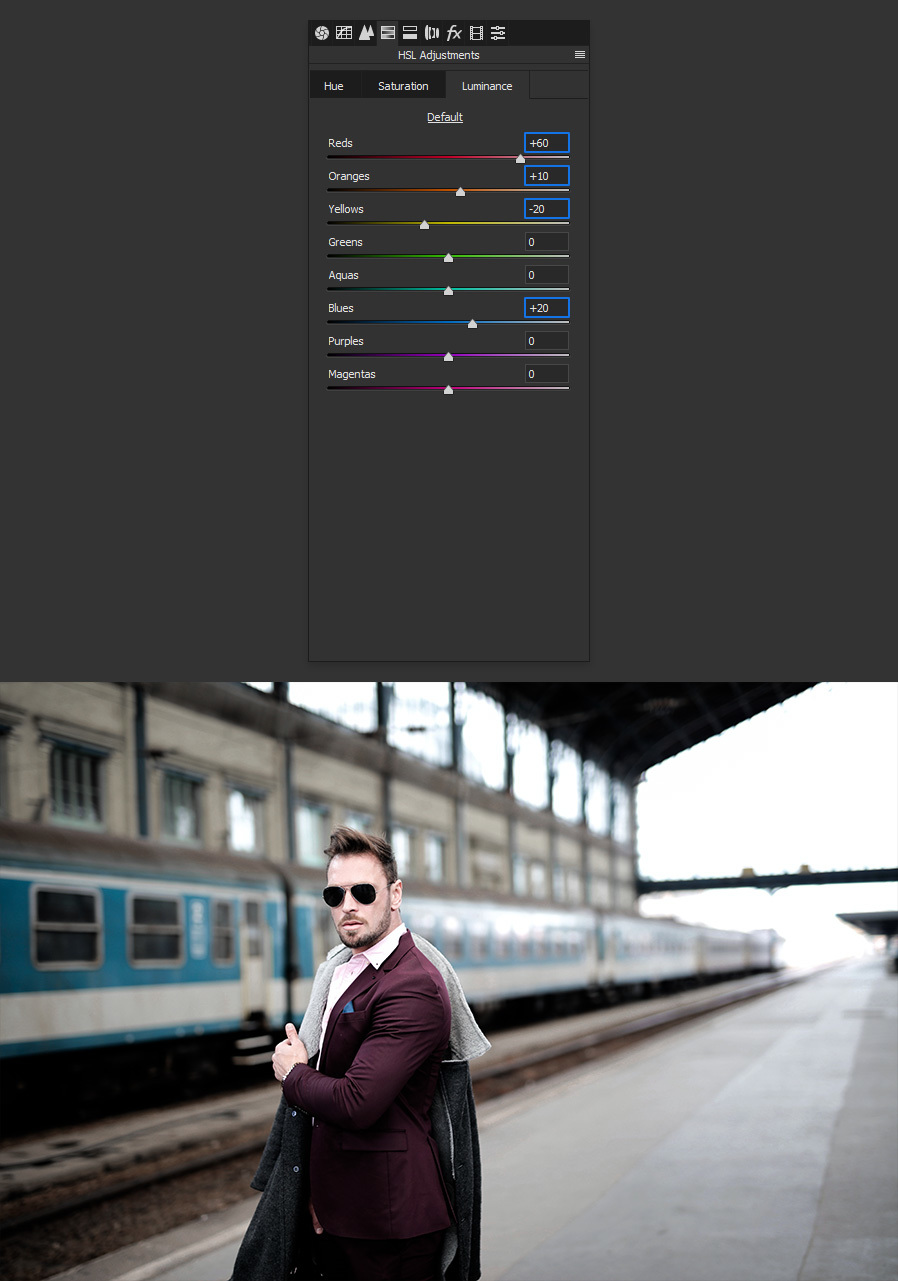
Still in the HSL Adjustments tab, go to Luminance and apply the following values.
Step 9
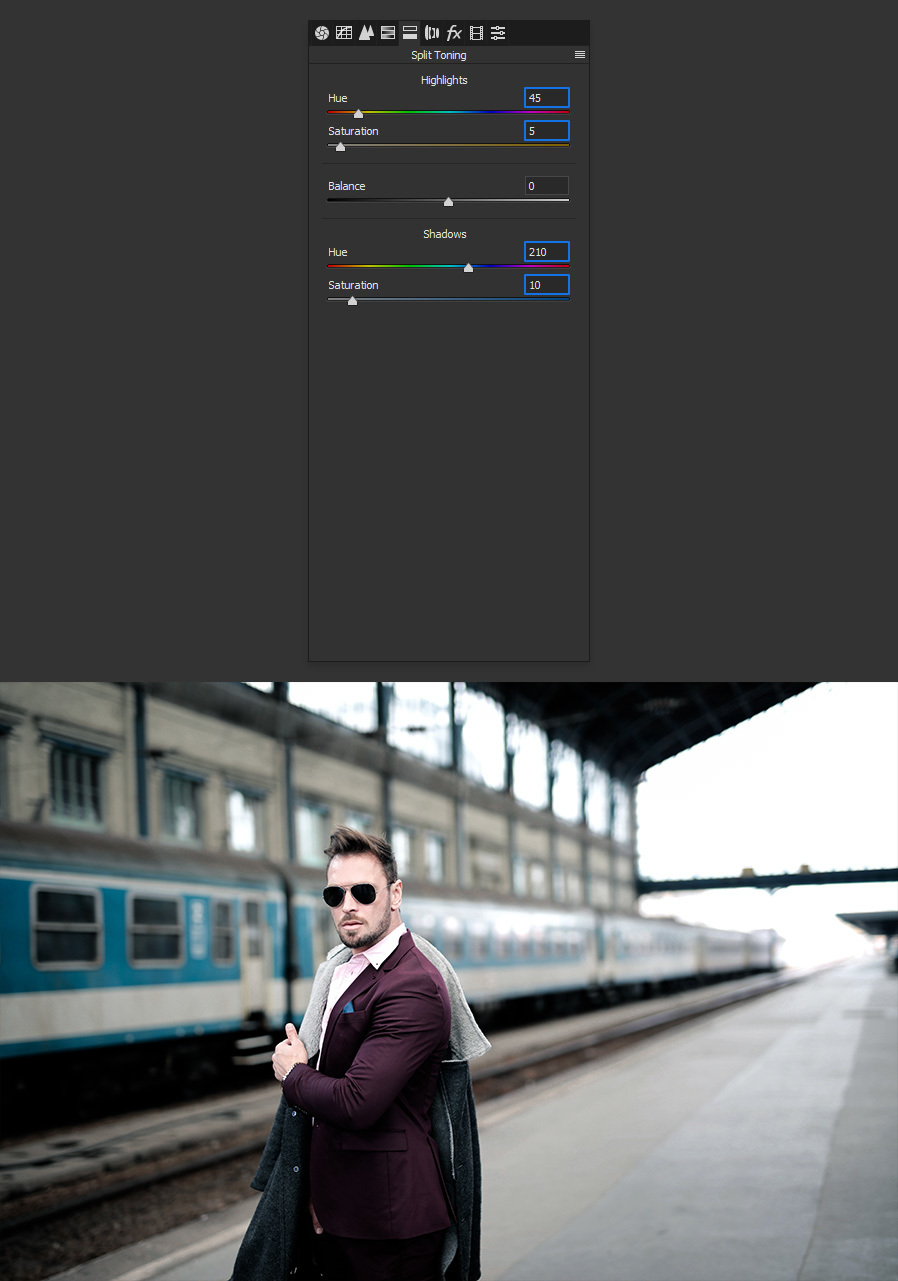
Go to the Split Toning tab and apply the following values.
Step 10
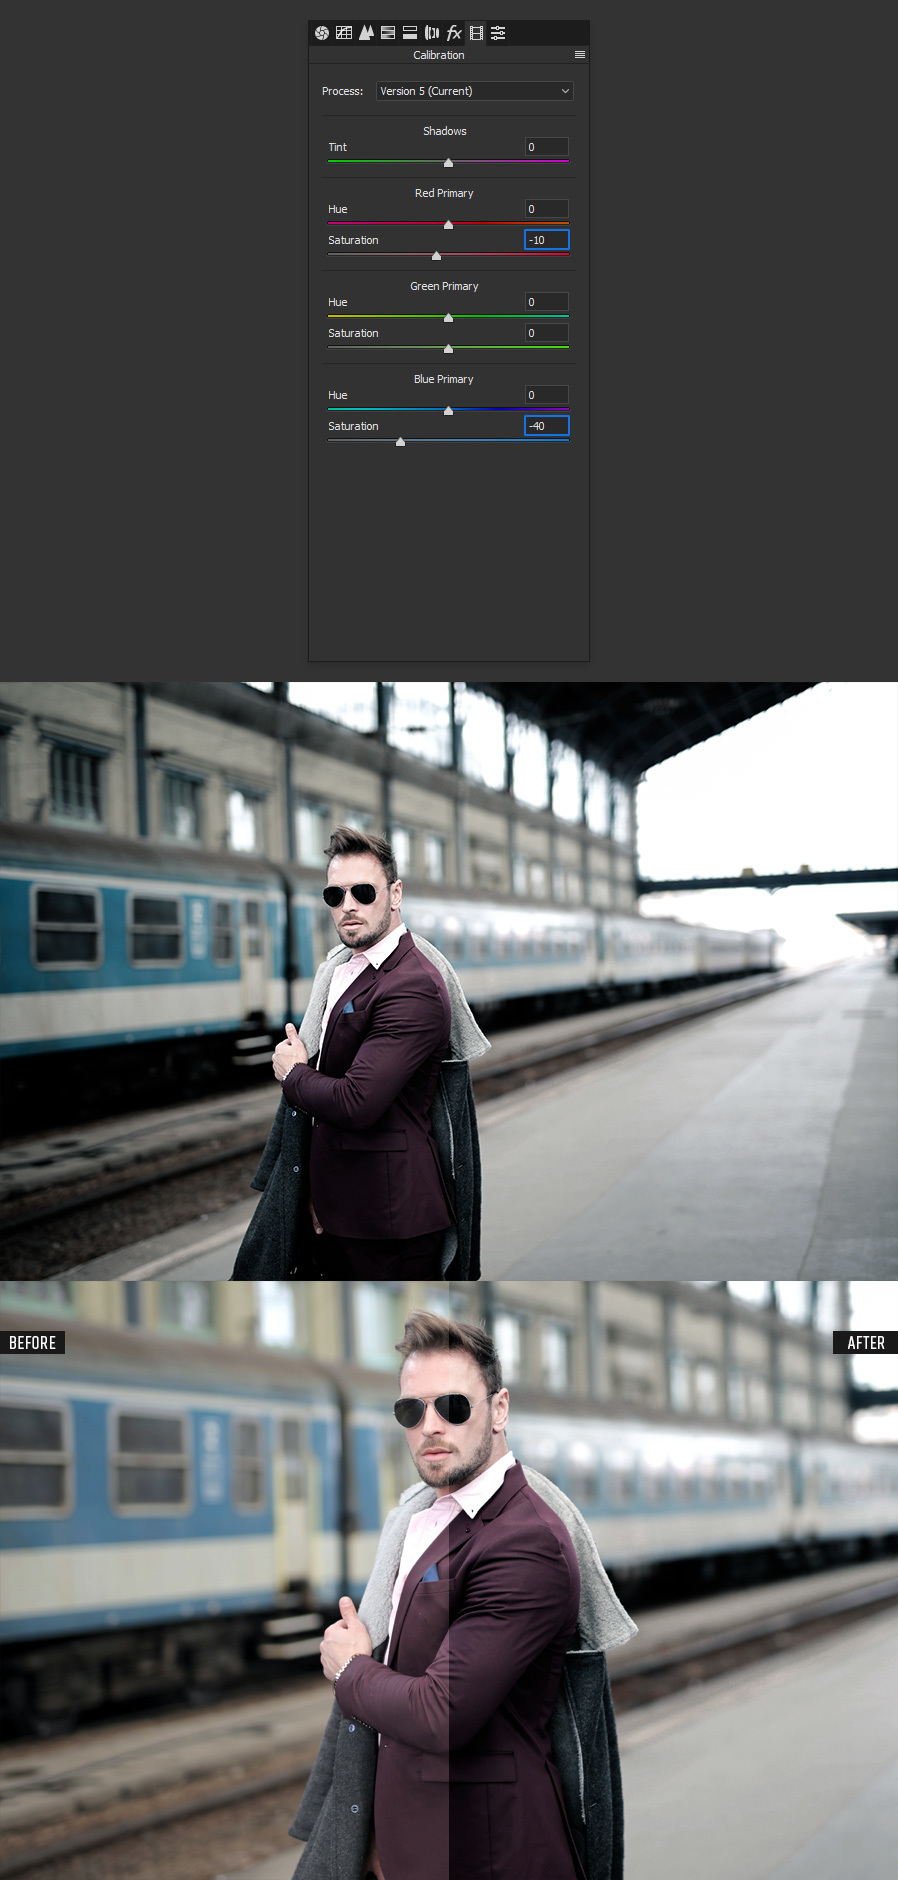
Go to the Calibration tab and set the Saturation of the Red Primary to -10 and the Saturation of the Blue Primary to -40.
Step 11
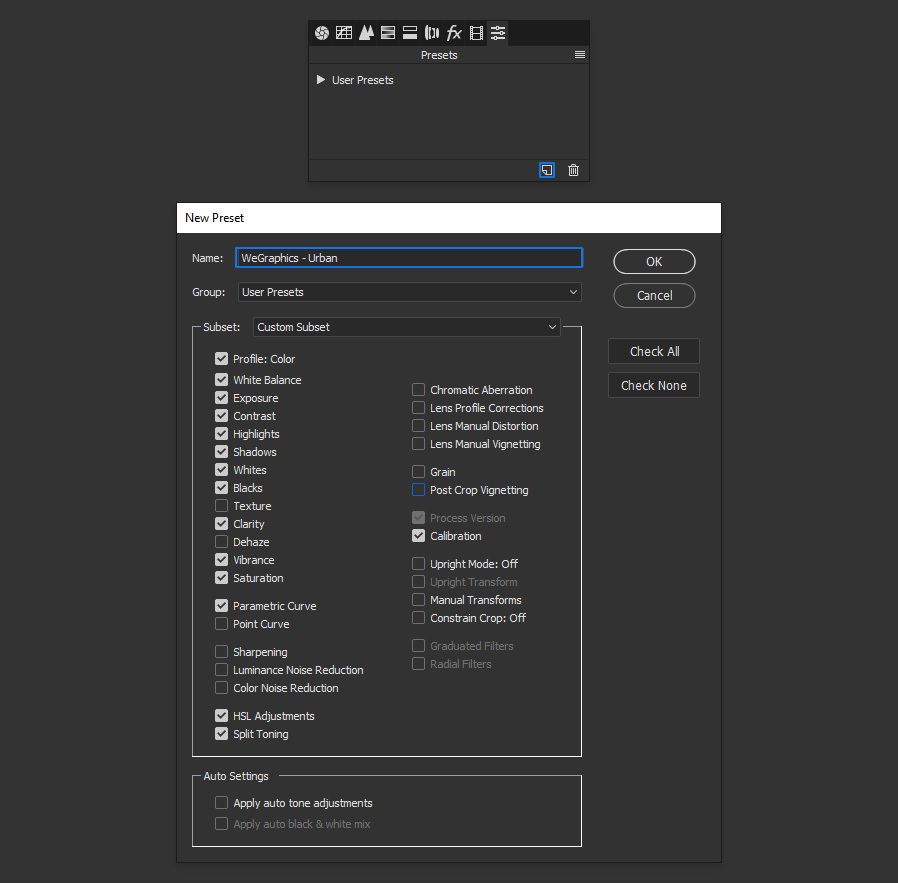
Lastly, and if you plan to use this effect on various pictures, a good idea is to save it as a preset. To do that, simply go to the Presets tab and click on the “New Preset” icon. Give the preset a name, be sure to check the modified values and click OK.
Step 12
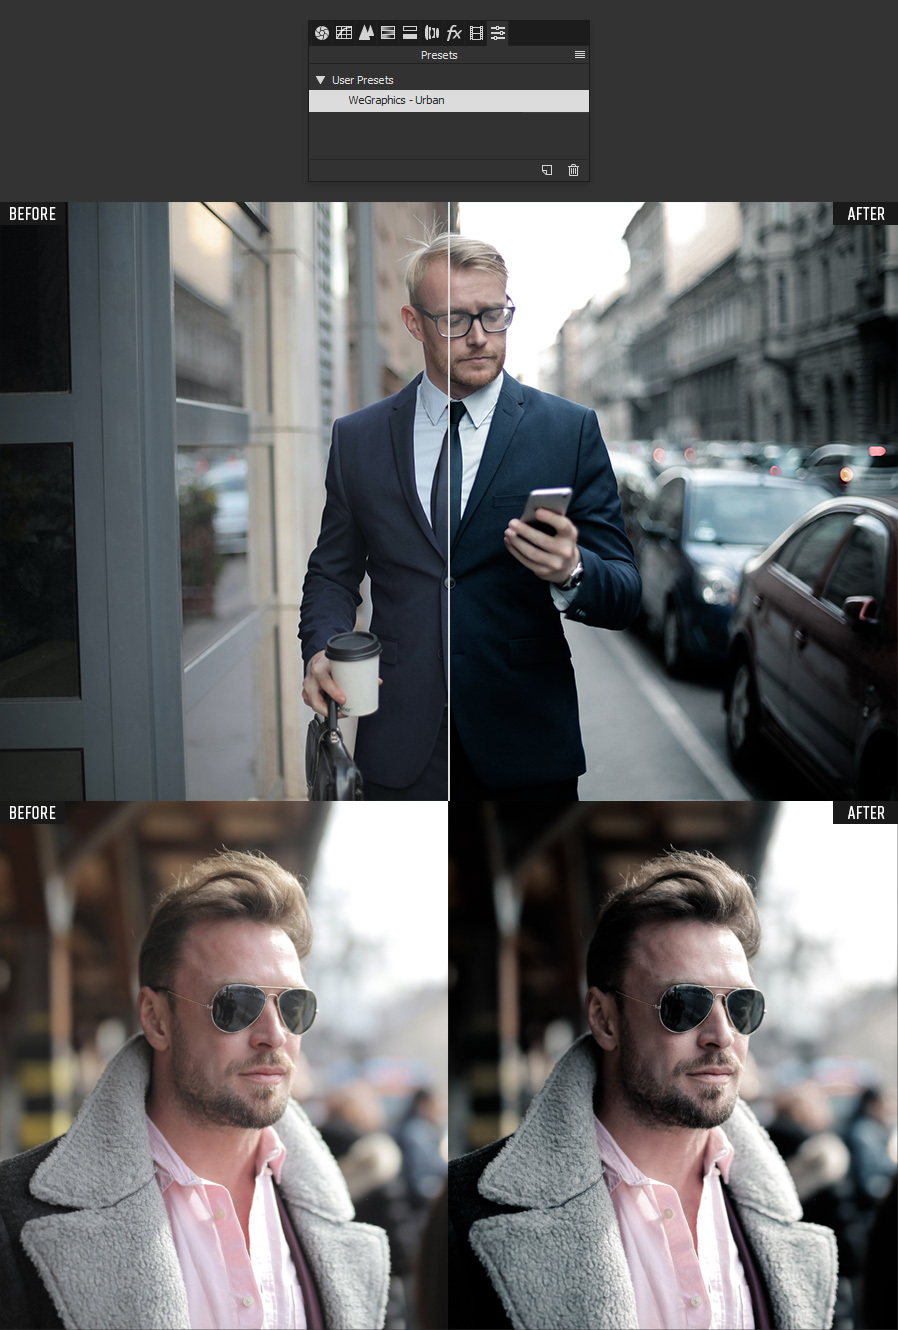
The next time you want to use this effect on a picture, simply open the image, go to the Camera Raw Filter, go to the Presets tab, and under “User Presets” click on the new created preset to apply it like I did in the following one.
Some Final Notes
If you want to edit the Camera RAW values, in the Layers Panel expand the layer effect and double click on the Camera Raw Smart Filter. Once in the Camera Raw window, adjust the values as you wish and click the OK button.


