
How to Easily Duplicate and Rotate Objects Around Any Point in Illustrator
Illustrator Tips & Tricks
In Illustrator there are many different ways to rotate an object, but when it comes to rotate it around a certain point with a copy of it, things can be a bit tricky. You probably saw many tutorials on how to rotate and duplicate an object in a circle, but those tutorials often use the center of a circle, and then you end up with many circles which has been rotate as well. Today, you will learn a super quick and easy way to duplicate and rotate an object around any point you wish, in a circular form without any extra objects on your artboard.
Step 1
Open Illustrator and make a new file at any size you want. In this case, i will setup my document at 1800 x 1200 px.

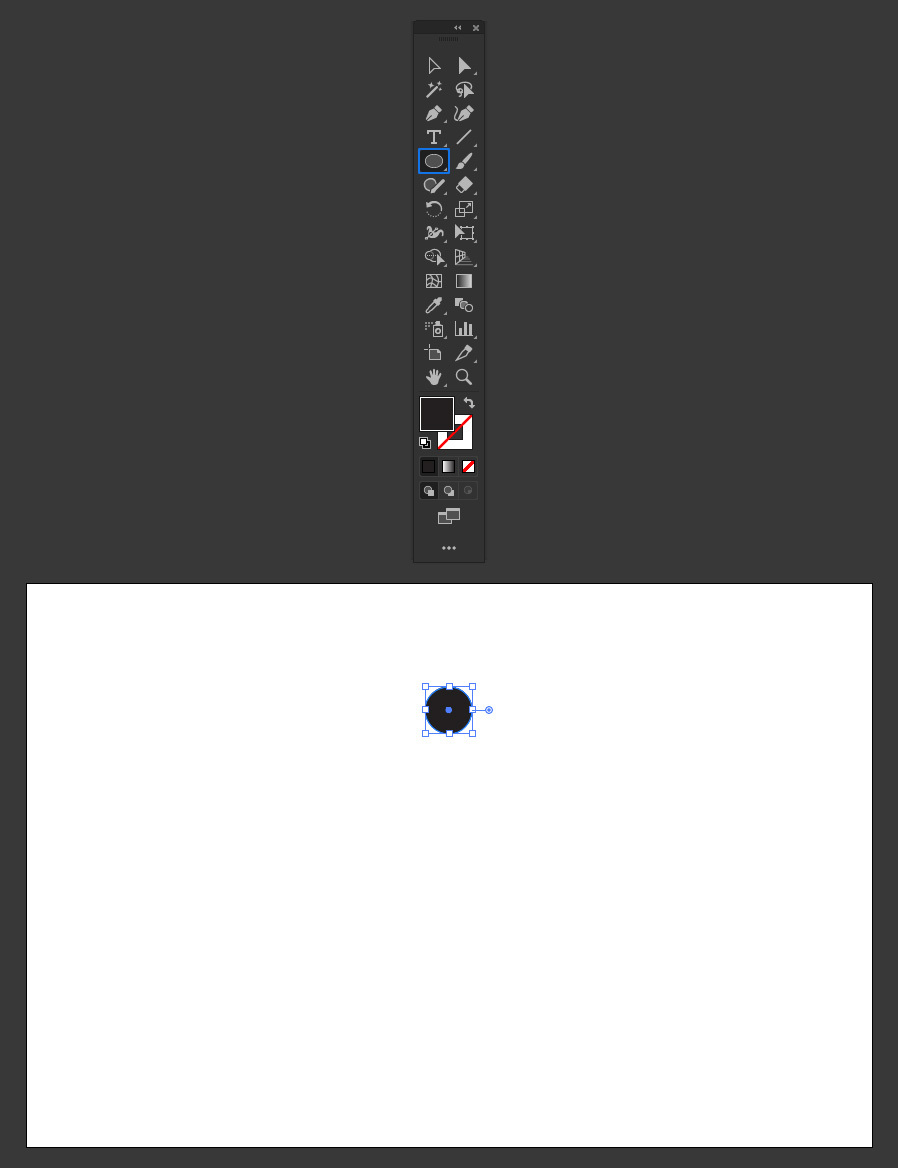
Step 2
Select the Ellipse Tool (L) and draw a circle (or any other shape you want).
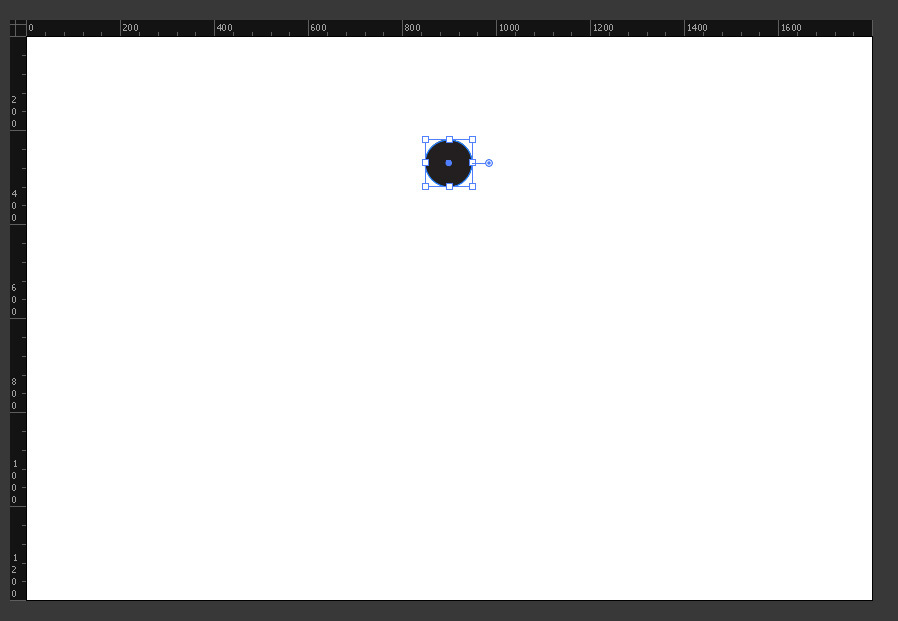
Step 3
Be sure to have the rules visible (if not, press Ctrl+R on your keyboard).
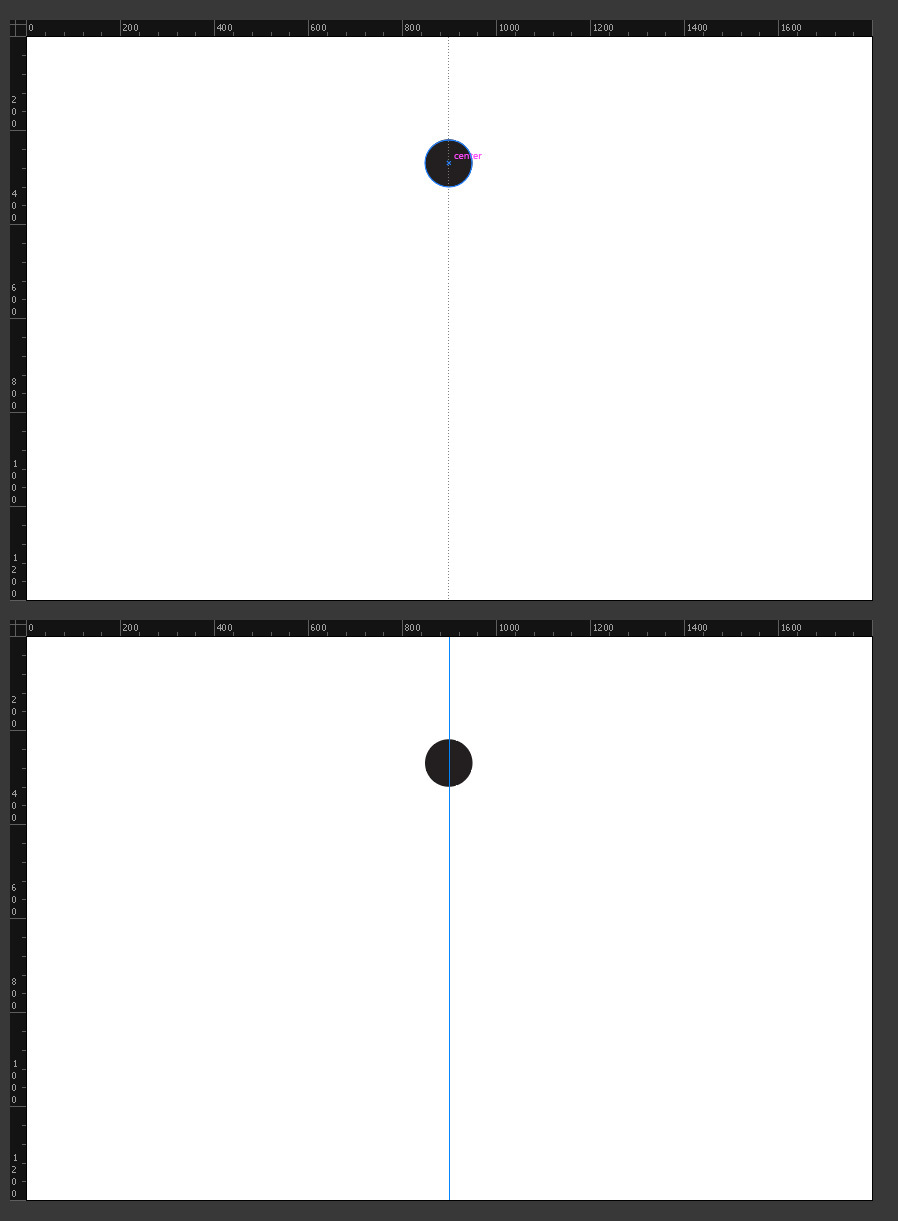
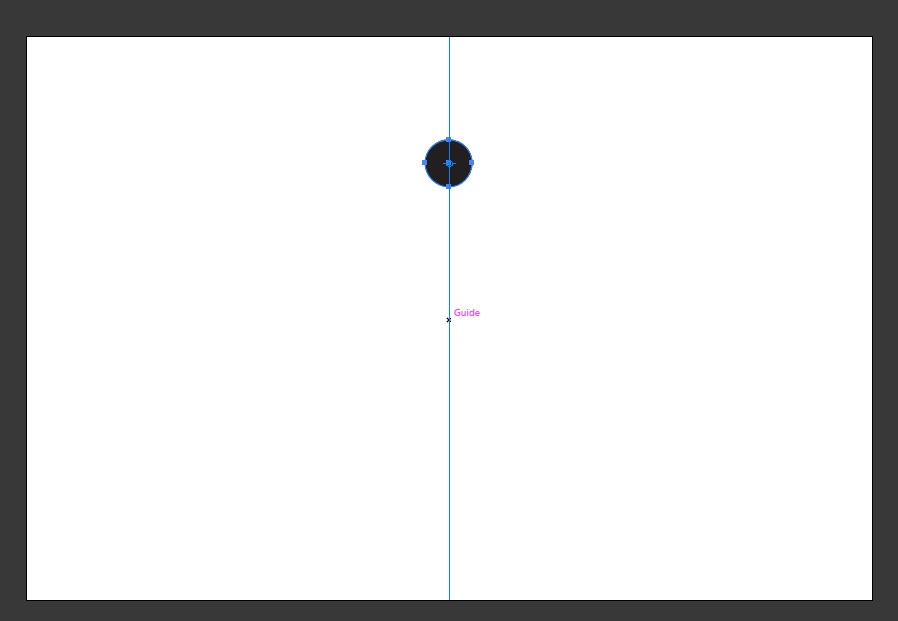
Step 4
Click and drag a guide from the left ruler to the center of the circle as shown (you can now hide the rulers if you want by pressing Ctrl+R again).
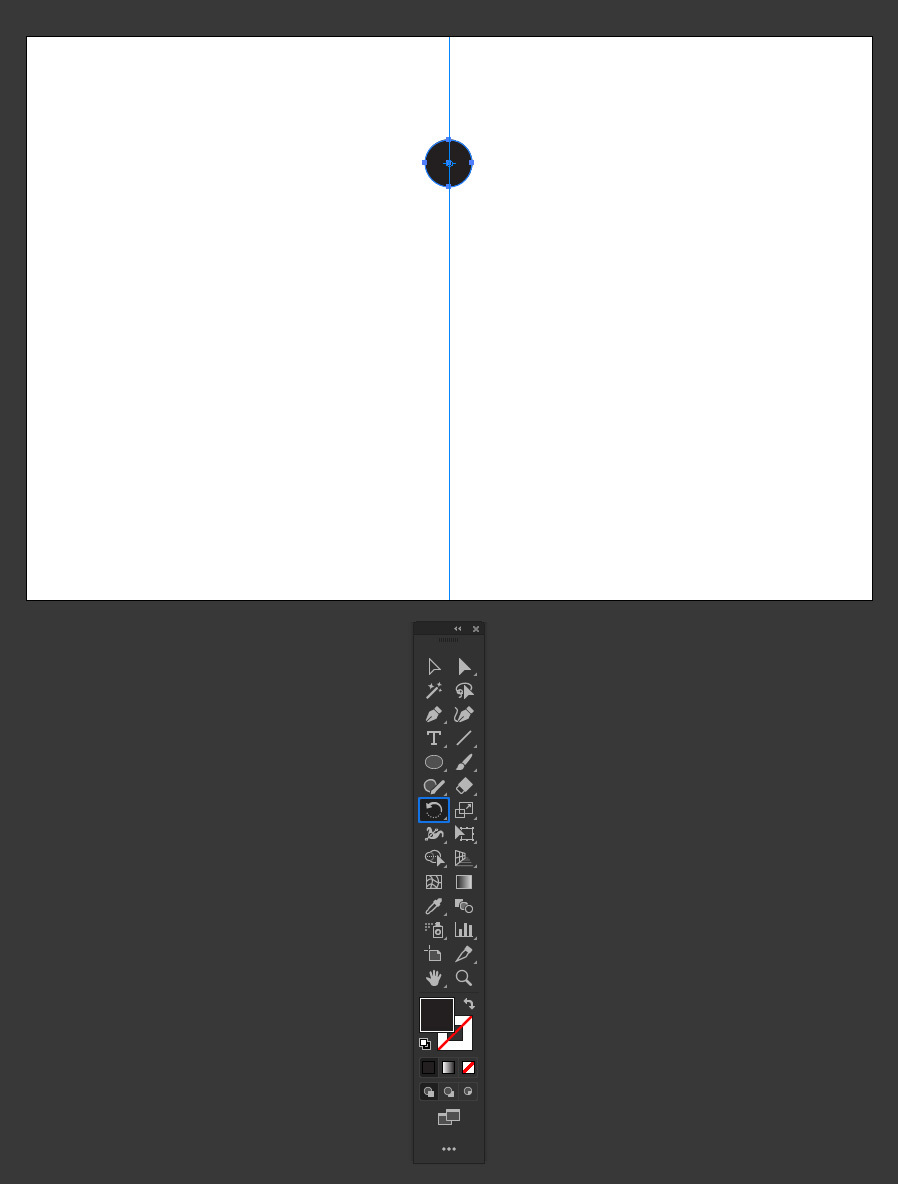
Step 5
Select the Circle and press "R" on your keyboard to select the Rotate Tool.
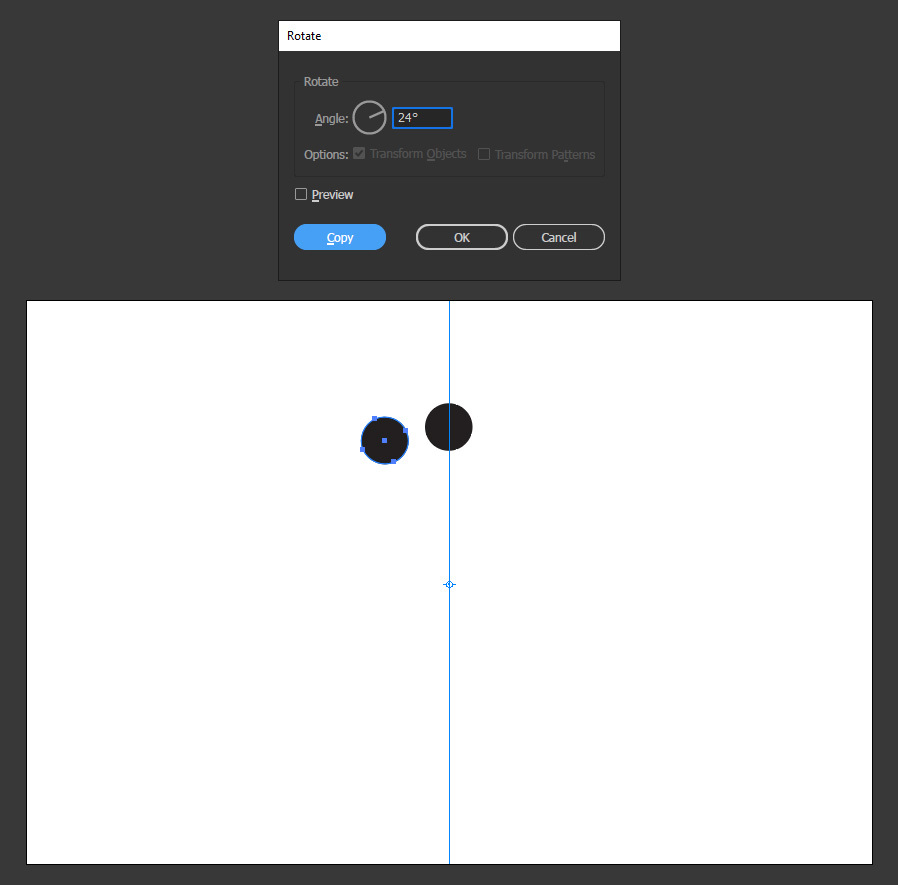
Step 6
Hold the Alt key on your keyboard and click anywhere on the guide to establish the rotation center point.
Step 7
In the Rotate window set any rotation angle you want and click the Copy button.
Tip: be sure that the angle you choose is divisible by 360º.
Step 8
With the copied circle selected, press Ctrl+D on your keyboard to duplicate and apply the rotation again on a new circle.
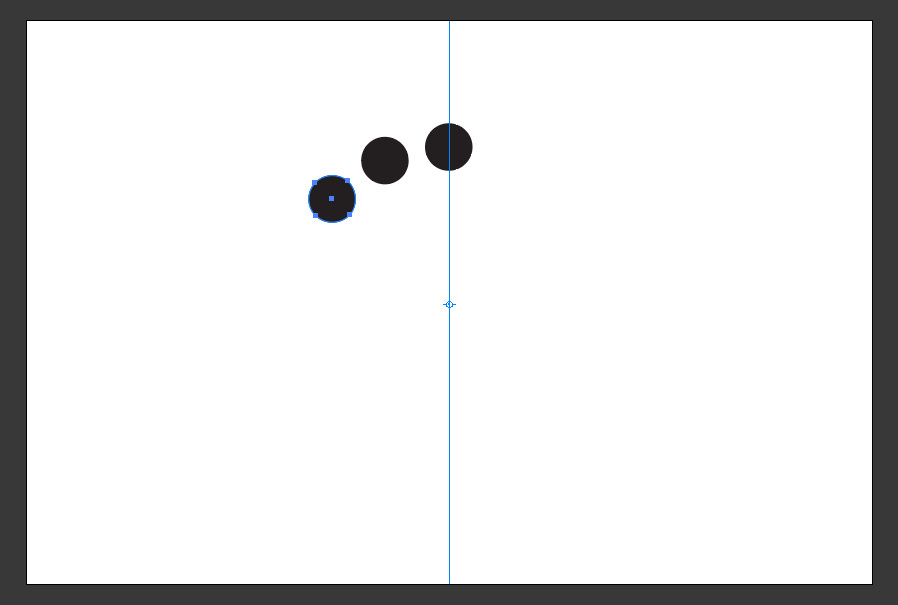
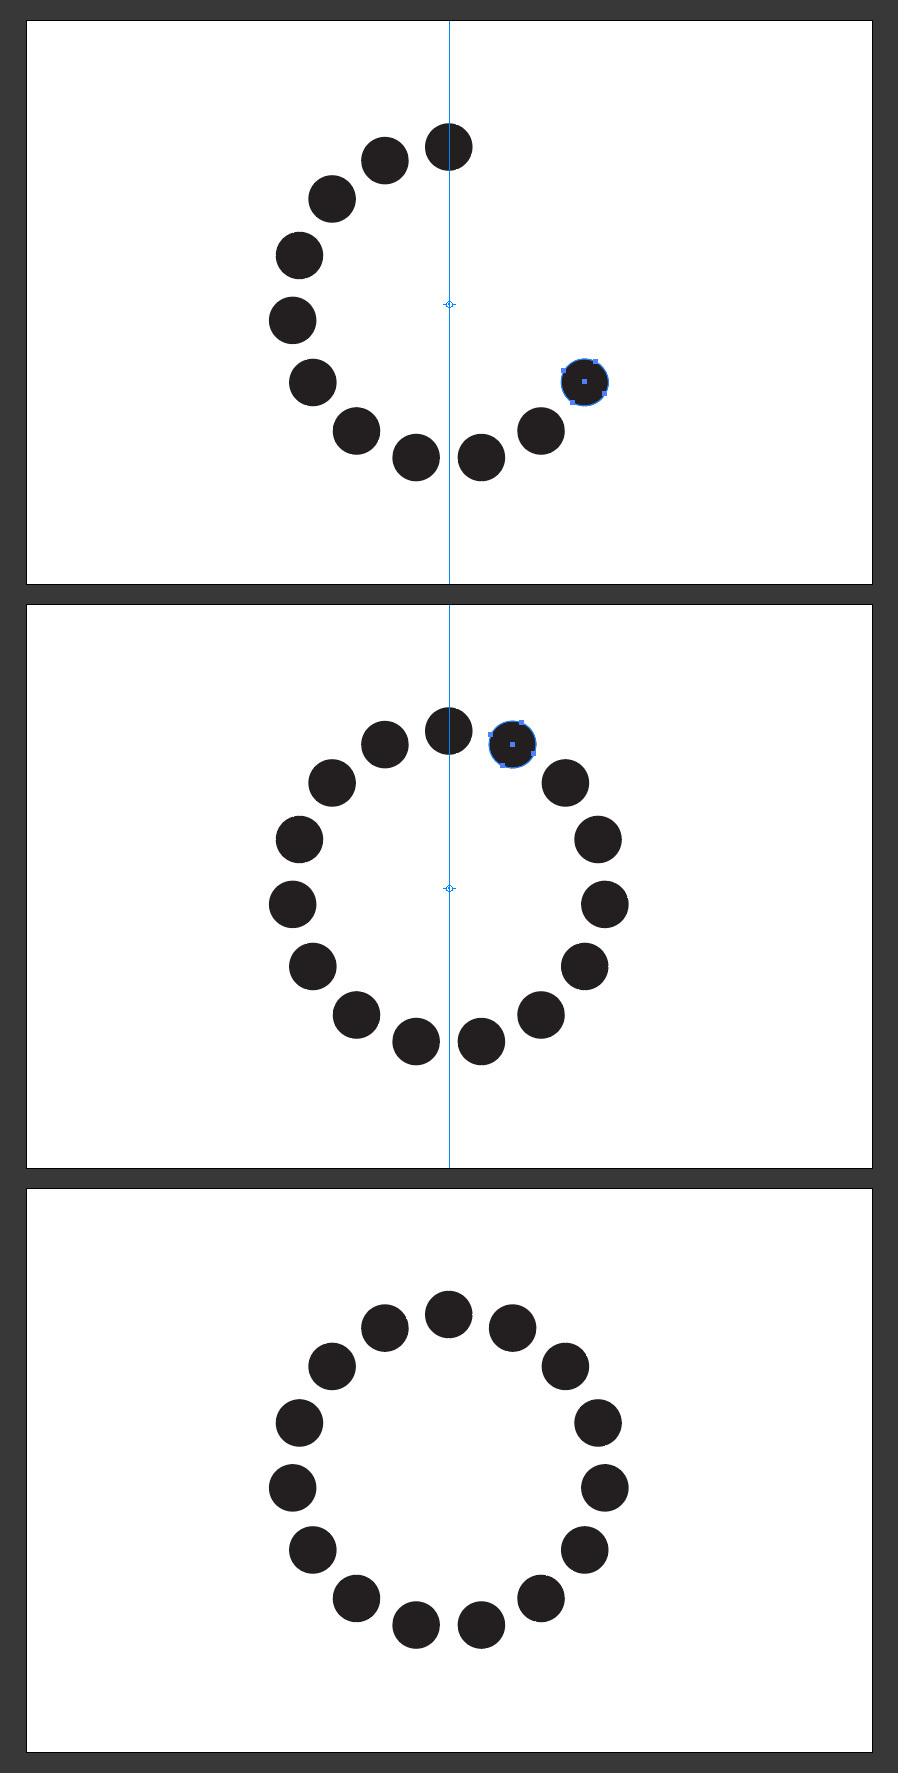
Step 9
Keep pressing Ctrl+D until the circle is completed.
More from Quick Tips

How to Quickly Make Live Metaballs in Illustrator
Quick Tipsby Diego Sanchez
Metaballs, with their fluid and organic shapes offer an endless creative potential for various design projects. But sometimes in Illustrator, a simple shape can take you a few extra minutes to make. And this is the case with metaballs, because if you make them using a traditional method (like manually drawing the paths between two circles) you will accomplish the task, but using more time than you need. So today, I will show you a very simple method to create metaballs in Illustrator, using only the default tools, with the ability to scale and move the shapes used and with no need to manually trace anything.
Read more
How to Easily Remove Dust From an Image
Quick Tipsby Diego Sanchez
Removing dust from an image can be a time consuming and tedious task, but with some of the Photoshop tools the process can be much easier and efficient. In this tutorial, we will explore some simple steps to help you remove dust from an image in Photoshop quickly and easily whether you're dealing with old scanned photos, digital images with visible dust or simply want to clean up a shot for a professional look. To help you remove dust from your images, you have a few tools that you can use like the Spot Healing Brush or the Clone Stamp Tool but there is a quick and easy way to achieve the same results, so today I will show you how you can remove dust from any image in less than a minute by using the powerful Dust & Scratches filter and a simple layer mask.
Read more
How to Quickly Fix Perspective Distortions in Photoshop
Quick Tipsby Diego Sanchez
As you may already know, there are many different ways to achieve the same end result in Photoshop whether it's a color correction or a very complex effect; and fixing a photo perspective distortion is not an exception to that rule. You may use the Perspective Warp, a simple crop and distort method or just the Lens Correction filter, but the end results may not be as good as you expect; but today I will show you a quick and easy way to fix the perspective distortion of an image in less than 2 minutes with very good end results by using a combination of the Lens Correction filter and the Geometry of the Camera Raw filter.
Read more
How to Quickly Make a Floral Design in Illustrator
Quick Tipsby Diego Sanchez
Sometimes, you see very complex illustrations that you think it can take hours to create, but those complex illustrations can be made real quick if you know which tools to use. Today, I will show you how quickly you can make what it seems to be a very complex flower in Illustrator by using the Pucker & Bloat effect and the powerful Transform Panel, which you can adjust the values later to make different effects without the need to make the whole process again. And all of this in less than 5 minutes and 6 easy to follow steps.
Read more