How to Easily Add Shine to Skin in Photoshop
Photoshop Post Processing
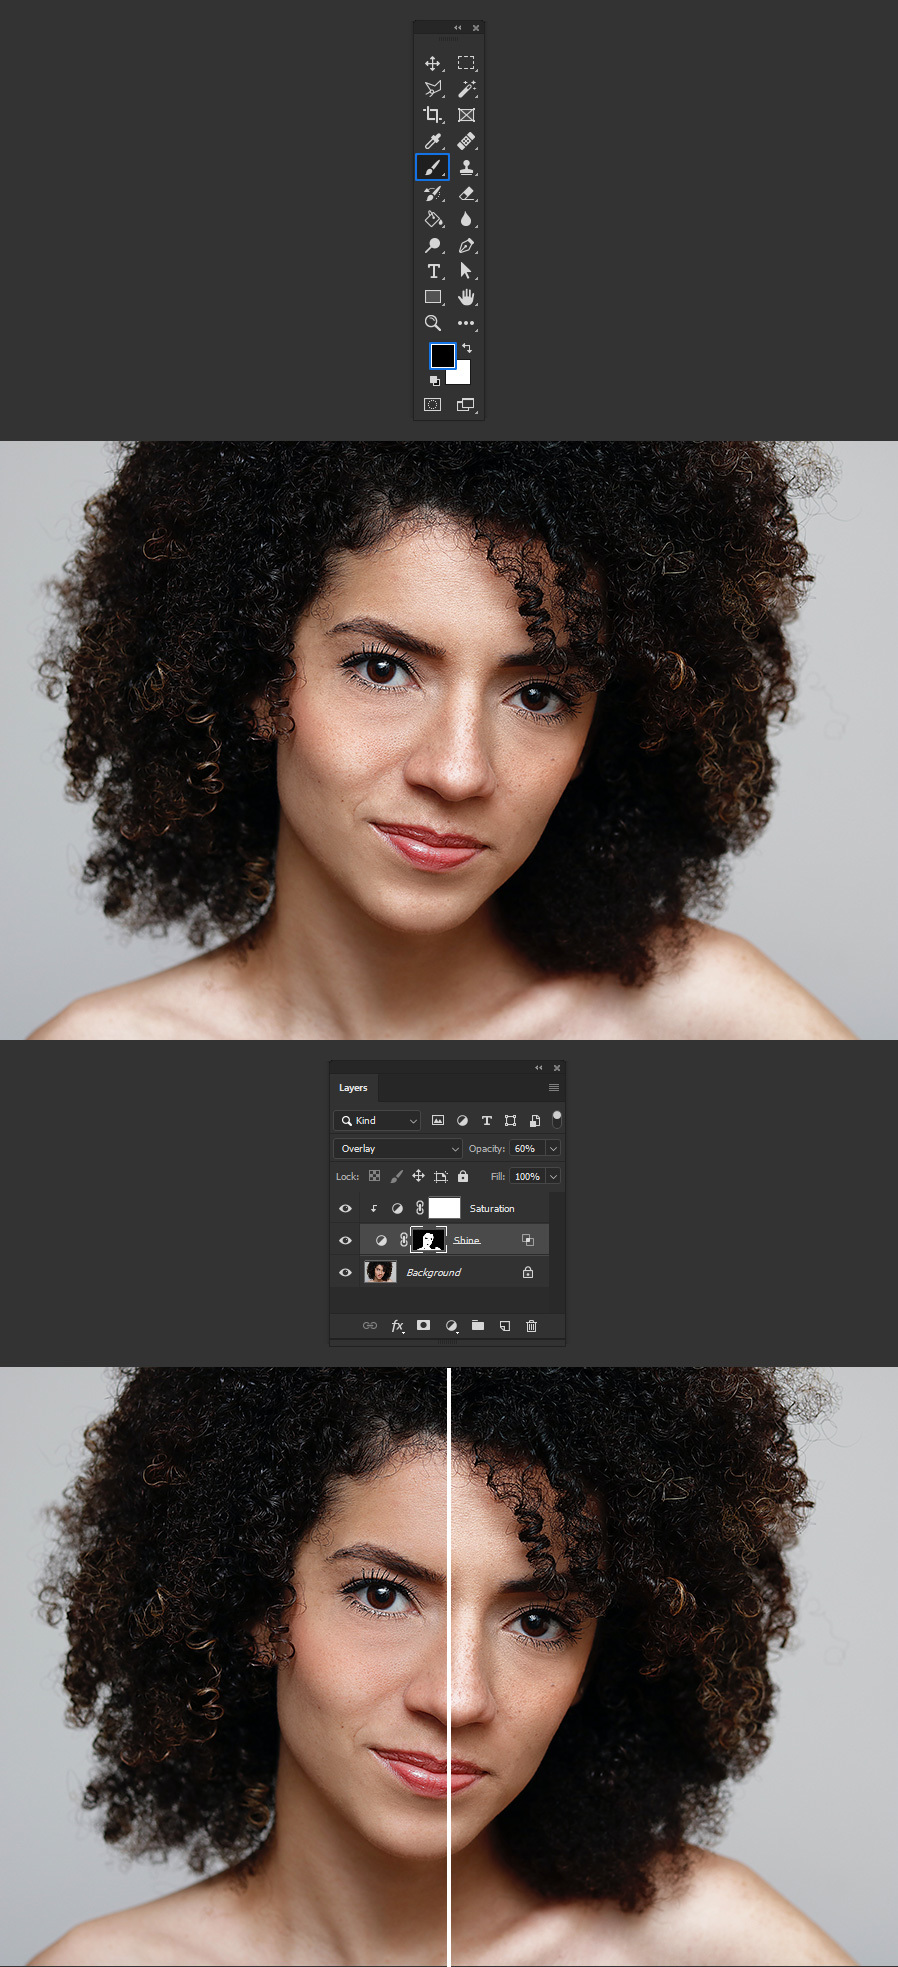
In the photo retouching process, there are a few challenges on the way to make your image looks just the way you want. There are a few steps that may require some more time than others, and one of those steps is the skin shining part. The most common way to add shine to the skin is by using the Dodge and Burn, but with this method you may miss some natural lights or even create new ones that are not in the original image. The method I will show you today, will only work with the original photo lights and will enhance your skin shine in less than 5 minutes while keeping the ability to adjust the effect even after you make it.
But before we begin, and if you want to follow this tutorial exactly as described, please download the following free image from Pexels: Download.
Step 1
Open your image in Photoshop.

Step 2
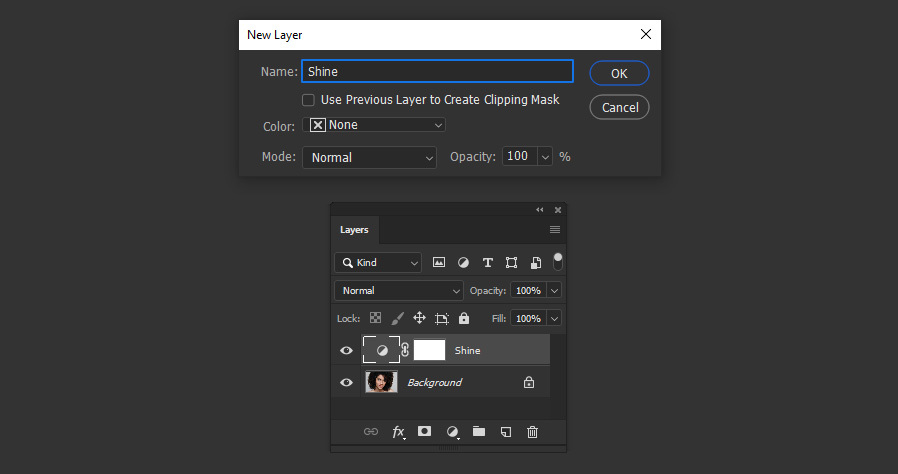
Go to Layer > New Adjustment Layer > Curves. Name this layer as "Shine" and click OK.
Step 3
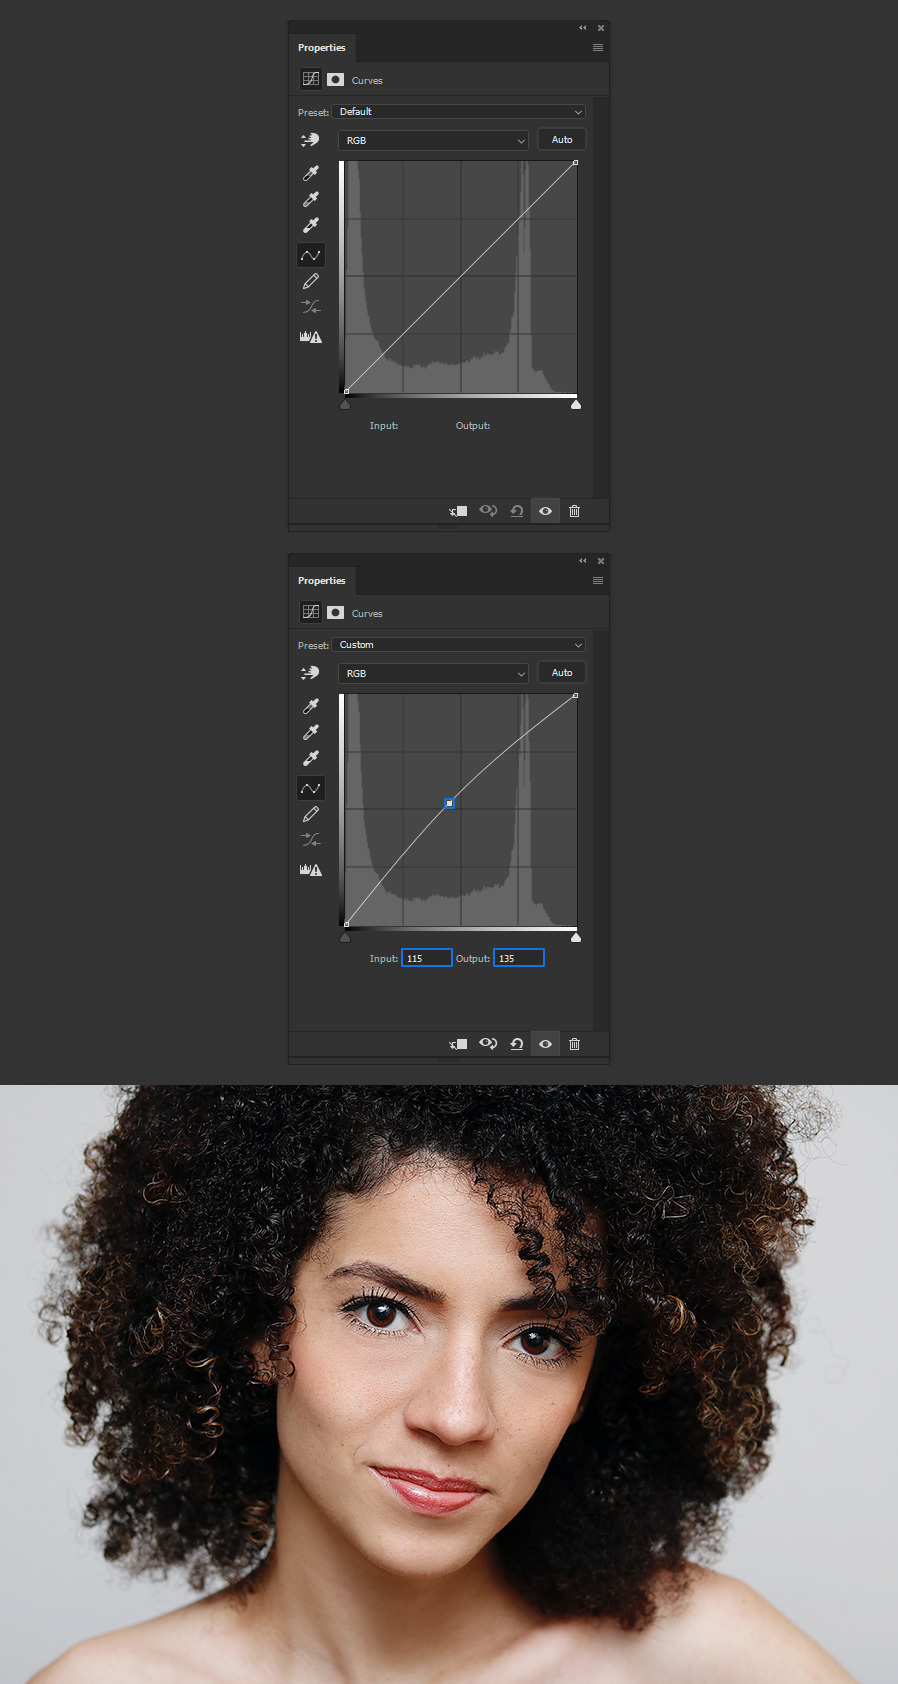
In the Curves Properties panel, add a new anchor point by clicking anywhere over the curve and set the point Input to 115 and the Output to 135.
Step 4
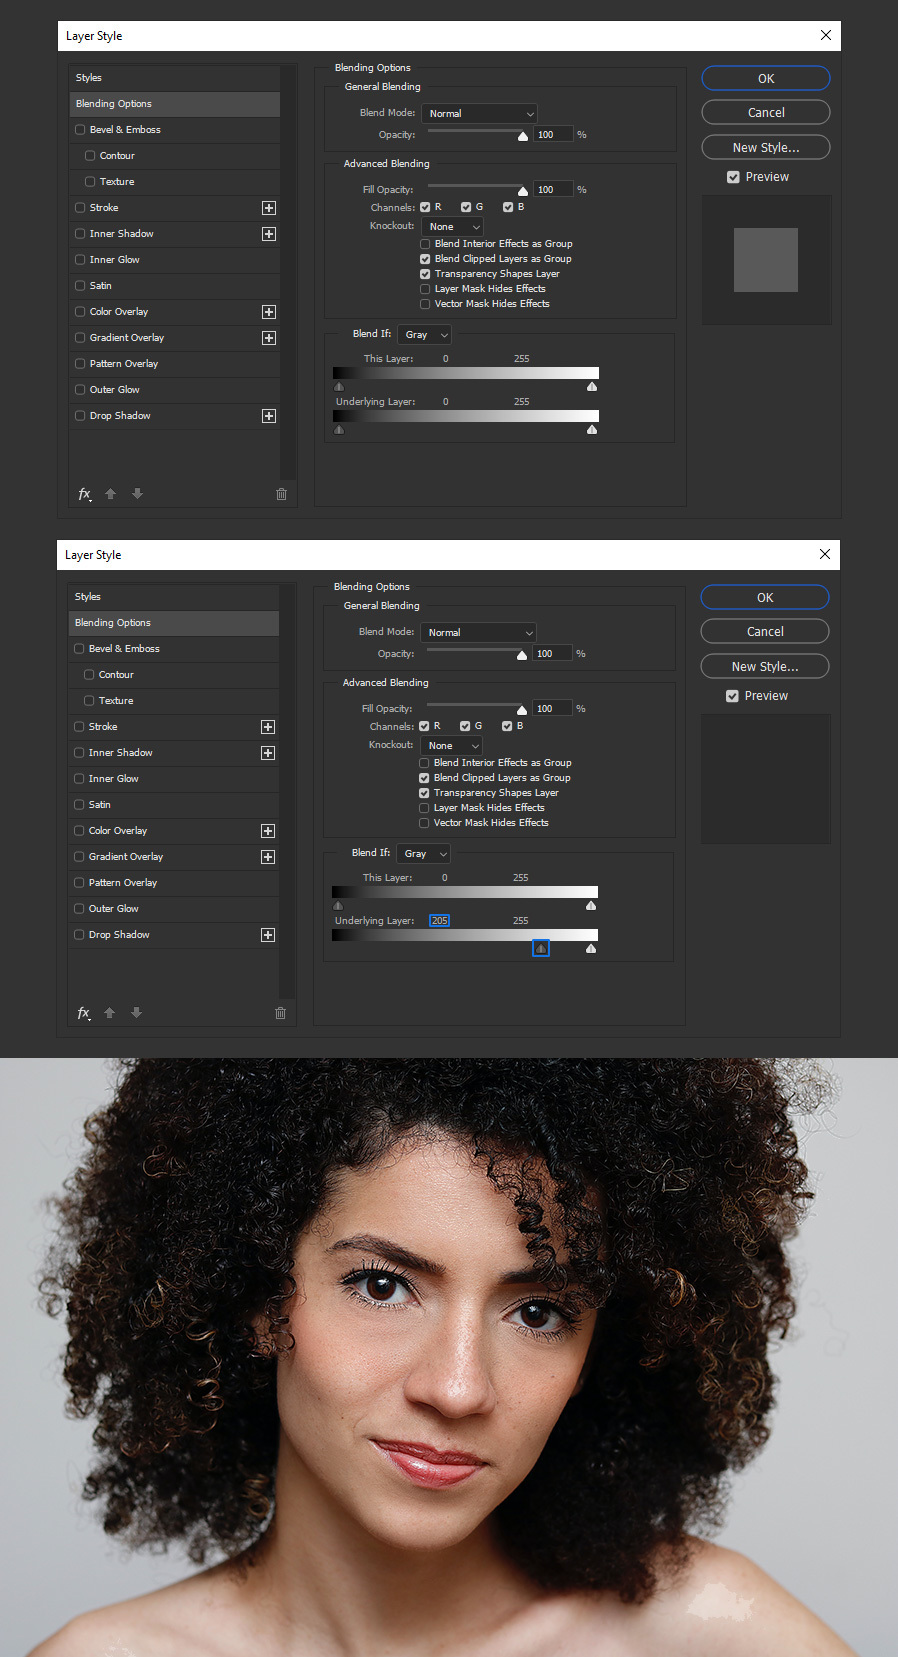
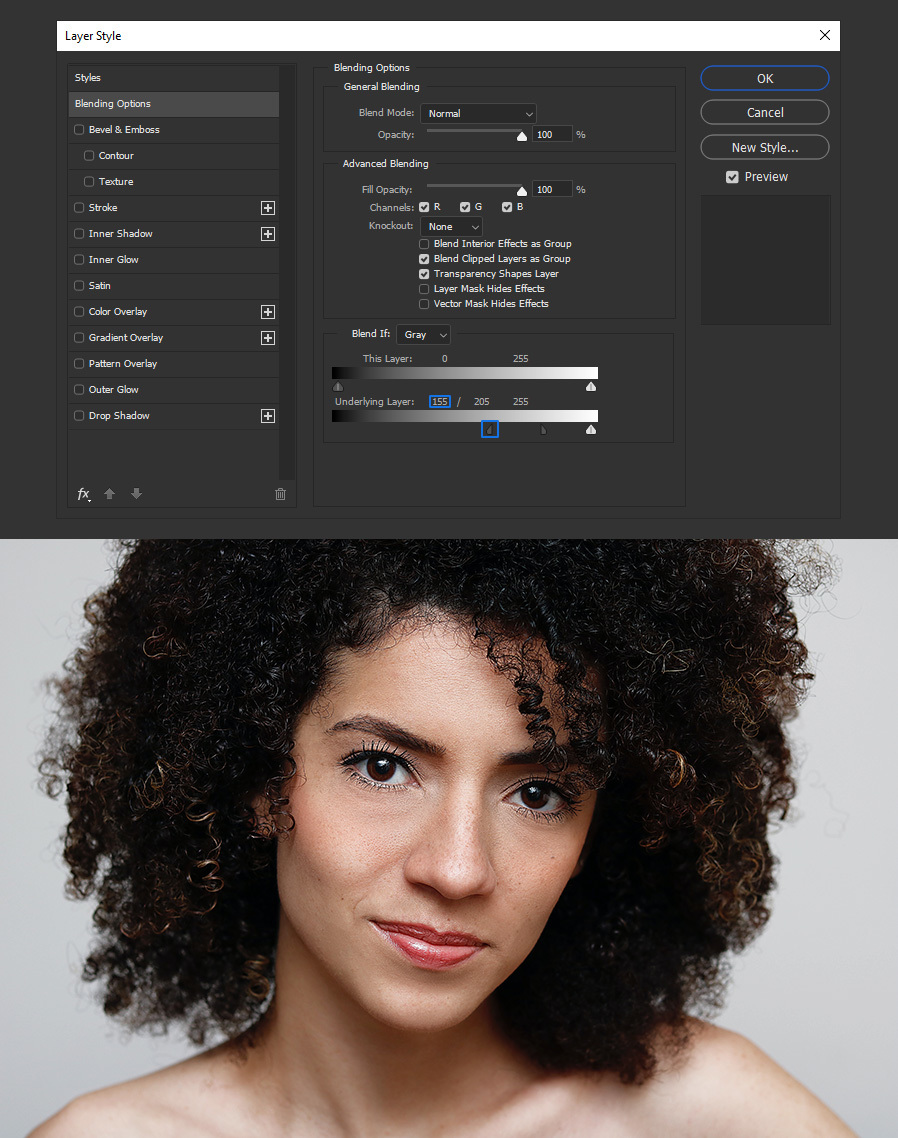
With the "Shine" layer selected, go to Layer > Layer Style > Blending Options. Drag the black slider of the "Underlaying Layer" until you reach a value where the more shining part of the skin becomes more noticeable (in this image, the shoulder), which in this case is a value of 205.
Step 5
Hold the Alt key (to split the slider in 2) and drag the black slider of the "Underlaying Layer" until you reach a value where that shining area is smoother, which in this case is a value of 155.
Step 6
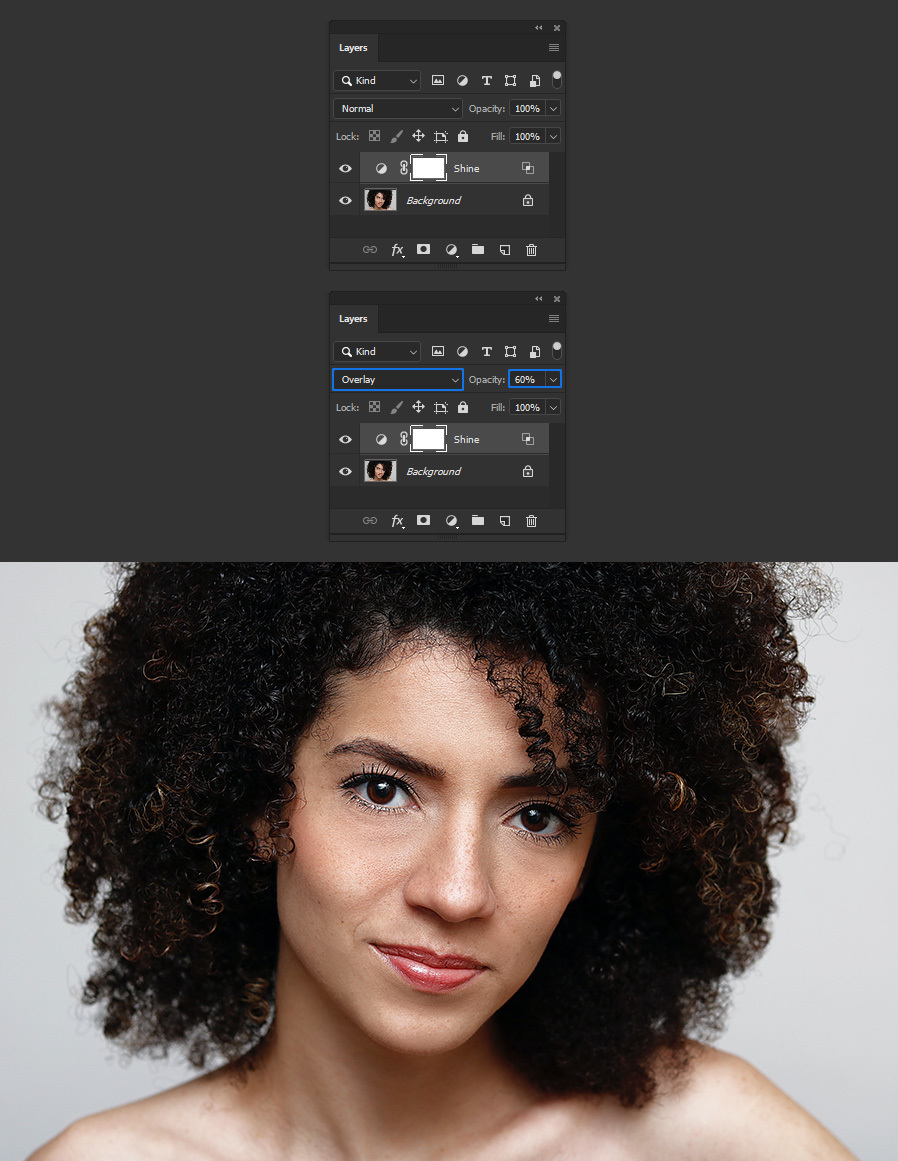
In the Layers Panel, set the blend mode of the "Shine" layer to Overlay and bring down the Opacity to about 60%.
Step 7
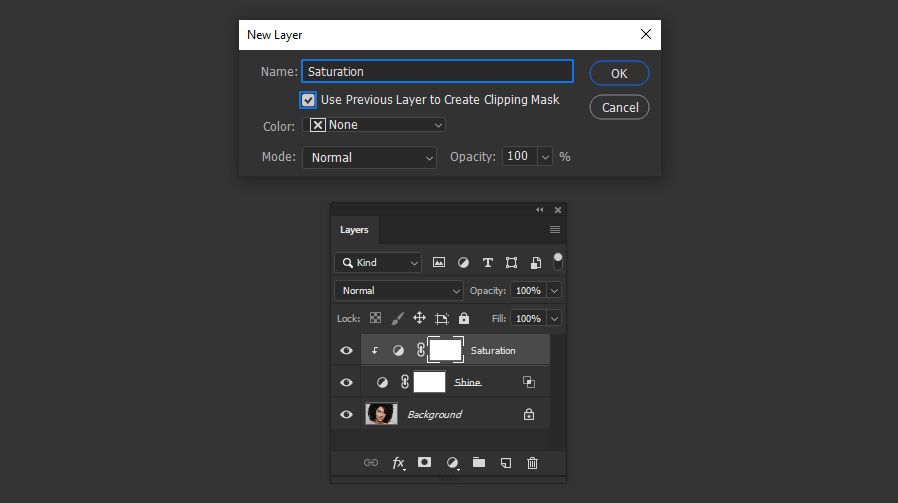
Go to Layer > New Adjustment Layer > Hue/Saturation. Name this layer as "Saturation", check the "Use Previous Layer to Create Clipping Mask" and click OK.
Step 8
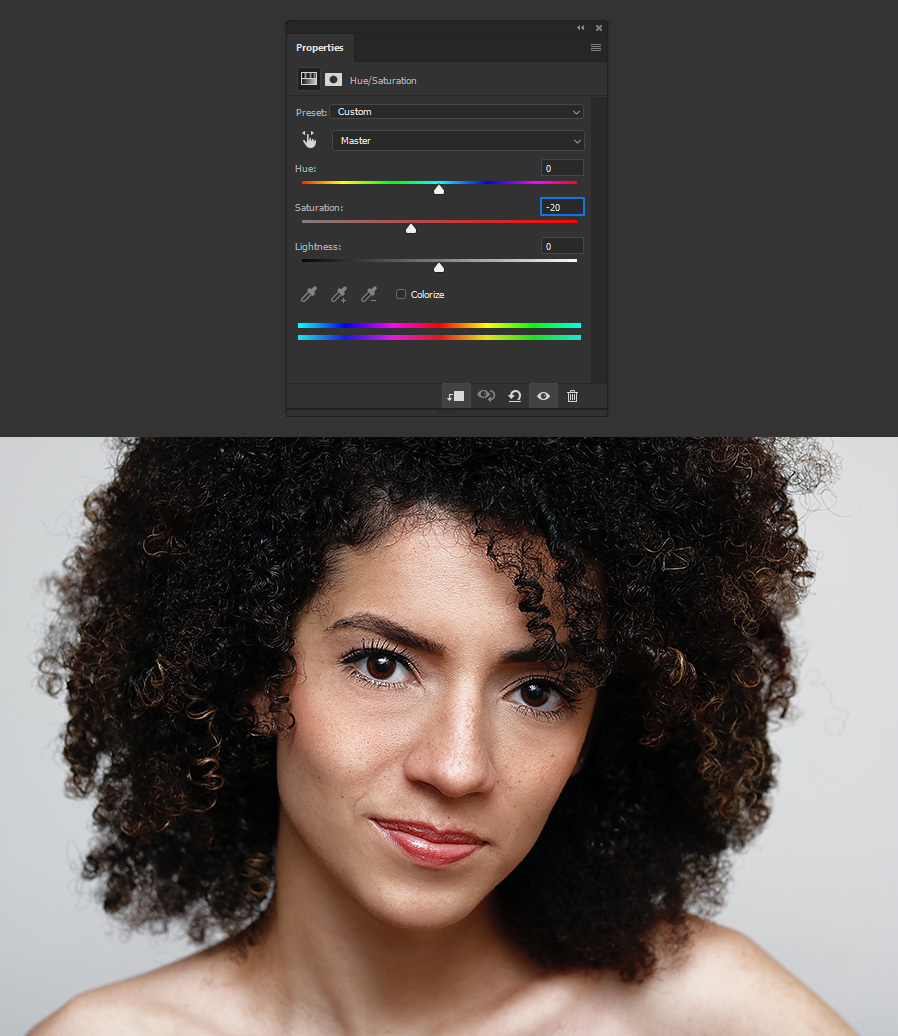
In the Hue/Saturation Properties panel, set the Saturation to -20.
Step 9
Click the Layer Mask Thumbnail of the "Shine" layer to make it active.

Step 10
Lastly, select the Brush Tool (B) and using a black soft rounded brush paint outside the skin areas to hide them.
