How to Create an Abstract Wire Mesh Wave Background with Illustrator and Photoshop
Perfect for web backgrounds and desktop wallpapers
This tutorial will teach you how to use a combination of Illustrator and Photoshop techniques to produce a stunning abstract background featuring wire mesh waves and gradients.
Preview
Here is a preview of the abstract background that we will be creating in this tutorial.

Step 1
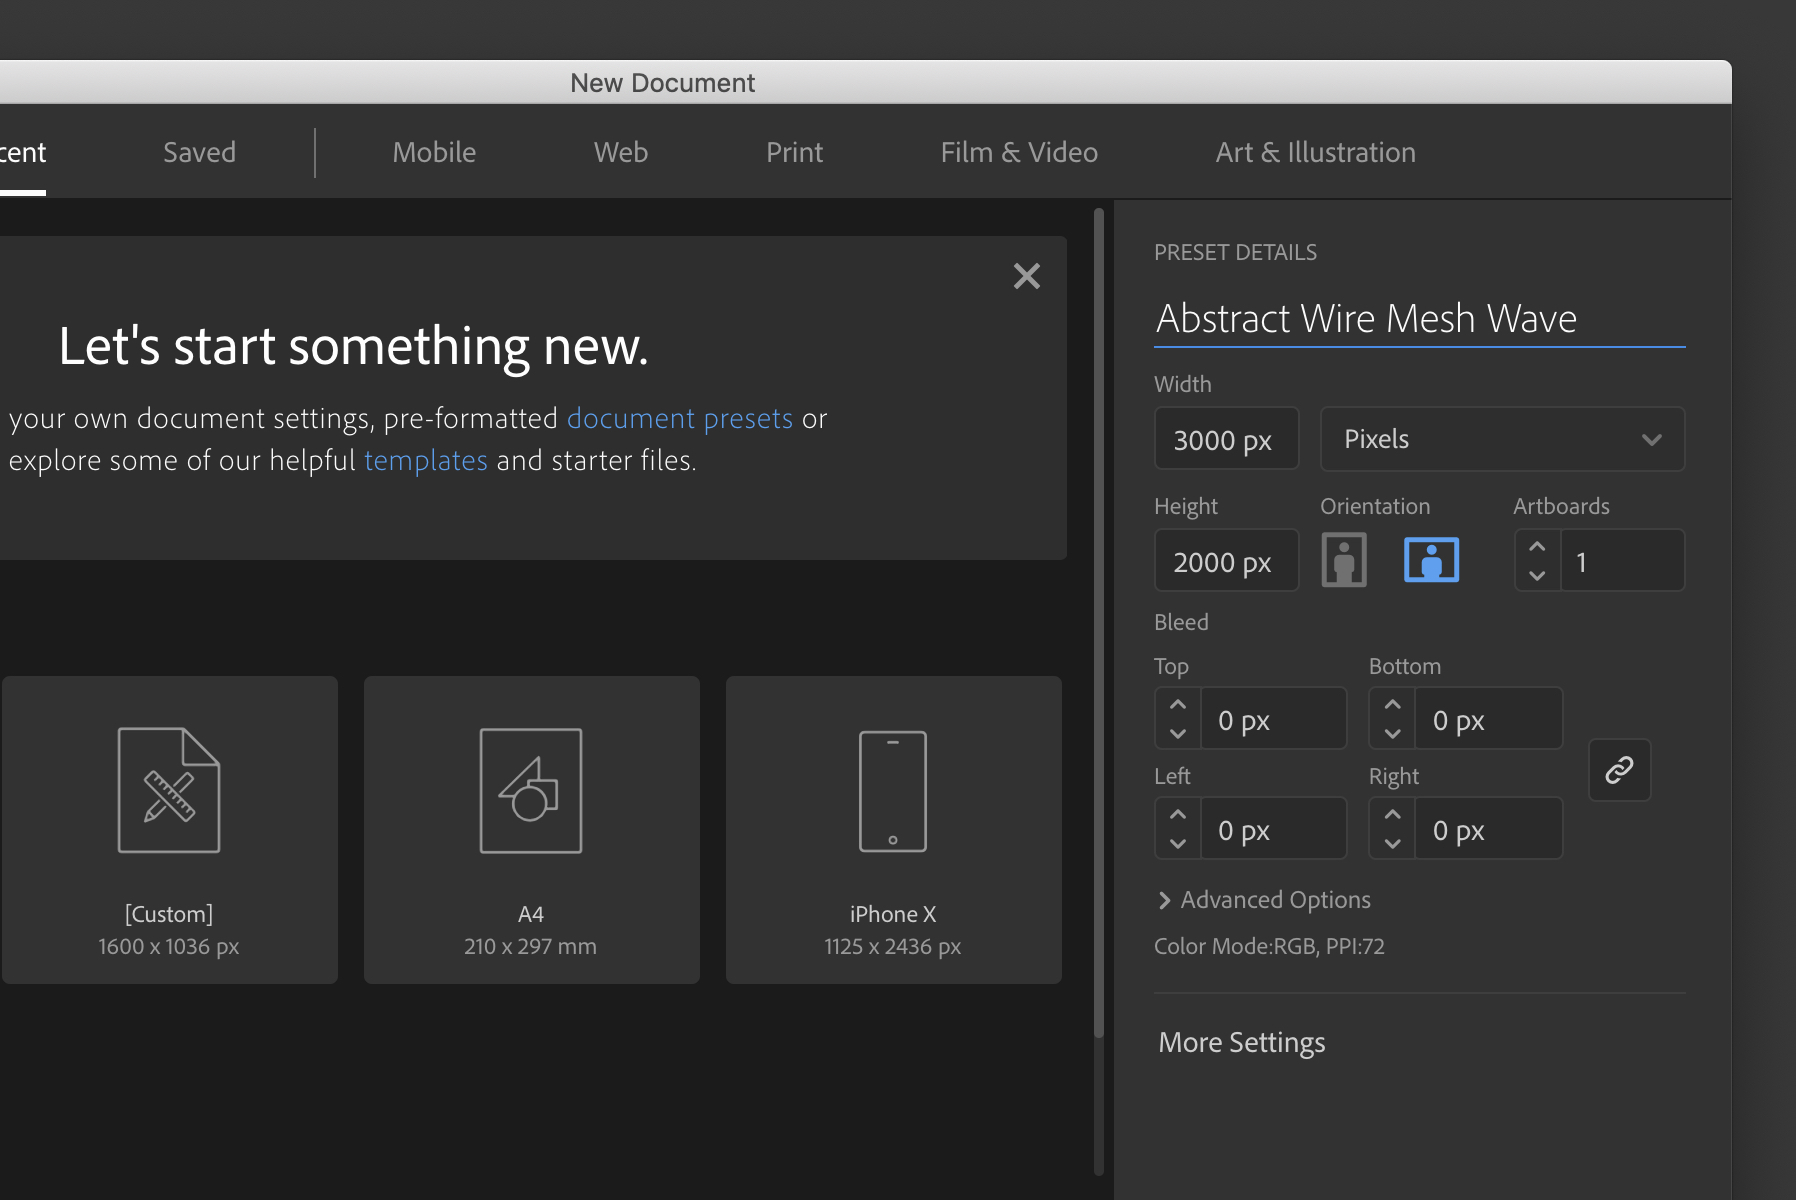
Begin by launching Illustrator and creating a new document.
- 3000 x 2000 px
- Orientation: Landscape
- Artboards: 1
- Bleed: None
- Color Mode: RGB
Step 2
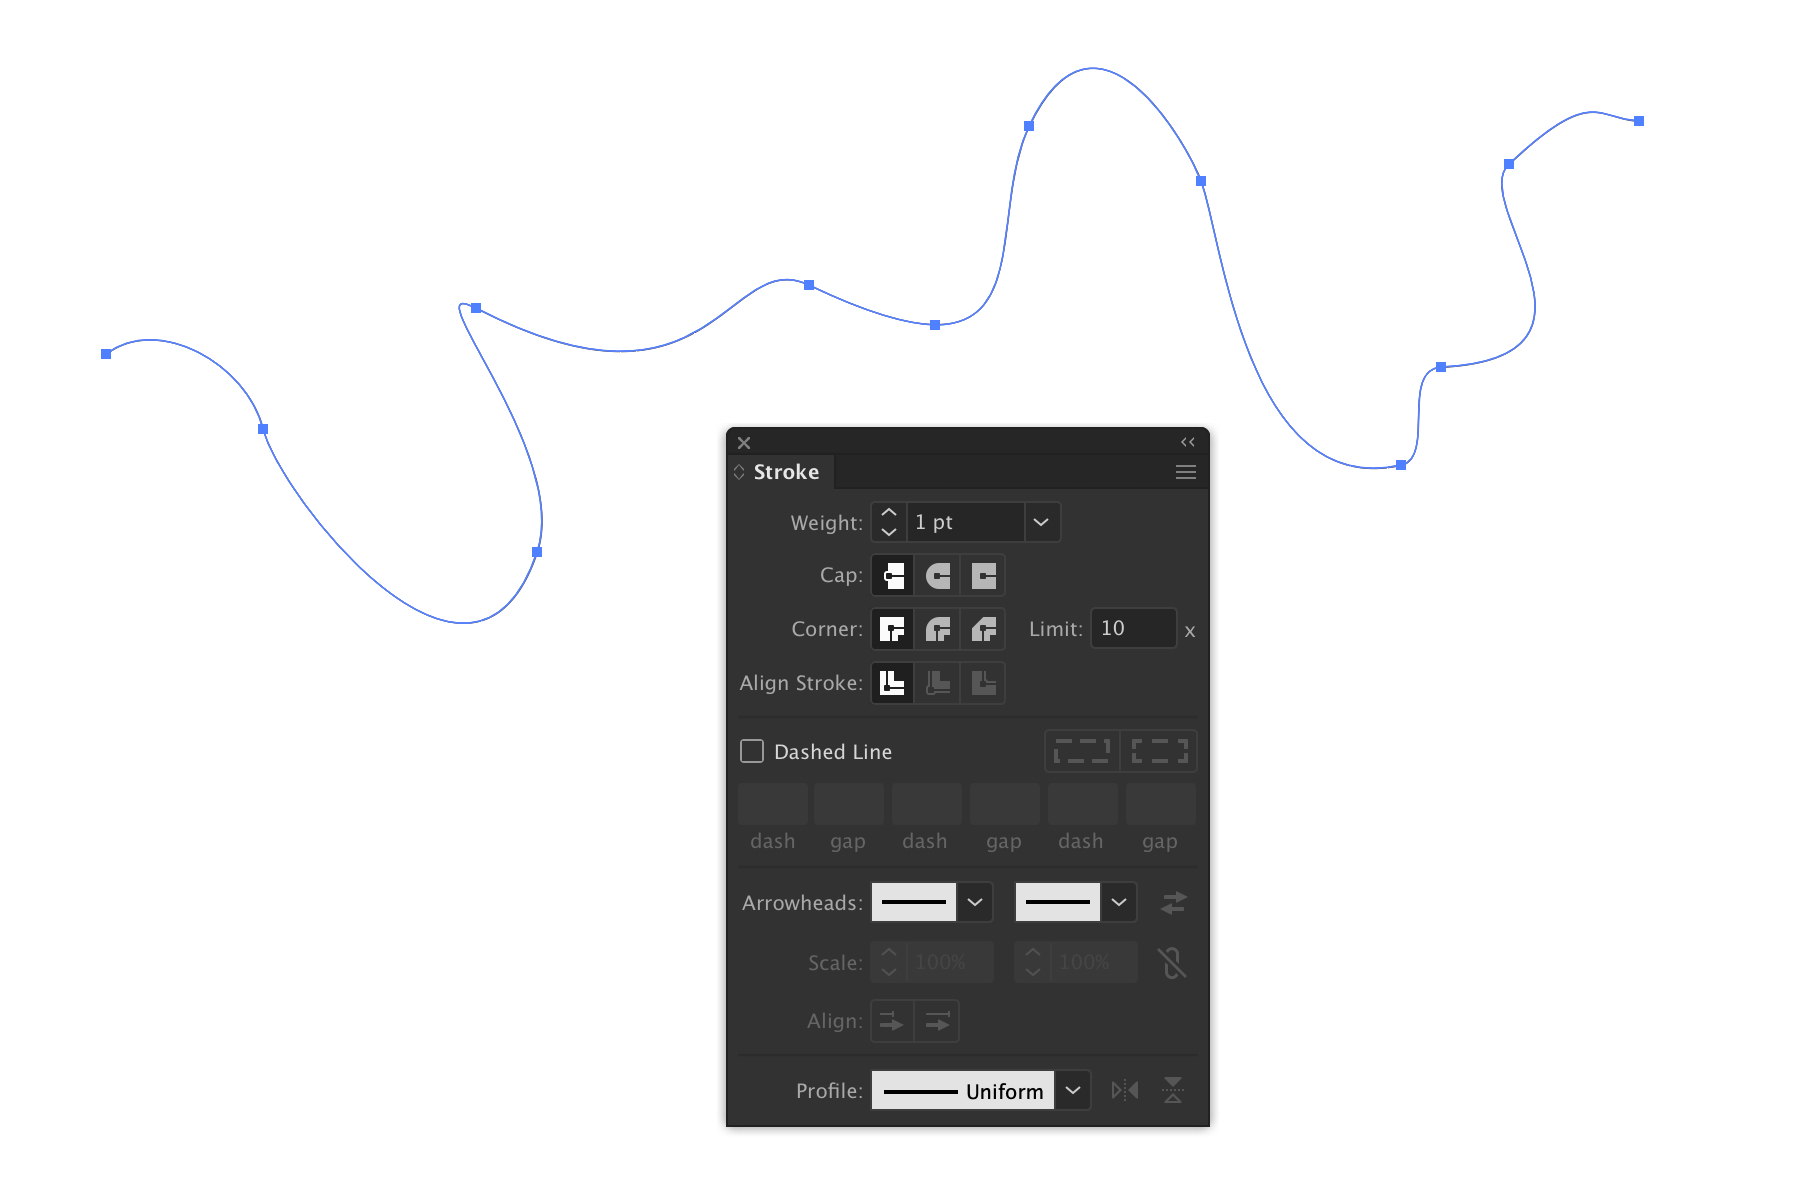
Select the Pen Tool and draw a random wavy line across the width of the artboard. I recommend sticking fairly close to the line I created and shown below to follow along with the tutorial.
Give the stroke a 1pt black stroke so that it can be seen.
Step 3
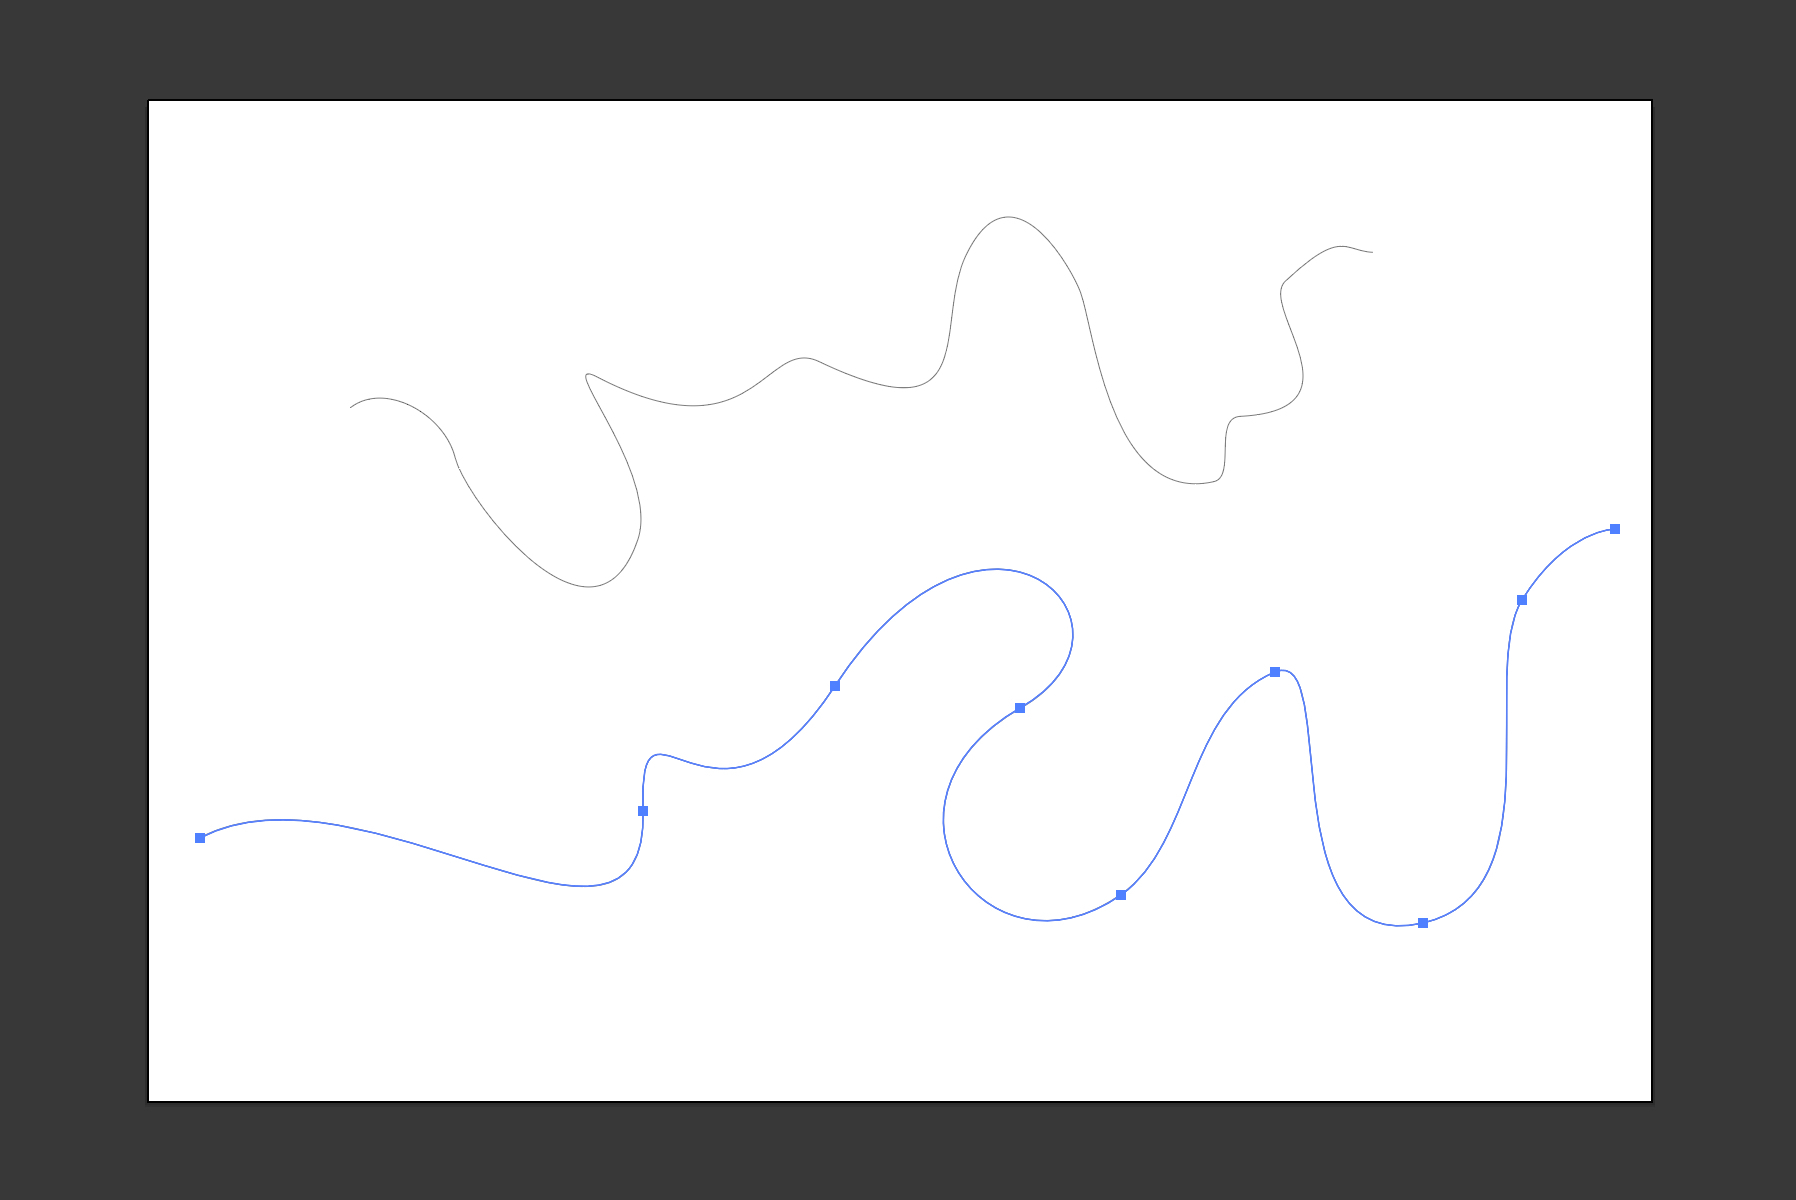
Draw a second vector line below the original. Again, I recommend emulating the line I have drawn here or creating something fairly similar if you don't want to trace.
Step 4
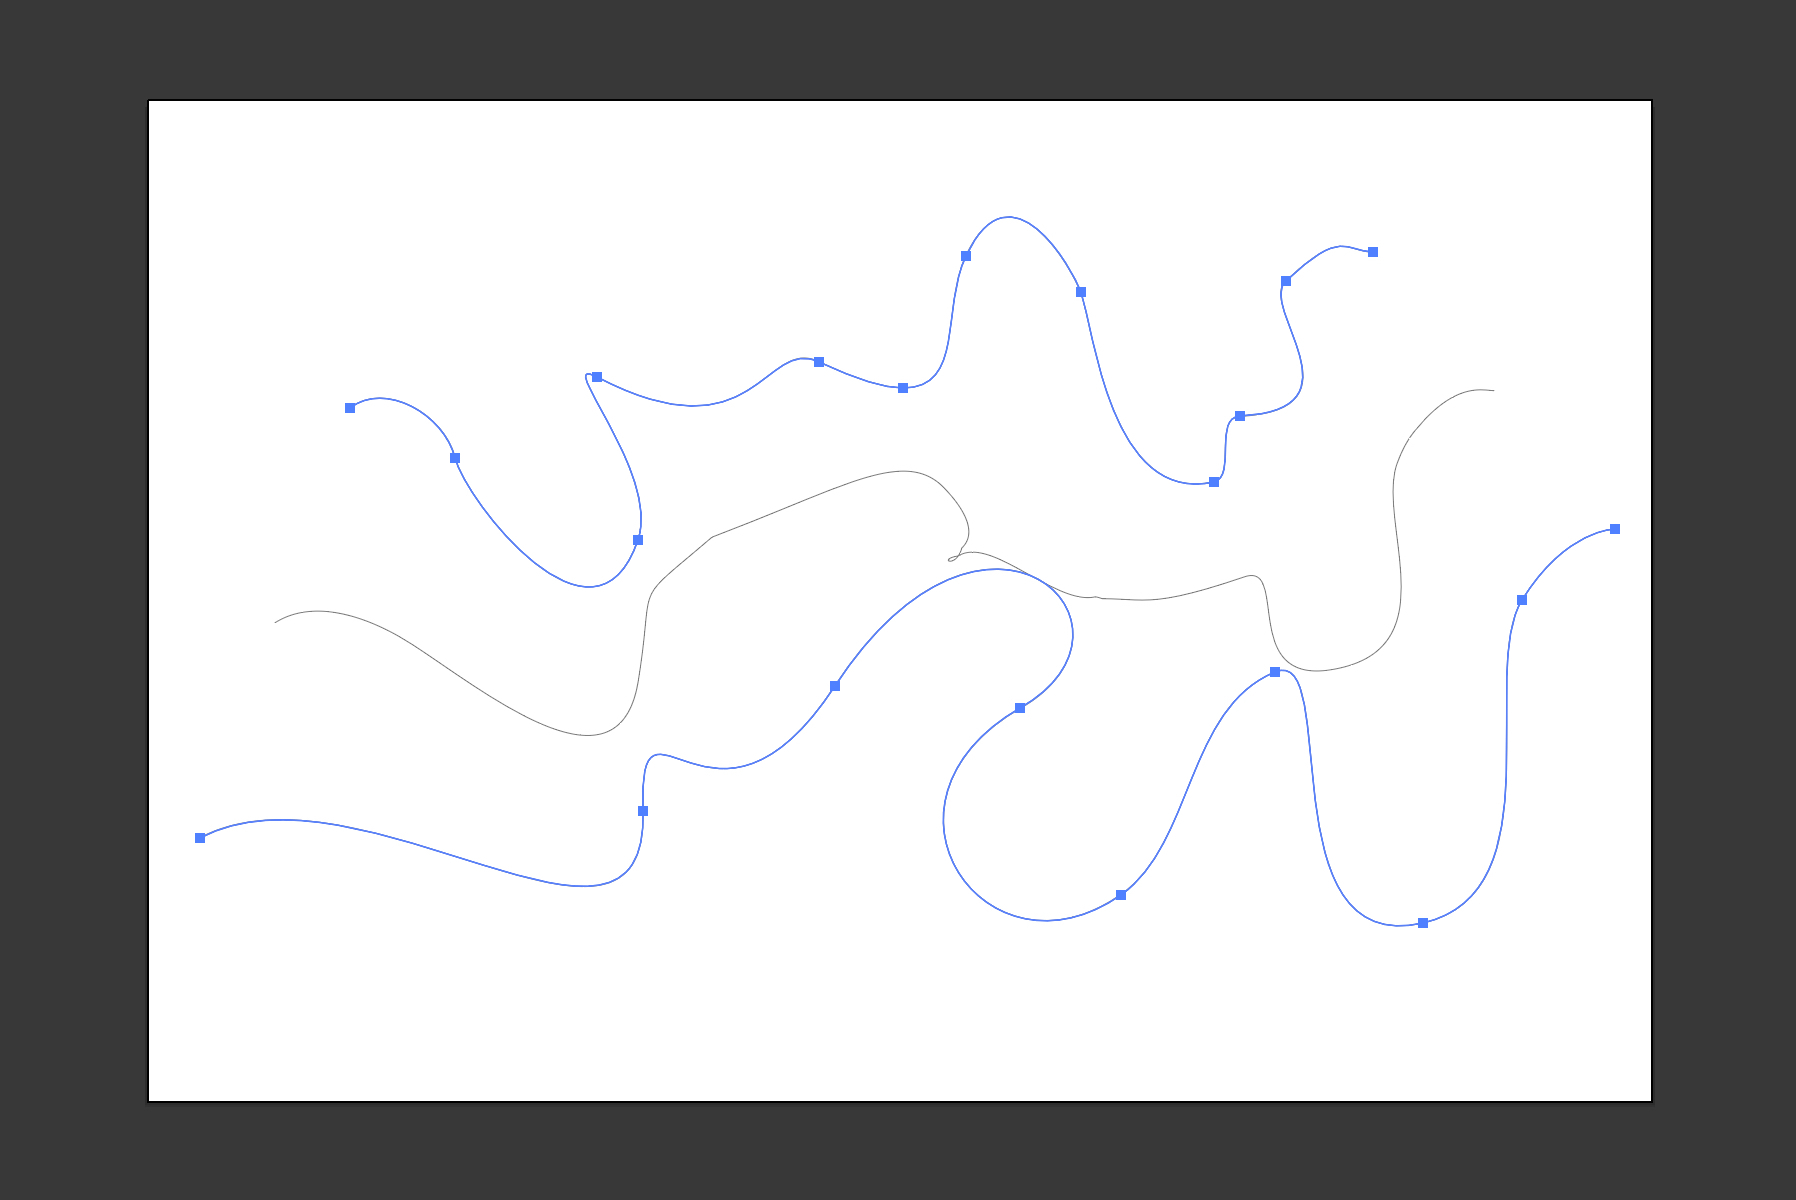
Select the Blend Tool (W) and click on the top line, then click on the bottom line to connect them.
You should have a new line appear in between the original lines. This means they have been successfully blended.
Step 5
Press the Enter key with the Blend Tool still active and both lines selected.
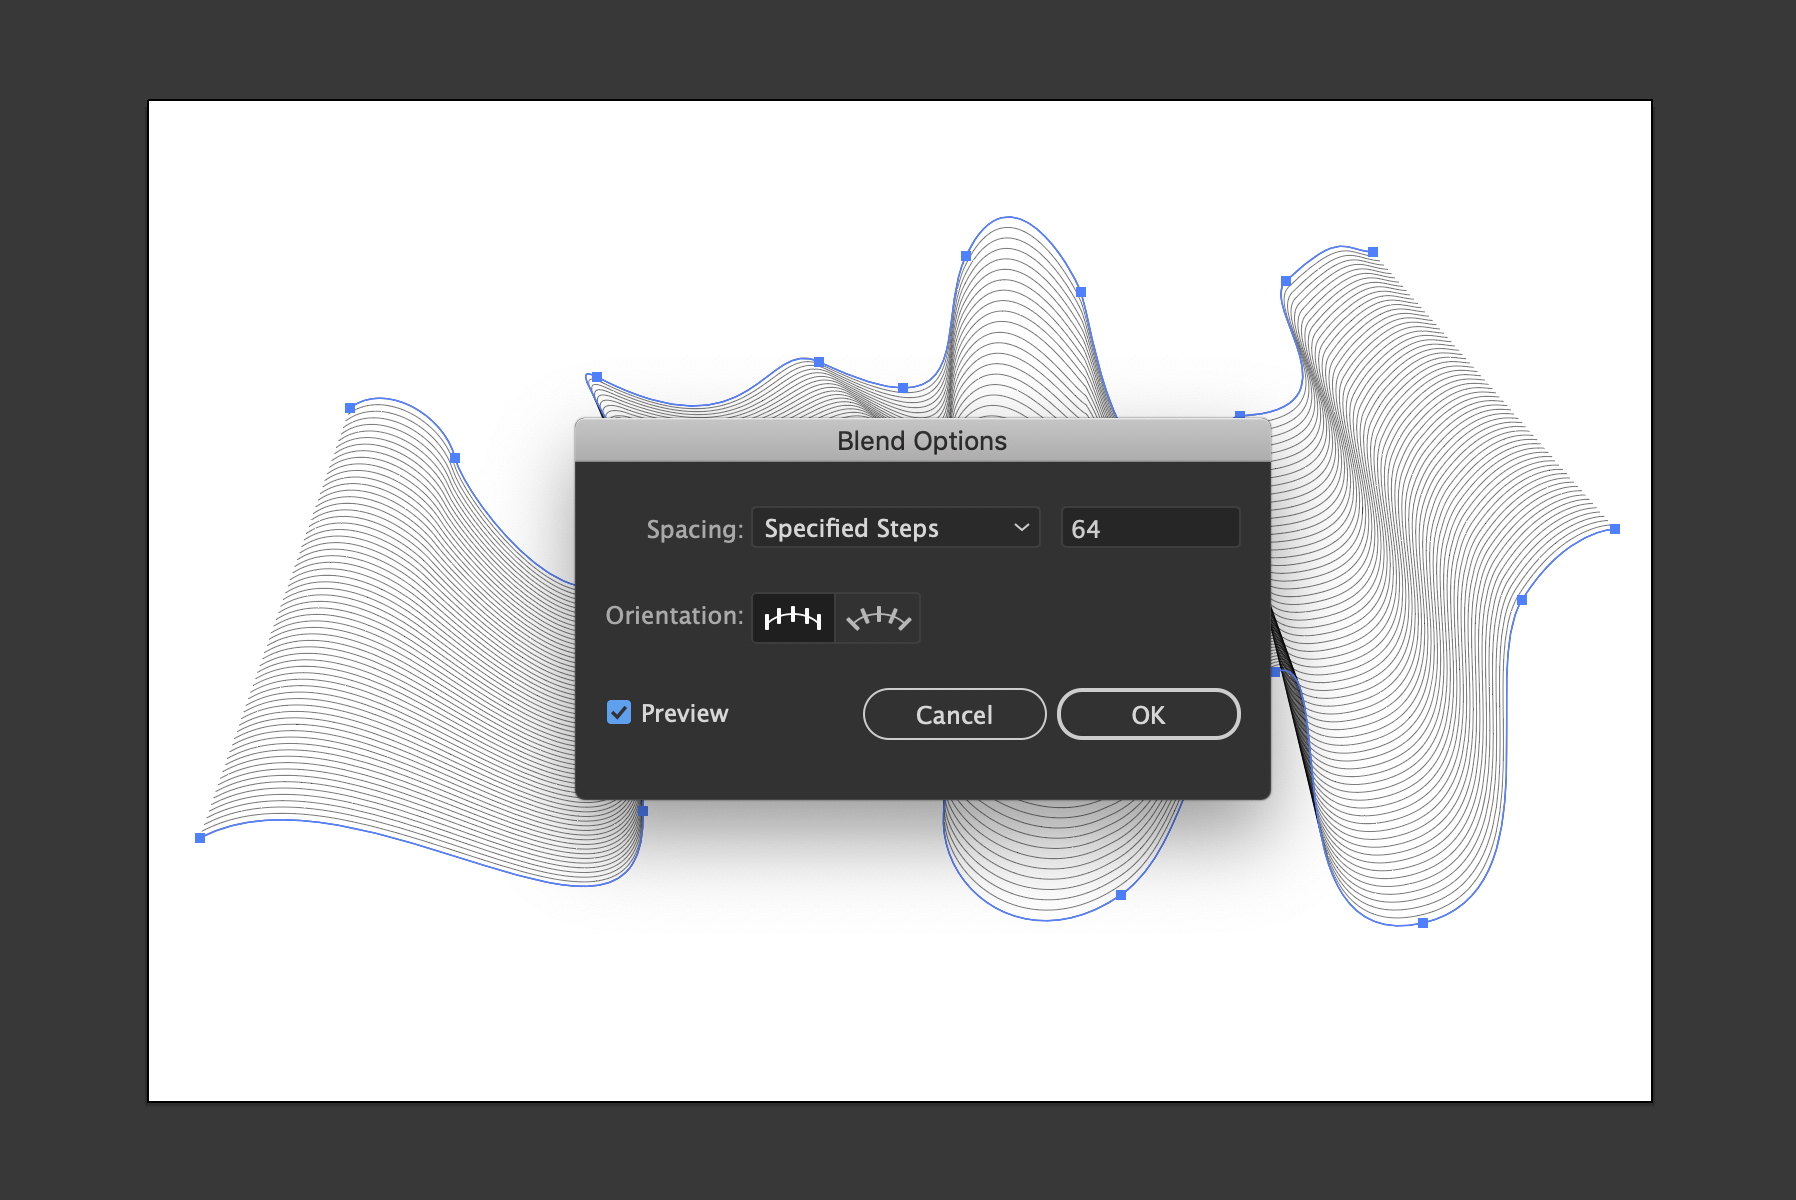
In the Blend Options window, choose:
- Specificed Steps
- Steps: 64
Step 6
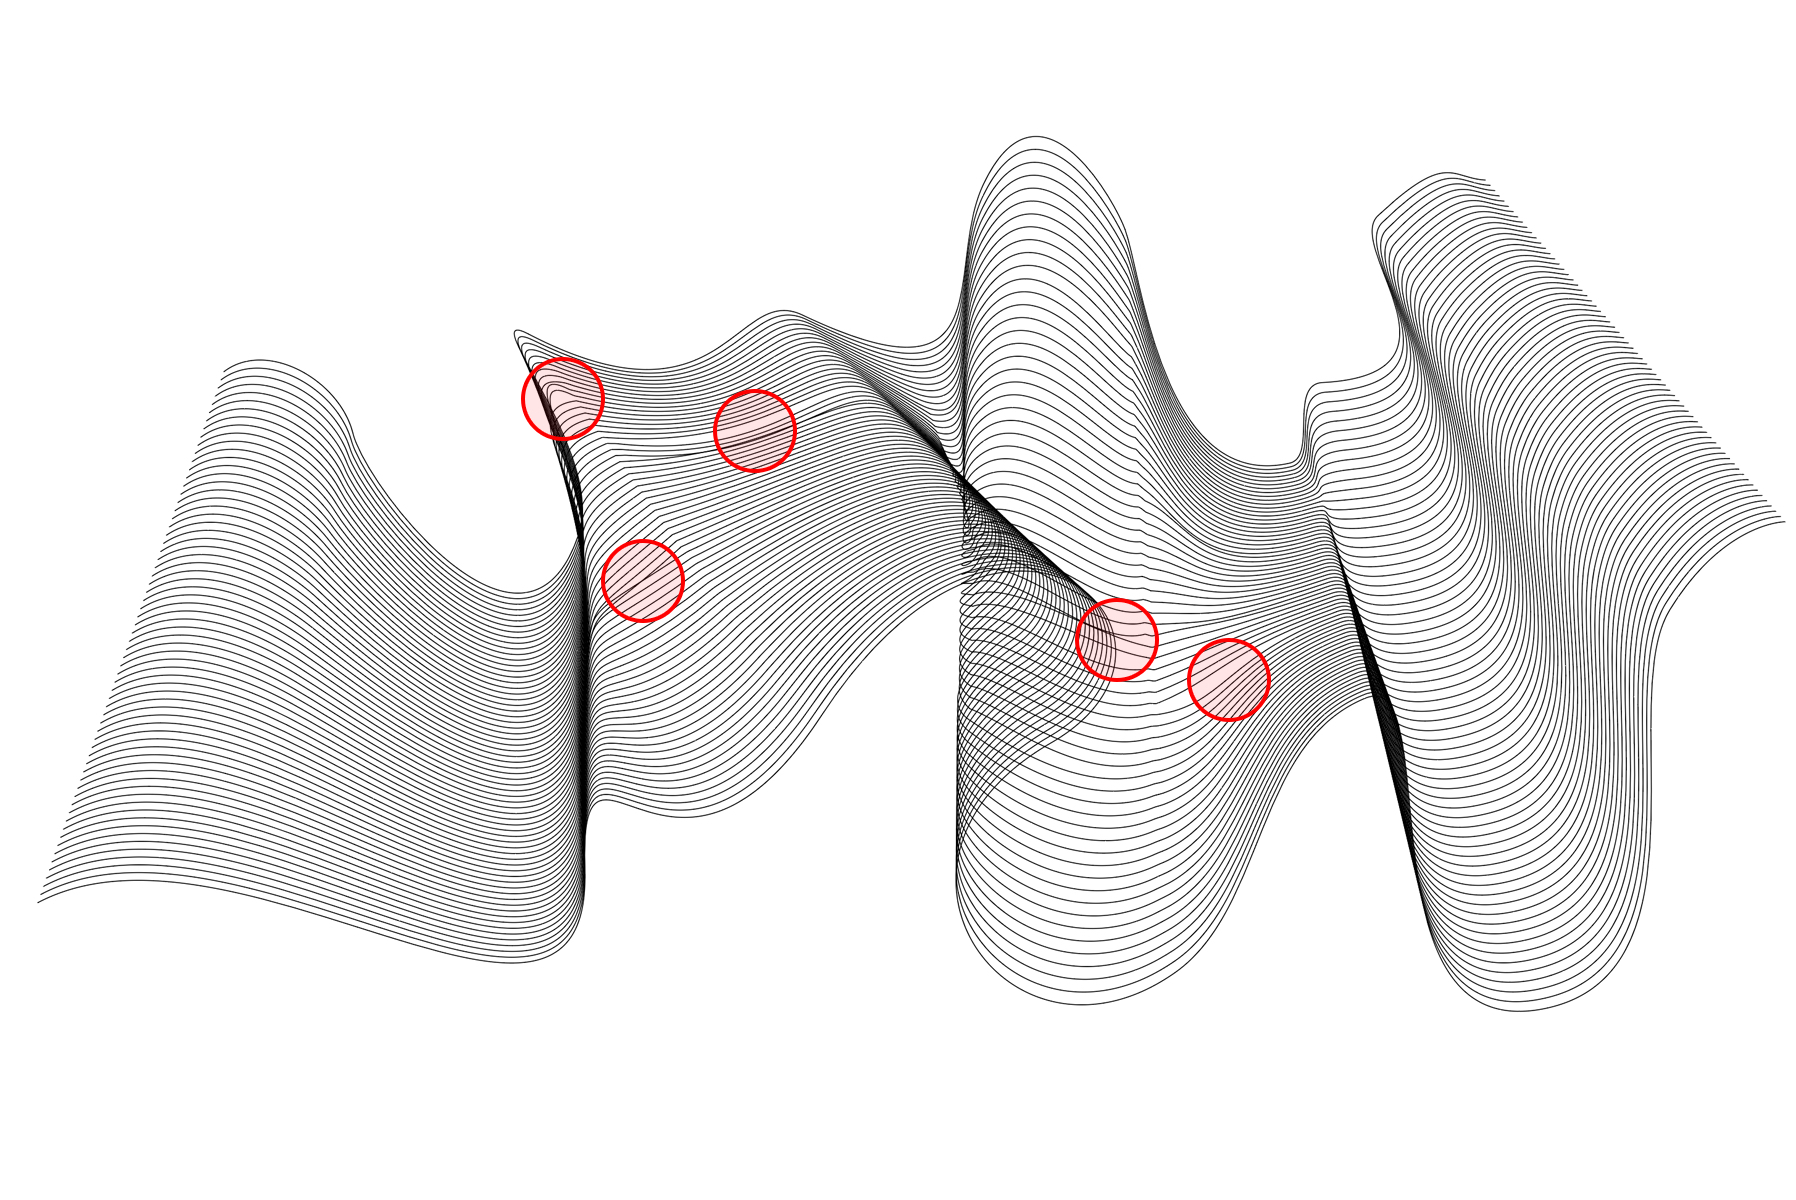
Unfortunately when using the Blend Tool with complex shapes, we can sometimes encounter visual glitches like the ones shown in the image below, where there is too much or too little space in some sections.
Check your vector wave thoroughly and identify any issues before continuing.
If you don't have any issues skip the next step.
Step 7
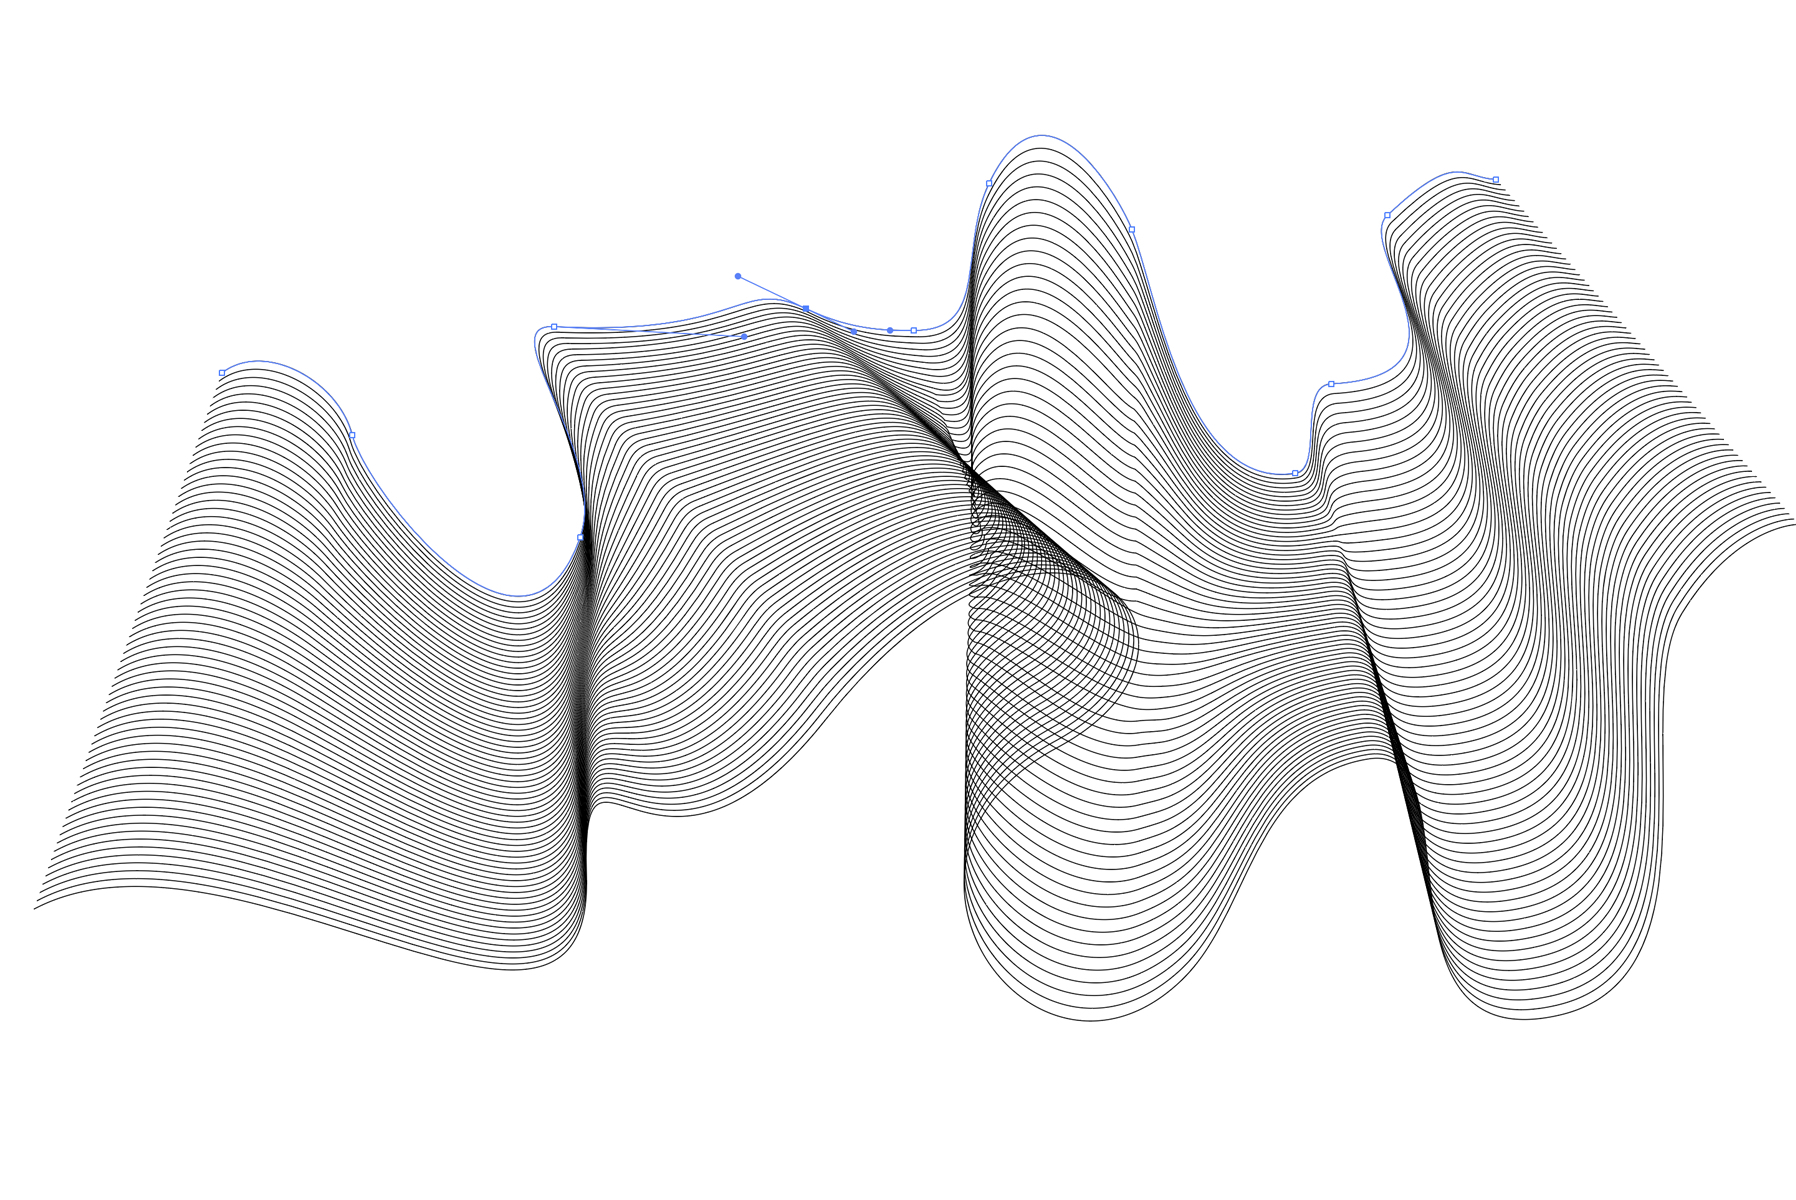
To fix these glitches, use the Direct Selection to manually tweak your source vector lines (the first 2 we started with).
It can be a bit tricky to hide these annoying problems but I've found that moving the position of the vector points slightly and experimenting with their handles to try and smooth out the lines usually works.
Step 8
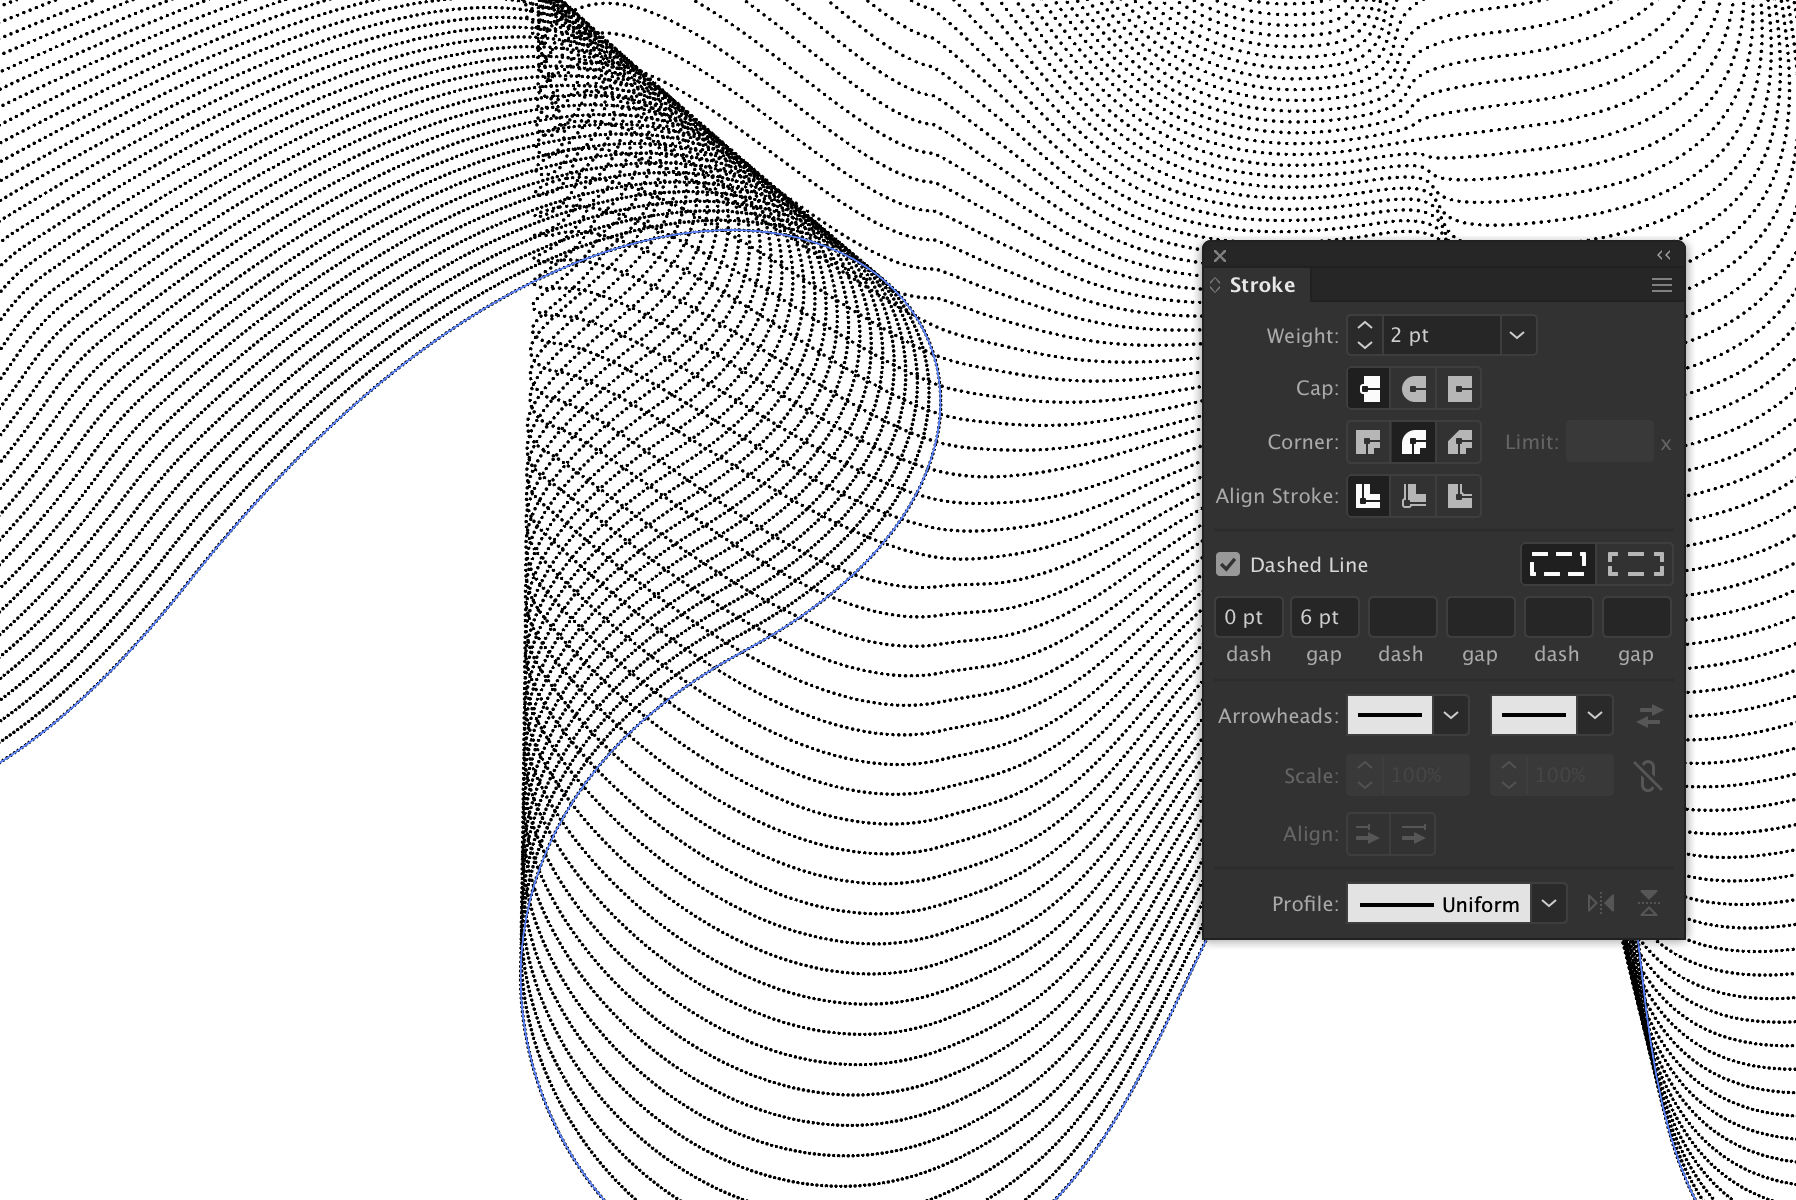
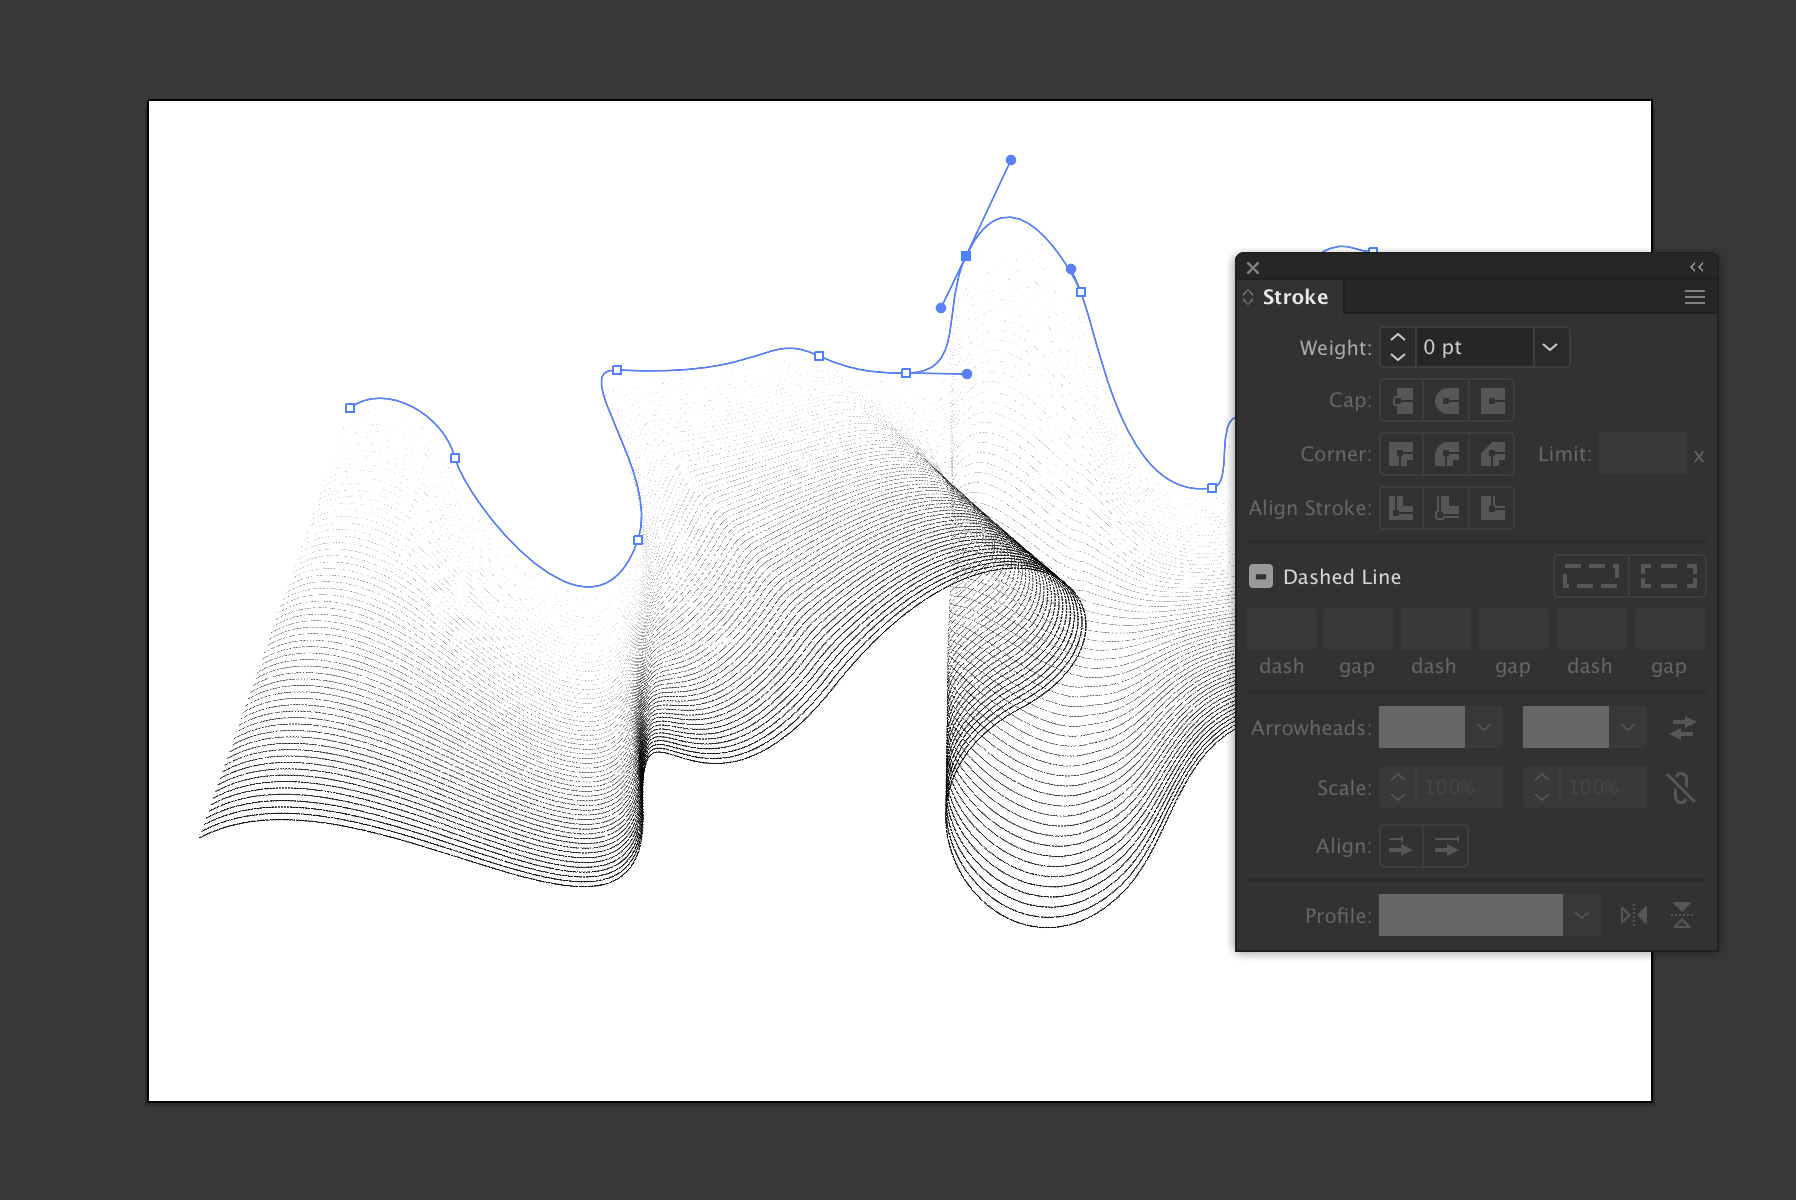
Select your vector lines and open the Stroke Window to apply these settings:
- Stroke Weight: 2 pt
- Corners: Round
- Dashed Line: ON
- Dash: 0
- Gap: 6 pt
You now have a dotted line instead of a basic solid line. It can be fun to mess around with this step and experiment with different settings.
Step 9
Using the Direct Selection Tool, select only the top vector line and set the stroke weight to 0.
Thanks to the blend feature in Illustrator, the vector lines will now gradually disappear as if they are fading into the distance.
Step 10
Time to switch over now, Open Photoshop CC.
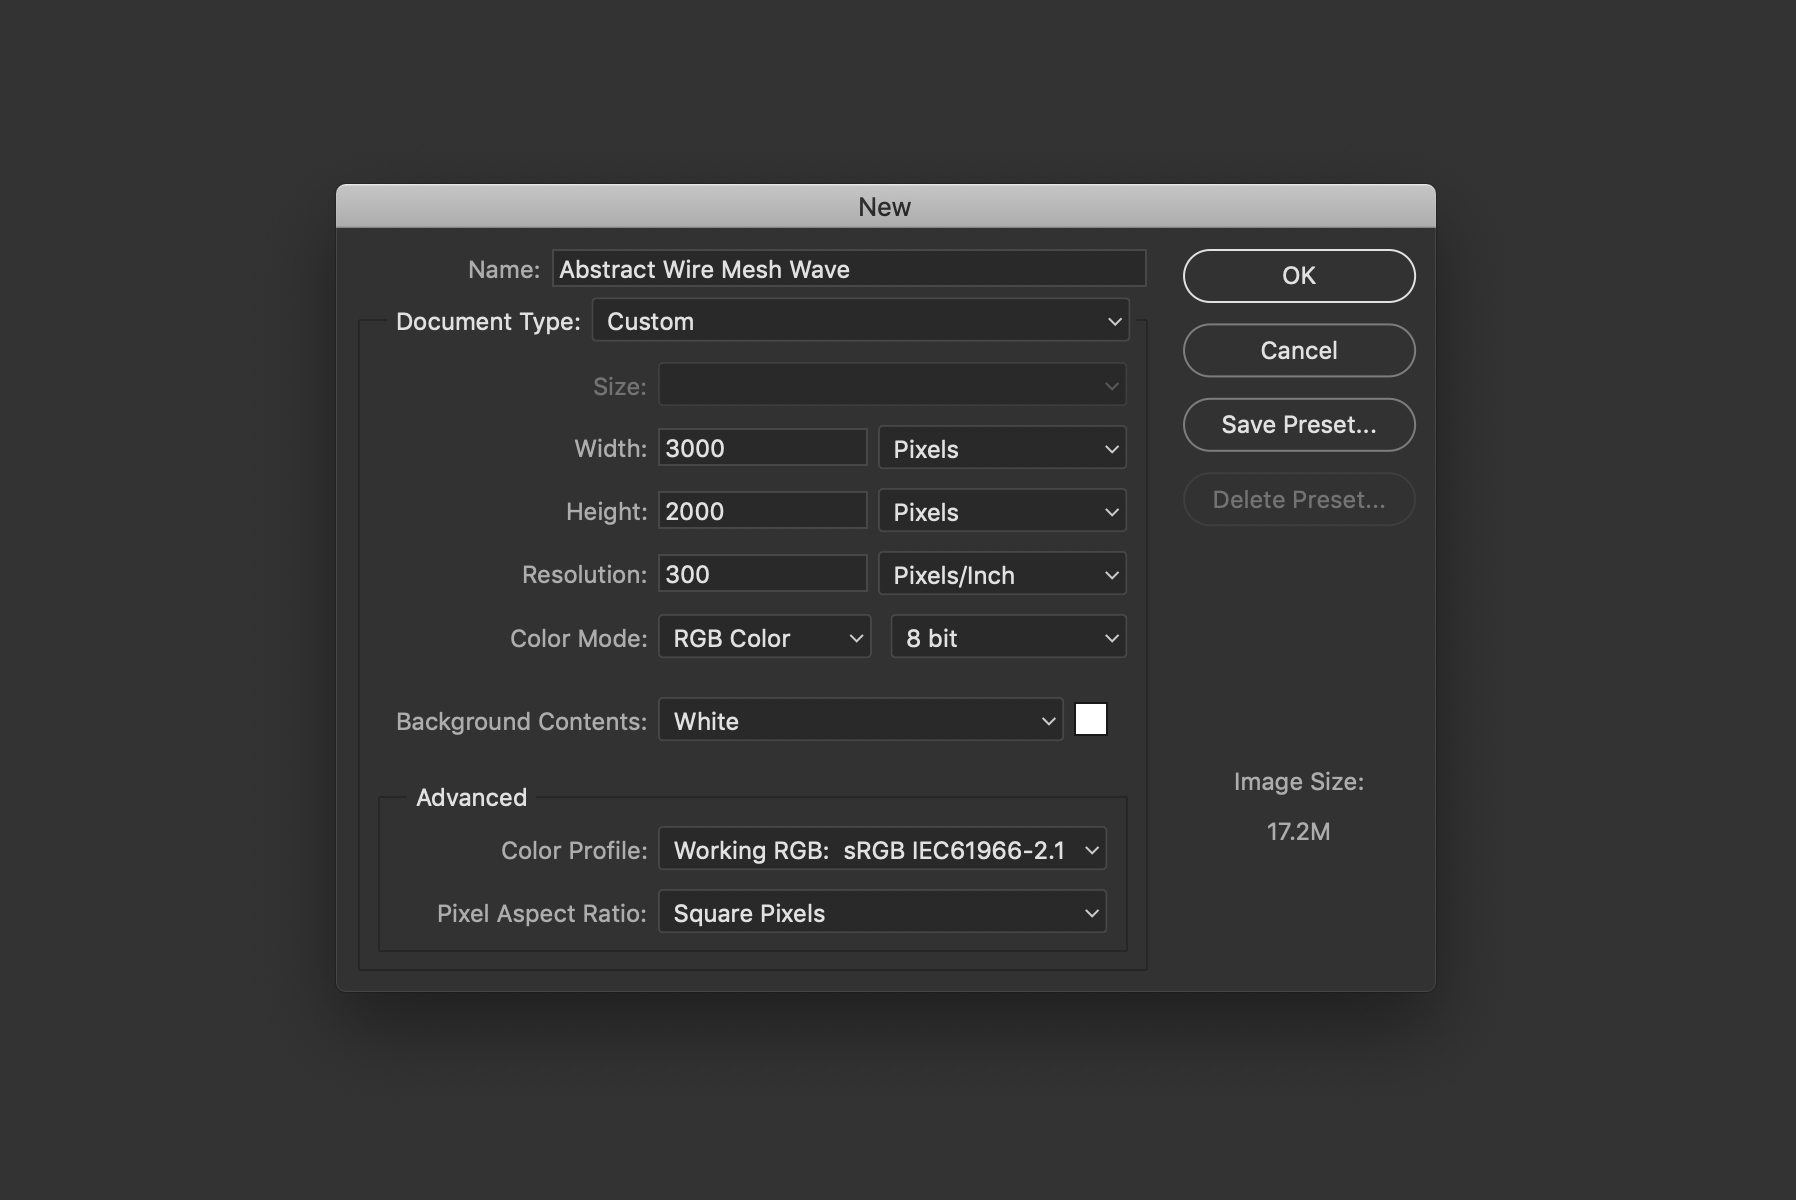
Create a new document:
- 3000 x 2000 px
- Resolution: 300 PPI
- Color Mode: RGB 8 bit
Step 11
Select your vector wave in Illustrator and copy and paste it into your Photoshop document as a Smart Object.

Step 12
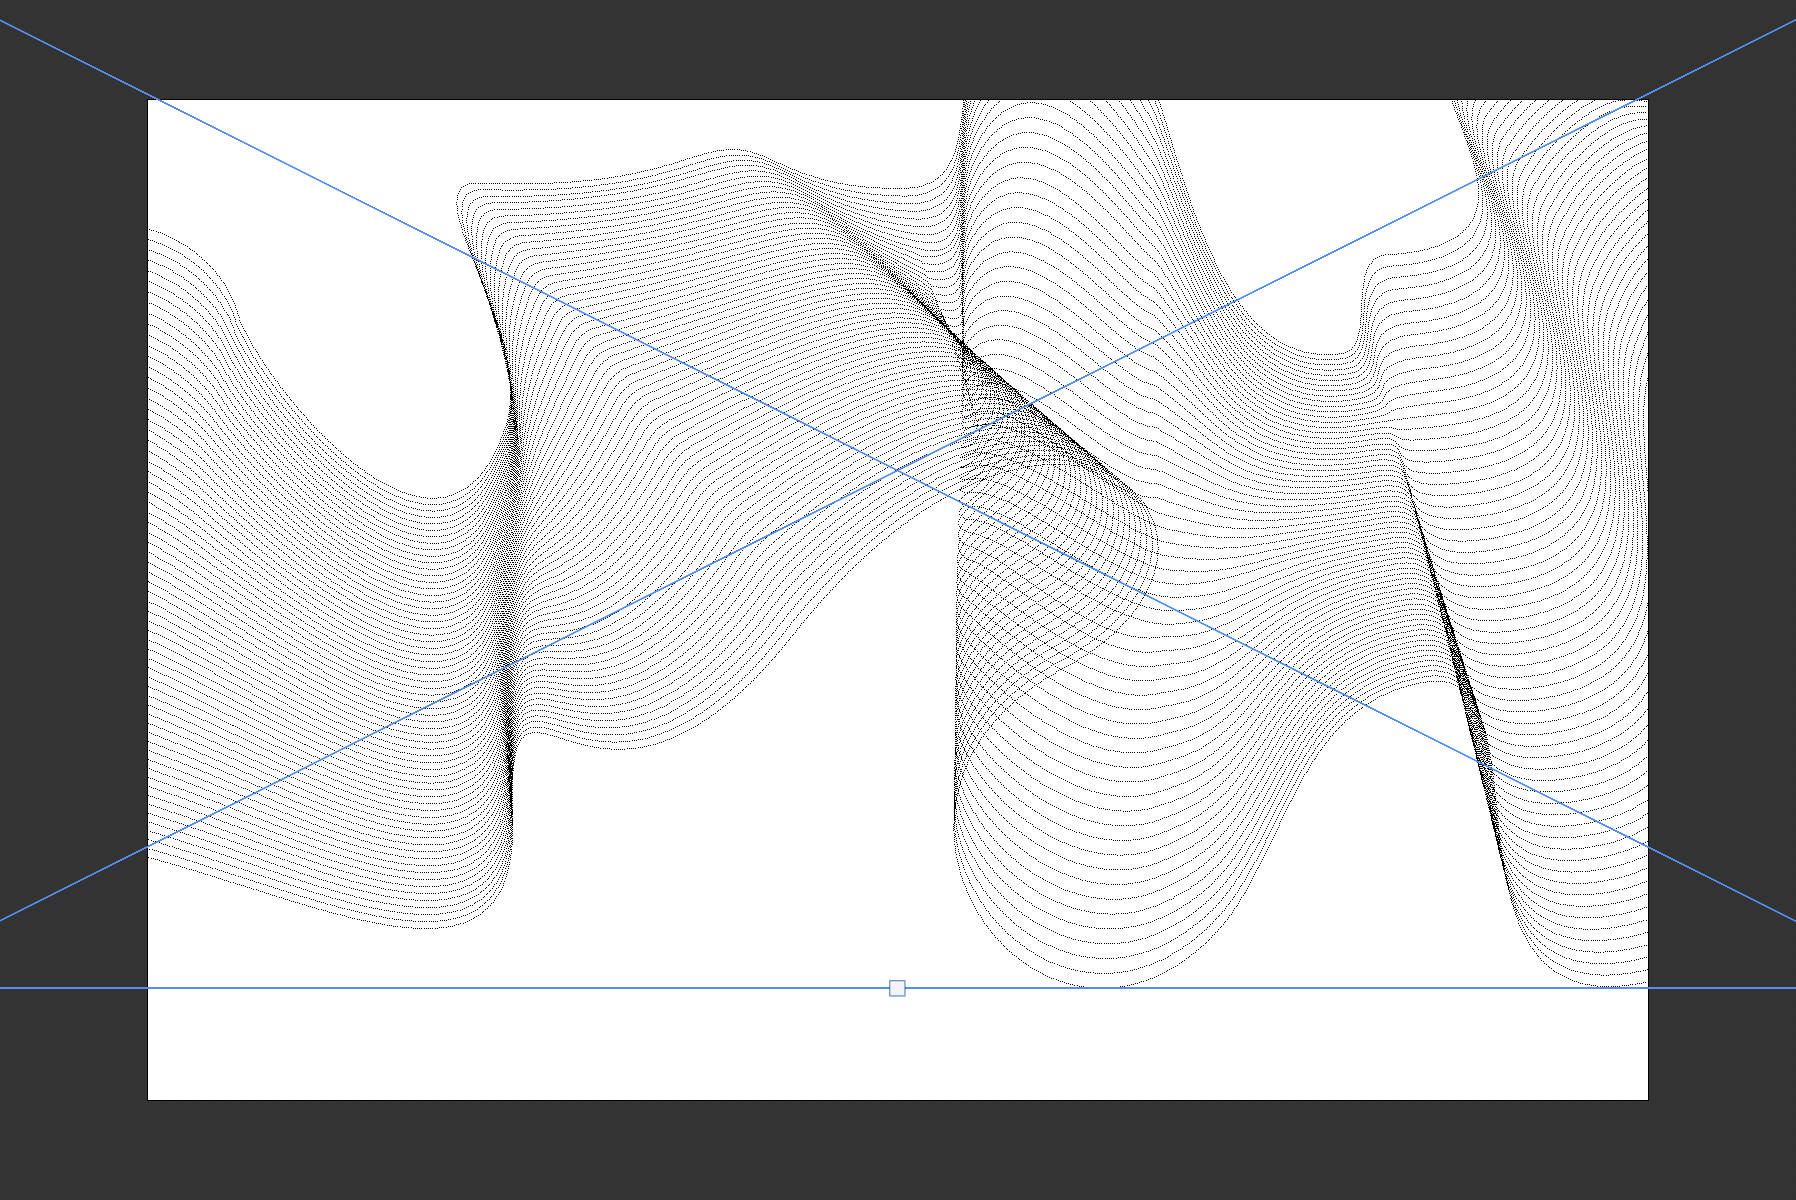
Use the transform tools or the handles around the vector smart object layer to resize and fit it to the canvas.
Ideally, the ends of the wave will not be visible and will instead extend paste the bounds of the artboard.
Step 13
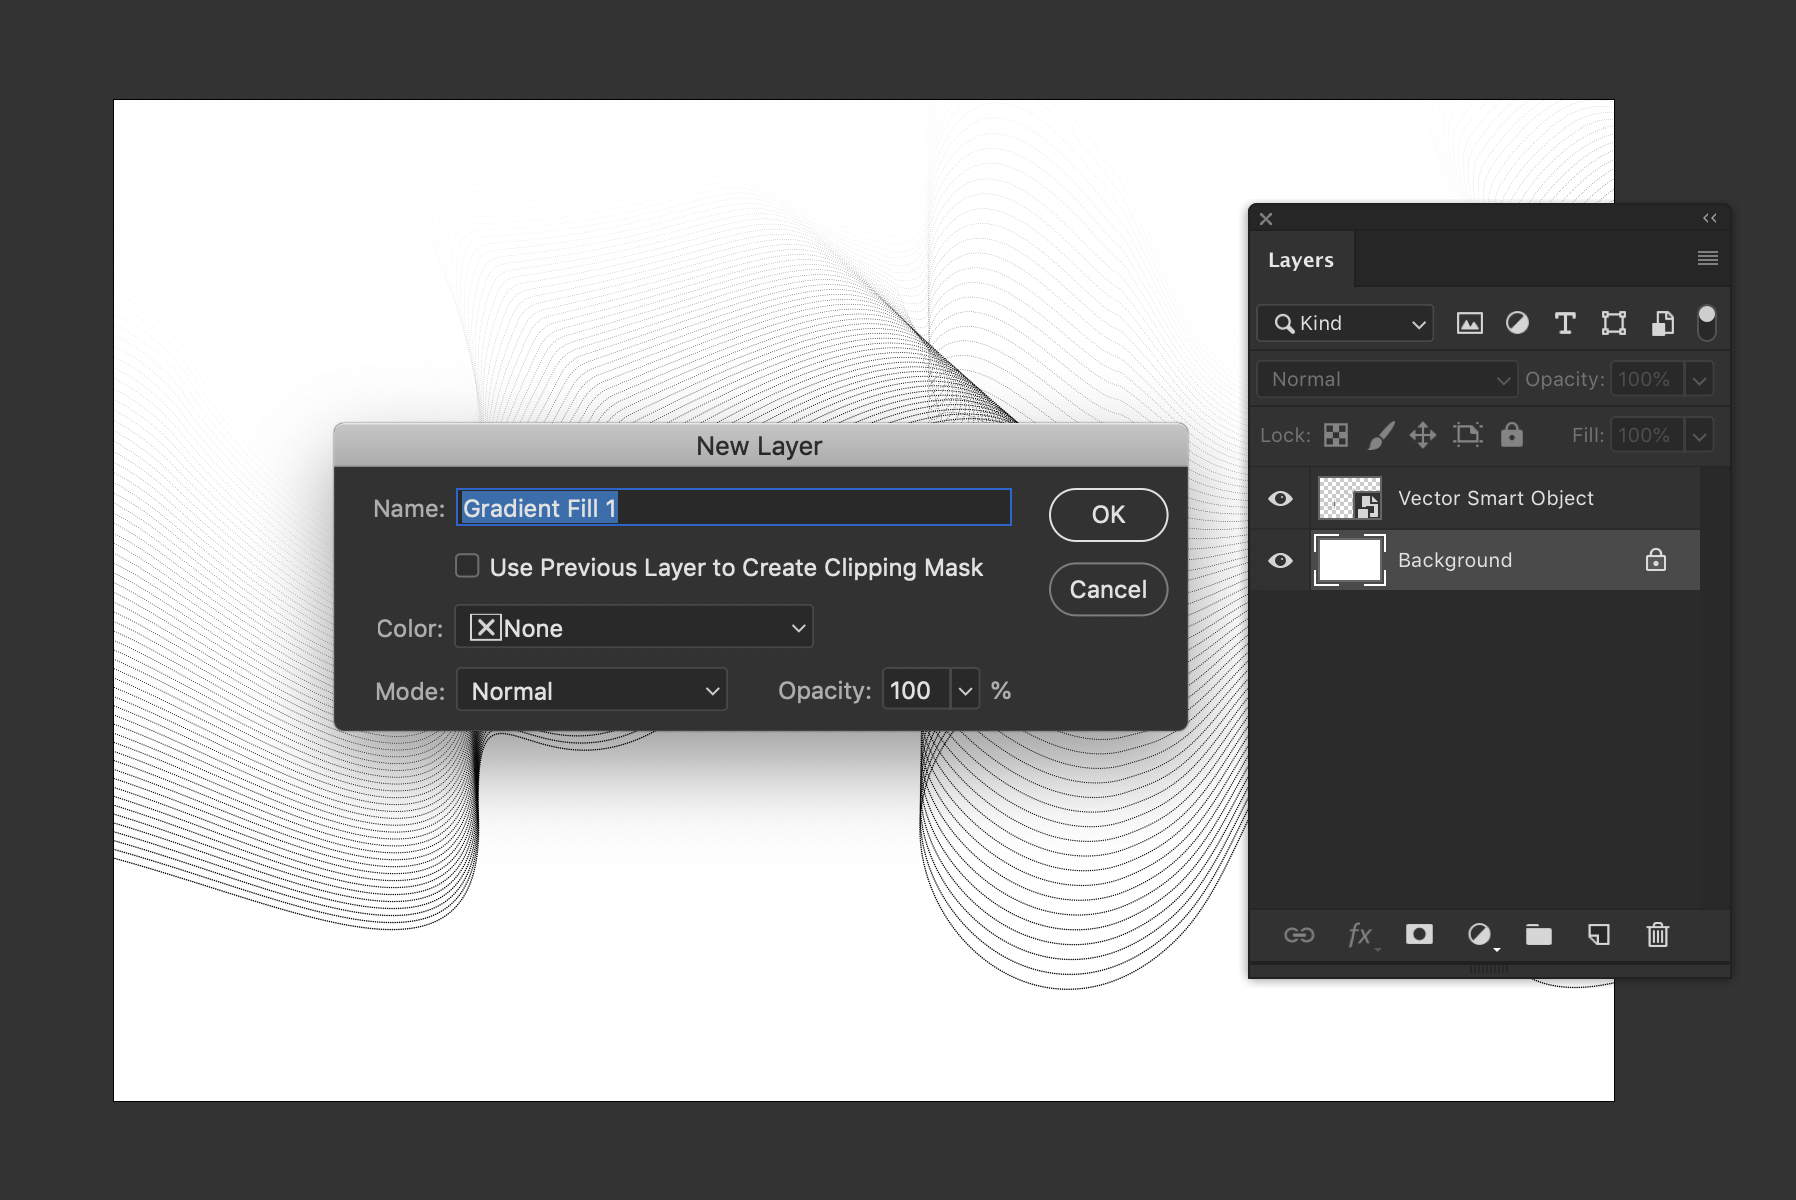
Go to Layer > New Fill Layer > Gradient Fill and hit OK.
The layer should be above the background but below the vector smart object in the Layers panel.
Step 14
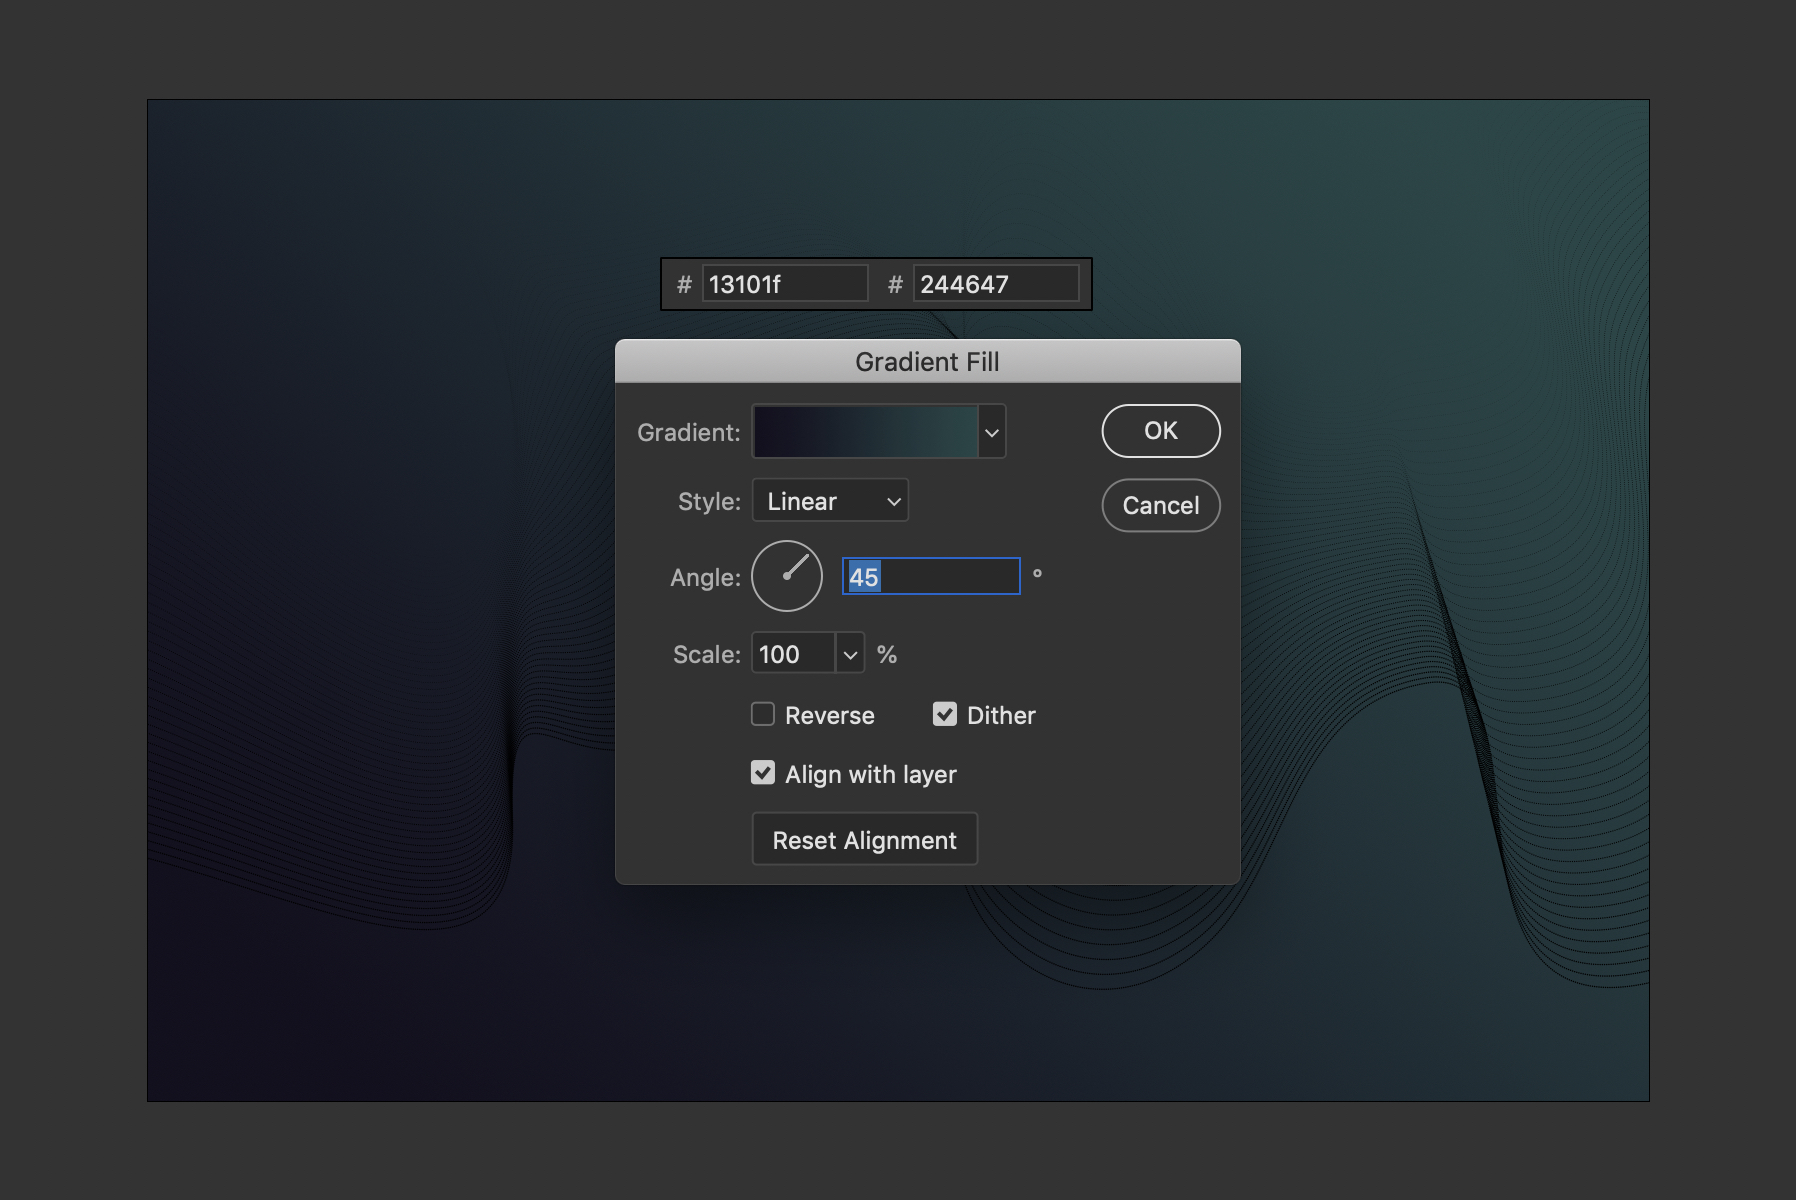
In the fill options window for your new gradient fill layer, enter the follow variables:
- Gradient Point 1 Color: #13201f
- Gradient Point 2 Color: #244647
- Gradient Point 1 Position: 0
- Gradient Point 2 Position: 100
- Style: Linear
- Angle: 45
- Scale: 100%
- Reverse off, Dither on, Align on
Step
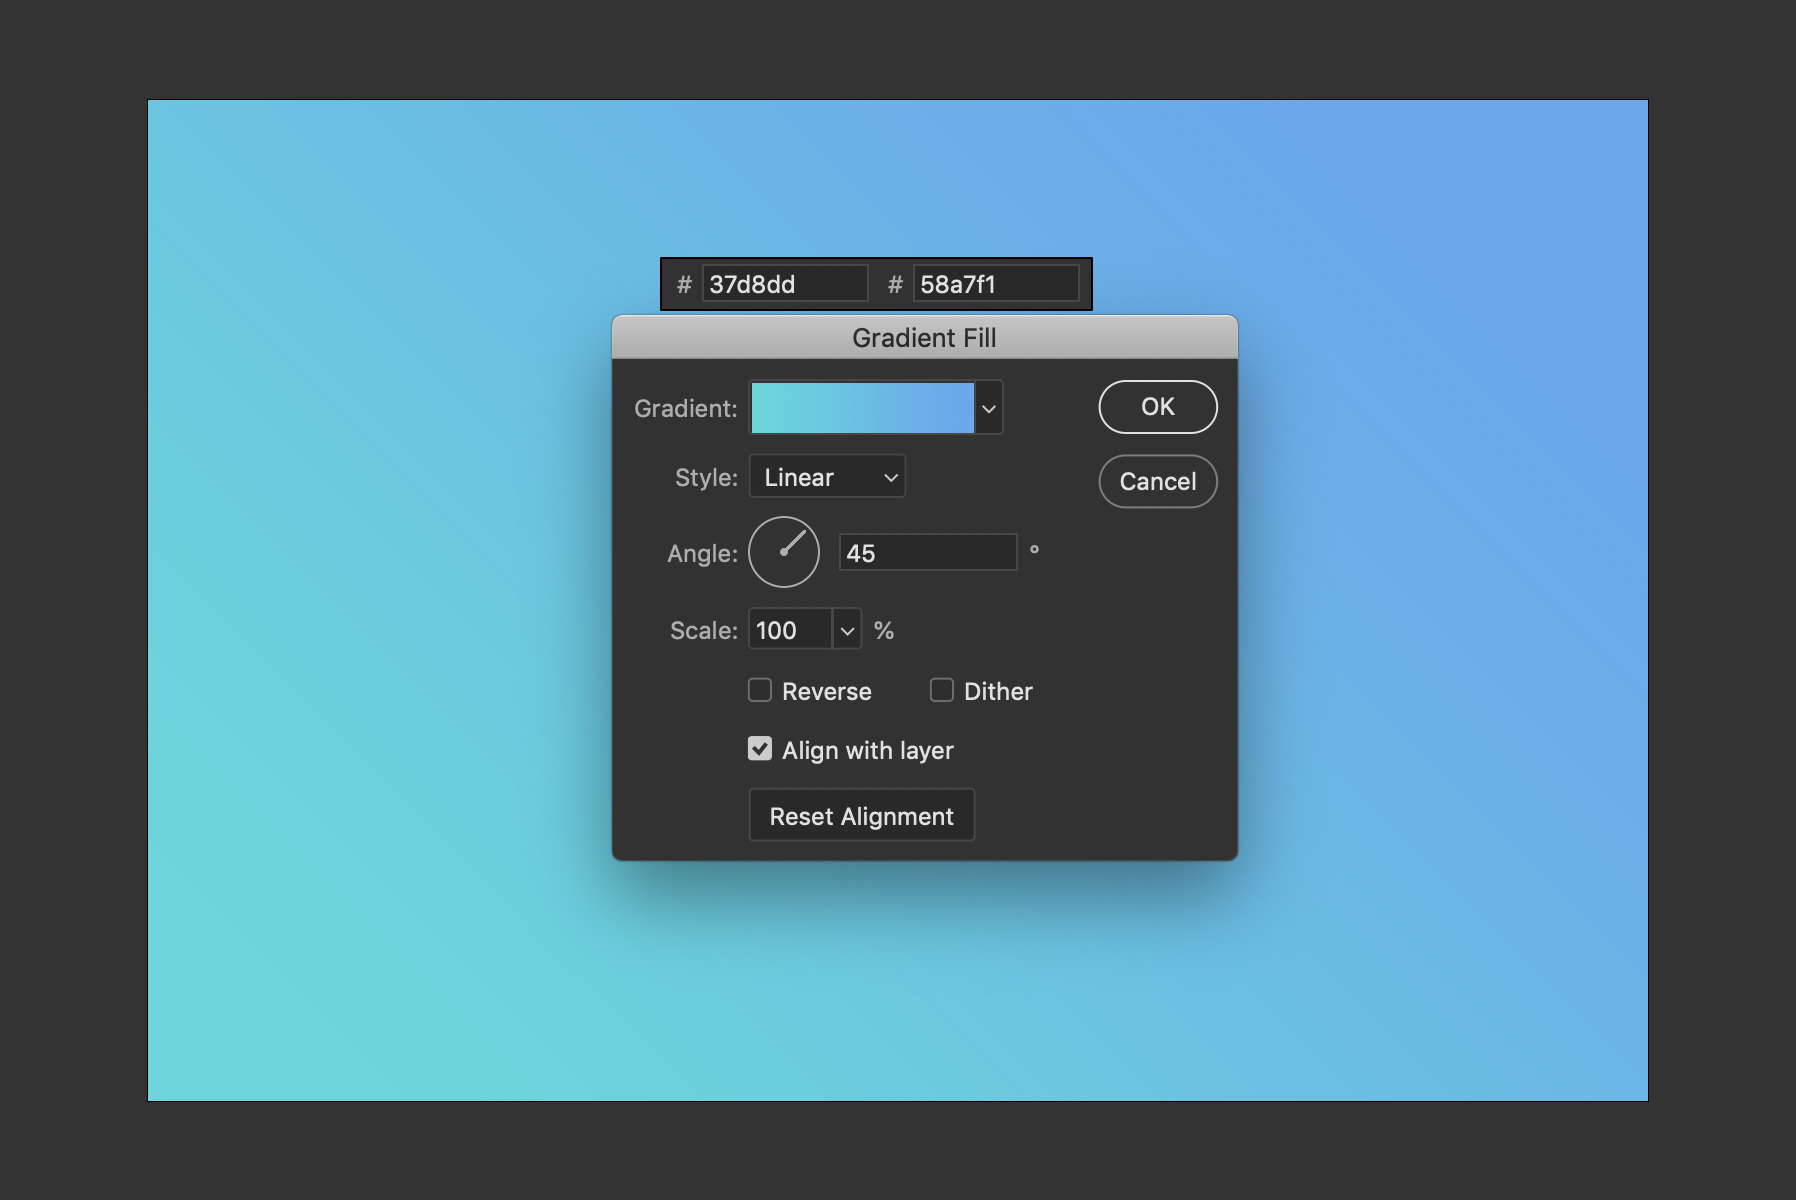
Duplicate the gradient fill layer and double click on the layer thumbnail to enter the Gradient Fill options window again.
Use the same settings as last time but with two change:
- Gradient Point 1 Color: #37d8dd
- Gradient Point 2 Color: #58a7f1
Step
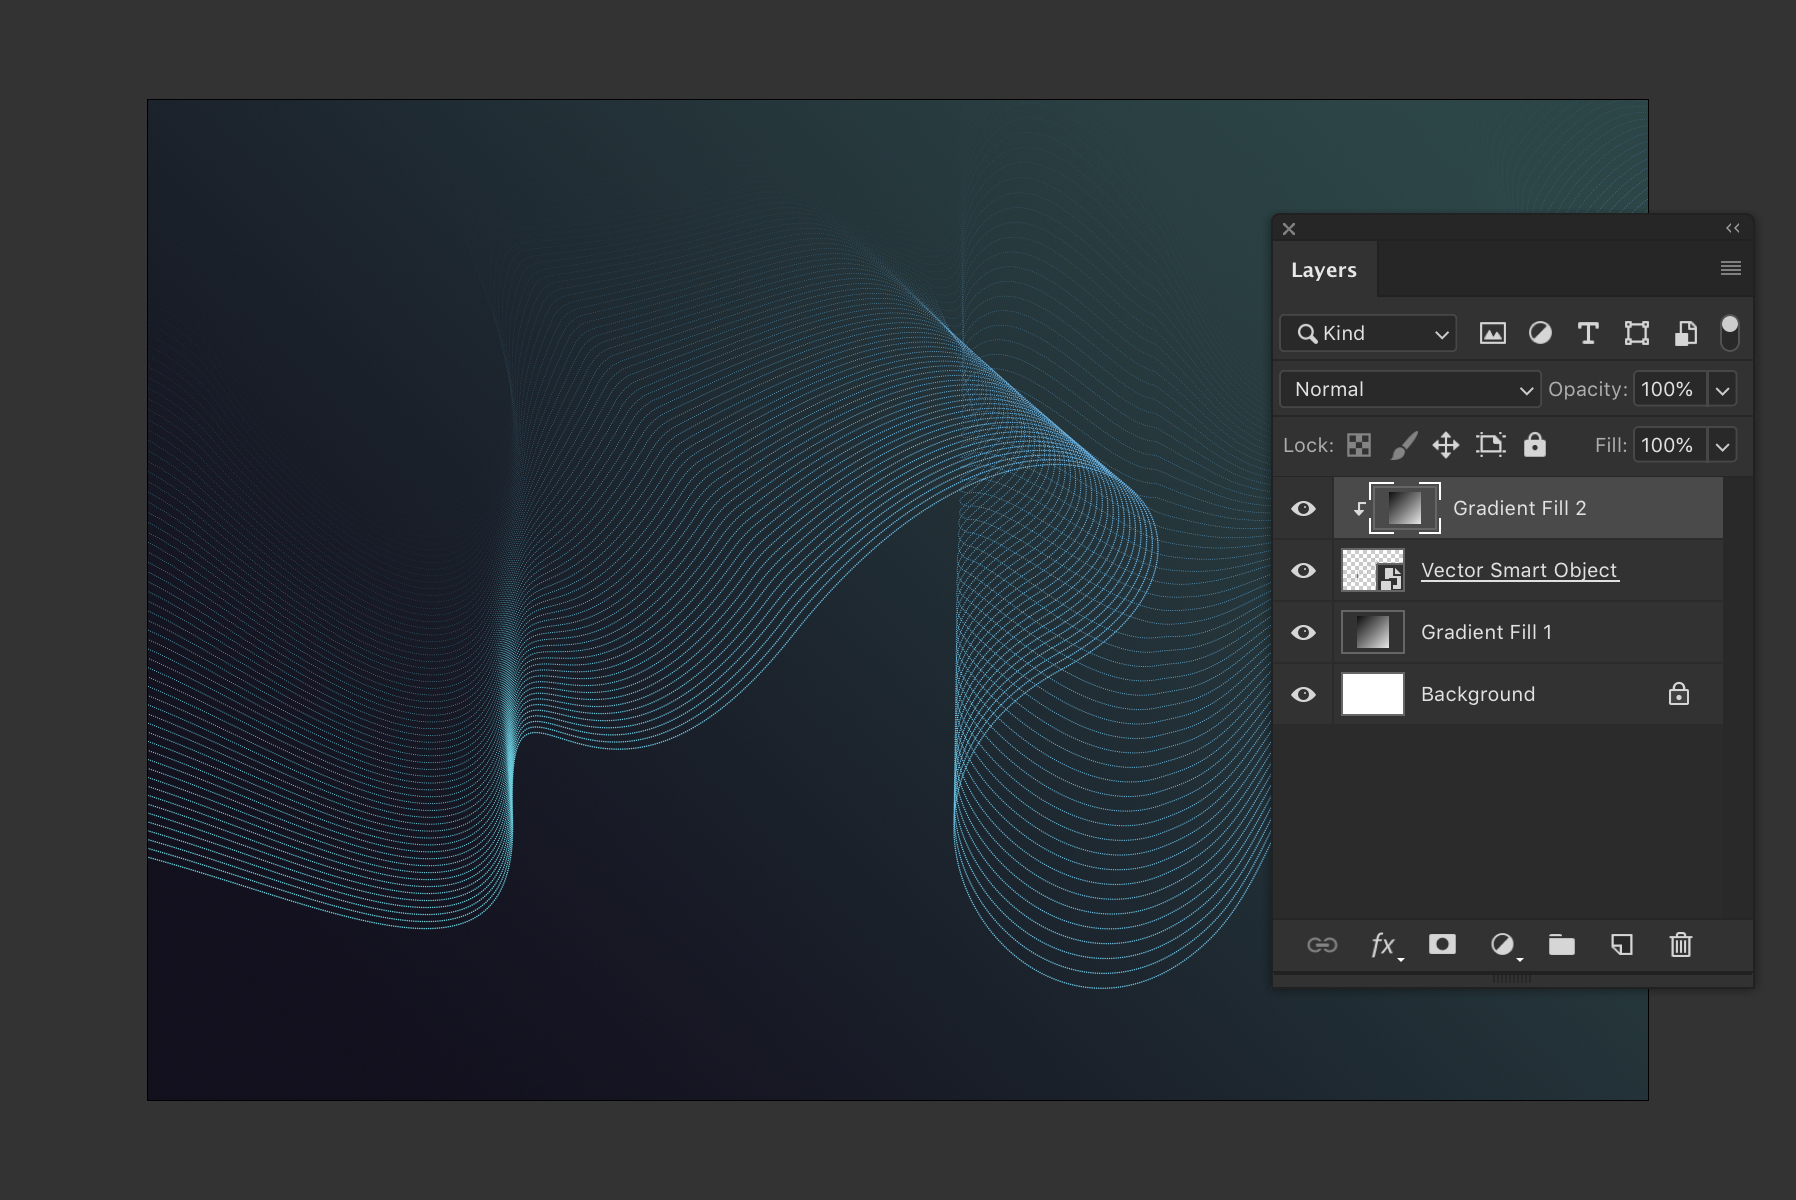
Move the second gradient fill to the top of the layer stack.
Right click on the gradient fill layer and choose Create Clipping Mask from the contextual menu.
Result & Conclusion
Here is the final result, and it looks even better at full size larger resolutions, everything we have done to create this abstract wave background can be scaled flawlessly in Photoshop. There's nothing to stop you using the Image > Image Size... to upscale to 7680 x 4329 px (8K).
Thanks for reading, I hope you have enjoyed following along with this tutorial and learned something new about using the blend tool in Illustrator and creating a stunning background in Photoshop.


