Do Everything at Once: How to Batch Process in Photoshop
Processing Files in Photoshop
There are some repetitive tasks that sometimes we have to do, like applying a watermark or just change the size of hundreds of images. We can of course do this by using Photoshop Actions, but we have to open every image and then click the play button on the actions panel hundreds of times to apply the action to each image.
Today, I will show you how to batch process in Photoshop any amount of images inside a folder just by creating a simple Batch Automation command. First, we need an action to apply to our images, it could be a very complex or very simple one and then we have to tell Photoshop to process all the images we want using a Batch Process. So let´s start by creating a very simple half resizing action first to later apply this action to all our images using the batch automation in Photoshop.
What we will need before start:
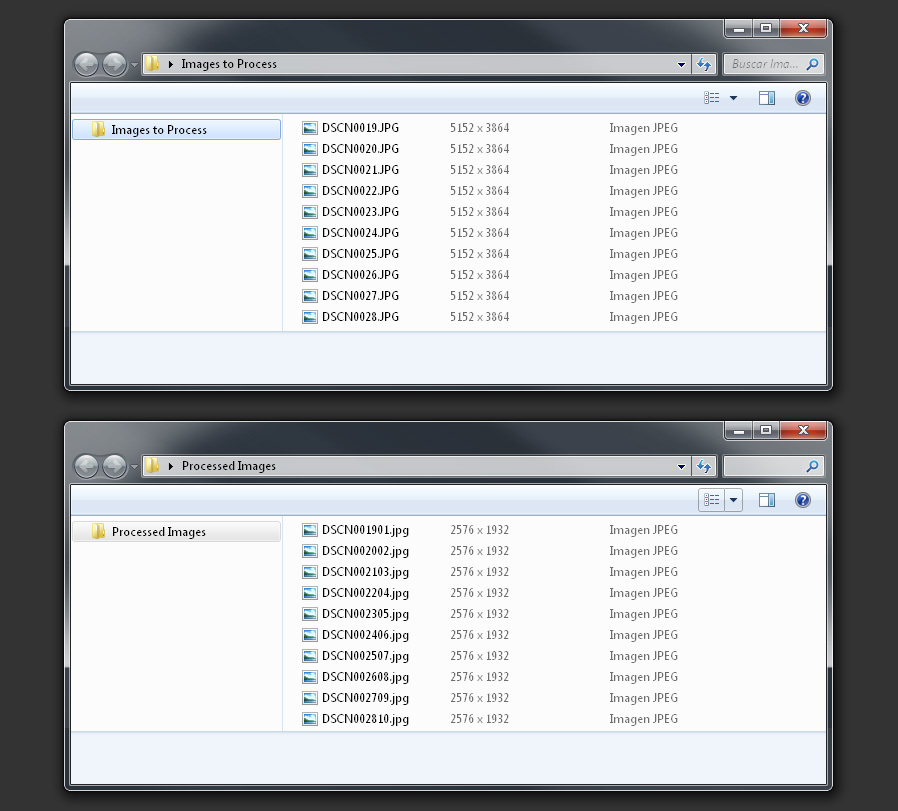
- A source folder containing all the images we want to process.
- A destination folder where we will save the processed images.
Step 1
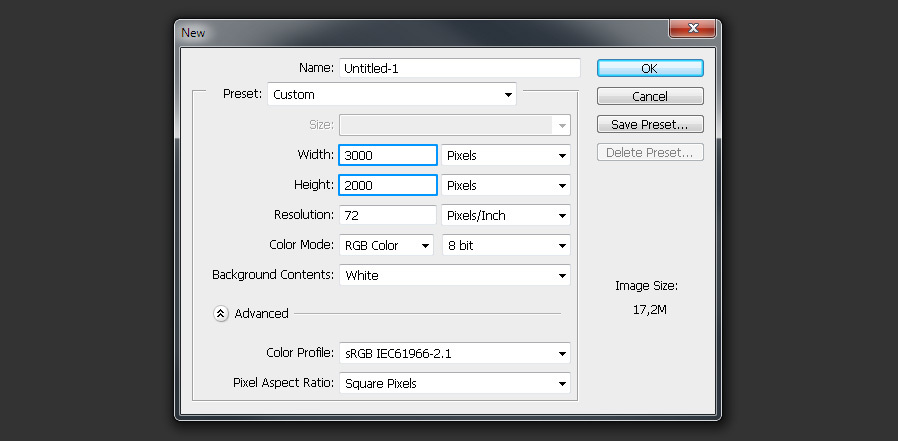
Open Photoshop and create a Document of 3000 x 2000 px.
Step 2
Go to Window > Actions to show the Actions Panel.

Step 3
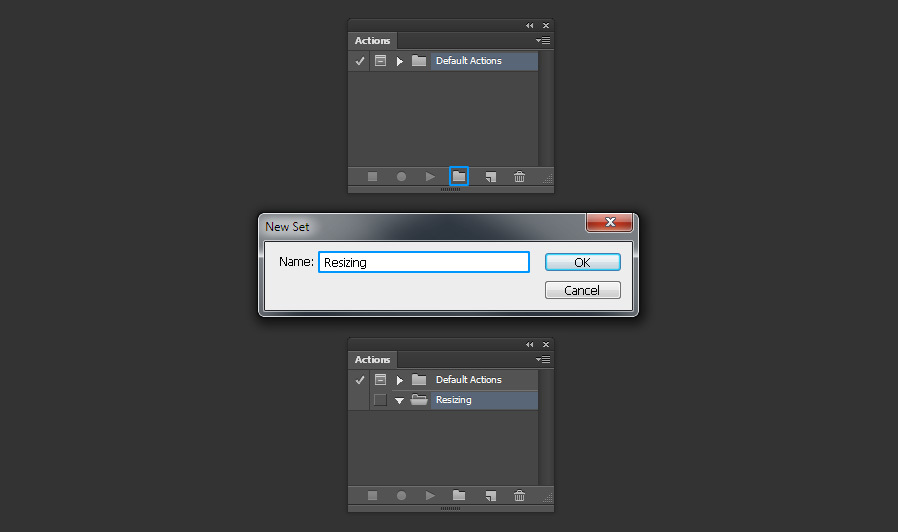
Click on the bottom folder icon to create a new action set and name it ‘Resizing’.
Step 4
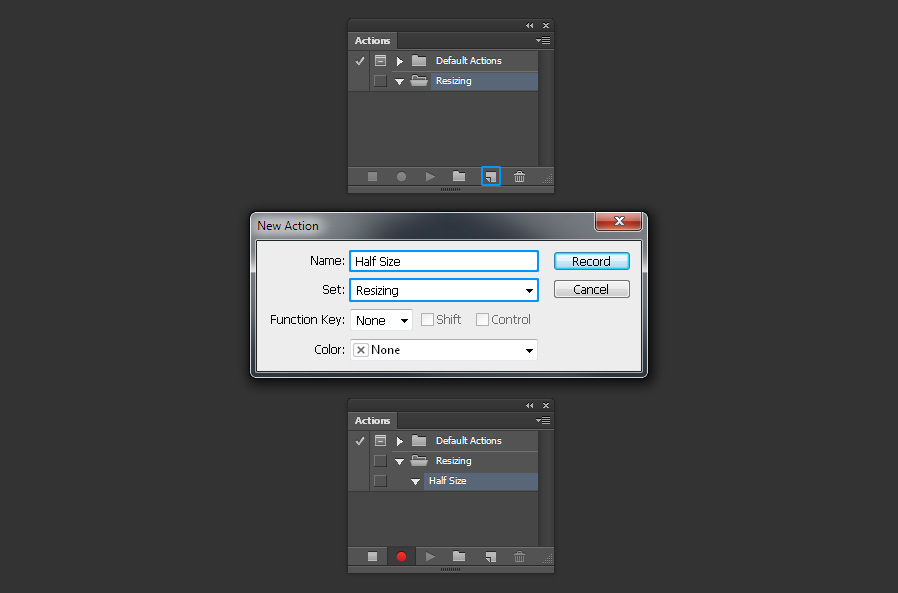
With the recently created action set selected, click on the Create New Action icon. Name the action as ‘Half Size’ (be sure to have the ‘Resizing’ set selected) and click Record.
Step 5
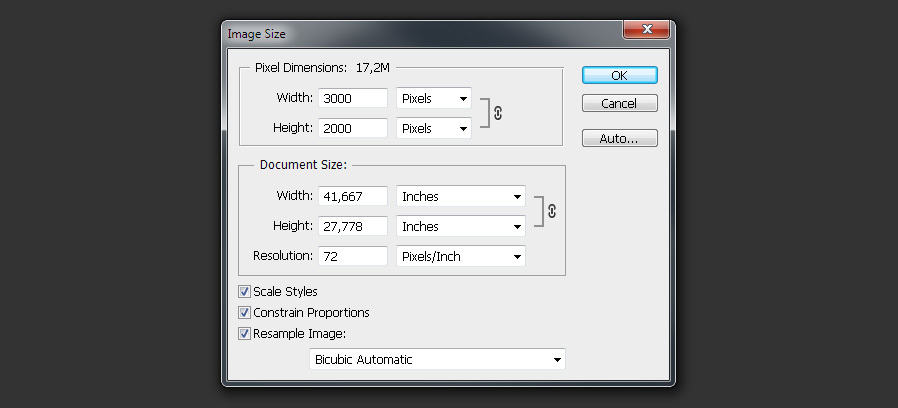
Go to Image > Image Size.
Step 6
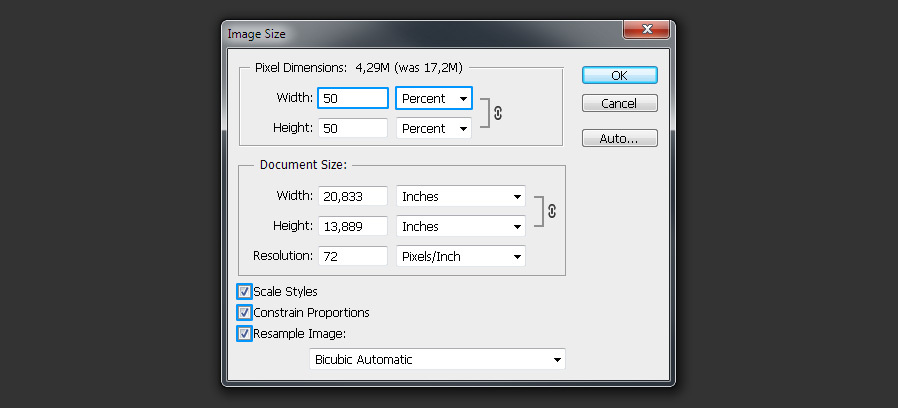
Set the Width Dimension to 50%. Be sure to have the Scale Styles, Constrain Proportions and Resample Image checked, and click OK.
Step 7
Go to File > Save As. Choose the JPEG file format and click Save.
Note: It does not matter where you save the file, because we just need to define the file type we want, we will set the destination of all our images later or the Automation process.

Step 8
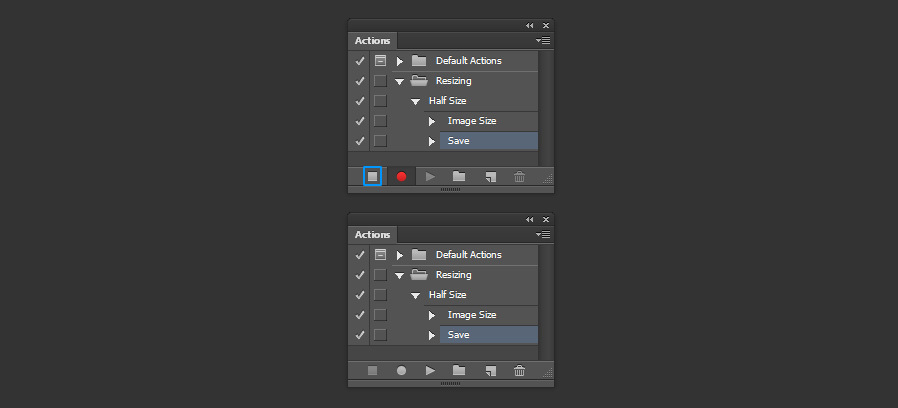
Click on the Stop icon in the Actions Panel to stop recording the action.
Step 9
Go to File > Automate > Batch.
Step 10
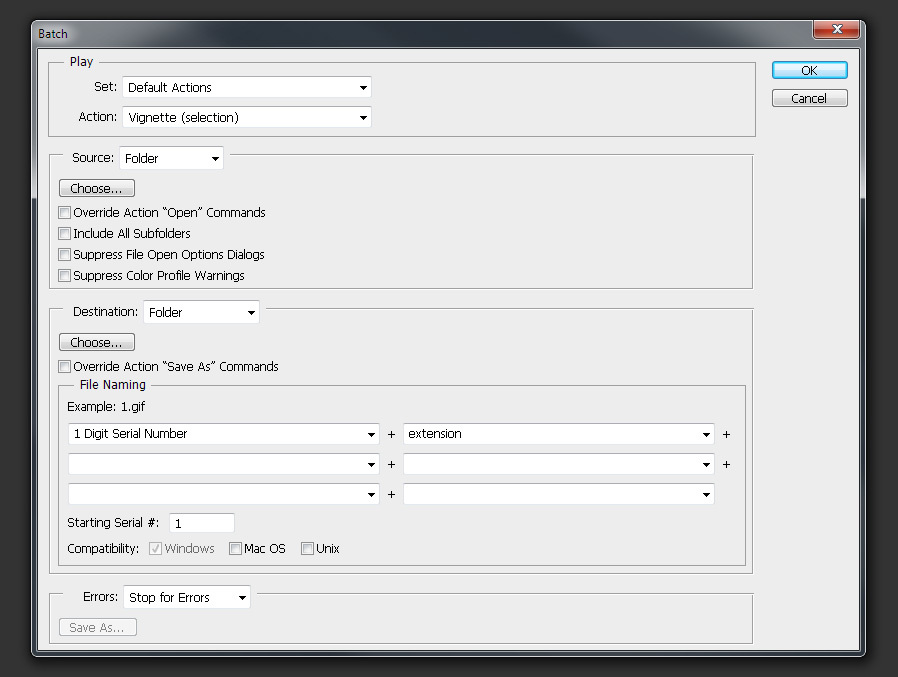
In the ‘Play’ section of the Batch options window, from the dropdown menu of the ‘Set’ option, selected the created ‘Resizing’ action folder and in the ‘Action’ select the ‘Half Size’ action we just created.

Step 11
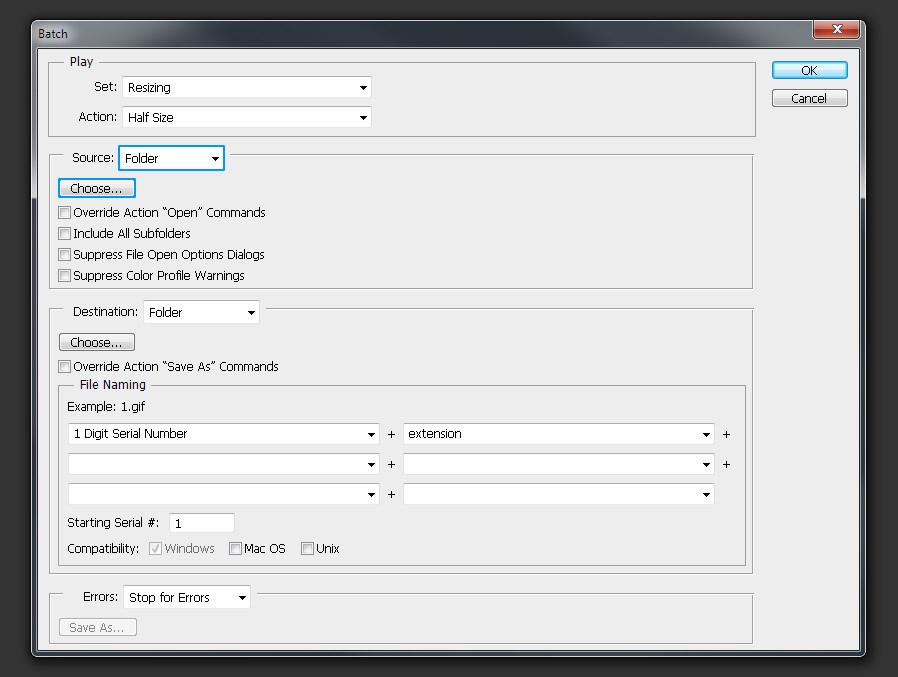
In the ‘Source’ section, choose ‘Folder’ and then click on the ‘Choose’ button right below.
Step 12
Locate the Source folder on your computer (where the images you want to process are) and click OK.

Step 13
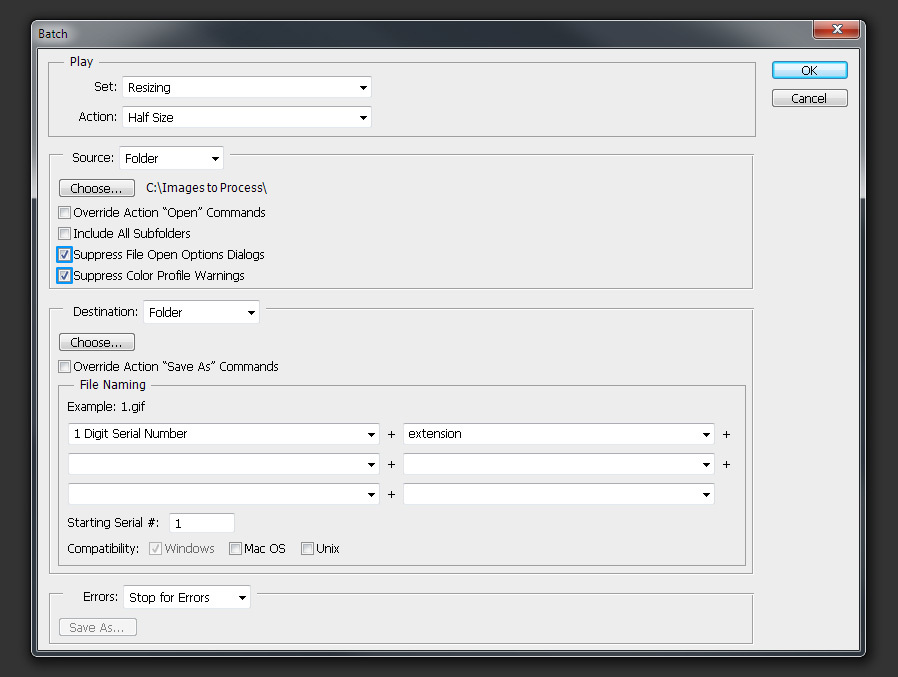
Still in the ‘Source’ section, check the ‘Suppress File Open Options Dialogs’ and the ‘Suppress Color Profile Warnings’ options.
Step 14
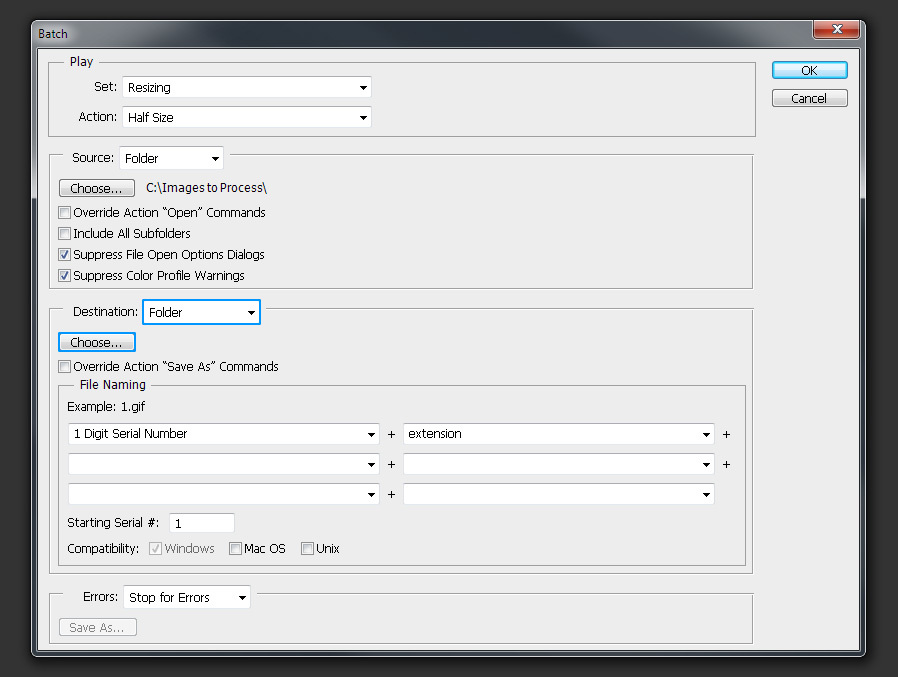
In the ‘Destination’ section, choose ‘Folder’ and then click on the ‘Choose’ button right below.
Step 15
Locate the Destination folder on your computer (where the processed images will be saved) and click OK.

Step 16
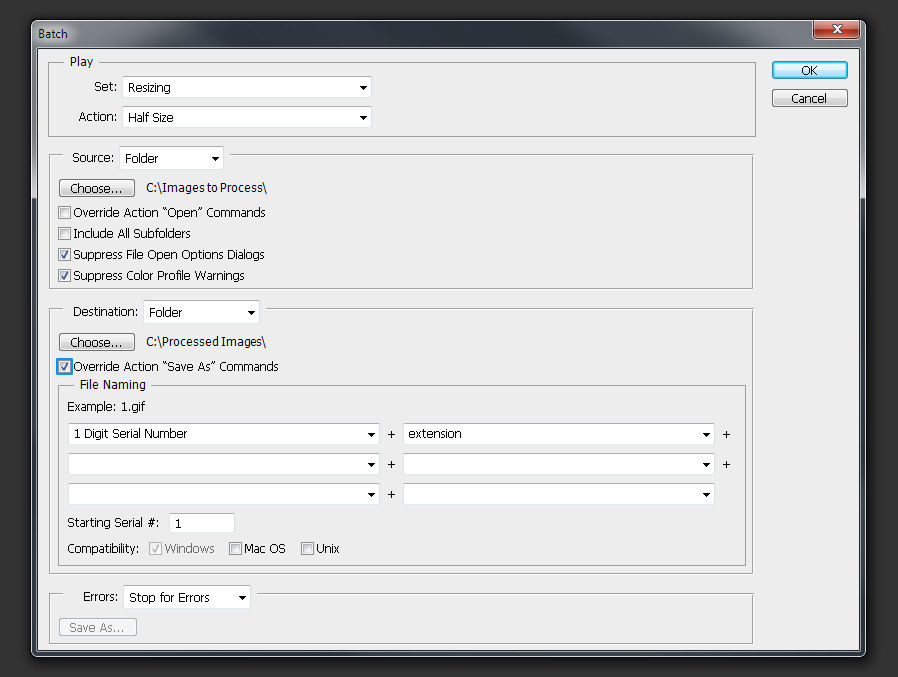
Still in the ‘Destination’ section, check the ‘Override Action ‘Save As’ Commands’ option.
Step 17
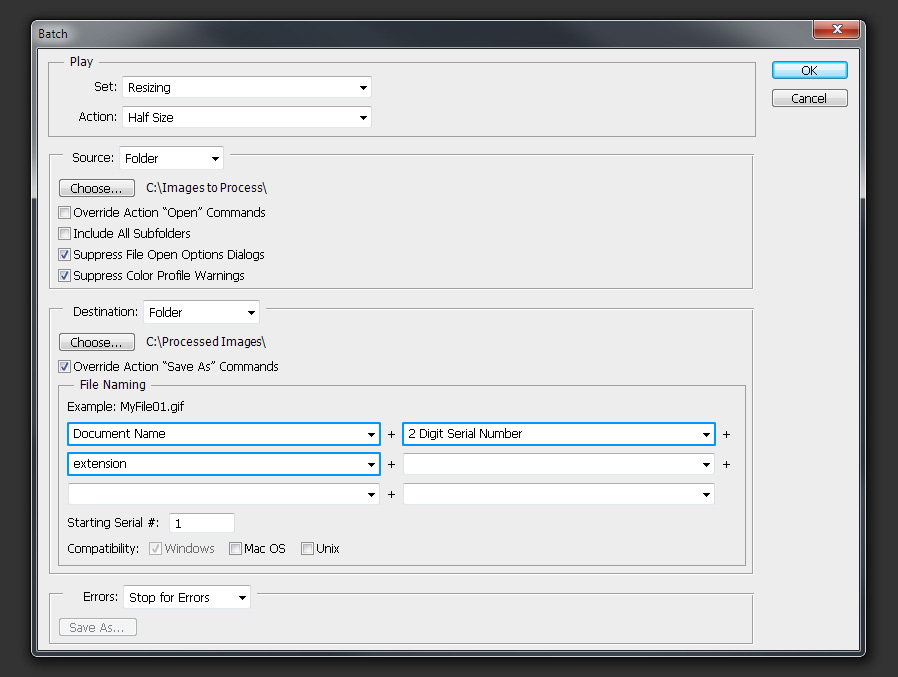
In the ‘File Naming’ section, you may choose different options for the files that will be processed and saved. In this case, I will save them with the Document Name + 2 Digit Serial Number + Extension. To do it, just select the following options under each of the dropdown menus.
Step 18
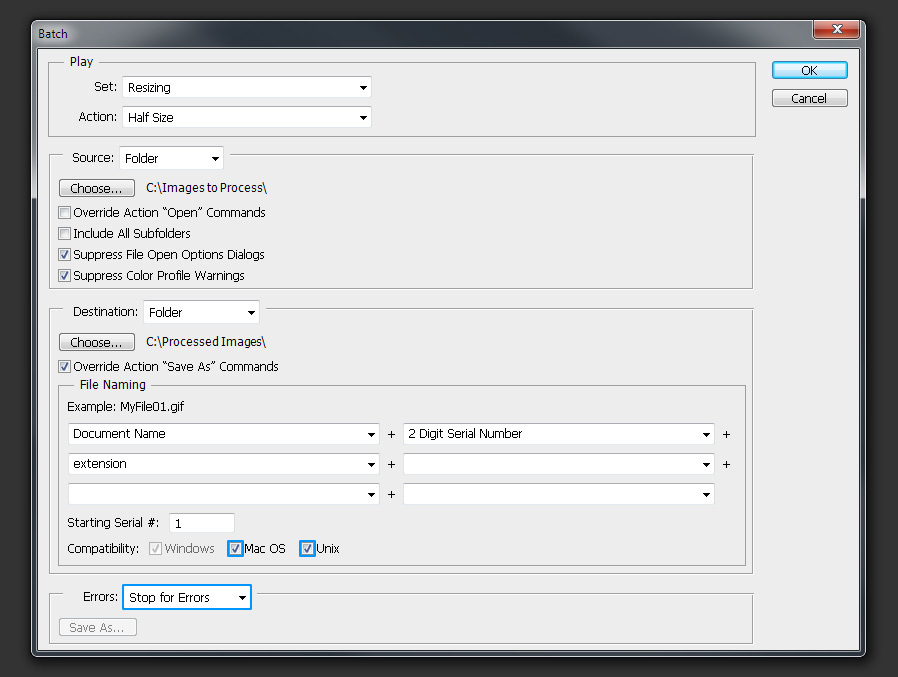
Now simply select the Compatibility you want to give to the files (I will check all), be sure to have the ‘Stop for Errors’ under the Errors section selected and click the OK button to start processing all the files inside the Source folder.
Some Final Notes
By using the Photoshop Batch Automation option, you can save a huge amount of time, since you do not have to manually apply the action to all the files one by one. By using this method, Photoshop will handle all the work for you, from opening the files, to process and save them with the options you choosed, all with a single click.
