Design a Modernism Inspired Poster from Scratch with Illustrator
Create a modernism inspired poster using geometric shapes
This tutorial will teach you how to create an eye-catching poster design from scratch in Adobe Illustrator using basic geometric shapes and inspired by the modernism design era.
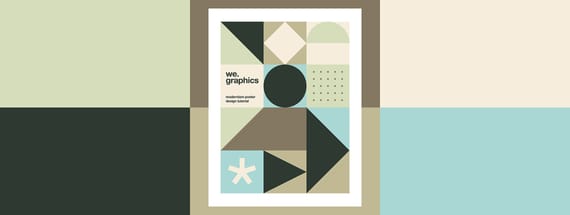
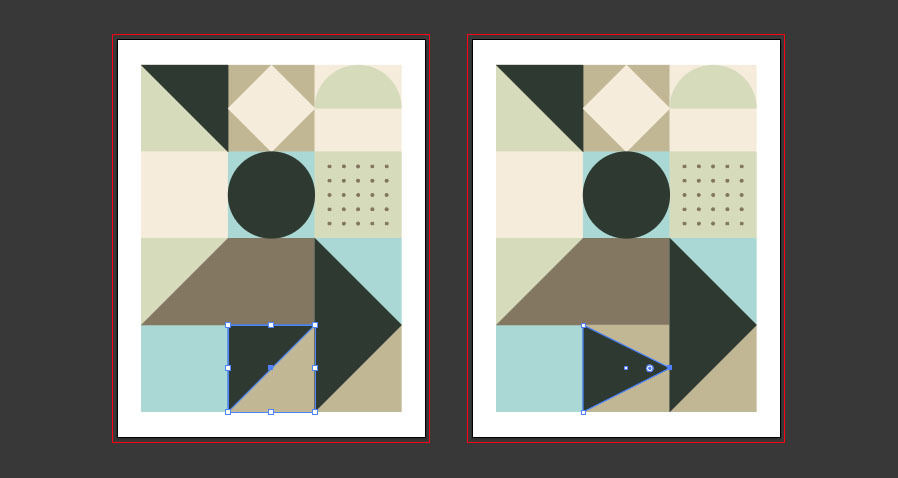
Preview
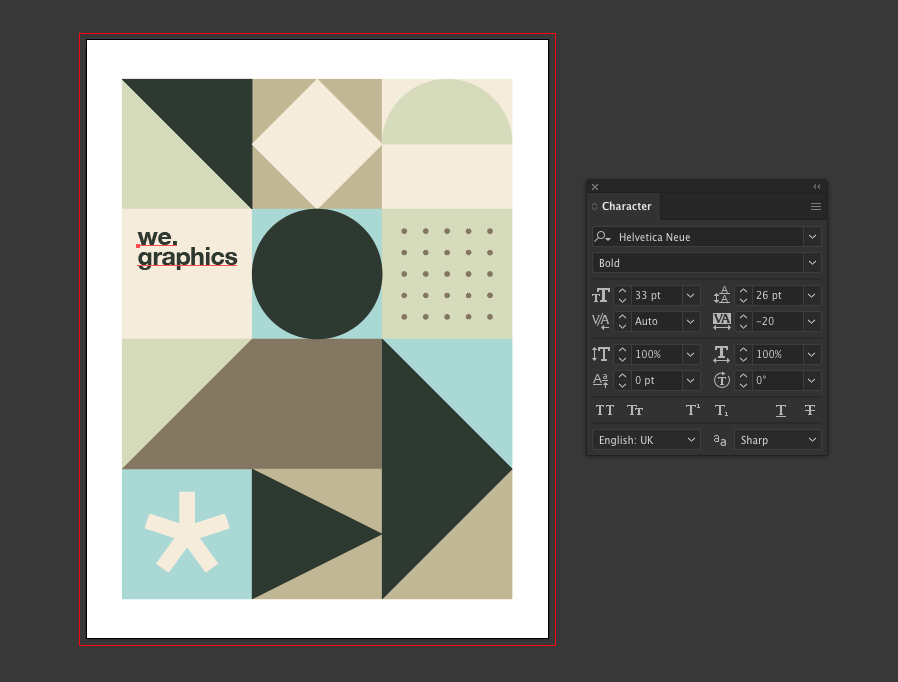
Before we get started, here is a preview of the poster that we will be creating in this simple to follow tutorial.

Step 1
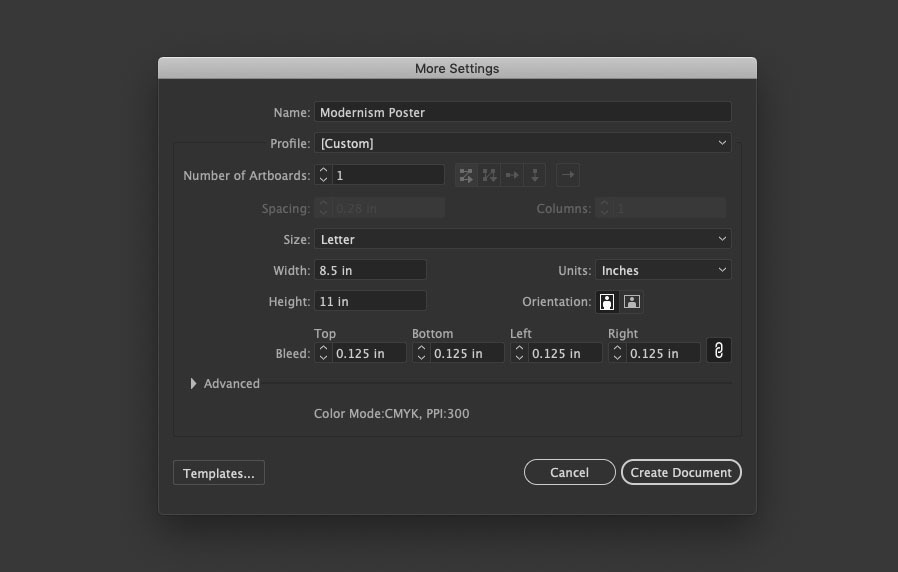
Launch Adobe Illustrator and create a new document by going to File > New... or pressing CMD+N or CTRL+N.
Choose US Letter from the presets, and customise it by adding 0.125 in bleed on all sides.
Click Create.
Note: I'm using the More Settings window to show everything more easily in the screenshot below, your window may look different.
Step 2
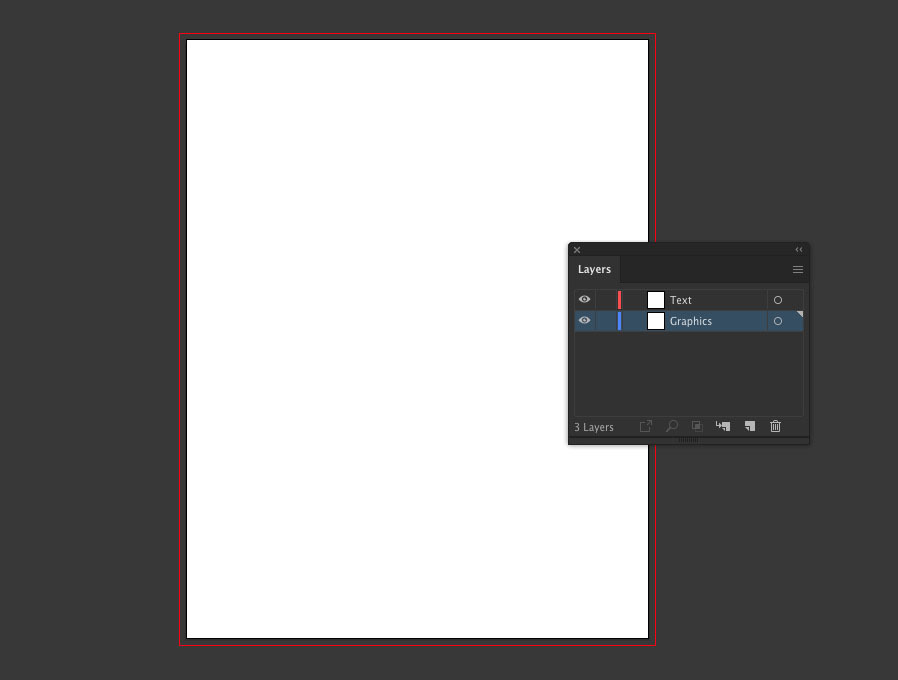
It is always good practice to set up your document before you start throwing in elements. This template will only need 2 layers.
Double click on the first layer and rename it to Graphics.
Create a new layer and name it Text.
Step 3
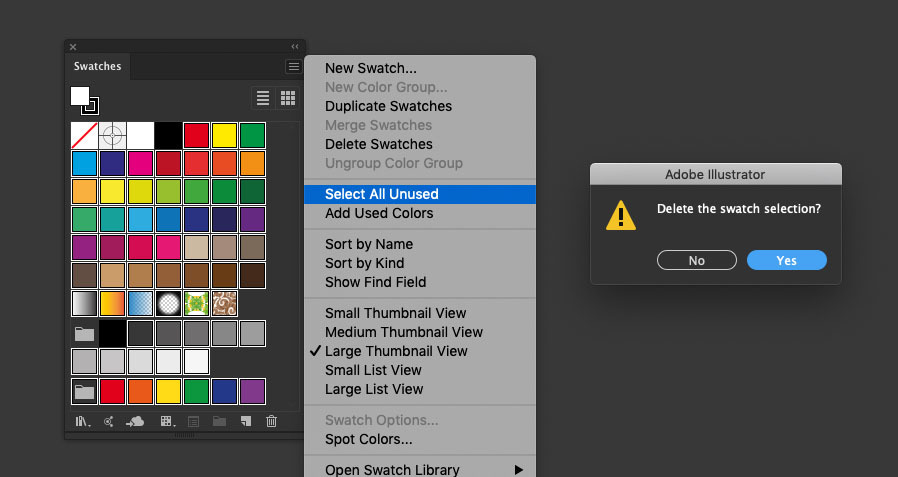
Now for the swatches, we are going start by clearing out the default Illustrator before adding the swatches we will be using in the design.
Open the Swatches window and click the little 3 line menu icon in the top right corner.
Choose Select All Unused which should select all swatches except for Black and White.
Then click the delete icon and choose Yes.
You can also delete the folder and extra black swatch that is left behind.
Step 4
Now add the following swatches, and check the Global option for all of them.
Tip, you can save some time by saving the screenshot below to your computer, placing it in your Illustrator document and using the Eyedropper tool on the image to grab the colors.
- Swatch 1: C=4 M=7 Y=16 K=0
- Swatch 2: C=27 M=22 Y=45 K=5
- Swatch 3: C=42 M=40 Y=55 K=28
- Swatch 4: C=21 M=7 Y=33 K=0
- Swatch 5: C=73 M=53 Y=65 K=64
- Swatch 6: C=39 M=0 Y=21 K=0

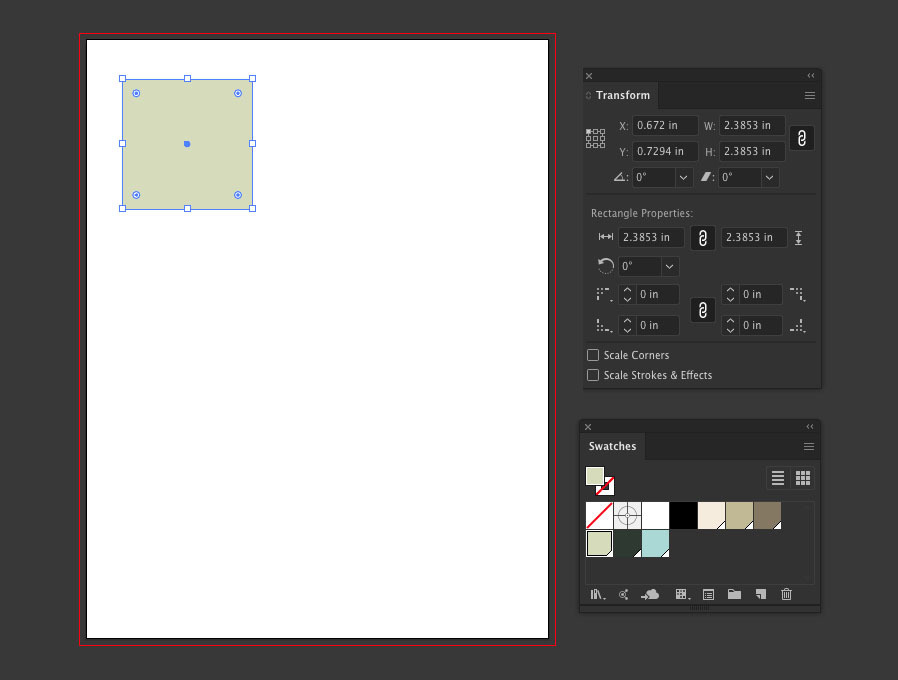
Step 5
Select the Rectangle tool and draw a square shape on the canvas. Set the fill color to the light green swatch and stroke to none.
I recommend using the exact settings I have here, because we want to end up with 3 columns and 4 rows of squares, all with equal spacing around the edges.
- X: 0.672 in
- Y: 0.7294 in
- W: 2.3853 in
- H: 2.3853 in
No complicated math is needed is you don't know the exact size ahead of time, just try to eyeball it and resize afterwards.
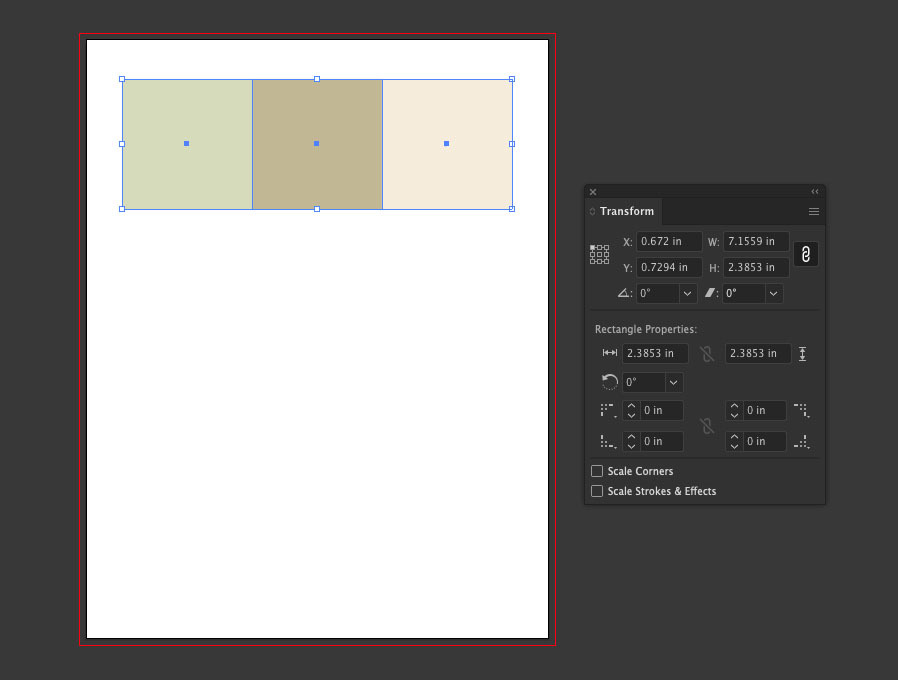
Step 6
Duplicate the square shape twice and move each copy to the right with no space in between.
Set the fill color of the middle square to Swatch 2 in the list
Set the fill color of the right square to the Swatch 1
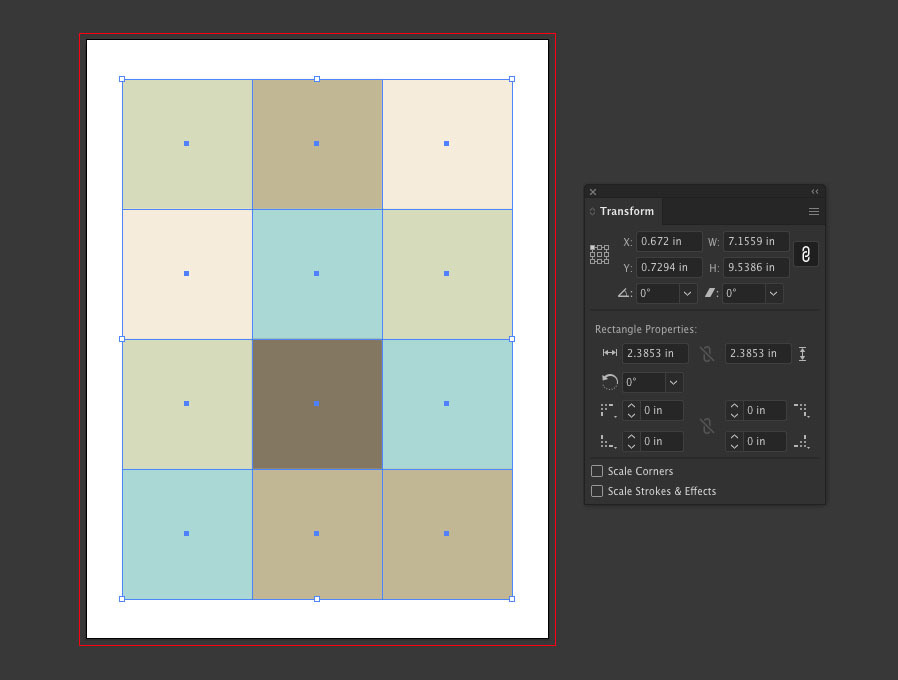
Step 7
Duplicate the row of squares 3 times and make 3 more rows directly below each other with no space in between.
Change the colors of the new squares (from top to bottom and left to right) to:
- Swatch 1
- Swatch 6
- Swatch 4
- Swatch 4
- Swatch 3
- Swatch 6
- Swatch 6
- Swatch 2
- Swatch 2
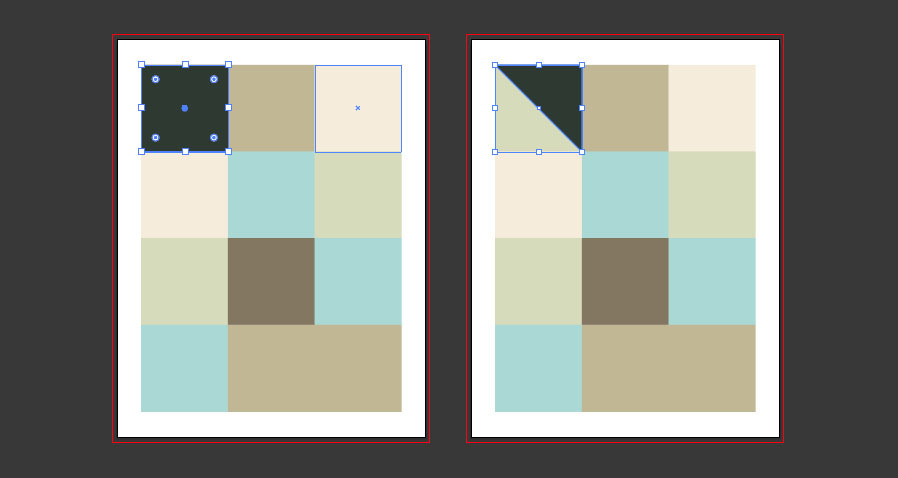
Step 8
Select the first square, then press CMD+C or CTRL+C to Copy and CMD+SHIFT+V or CTRL+SHIFT+V to Paste in Place.
Change the fill color to Swatch 5 from the list.
Select the Pen Tool and click on the bottom left point of the shape to subtract that point (the cursor should be a minus sign icon.
Step 9
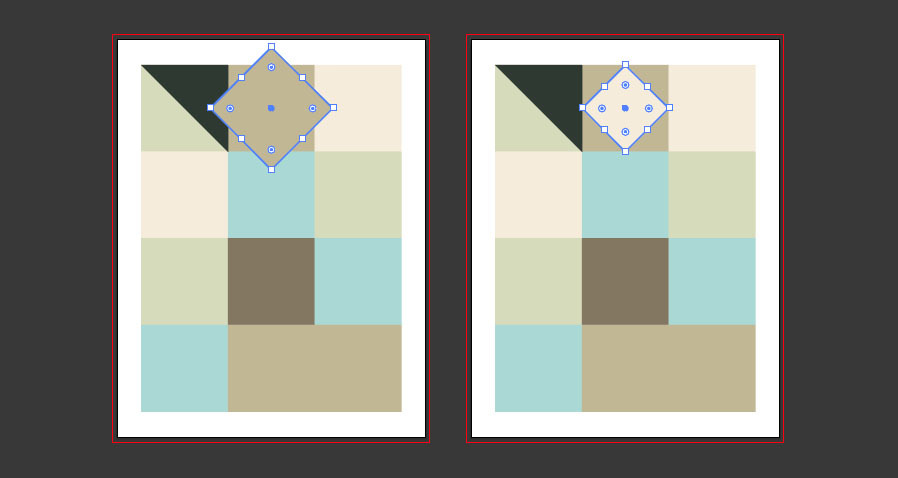
Copy and paste in place again on the second square and rotate it 45 degrees around the center.
Use the Transform controls around the shape to resize the diamond and make it fit perfectly inside the original square.
Change the fill color to Swatch 1.
Step 10
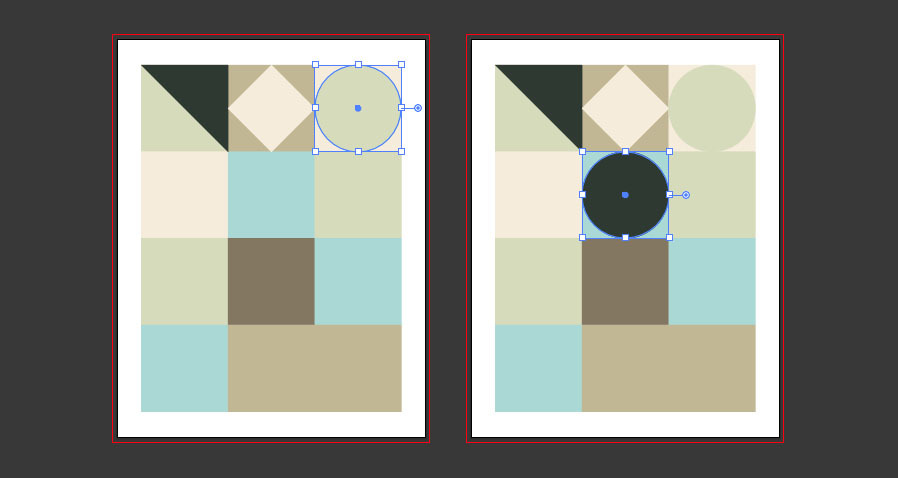
Select the Ellipse Tool and draw a circle inside the third square.
Set the fill color to Swatch 4.
While we're here and have a full circle, we can save some time for later by duplicating it and placing in the fifth square.
Set the fill color to Swatch 5.
Step 11
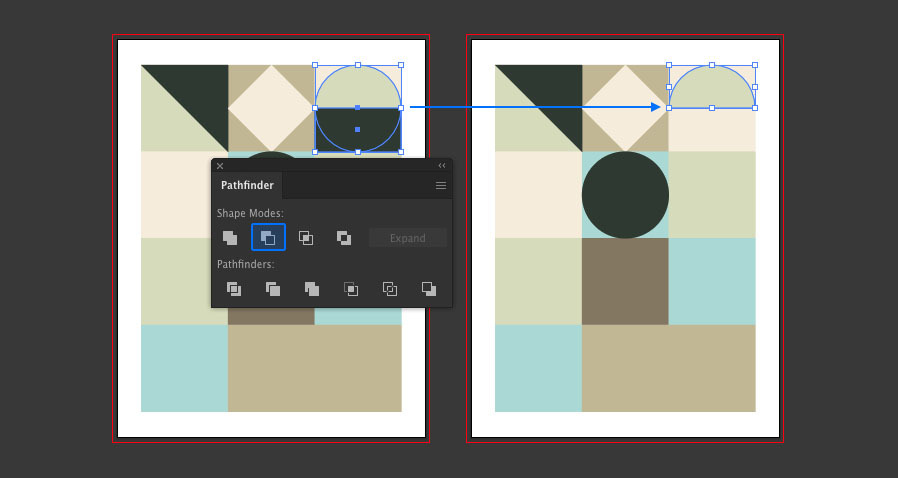
Back to the third square, draw a new rectangle shape that is the same width as the square but half the height and align it to bottom point of the circle.
Tip: Turning on Smart Guides (CMD+U or CTRL+U) makes this step much easier.
Select both the rectangle and circle and then in the Pathfinder window click on the Subtract icon.
Step 12
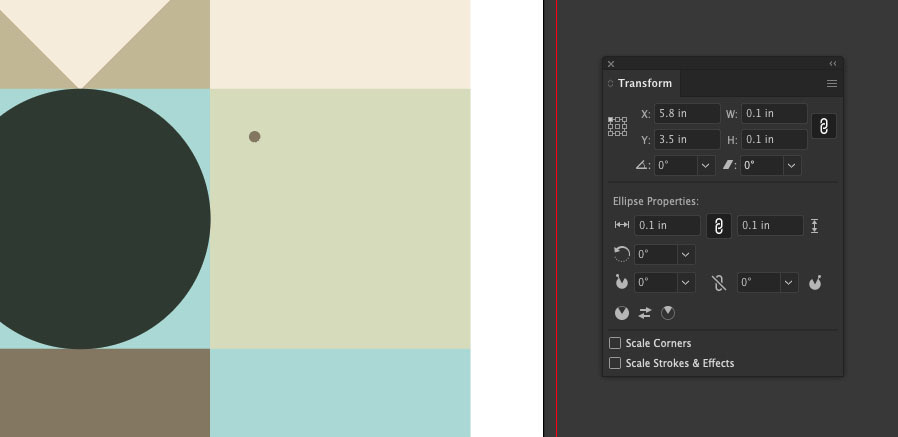
Select the Ellipse Tool and draw a tiny circle:
- X: 5.8 in
- Y: 3.5 in
- W: 0.1 in
- H: 0.1 in
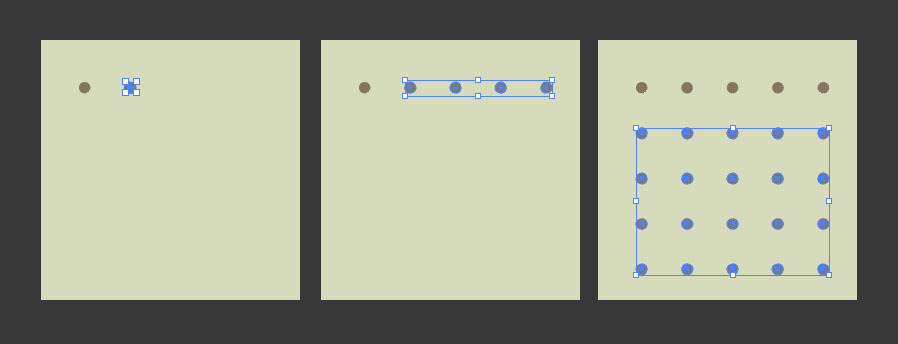
Step 13
Select the tiny circle and hold down the Alt key whilst you press the right arrow key.
Release the alt key and press the left arrow key.
Now hold Shift and press the right arrow key 3 times.
Do this 4 times. You should no have a complete row of tiny circles
Select the whole row and repeat the process except using the down arrow key to create 4 more rows.
Step 14
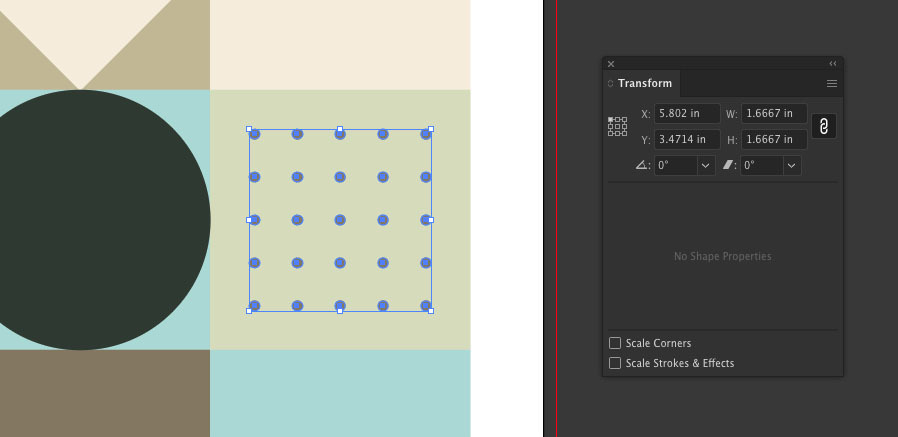
Select all of the tiny circles and group (CMD+G or CTRL+G) them.
In the Transform window enter these values:
- X: 5.802 in
- Y: 3.4714 in
- W: 1.6667 in
- H: 1.6667 in
Step 15
Duplicate the triangle from the first square and move it down the the seventh square.
Rotate the triangle 90 degrees clockwise.
Set the fill color to Swatch 3.
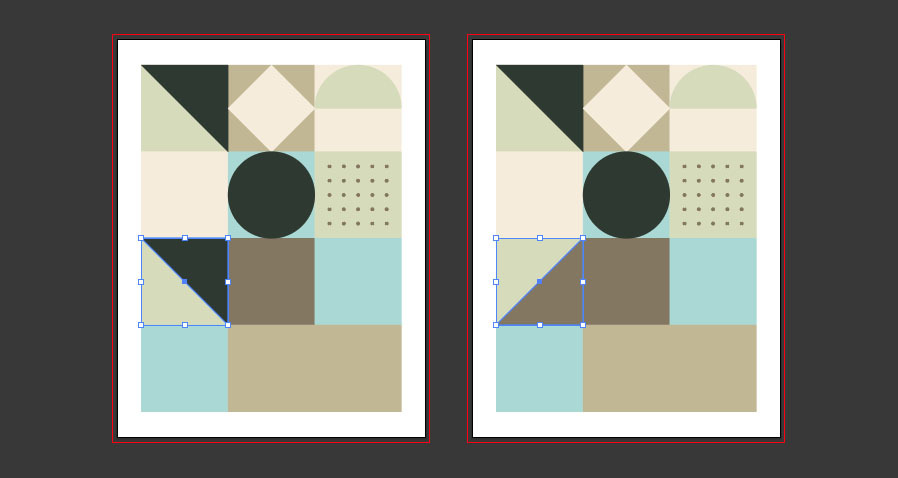
Step 16
Duplicate the triangle again and move it to the ninth square.
Rotate the triangle 90 degrees clockwise.
Set the fill color to Swatch 5.
Step 17
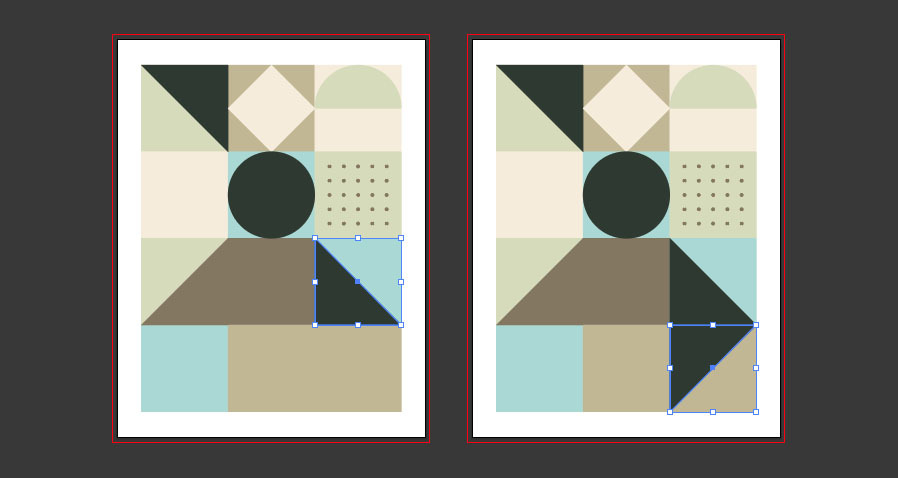
Duplicate the triangle yet again and move it to the last square.
Rotate the triangle 90 degrees clockwise.
Duplicate the triangle one last time and move it to the eleventh square.
Select the Direct Selection Tool and click on the top right point of the triangle.
Drag the top right point of the triangle down so that it aligns with the middle point of the square.
Step 18
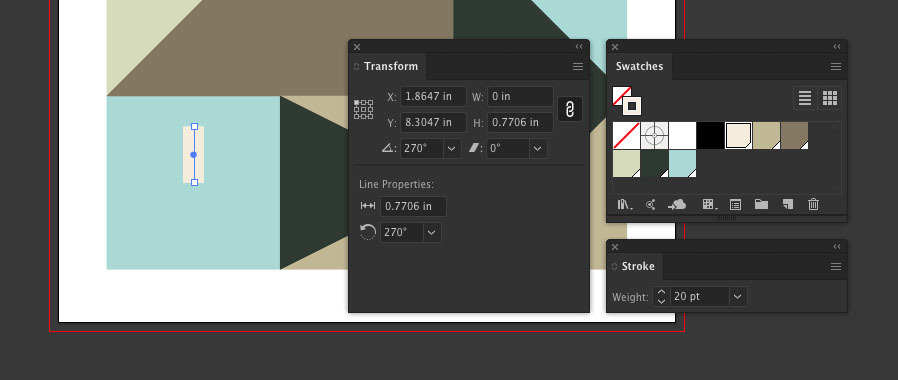
Select the Line Segment Tool and quickly draw a straight line in the top area of the tenth square, it doesn't really matter the size because you will enter in these values manually afterwards:
- X: 1.8647 in
- Y: 8.3048 in
- W: 0 in
- H: 0.7706 in
Set the stroke weight of the line to 20 pt and the stroke color to Swatch 1.
Step 19
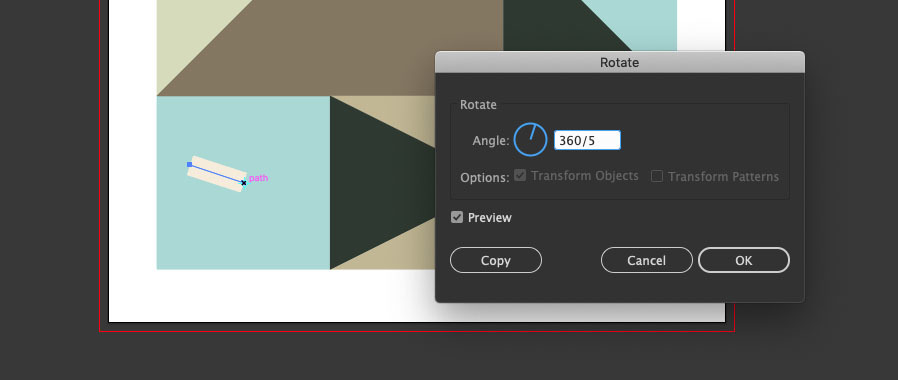
Click on the line to make sure it is active and then select the Rotate Tool.
Hold down the Alt key and click on the bottom point of the line segment.
In the Angle field we can enter a quick equation 360/5 to calculate the exact degrees needed (it's 72)
Click on Copy
Step 20
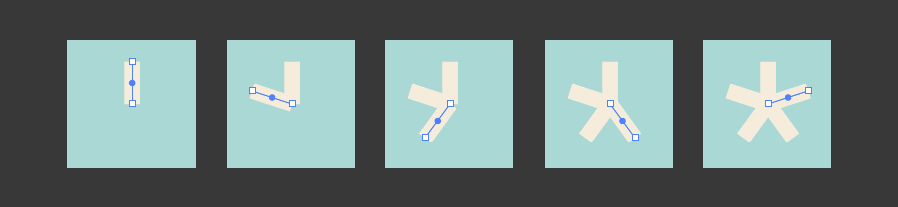
Press CMD+D or CTRL+D to repeat the rotation 3 more times.
Step 21
Finally we can add some text to our design.
Notice that we left the fourth square blank? This is perfect spot to add your text.
I recommend using these setting for the headline text:
- Font: Helvetica Neue Bold
- Size: 33 pt
- Leading: 26 pt
- Tracking: -20
- Color: Swatch 5
If you don't have Helvetica Neue, then standard Helvetica or Arial will do the trick.
Step 22
For the smaller text, simply reduce the font size to around 14 pt and set the leading back to Auto.
Use Swatch 5 again for the color.

Result & Conclusion
As you can see, the final result is surprisingly eye catching and reminiscent of the modernism era. The use of simple geometric shapes and complimenting colors really work well together.
This design is that it is very open to customisation, you can definitely put your own stamp on this layout by tweaking the colors, rearranging the geometric shapes or adding your own unique shapes into the mix.
Thanks for reading, I hope you enjoyed following along with this tutorial and learned something new in the process!
More from Tutorials

How to Make Light Leaks From Images in Photoshop
Tutorialsby Diego Sanchez
Light leaks can instantly add warmth, depth, and a cinematic feel to your images, and creating them in Photoshop is much easier than you might think. In this tutorial, we’ll transform ordinary images into beautiful light leak overlays using just a few simple tools like Blur, Contrast adjustments, and the Liquify filter. By manipulating colors and shapes, you can craft soft gradients of light that bring a nostalgic, film-inspired atmosphere to your photos. Whether you want to enhance portraits, add flair to design projects, or create dreamy lighting effects, this method gives you full control over the final look in just a few minutes.
Read more
Enhance Autumn Colors in Lightroom with Ease
Tutorialsby Diego Sanchez
Enhancing the warm and vibrant tones of autumn photography is easier than it seems with just a few simple adjustments in Lightroom. By carefully refining exposure, boosting contrast, and enhancing the reds, oranges, and yellows, you can transform any fall image into a rich and captivating scene. Using only Lightroom’s basic tools along with the Color Mixer and Color Grading panels, you’ll bring out the full beauty of autumn landscapes with ease.
Read more
Easily Add a Twilight Mood to Your Photos in Lightroom
Tutorialsby Diego Sanchez
Give your photos a mystical touch by transforming ordinary daylight or sunset shots into captivating twilight scenes. By combining simple adjustments with precise tweaks in the Color Mixer, enhancing tones with Color Grading, and adding a delicate layer of Grain, it’s possible to achieve a soft, cinematic glow. These subtle yet impactful edits can shift the mood of your images, creating a serene, atmospheric look that feels like the perfect blue hour moment.
Read more
How to Create an Editable Soft Glow Text Effect in Illustrator
Tutorialsby Diego Sanchez
Creating eye-catching visual effects in Illustrator doesn’t always require complex tools or multiple layers. Sometimes, a single feature—used creatively—can deliver stunning results. Today, I’ll show you how to create a soft glow text effect using nothing but the Appearance Panel in Illustrator. Thanks to its non-destructive structure, you’ll be able to edit your text at any time without losing the effect, making it perfect for experimenting with different styles, colors, and typefaces without starting over.
Read more