Create an Easy Stitched Fabric Type Style in Photoshop
Stitched fabric type can add a realistic element to your designs. It's an appealing and stylish look that is easy to create using layer styles and a few fabric patterns. Let's jump in and give it a try.
First up... Here's a look at what we're creating.
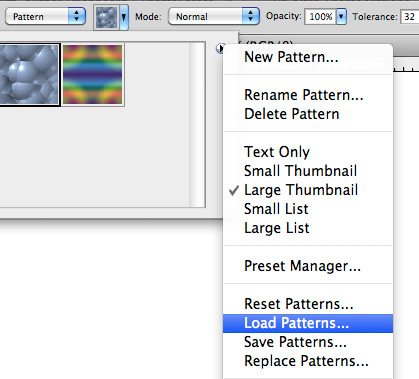
 Now click the drop down arrow next to the pattern thumb in the top tool bar. Click the small arrow in the top right corner of the pattern thumb window, and select Load Patterns.
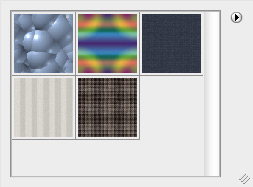
 Navigate to the .pat file that you extracted from the pattern sample .zip file. Now you should have three new patterns loaded.
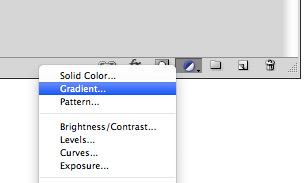
 Now create a new Gradient Fill Layer, by clicking the icon at the bottom of the layers panel and selecting Gradient from the drop down.
 Double click the gradient fill layer's thumbnail and create a transparent to black radial gradient. Click okay and set the fill layers blend mode to Soft Light, and opacity to 50%.
 This gives our background a slightly lighted look.
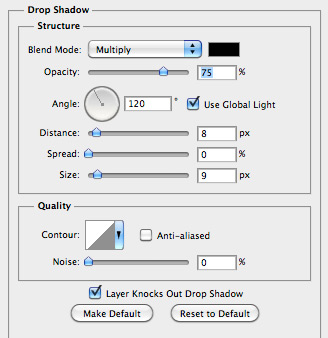
 Now it's time to apply some layer styles, starting with a Drop Shadow.
 Next up, let's add an Outer Glow. Note the noise level. This adds the slight ragged edge that we need.
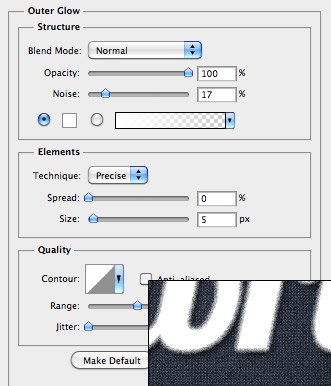 For the pattern overlay, we'll be using the 2nd pattern from the sample pack.
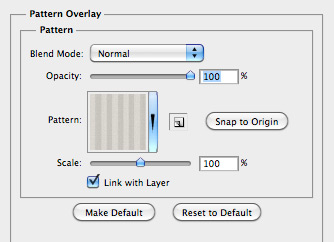 And finally, for the stroke we'll be using the 3rd pattern from the sample pack.
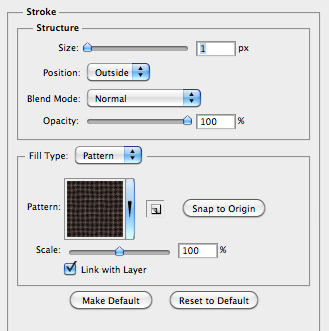 After applying these layer styles, you should have something like this:
 And that's it folks. An easy fabric type style in minutes!
First up... Here's a look at what we're creating.

Step 1 - Installing the Patterns
For this tutorial, you'll need to download and install our fabric pattern sample pack. To add these patterns to Photoshop... Choose the Paint Bucket Tool (G), and select Pattern from the drop down box in the top toolbar. Now click the drop down arrow next to the pattern thumb in the top tool bar. Click the small arrow in the top right corner of the pattern thumb window, and select Load Patterns.
 Navigate to the .pat file that you extracted from the pattern sample .zip file. Now you should have three new patterns loaded.

Step 2 - Creating the Background
Create a new Photoshop document 600x600 at 72dpi. Using the Paint Bucket Tool, fill the background layer with WG Fabric Pattern 1 (the dark blue swatch), from the patterns panel. Now create a new Gradient Fill Layer, by clicking the icon at the bottom of the layers panel and selecting Gradient from the drop down.
 Double click the gradient fill layer's thumbnail and create a transparent to black radial gradient. Click okay and set the fill layers blend mode to Soft Light, and opacity to 50%.
 This gives our background a slightly lighted look.
Step 3 - Adding the Type
Now let's add our type. I chose Lobster as my font face. Choose a size that fills the document. Now it's time to apply some layer styles, starting with a Drop Shadow.
 Next up, let's add an Outer Glow. Note the noise level. This adds the slight ragged edge that we need.
 For the pattern overlay, we'll be using the 2nd pattern from the sample pack.
 And finally, for the stroke we'll be using the 3rd pattern from the sample pack.
 After applying these layer styles, you should have something like this:
 And that's it folks. An easy fabric type style in minutes!


