Create a Sweet Chocolate-Coated Text Effect
This Photoshop tutorial is thought for greedy people (like me!). Today we will create a delicious chocolate-covered text effect. We will create some details on paper, then we will work with layer styles to achieve the nice result.
Preview:
Click on the image for a full size preview
DOWNLOAD SOURCE FILE
Support Material
Step 1
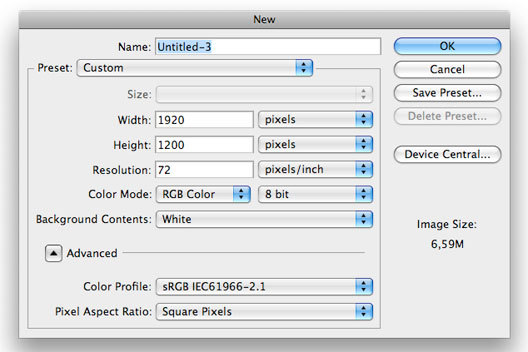
Open a new document in Photoshop. Since I want to create a wallpaper, my size is 1920x1200 pixels, but you can set up to the size of your desktop. Resolution is 72 pixels/inch, which is perfect while working on a computer destined project.
Step 2
Using the Candice font, write "Sweet" with the Horizontal Type tool (T). Font size is 380pt. Choose a light color because we will print this document and we will sketch over the text to create the chocolate pending effect.

Step 3
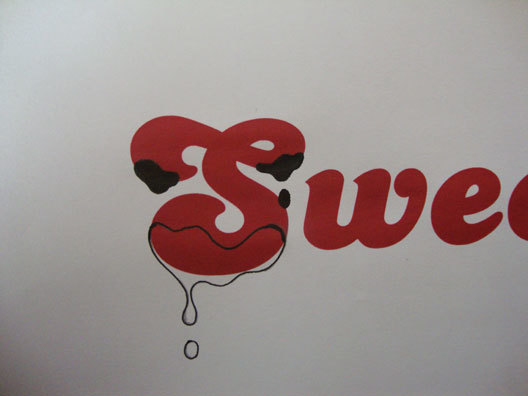
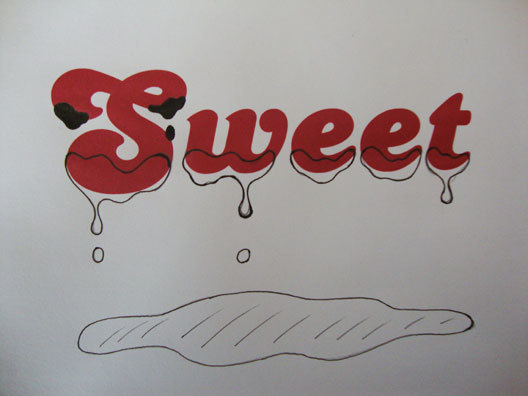
Print the image. I think it's easier to create the chocolate effect on paper rather than immediately use the pen tool. For those who have a tablet, it's more convenient to work directly in Photoshop. However I decided to dirty a bit my hand.
Start painting the chocolate as shown in the following screenshots:
Step 4
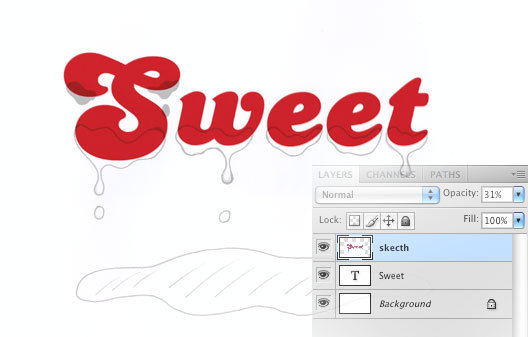
Scan the image and paste it on your Photoshop document. Place it above the text and reduce the opacity of the sketch at around 30%. In this way you can take the sketch as a reference while using the pen tool in the next step
Step 5
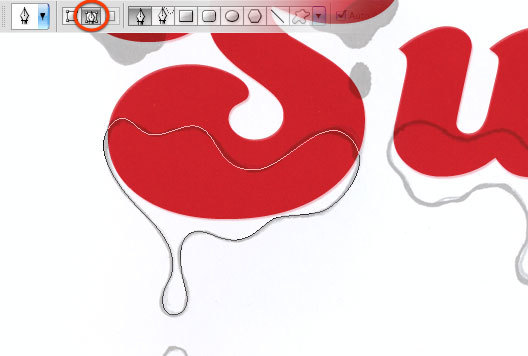
With the pen tool in Paths mode start tracing the chocolate border. Start from the "S"
Step 6
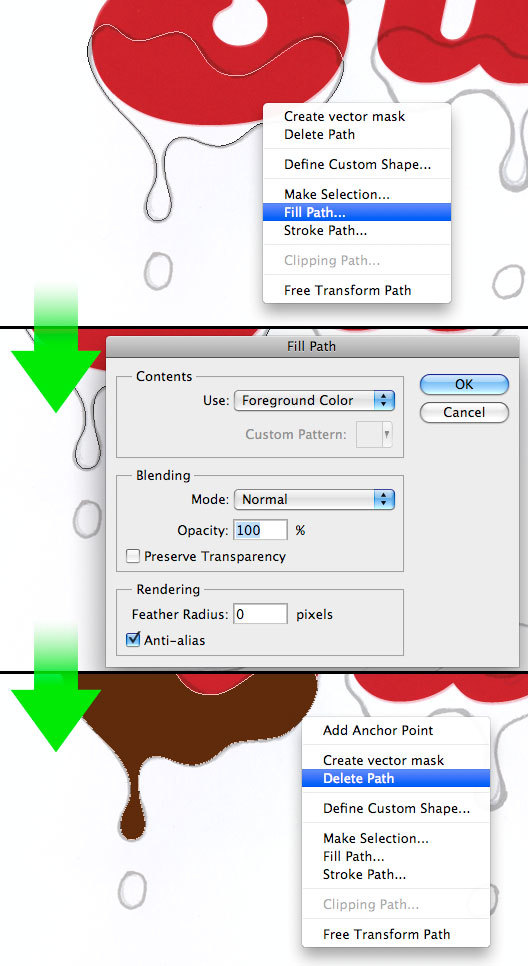
Create a new layer and set the foreground color to brown (#602b0b). With the pen tool still active, right-click on the canvas and select "fill path". In the next window set "use foreground color" and hit OK. Right click again and select "delete path".
Step 7
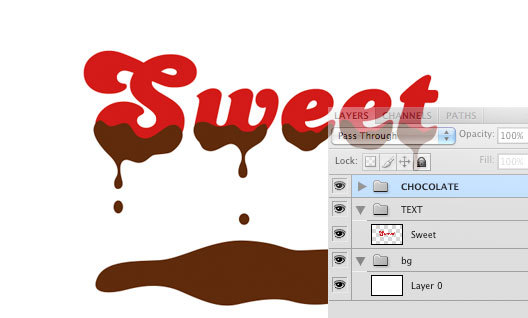
Use the same technique to create the other shapes, then hide the sketch layer visibility.
Select all the chocolate shapes and group them (ctrl+G) to make order.
Step 8
At this point we will add some layer styles. Let's start from the text. Hide the chocolate group for the moment. Right-click on the text layer and select "blending options". We will add gradient overlay, bevel and emboss, satin and inner shadow. The aim is to create a kind of golden 3d text effect. The following screenshots will show the settings.
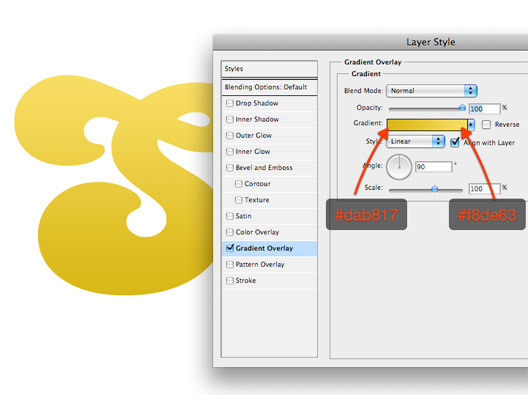
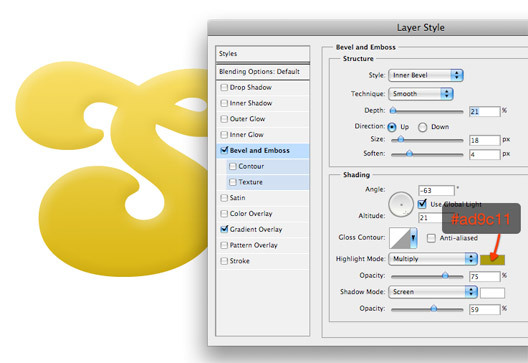
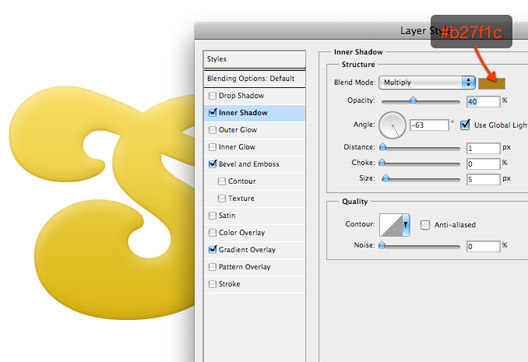
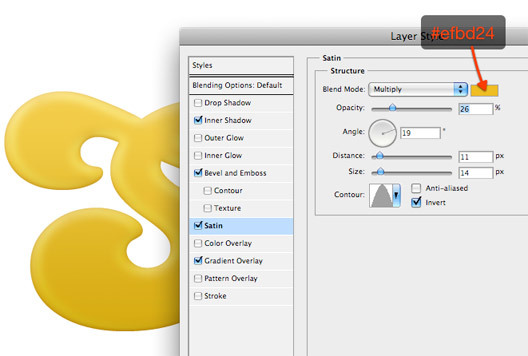

The text is complete. It remembers me text effects used on cereal packaging.
Step 9
We can now make visible chocolate group and select the first shape, in my case the chocolate that covers the letter "S". Right-click and select blending options to play again with layer styles. We will add bevel and emboss, satin and inner glow to create the chocolate-styled effect.
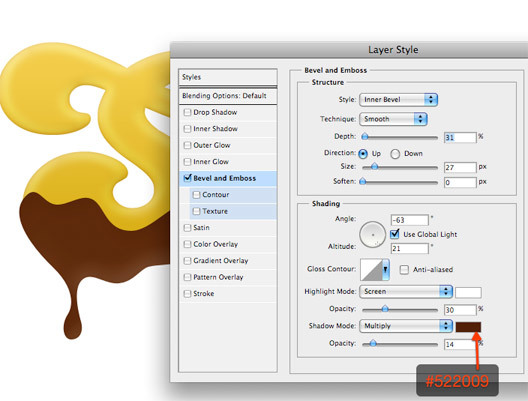
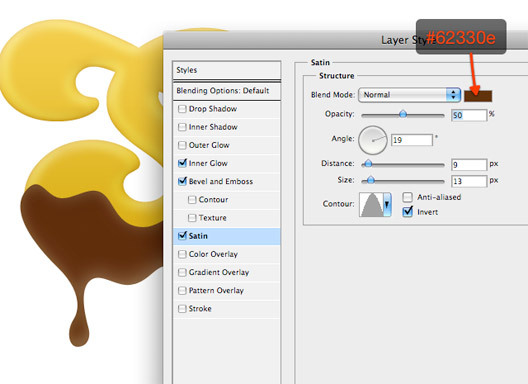
Step 10
Copy this layer style (right-click>Copy Layer Style) and paste it on all the other chocolate layers. Just one thing to modify: about the bottom chocolate mark, increase the bevel and emboss size. We've done! You can add a nice radial gradient to the background to finalize the work.
