Create a Quick and Easy 3D Type Effect
Clean and modern 3D type is a cool effect, and it's surprisingly quick and easy to create. With the combination of Photoshop and Illustrator, this effect is can be created in minutes. Let's take a look at how it's done.
Here's a look at what we'll be creating.
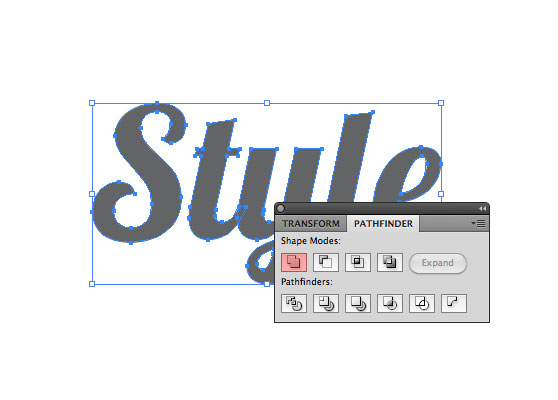
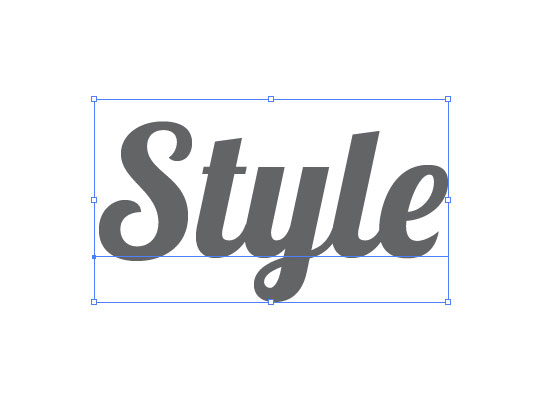 Next, let's convert the text to a single shape. Select the type and click (Type | Create Outlines). Then click the "Unite" shape mode on the Pathfinder panel.
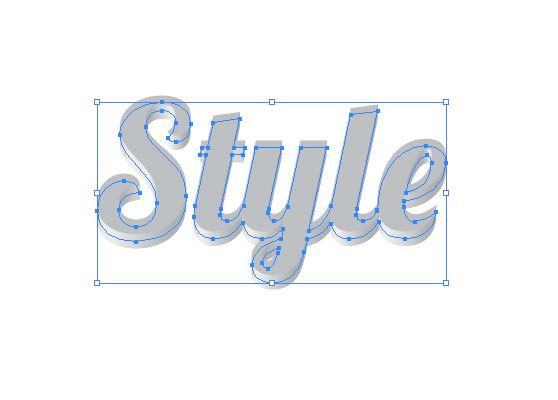
 Now you should have something like this.
 In order to move the 3D portion of the type over to Photoshop, we'll need to convert it to a shape. Click (Object | Expand Appearance). Now with everything still selected click (Object | Ungroup). You may have to ungroup 2 or 3 times to fully release all of the shapes from one another.
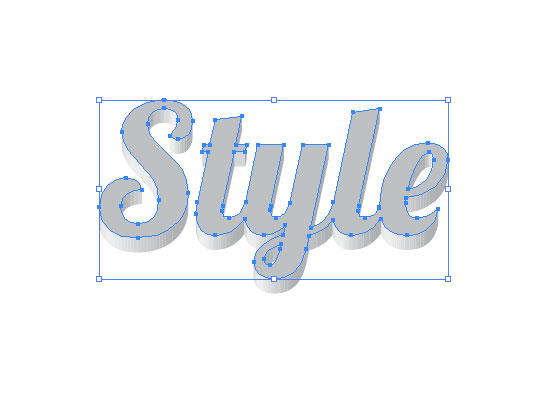 In a new Photoshop document (mine is 558x400) paste the type shape (Cmd+V). When given the option, select to paste as pixels. Note: don't resize the shape, press enter to paste as is.
Back over to Illustrator select only the 3D portion, and copy and paste it to a layer below the type shape in Photoshop.
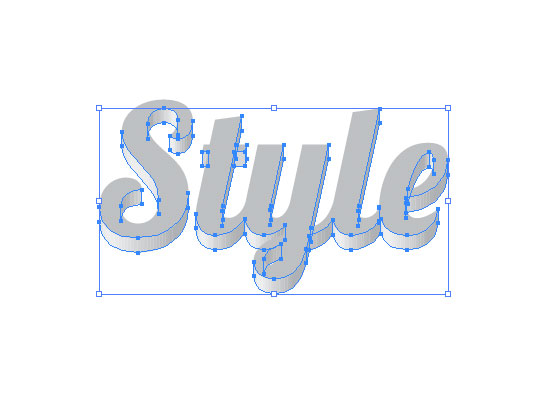 Now align the two layers so that they appear as one shape. Same as they were in Illustrator. When done, you should have something like this. Note: I made the type shape a bit darker so you can see that they are aligned.

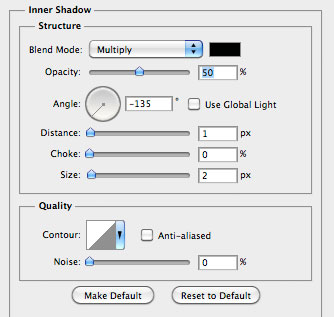
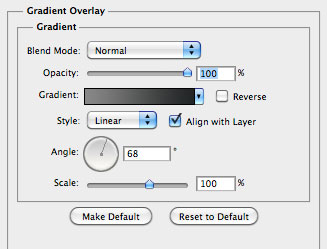 The colors for the gradient are #878787 to #222525
 You should end up with something like this.

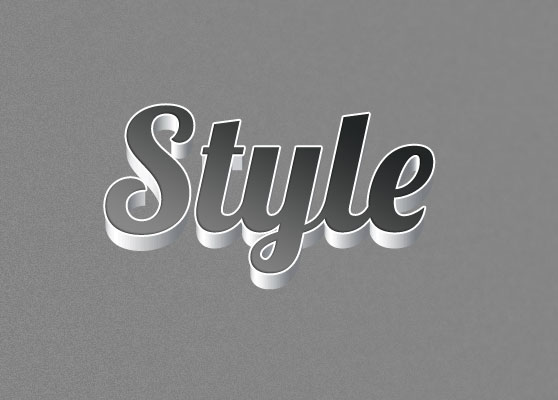 Now let's add an overhead highlight by choosing a large soft white brush and clicking one time in the center of the document on a layer above the background. You'll need to set this layer's blend mode to Overlay.
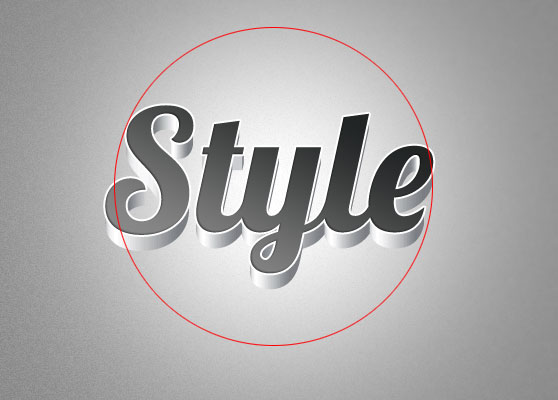 As you can see from the 3D shape the light is coming from the lower left. So our shadows should reflect that. (Cmd+Click) the topmost type shape layer to make a selection. Now create a new layer and position it below the 3D shape layer. Blur it slightly using (Filter | Blur | Gaussian Blur). Set the amount to 2%, then position it 1-2 pixels up and to the right. You should now have a subtle shadow like the one below.
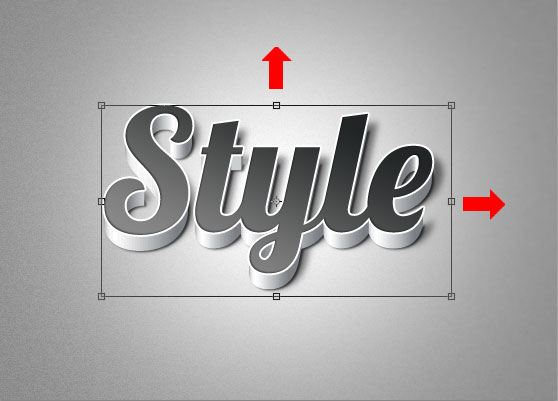
 Now duplicate this shadow layer, and blur it further using (Filter | Gaussian Blur) with amount set to 5. Now using (Edit | Transform | Scale) pull the shadow slightly to the right and up.
 That does it! A quick and easy 3D effect that you can apply to not just type, but any vector object. Happy designing!

Here's a look at what we'll be creating.

Step 1 - Start in Illustrator
Open up Illustrator, and type a single word. I chose "Style" and 75% black for the color. I'm using a font called Lobster, which you can download here. Next, let's convert the text to a single shape. Select the type and click (Type | Create Outlines). Then click the "Unite" shape mode on the Pathfinder panel.

Step 2 - Make it 3D
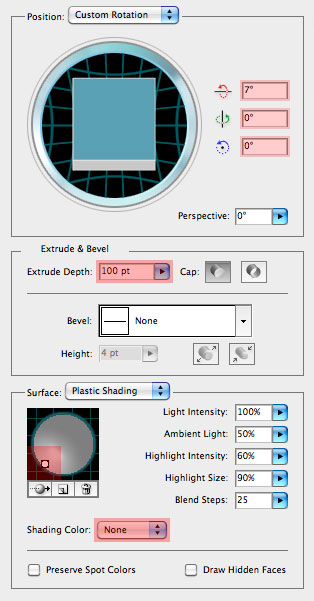
Now we have one solid shape. Let's add the 3D portion by clicking (Effect | 3D | Extrude & Bevel). I've highlighted the changes to make on the 3D options window. Now you should have something like this.
 In order to move the 3D portion of the type over to Photoshop, we'll need to convert it to a shape. Click (Object | Expand Appearance). Now with everything still selected click (Object | Ungroup). You may have to ungroup 2 or 3 times to fully release all of the shapes from one another.
Step 3 - Take it to Photoshop
Now that we have our shapes, let's get them over to Photoshop. First up, select the original type without the 3D portion. Press (Cmd+C) to copy it. In a new Photoshop document (mine is 558x400) paste the type shape (Cmd+V). When given the option, select to paste as pixels. Note: don't resize the shape, press enter to paste as is.
Back over to Illustrator select only the 3D portion, and copy and paste it to a layer below the type shape in Photoshop.
 Now align the two layers so that they appear as one shape. Same as they were in Illustrator. When done, you should have something like this. Note: I made the type shape a bit darker so you can see that they are aligned.

Step 4 - Finishing up in Photoshop
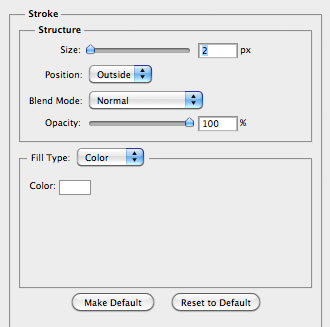
On the top type shape layer, I applied the following styles.
 The colors for the gradient are #878787 to #222525
 You should end up with something like this.

Step 5 - Adding Light and Shadows
Let's add a bit of light to the scene. First we need to add some gray to the background so that our light shows up. Fill the background layer with #838383. You can even add a touch of noise, if you wish, by clicking (Filter | Noise | Add Noise). Use no more than 2-3 for the amount. Now let's add an overhead highlight by choosing a large soft white brush and clicking one time in the center of the document on a layer above the background. You'll need to set this layer's blend mode to Overlay.
 As you can see from the 3D shape the light is coming from the lower left. So our shadows should reflect that. (Cmd+Click) the topmost type shape layer to make a selection. Now create a new layer and position it below the 3D shape layer. Blur it slightly using (Filter | Blur | Gaussian Blur). Set the amount to 2%, then position it 1-2 pixels up and to the right. You should now have a subtle shadow like the one below.
 Now duplicate this shadow layer, and blur it further using (Filter | Gaussian Blur) with amount set to 5. Now using (Edit | Transform | Scale) pull the shadow slightly to the right and up.
 That does it! A quick and easy 3D effect that you can apply to not just type, but any vector object. Happy designing!

