Antique a Photo Using Textures in 3 Quick Steps
Nothing tells a story like an old photo. You can find sometimes find them by the box fulls at antique shops and thrift stores. Not only are they fun to look at, there also fun and easy to create in Photoshop with a couple of adjustment layers and a good grunge texture. Lets take a look how.
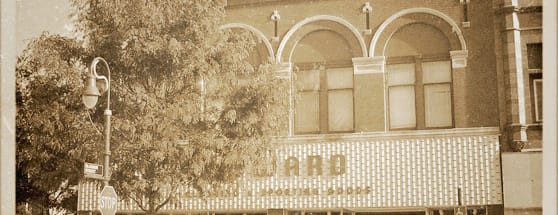
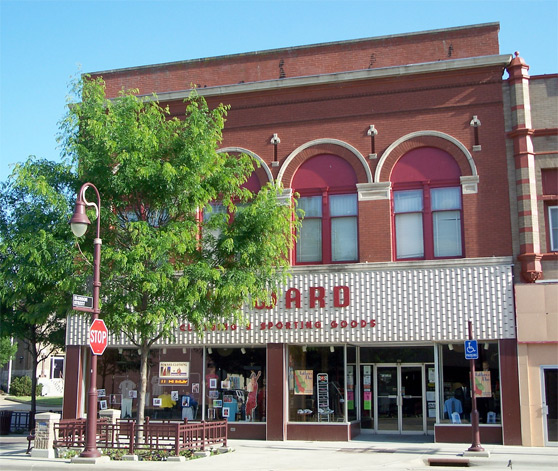
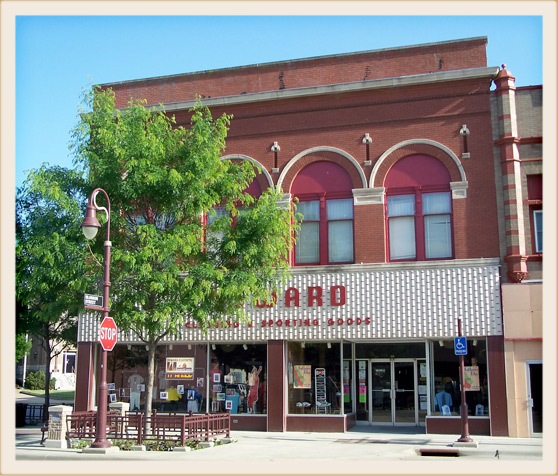
Here's a look at what we'll be creating. I found this perfect image of a small town store front by Jo Naylor on flickr.
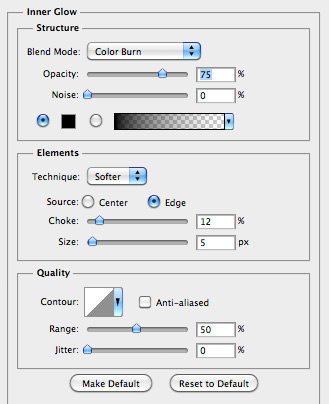
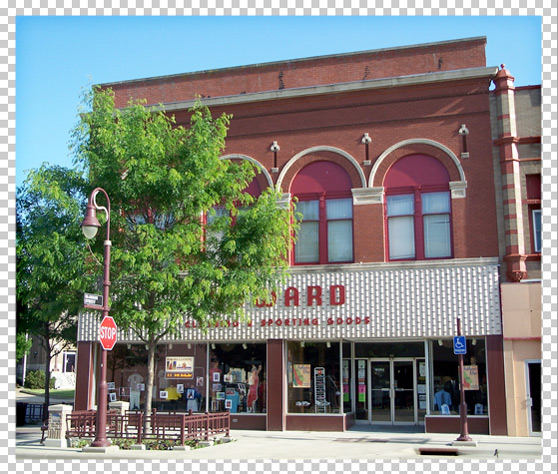 Now, fill a new layer, placed below the image layer, with a solid color. I used #f2eadf. Lets also apply an Inner Glow layer style to this background border layer.
 You should now have a border that looks similar to mine.
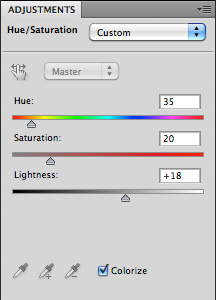
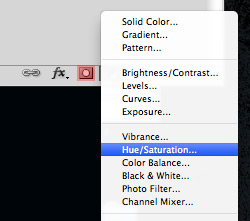 Make sure the newly created adjustment layer is above the image and apply the following settings.
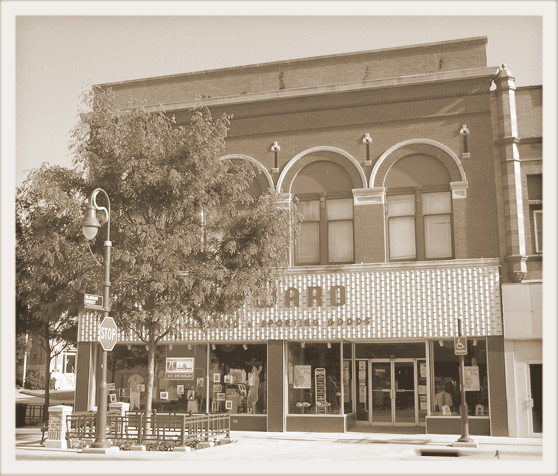
 Your image should look similar to mine. It's already looking pretty antiqued.
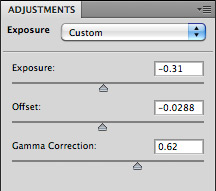
 Now lets add an Exposure adjustment layer, and apply this following settings.
 It's a little too dark in the middle. To fix that, let's use a large soft black brush to paint on the center of the exposure layer's layer mask.
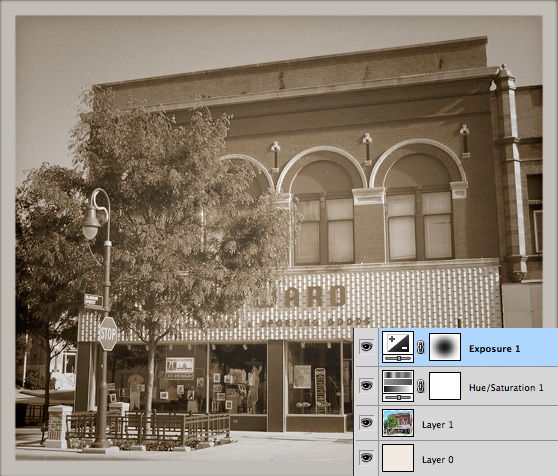 I like it... This looks old and antiqued. But lets take it a step further and give it some where and tear that would have occurred over time through years of handling.
 Copy and paste this texture onto a layer above all others in our composition. Set the layer's blend mode to overlay, and set the opacity to 50%.
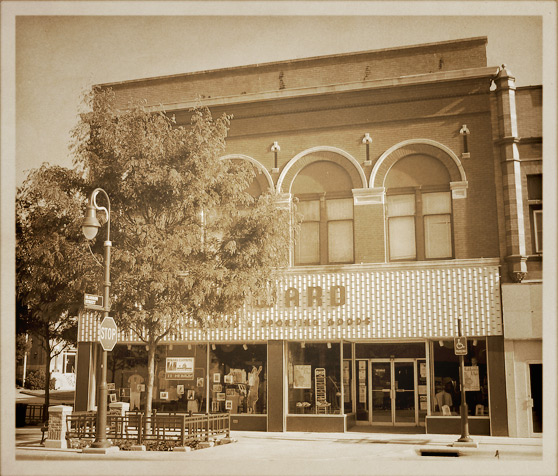 Fill a new layer, above all others, with white. Then select (Filter | Noise | Add Noise ) enter an amount somewhere around 150%, and click Ok. Set this layer's blend mode to Color Dodge, and the opacity to 10%. This gives the image a touch of film grain.
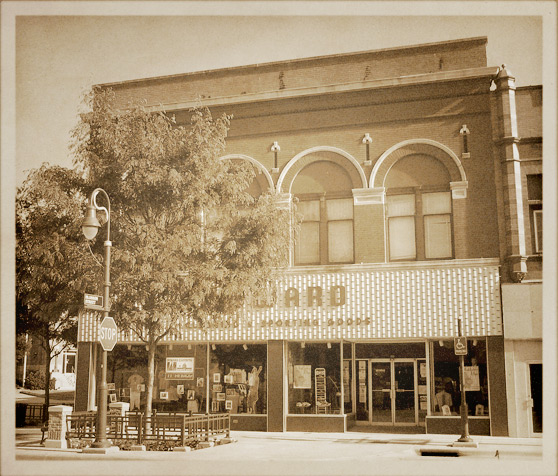 I like how this looks, very antique and vintage. But I'd like to take it a step further, and make it appear a bit more worn. As an optional step, lets apply a screen overlay. To do this I used a texture, (No 7) to be exact, from the Noise Effect Textures Vol 3, here at WeGraphics.
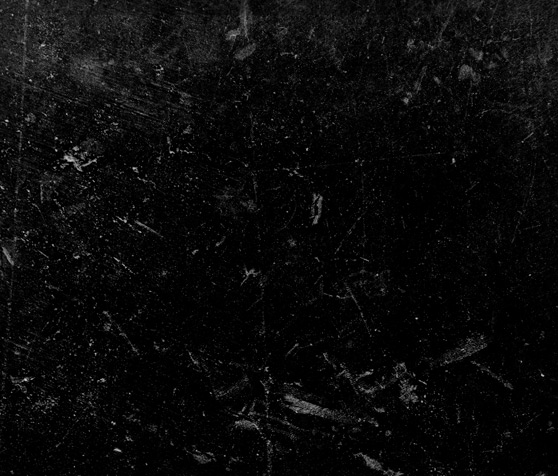 Copy and paste this texture to a layer above all others and set the layer's blend mode to Screen, and the opacity to 75%.
 There you have it! An antiqued photograph in 3 quick and easy steps. I hope you enjoyed this quick tutorial interesting and useful, and have picked up a few new techniques!
Here's a look at what we'll be creating.
 I found this perfect image of a small town store front by Jo Naylor on flickr.

Step 1 - Adding a Border
One characteristic that most all vintage photographs seem to have is a border around the image. To create that, we need to increase the canvas size by 60 pixels to give the image a 30 pixel border on all sides. Click (Image | Canvas Size ) and increase the height and width amounts by 60 pixels. Now, fill a new layer, placed below the image layer, with a solid color. I used #f2eadf. Lets also apply an Inner Glow layer style to this background border layer.
 You should now have a border that looks similar to mine.

Step 2 - Adjustment Layers
Next, we'll modify the color and exposure of the image using adjustment layers. Add a Hue / Saturation adjustment layer by clicking the new adjustment layer icon at the bottom of the layers panel. Make sure the newly created adjustment layer is above the image and apply the following settings.
 Your image should look similar to mine. It's already looking pretty antiqued.
 Now lets add an Exposure adjustment layer, and apply this following settings.
 It's a little too dark in the middle. To fix that, let's use a large soft black brush to paint on the center of the exposure layer's layer mask.
 I like it... This looks old and antiqued. But lets take it a step further and give it some where and tear that would have occurred over time through years of handling.
Step 3 - Applying Textures
After searching for the perfect texture, I found this great stained paper image from our friend Caleb Kimbrough on Flickr. Copy and paste this texture onto a layer above all others in our composition. Set the layer's blend mode to overlay, and set the opacity to 50%.
 Fill a new layer, above all others, with white. Then select (Filter | Noise | Add Noise ) enter an amount somewhere around 150%, and click Ok. Set this layer's blend mode to Color Dodge, and the opacity to 10%. This gives the image a touch of film grain.
 I like how this looks, very antique and vintage. But I'd like to take it a step further, and make it appear a bit more worn. As an optional step, lets apply a screen overlay. To do this I used a texture, (No 7) to be exact, from the Noise Effect Textures Vol 3, here at WeGraphics.
 Copy and paste this texture to a layer above all others and set the layer's blend mode to Screen, and the opacity to 75%.
 There you have it! An antiqued photograph in 3 quick and easy steps. I hope you enjoyed this quick tutorial interesting and useful, and have picked up a few new techniques!