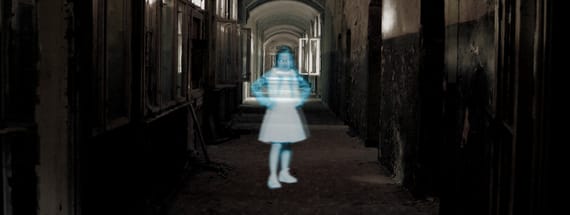
Add a Realistic Ghost Into any Image
Post Production Photoshop Effects
Creating a ghost from any picture in Photoshop could be easier than you think. Of course there are many different ways to achieve this effect, but the one I will show you here will let you adjust the effect even when you finish editing your image. With basic Photoshop tools and adjustment layers, in this tutorial you will learn how to create a ghost from any picture and add it to any other one you want.
But before we start, and if you want to follow this tutorial exactly as described, please download the following 2 free images from Pexels: Little Girl and Background.
Step 1
Open the background image in Photoshop.
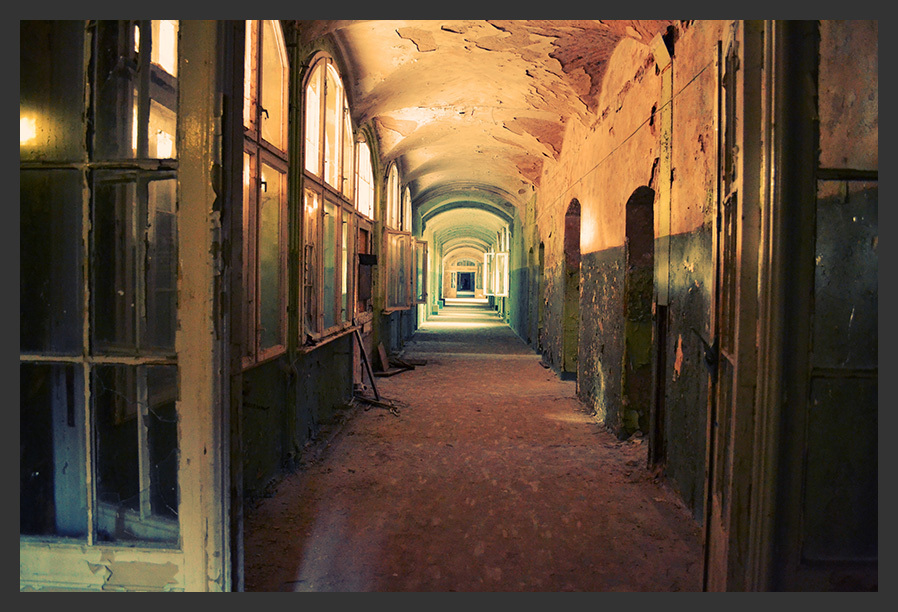
Step 2
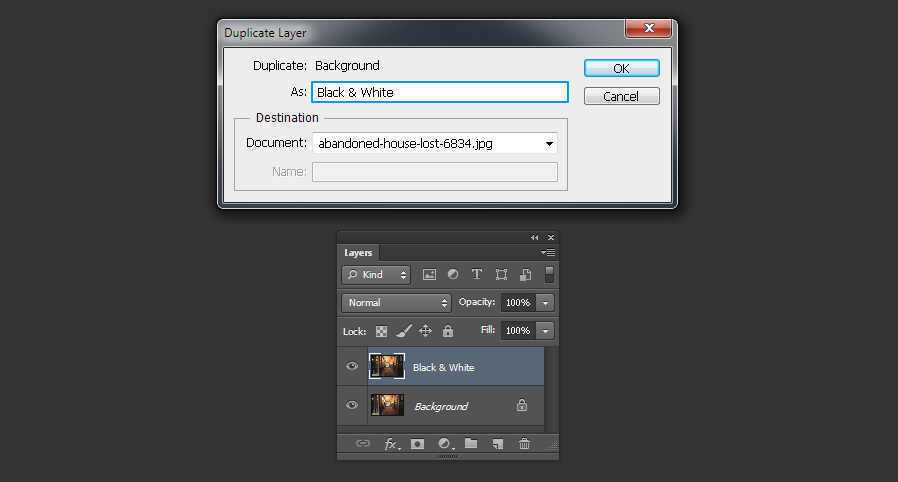
Go to Layer > Duplicate Layer. Name this new layer as “Black & White” and click OK.
Step 3
Go to Image > Adjustments > Desaturate.
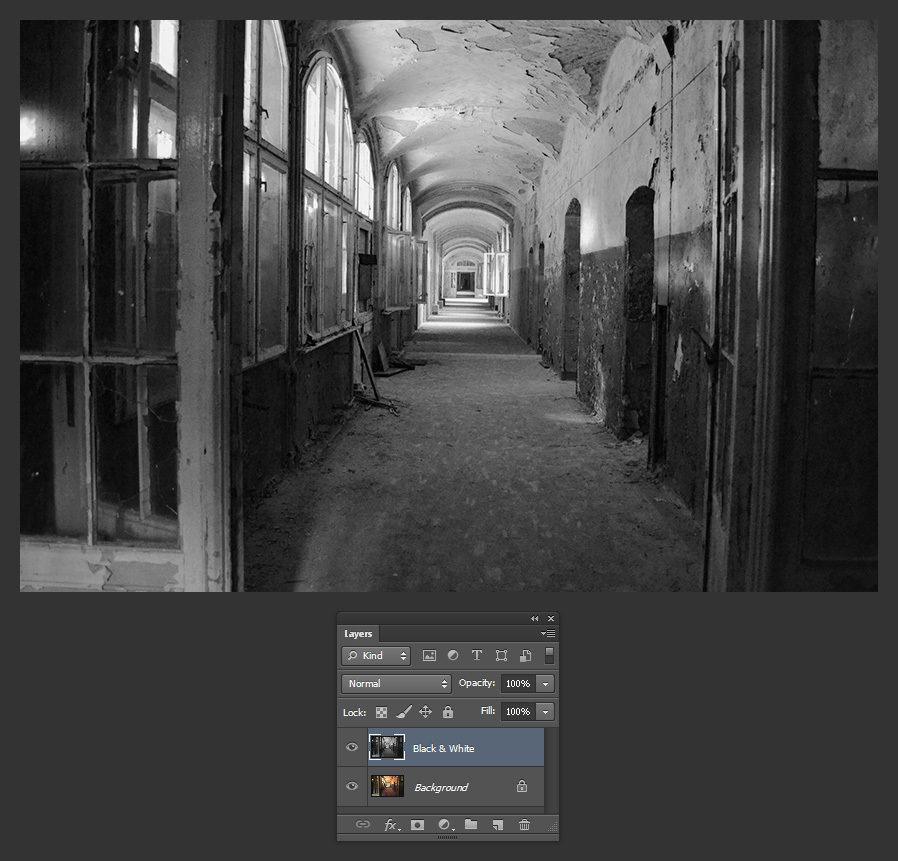
Step 4
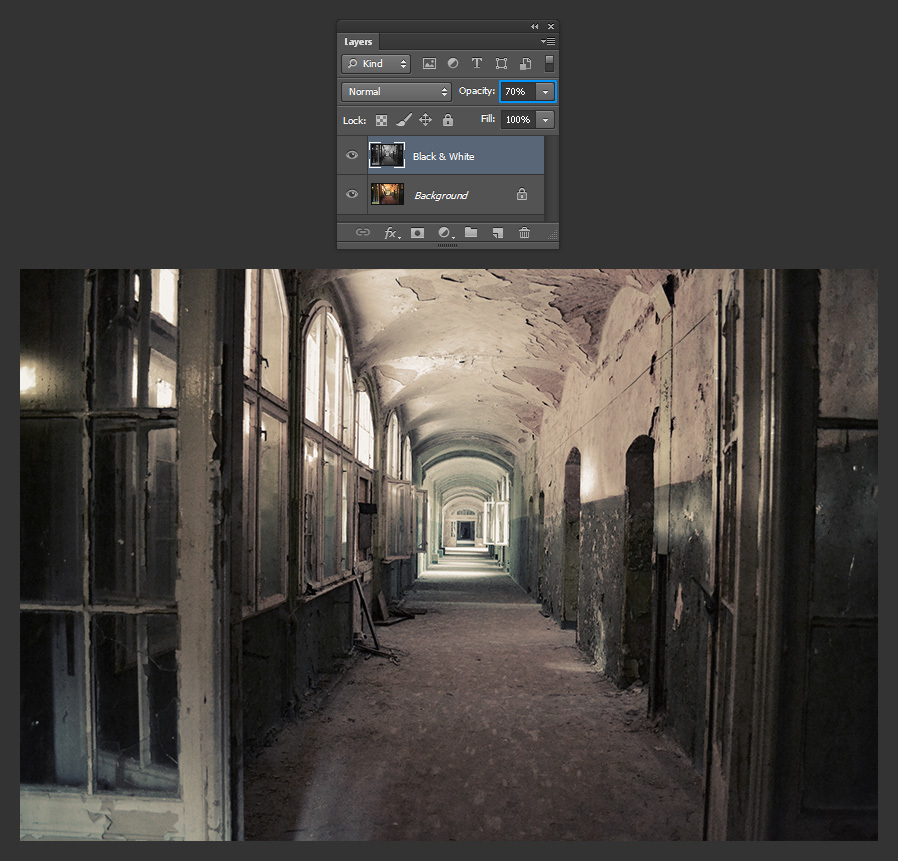
In the Layers Panel, reduce the Opacity of the “Black & White” layer to 70%.
Step 5
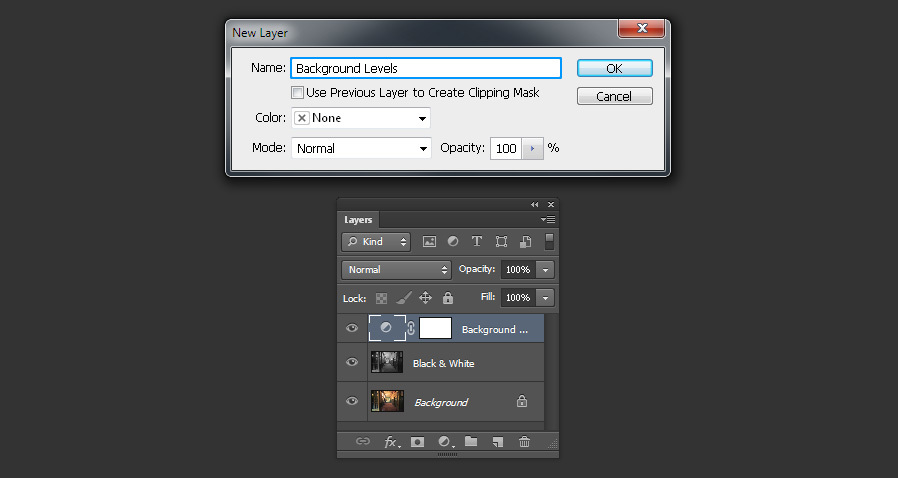
Go to Layer > New Adjustment Layer > Levels. Name this layer as “Background Levels” and click OK.
Step 6
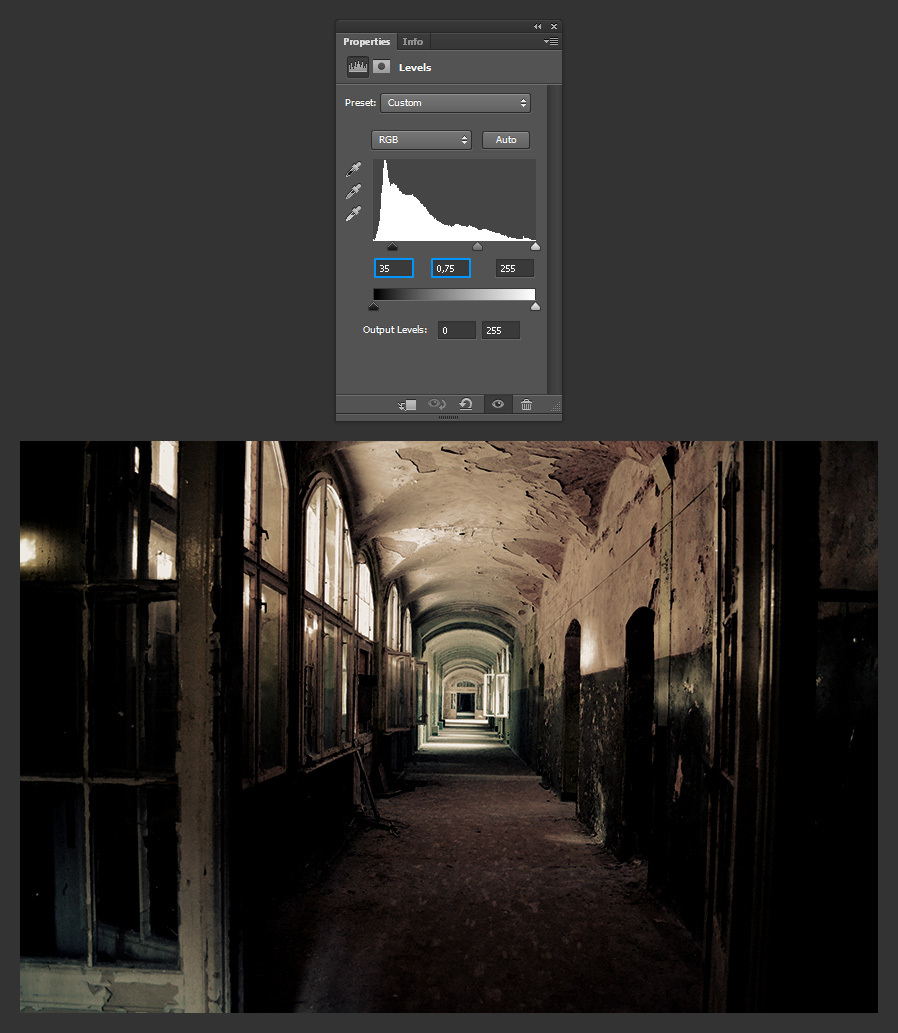
In the Levels Properties Panel, set the Shadow Input Level to 35 and the Midtone Input Level to 0,75.
Step 7
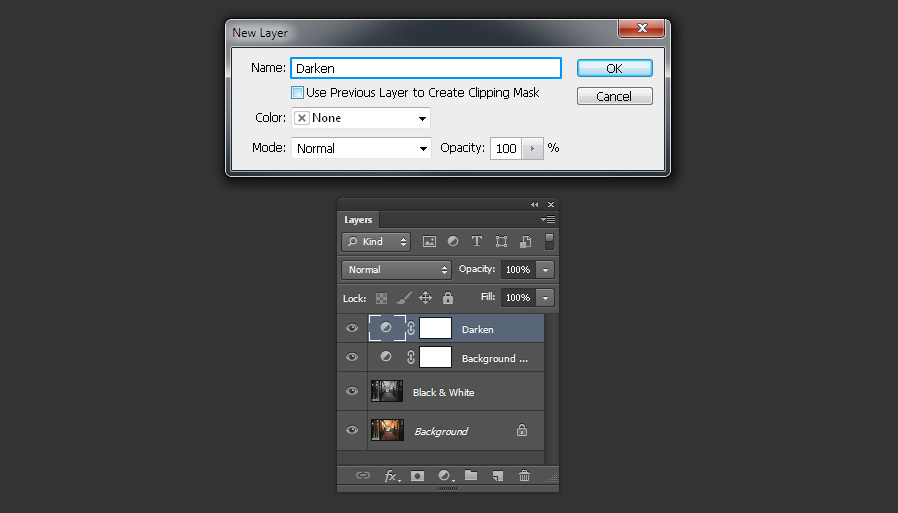
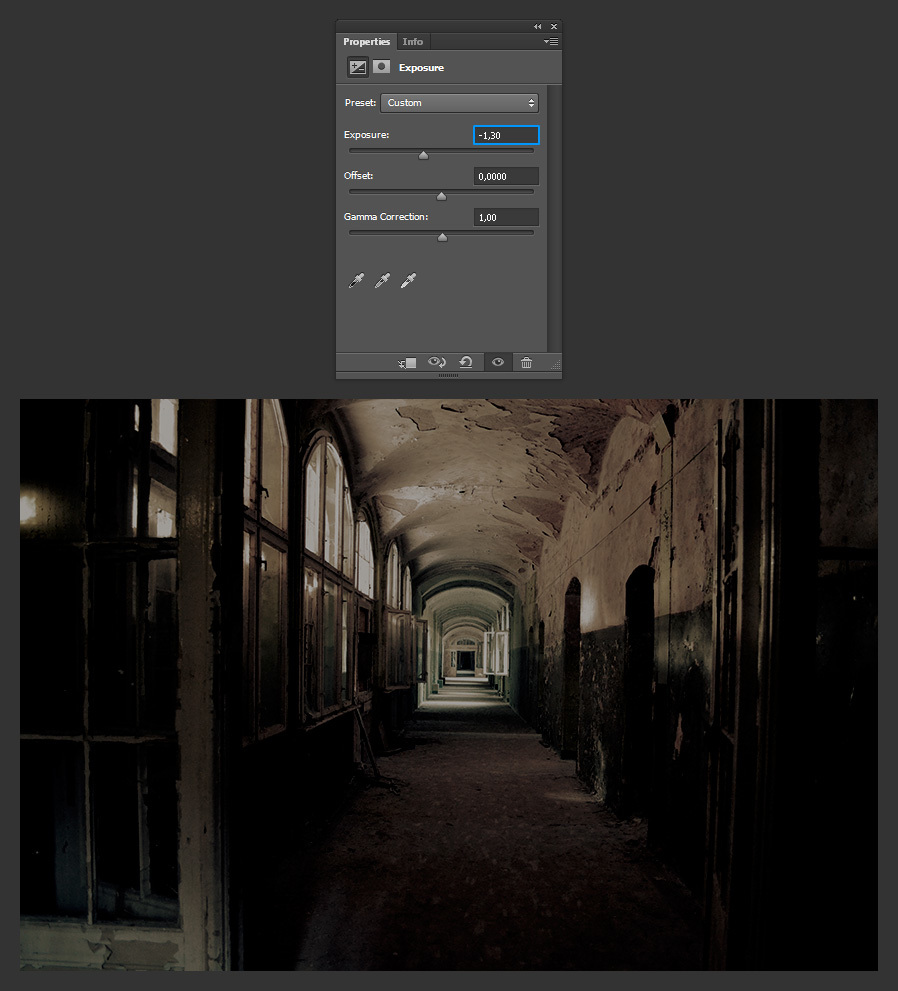
Go to Layer > New Adjustment Layer > Exposure. Set the name of this layer to “Darken” and click OK.
Step 8
In the Exposure Properties Panel, set the Exposure to -1,30.
Step 9
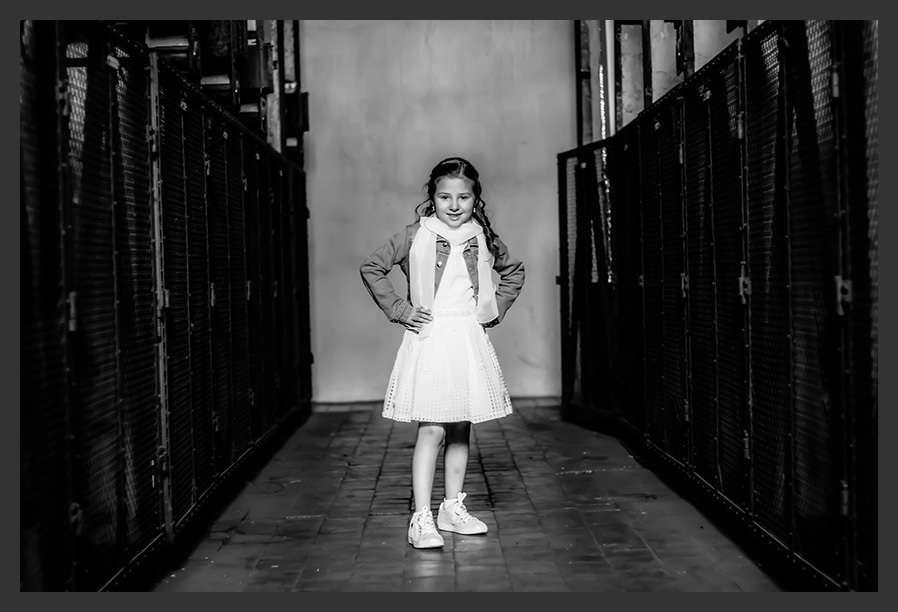
Open the little girl image in Photoshop and go to Image > Adjustments > Desaturate.
Step 10
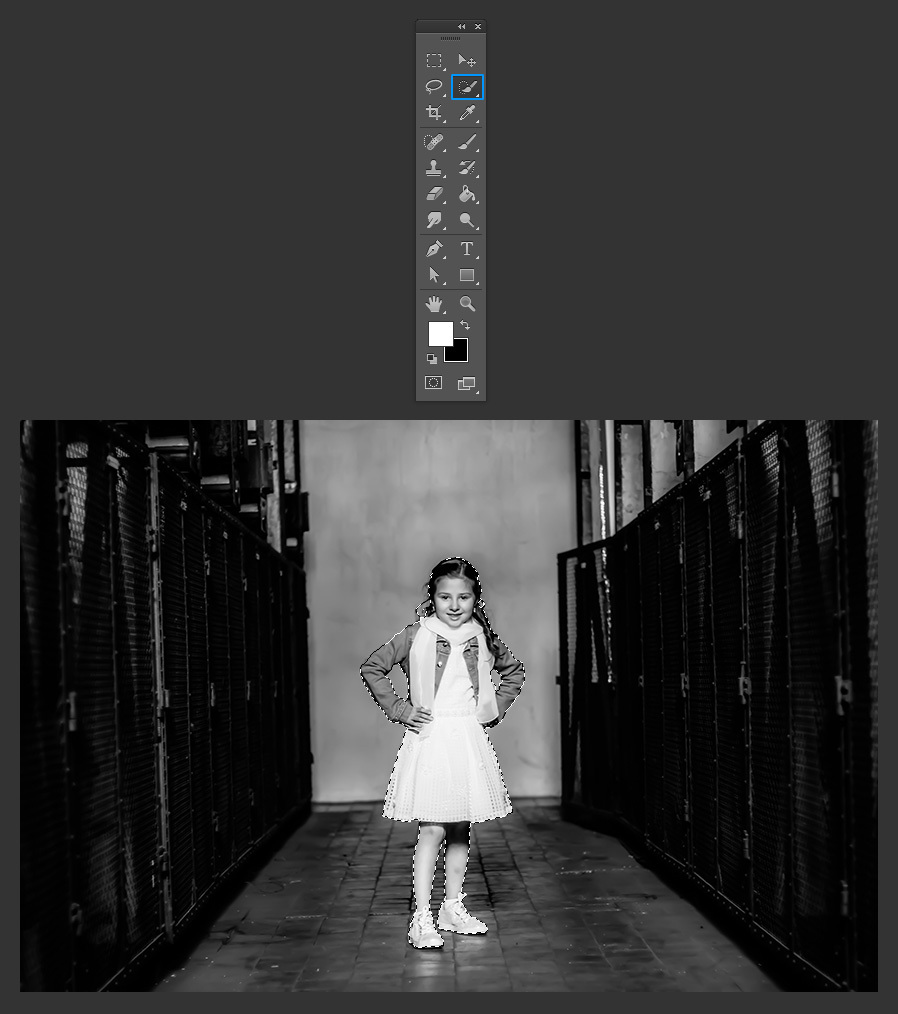
Using your preferred method, make a selection of the subject. In this case, I will simply use the Quick Selection Tool (W) to select the little girl.
Step 11
With the selection active, go to Edit > Copy.

Step 12
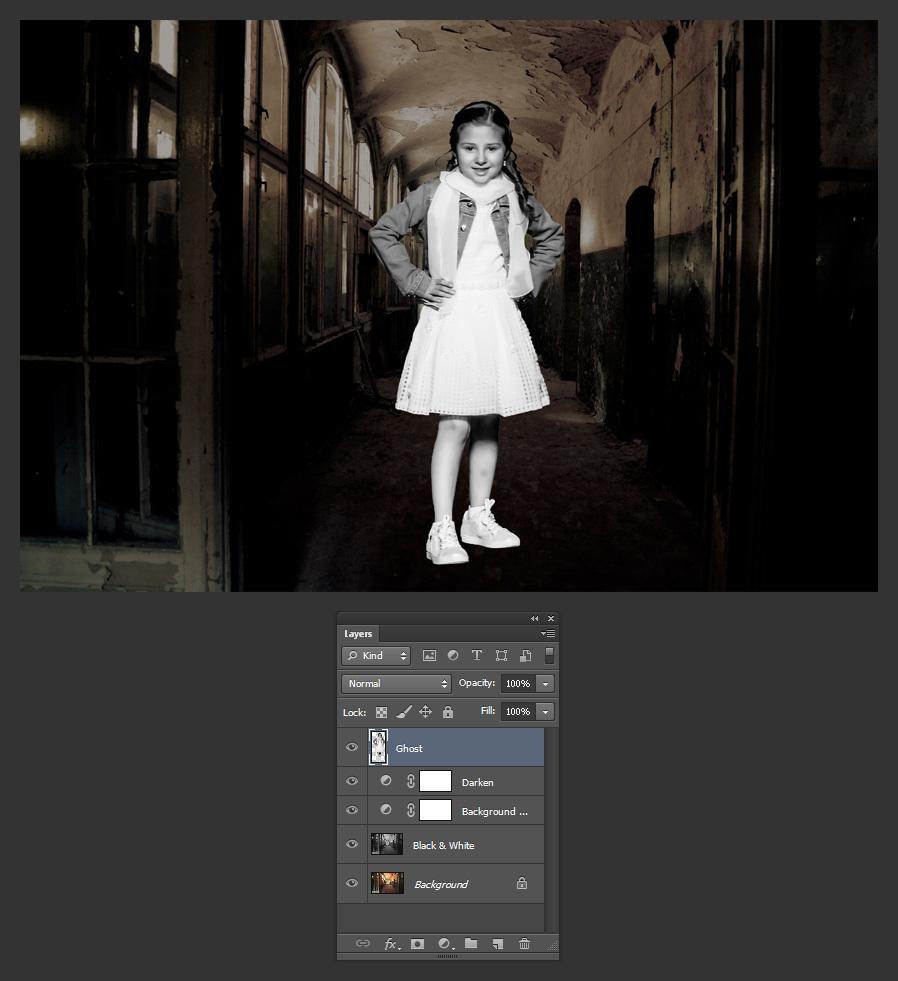
Select the Background document, go to Edit > Paste and rename this layer to “Ghost”.
Step 13
With the “Ghost” layer selected, go to Edit > Transform > Scale. Set the Horizontal and Vertical scale to 35% and hit the Enter key on your keyboard to commit the transformation.
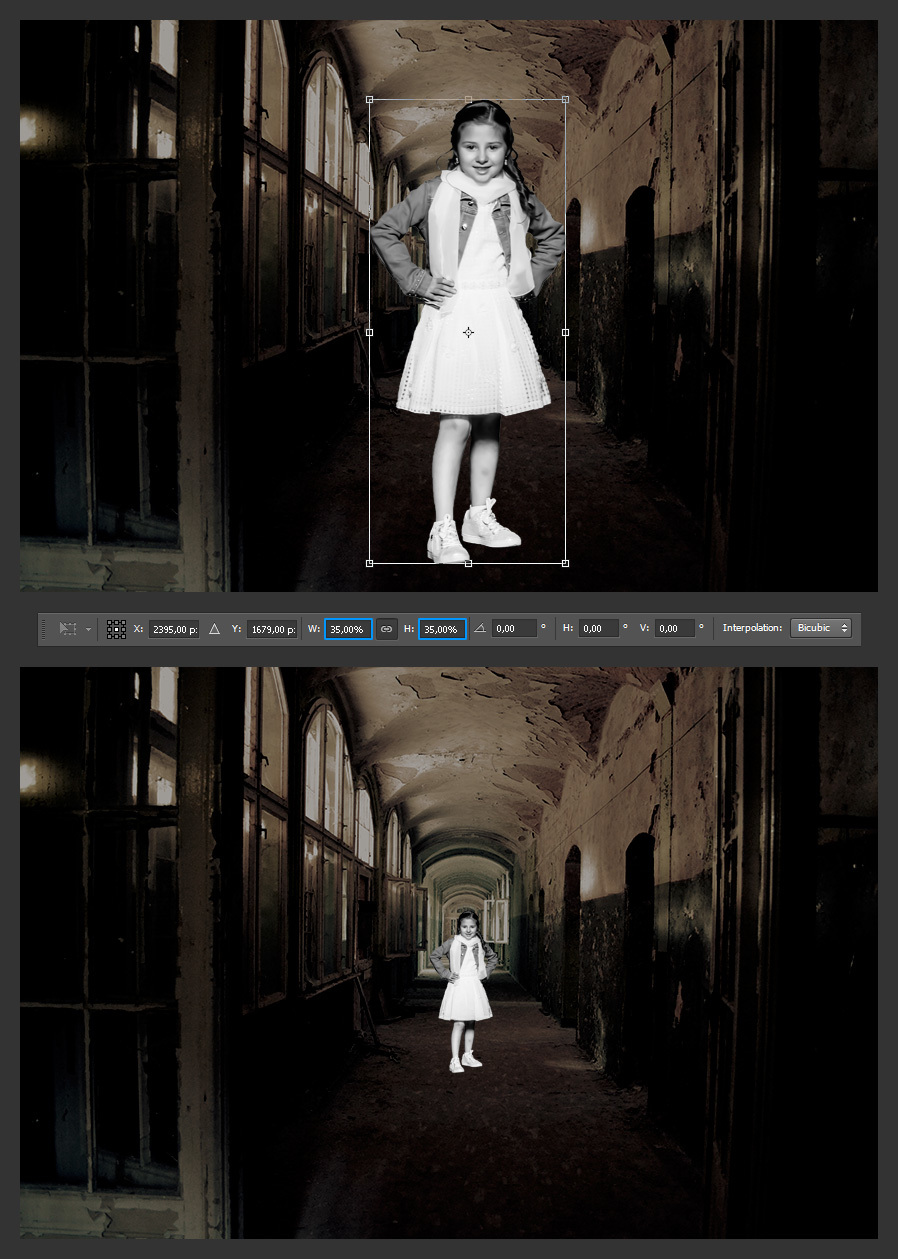
Step 14
Go to Layer > Smart Objects > Convert to Smart Object.
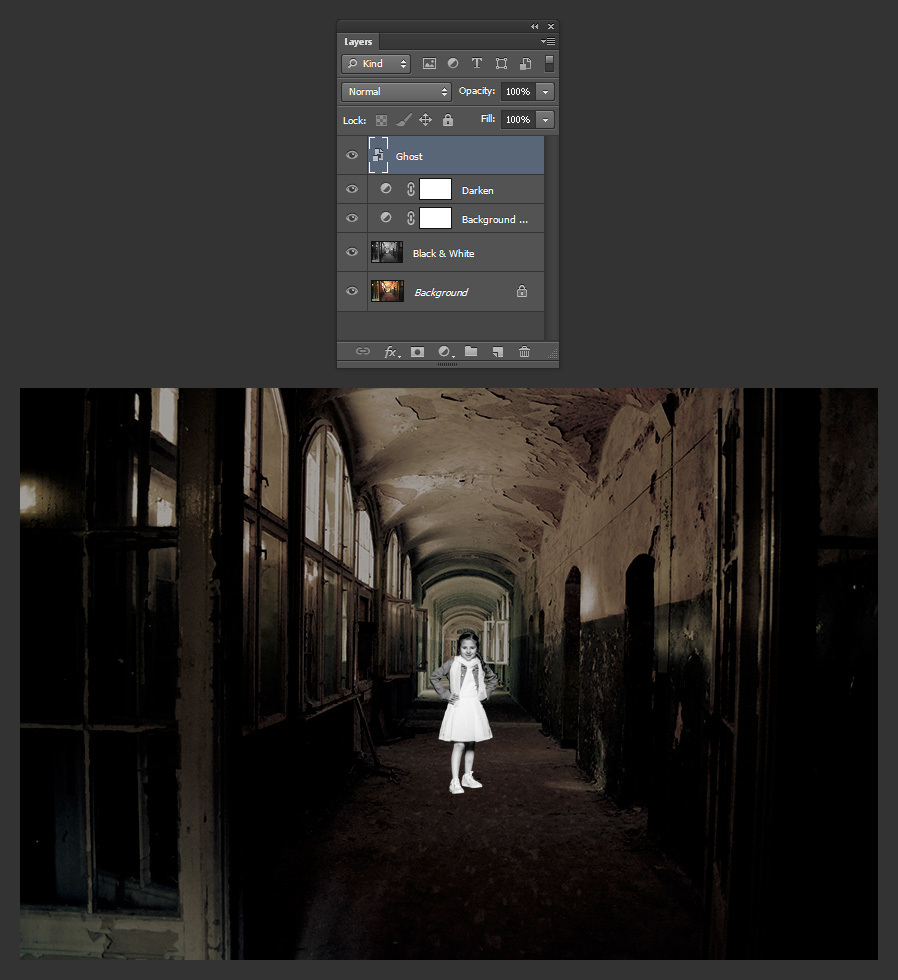
Step 15
Duplicate the “Ghost” layer 2 more times and name these layers as “Blurred” and “Glow”.

Step 16
Hide the “Blurred” and “Glow” layers by clicking on the eye icon next to the layer’s name.
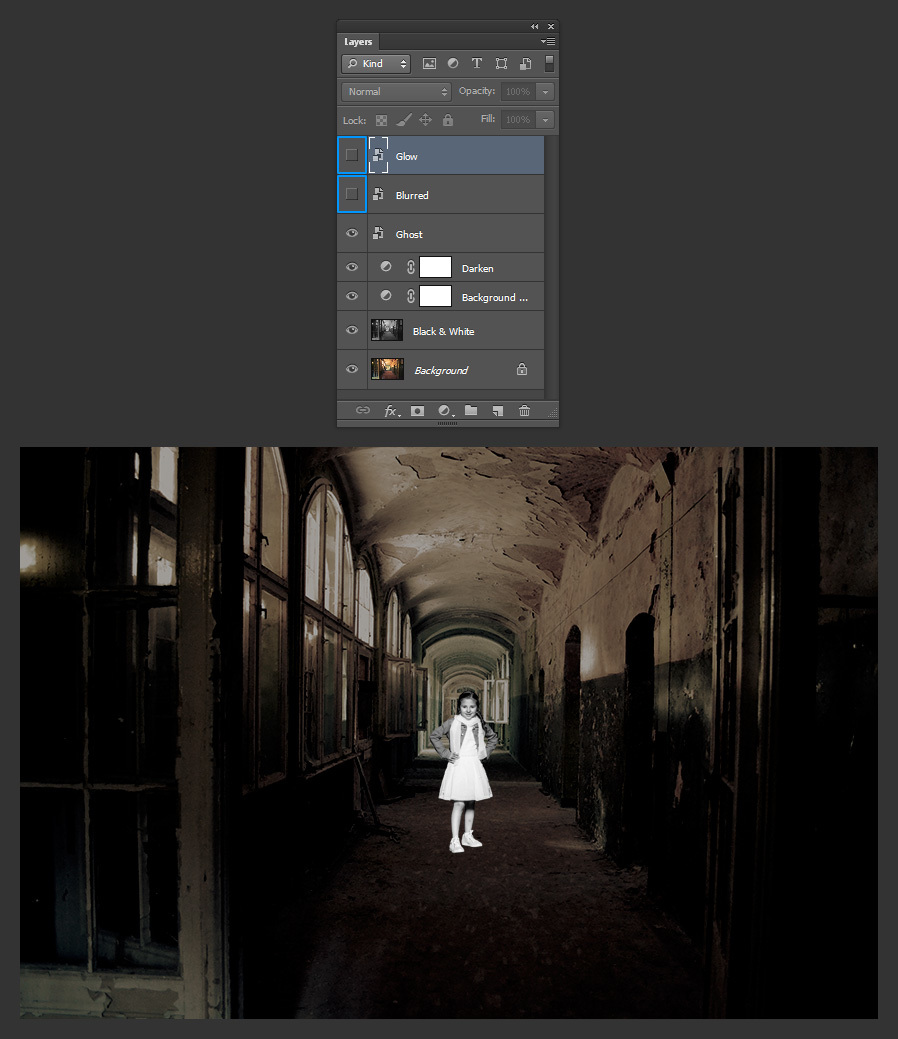
Step 17
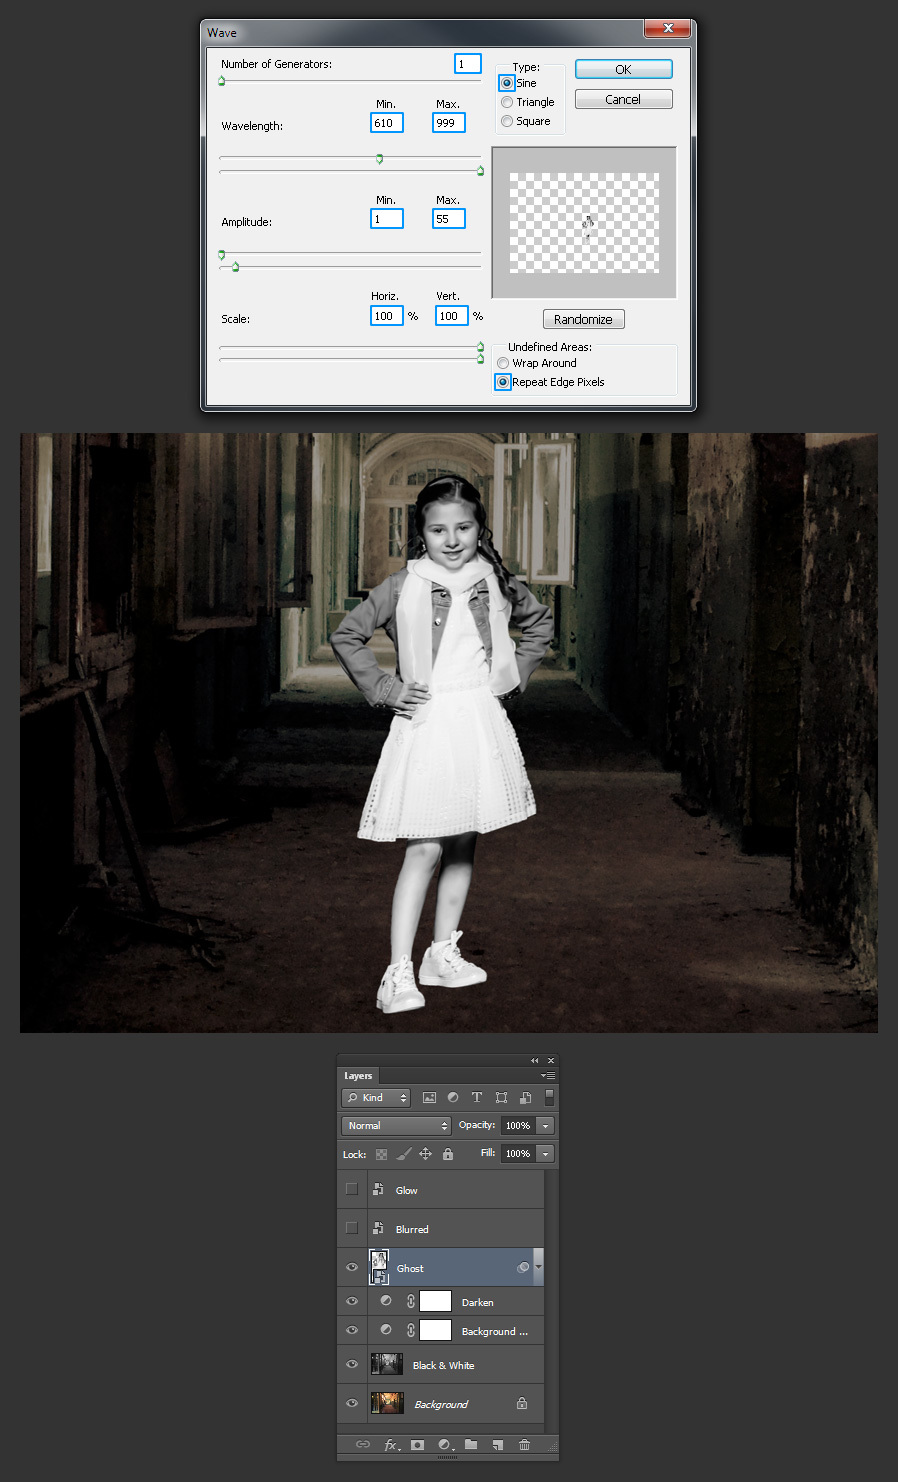
Click on the “Ghost” layer to make it the active layer and go to Filter > Distort > Wave.
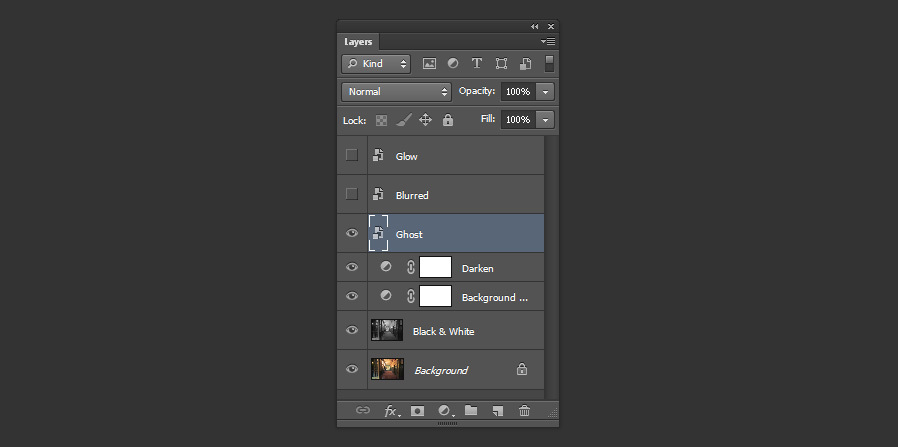
Step 18
In the Wave Panel, apply the following settings and click OK.
Step 19
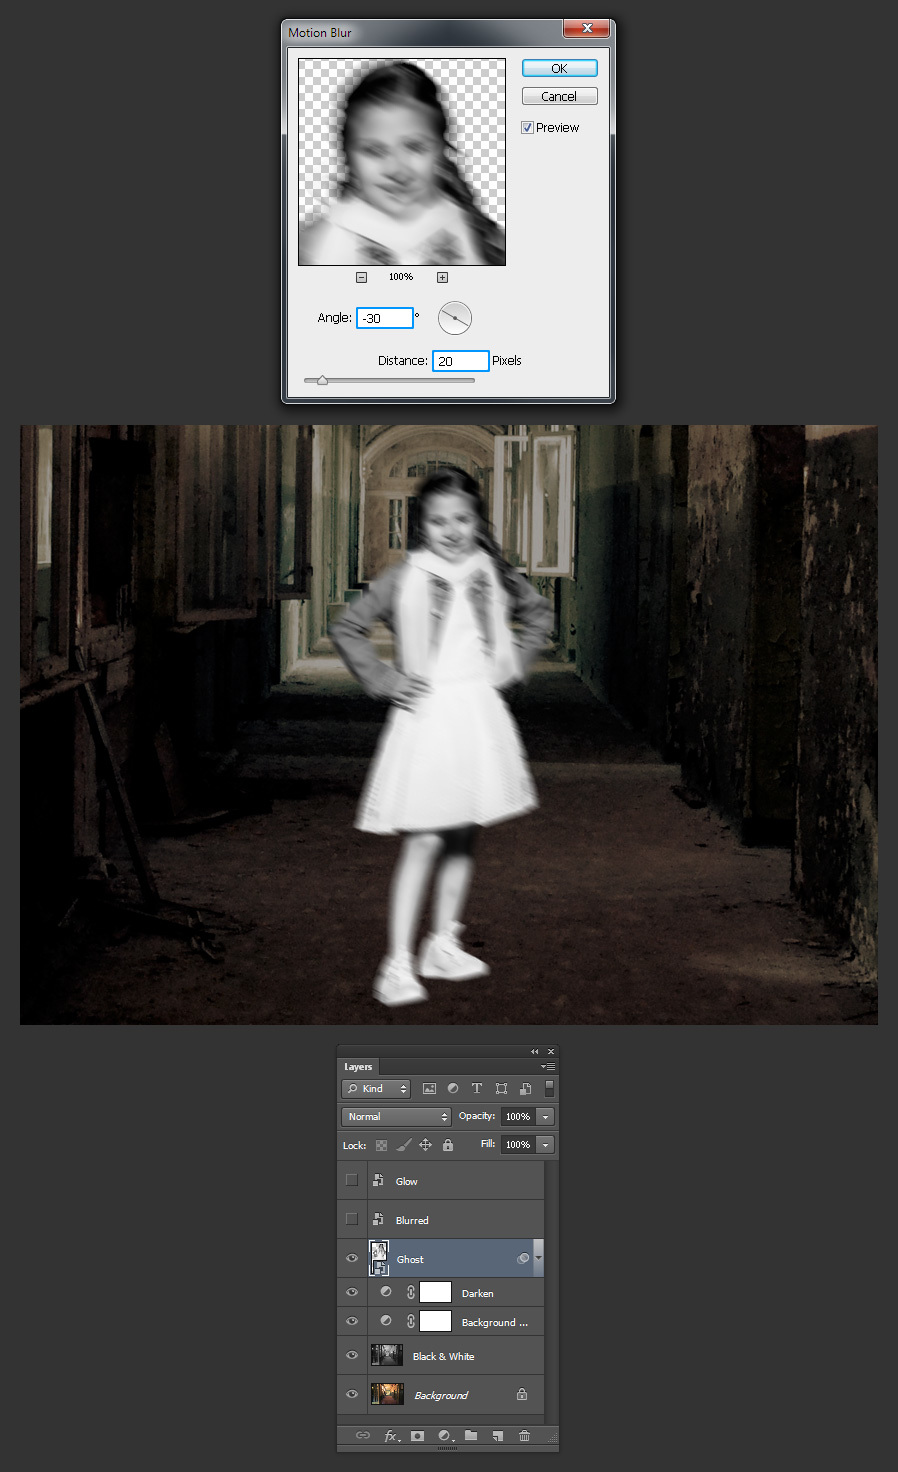
With the “Ghost” layer still selected, go to Filter > Blur > Motion Blur. Set the Angle to -30, the Distance to 20 pixels and click OK.
Step 20
In the Layers Panel, bring down the Opacity of the “Ghost” layer to 20%

Step 21
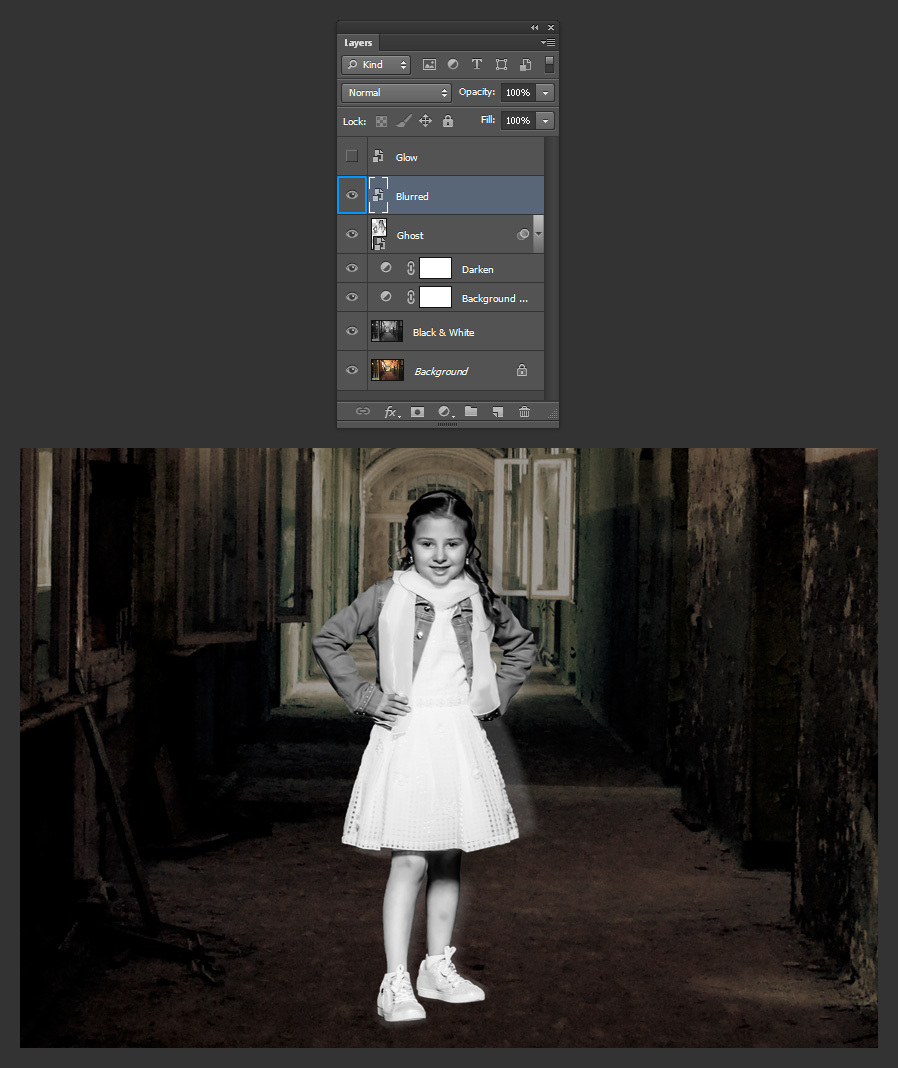
Select the “Blurred” layer and make it visible by clicking on the eye icon next to the layer’s name.
Step 22
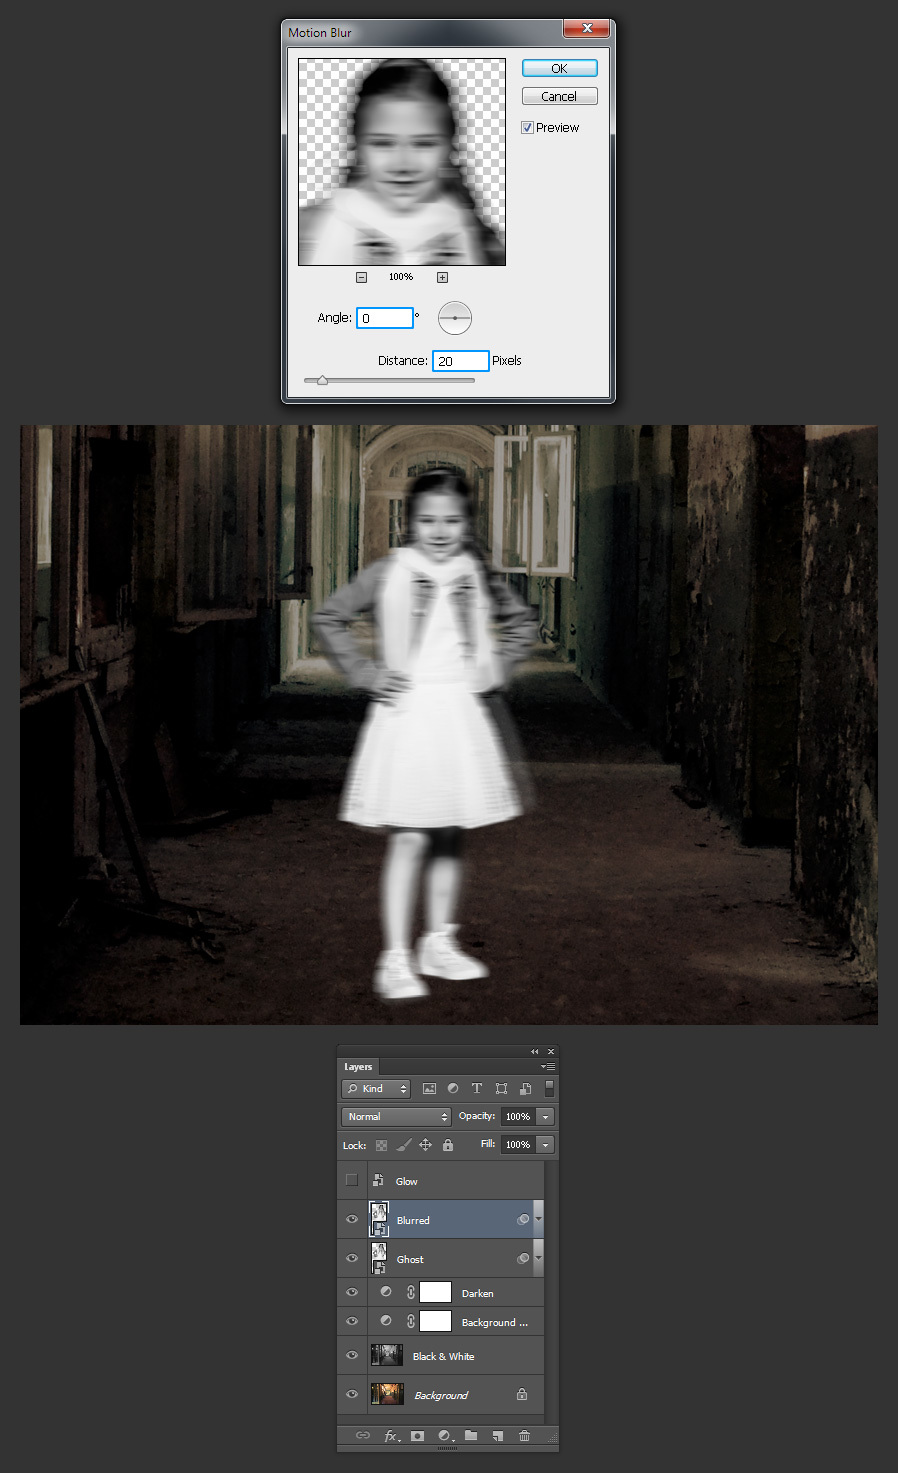
Go to Filter > Blur > Motion Blur. Set the Angle to 0, the Distance to 20 pixels and click OK.
Step 23
In the Layers Panel, bring down the Opacity of the “Blurred” layer to 50%
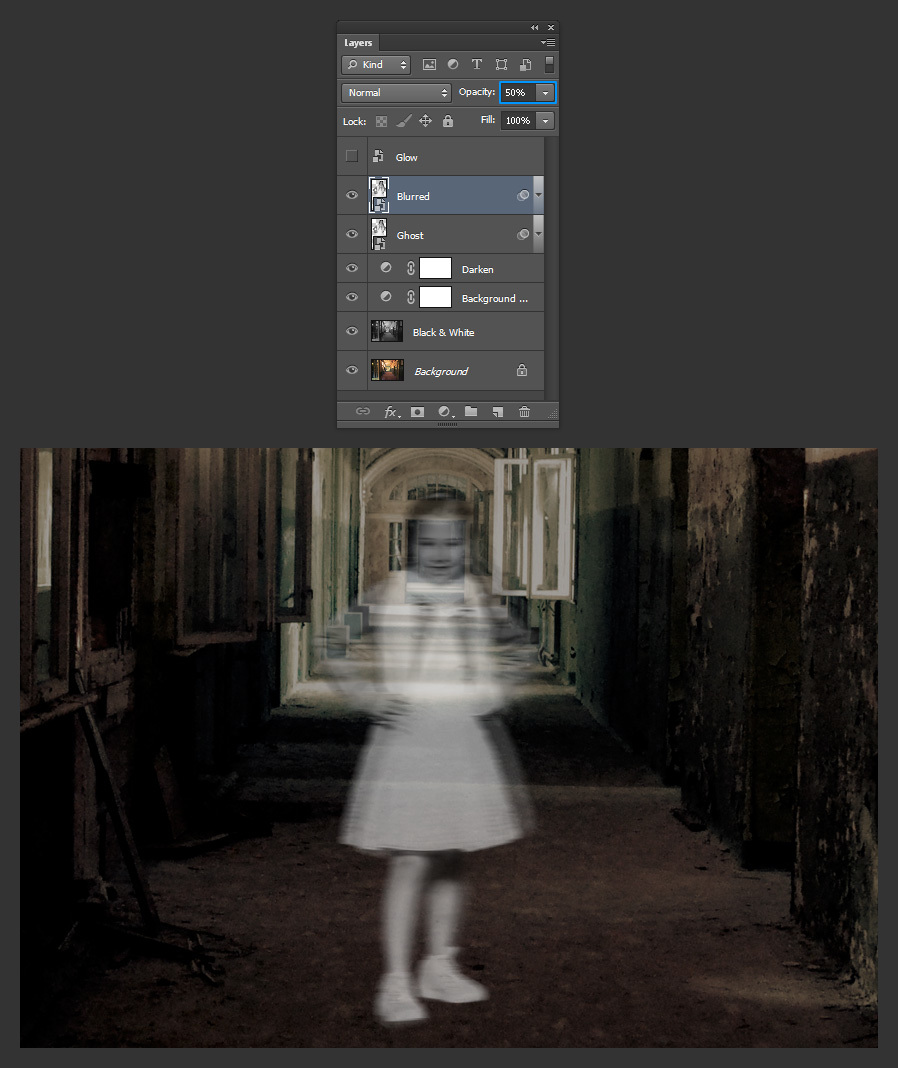
Step 24
Select the “Glow” layer and make it visible by clicking on the eye icon next to the layer’s name.

Step 25
Go to Filter > Blur > Gaussian Blur. Set the Radius to 6 pixels and click OK.
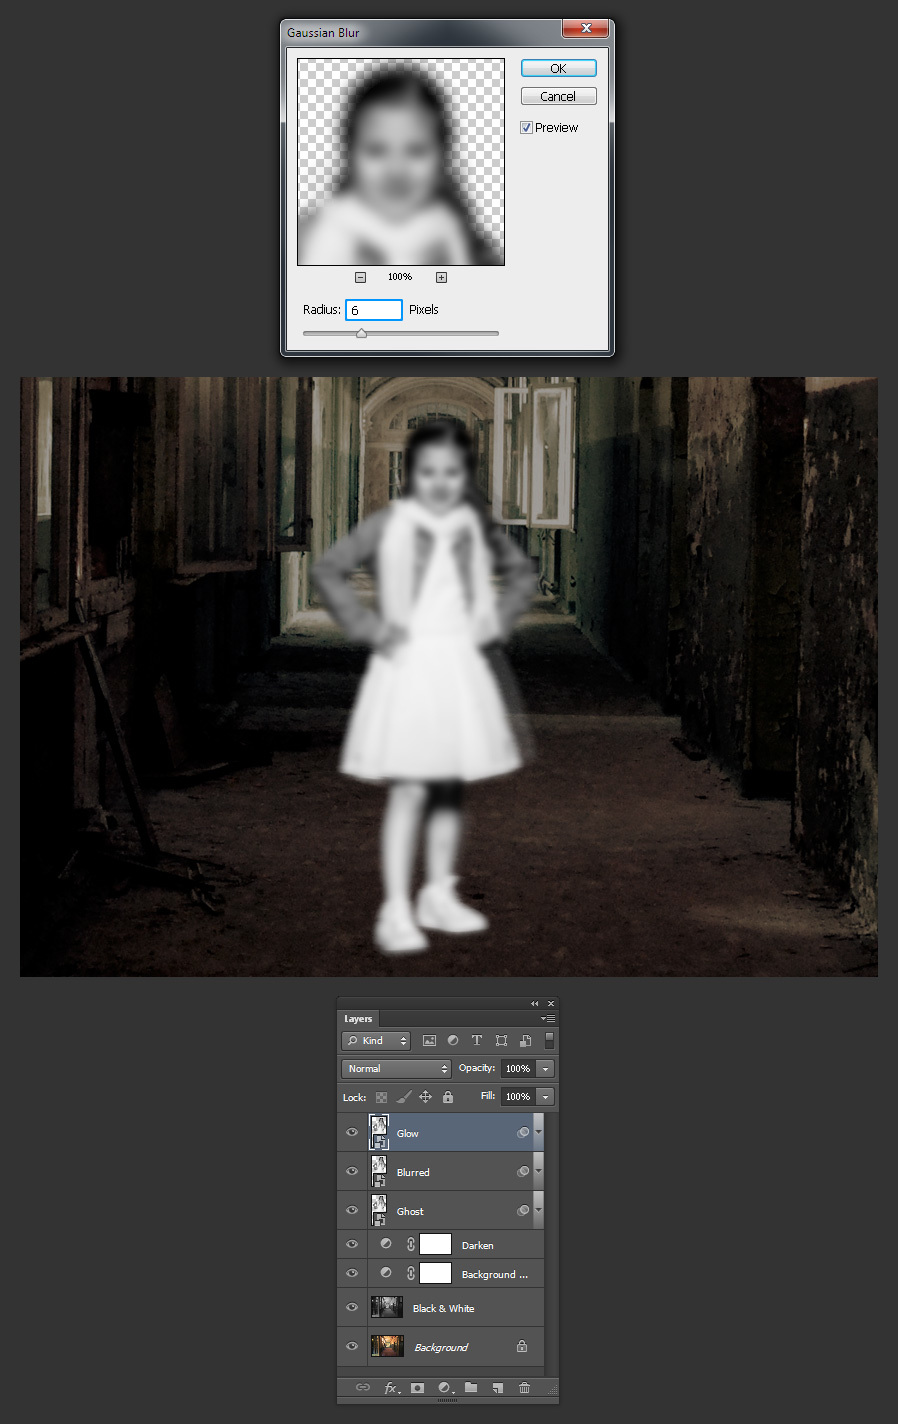
Step 26
In the Layers Panel, set the blend mode of the “Glow” layer to “Linear Dodge (Add)” and bring down the Opacity to 25%
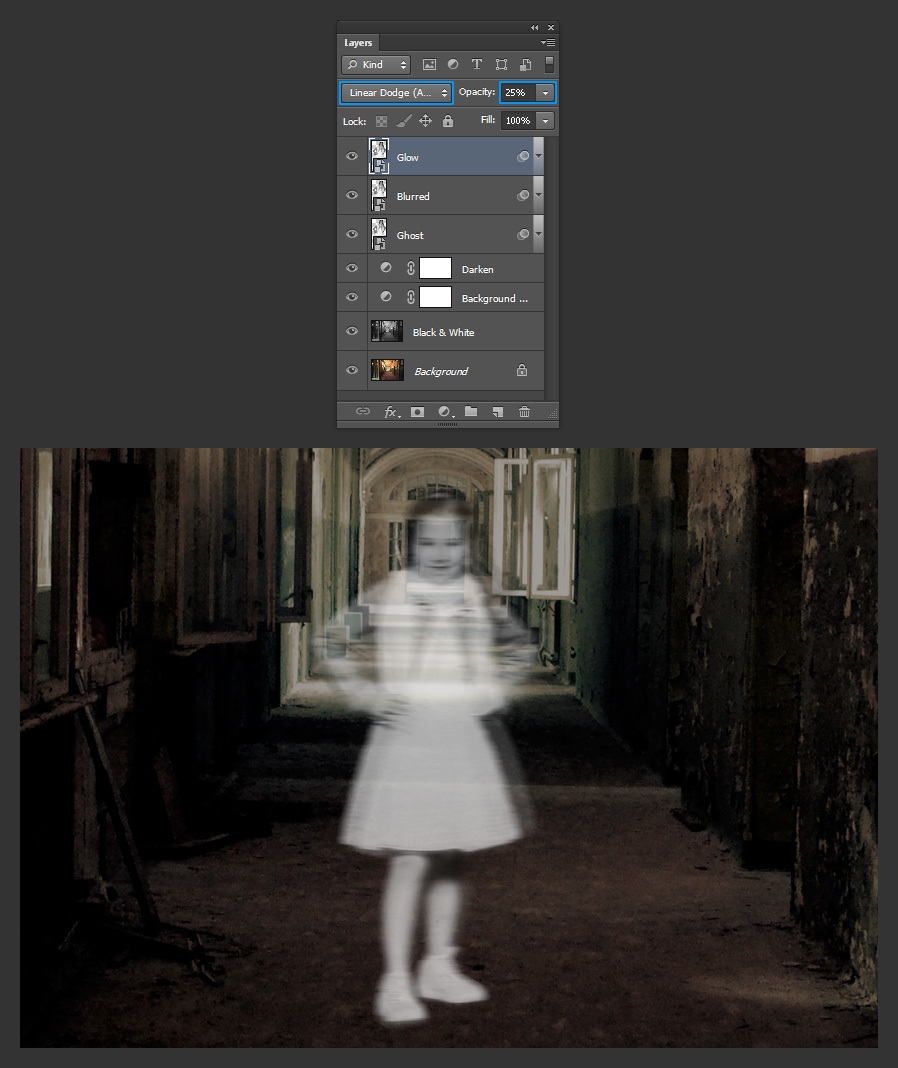
Step 27
Hold the Ctrl key on your keyboard and click on the “Blurred” and “Ghost” layers. Go to Layer > New > Group from Layers. Name this group as “Effects” and click OK.
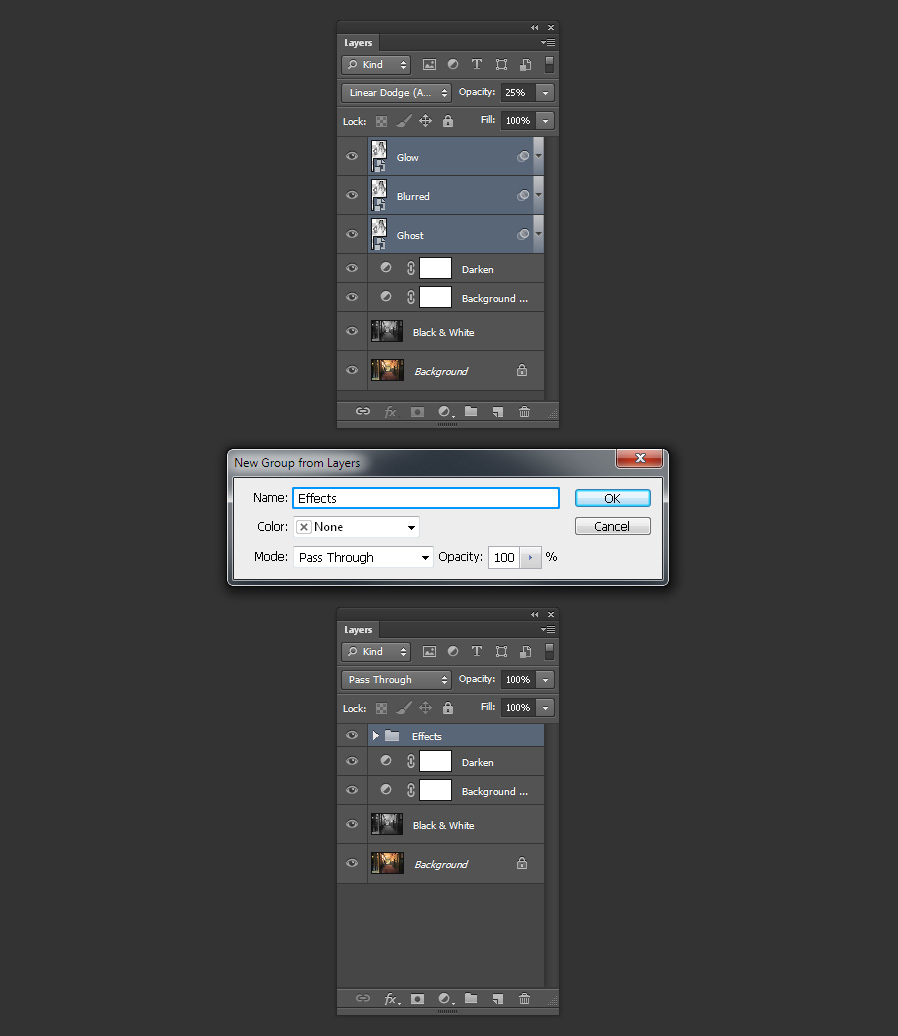
Step 28
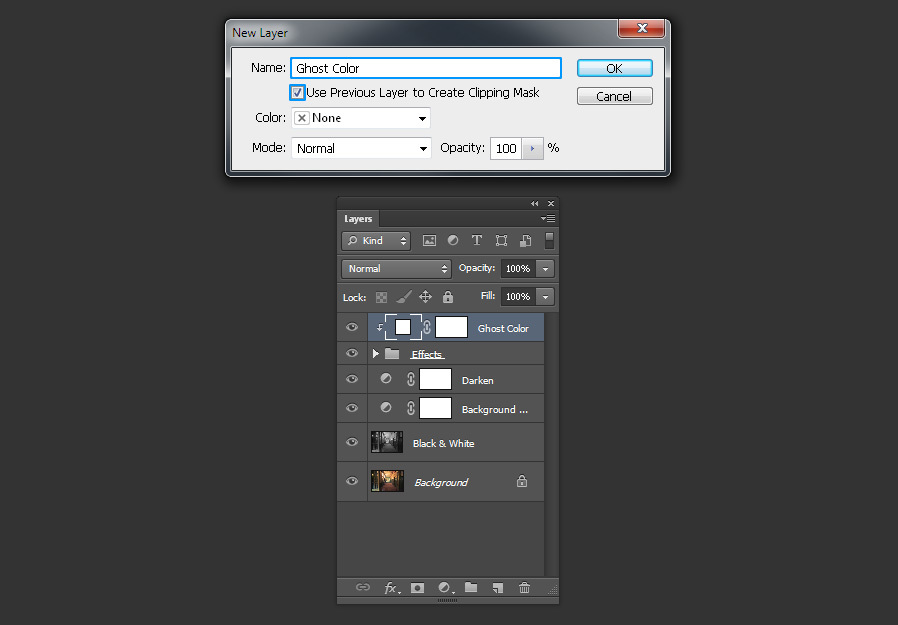
With the “Effects” layer group selected go to Layer > New Fill Layer > Solid Color. Name this layer as “Ghost Color”, be sure to have the “Use Previous Layer to Create Clipping Mask” selected and click OK.
Step 29
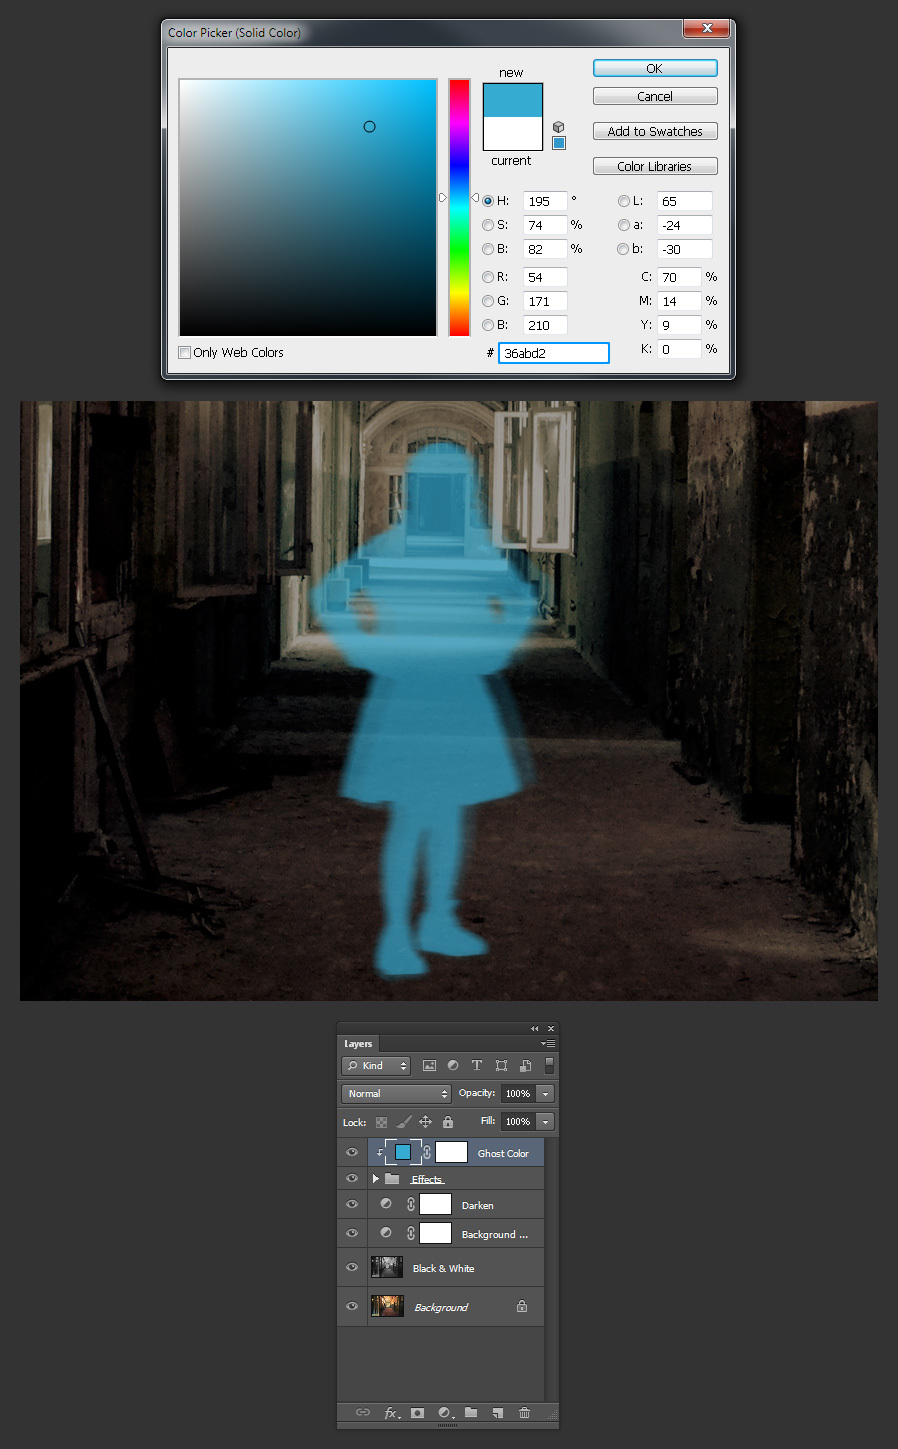
In the Color Picker window, set the color to #36abd2 and click OK.
Step 30
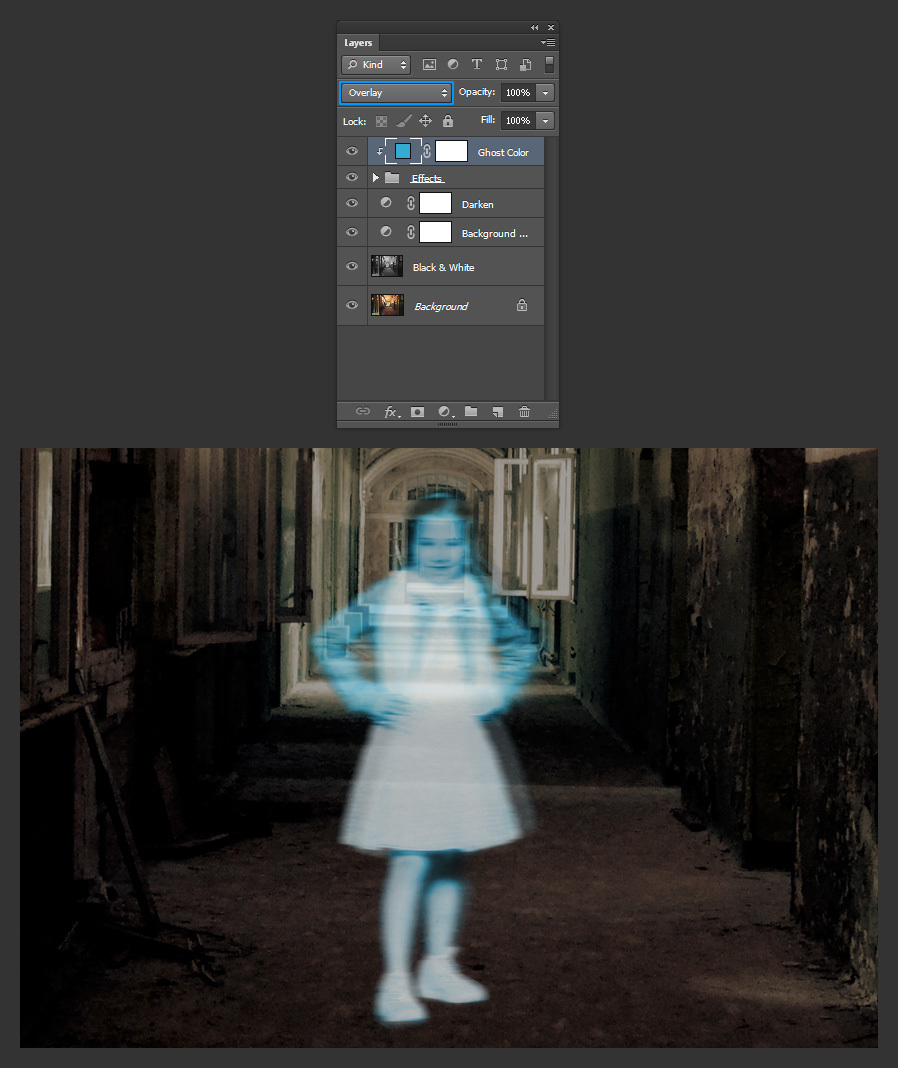
In the Layers Panel, set the Blend Mode of the “Ghost Color” layer to Overlay.
Step 31
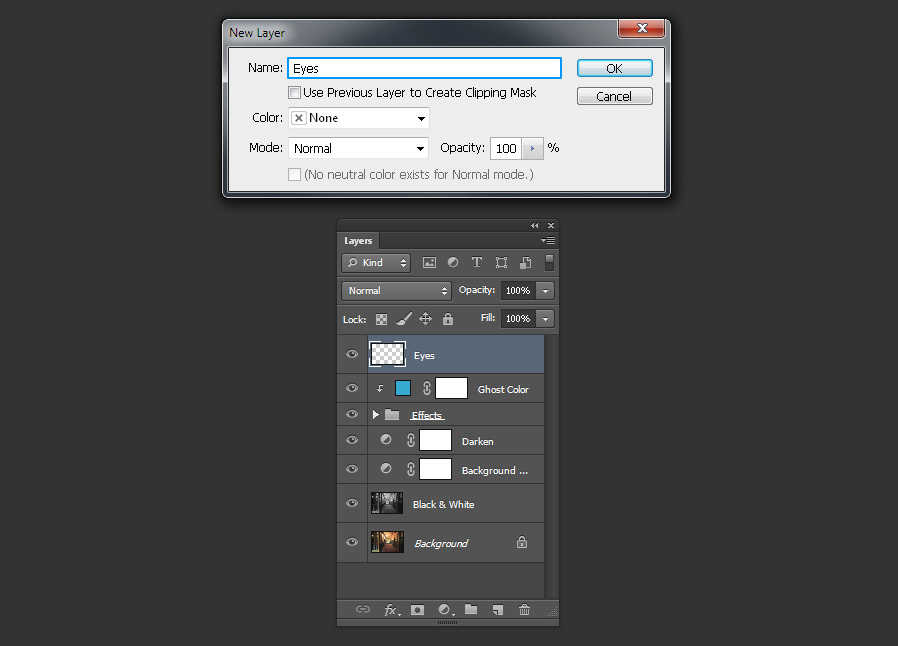
Go to Layer > New > Layer. Set the name of this layer to “Eyes” and click OK.
Step 32
Select the Brush Tool (B). In the Brush toolbar, select a soft rounded brush, set the size to 15 px, the Hardness to 0% and be sure to have the Opacity and Flow set to 100%

Step 33
Be sure to have the Foreground Color set to white and click once over each eye.
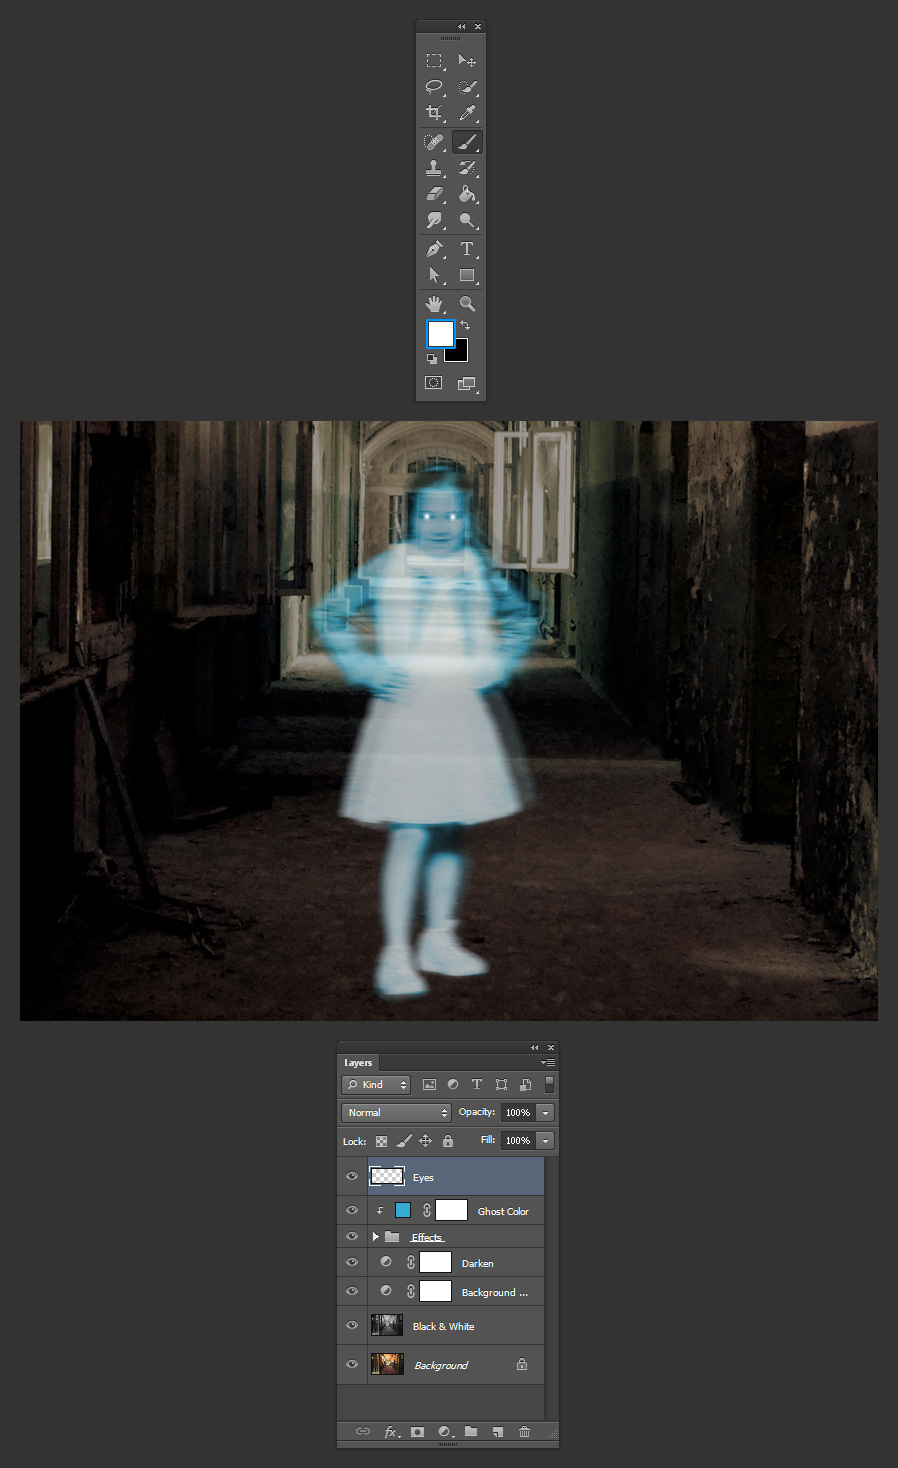
Step 34
Lastly, decrease the Opacity of the “Eyes” layer to 85%.

Conclusion
As we applied all of the effects to our subject after we convert it to a Smart Object, adjusting the effects is easy and we do not need to make all the process again. In the Layers Panel, simply expand the effects (click on the down arrow icon next to the layer’s name) and double-click on the effect you want to edit, set the new values and you will see the results in your image.
