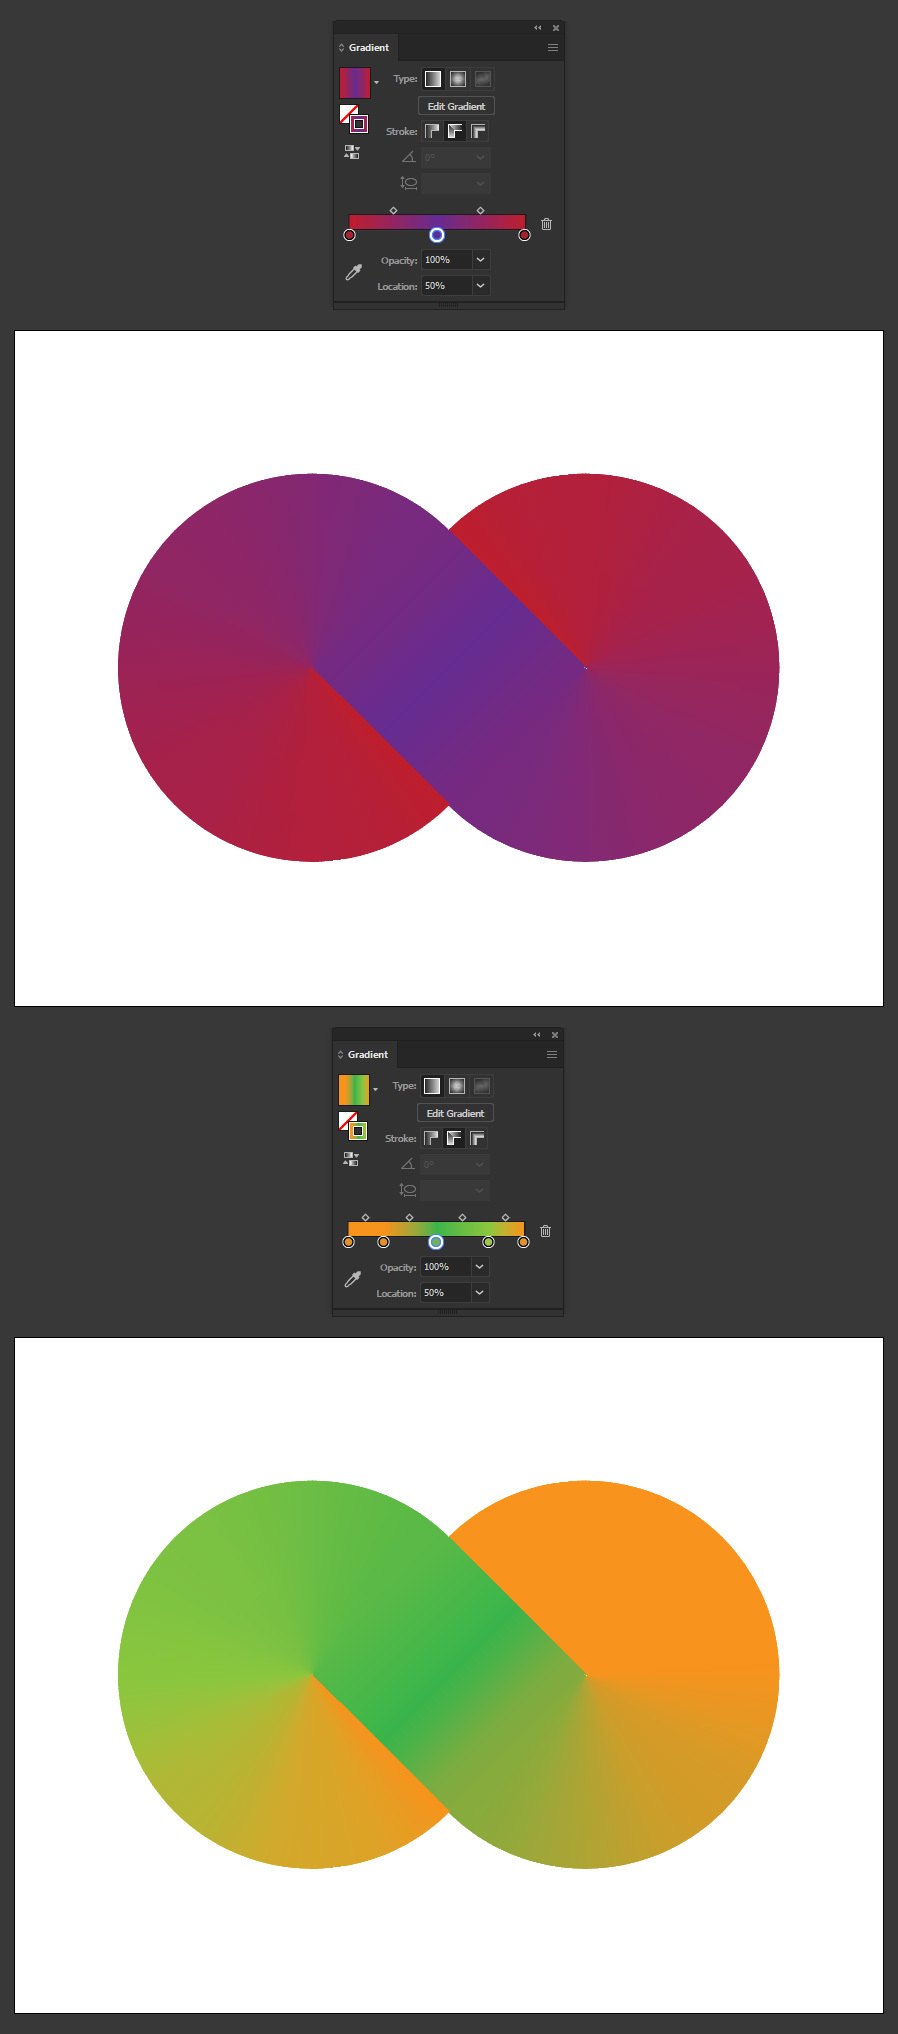
How to Make A Infinite Gradient in Illustrator
Illustrator Tips & Tricks
A handy resource that designers often use on their designs could be the gradients. They can be used on backgrounds, to replicate some sky colors or simply to add depth on some objects or texts. There are many different types of gradients (radial, circular, linear, etc) but there is one that is very useful and we can find it in Illustrator under the Gradient panel. Today, I will show you how you can make an infinite gradient in Illustrator using only the default tools and a type of stroke gradient that is not used so often.
Step 1
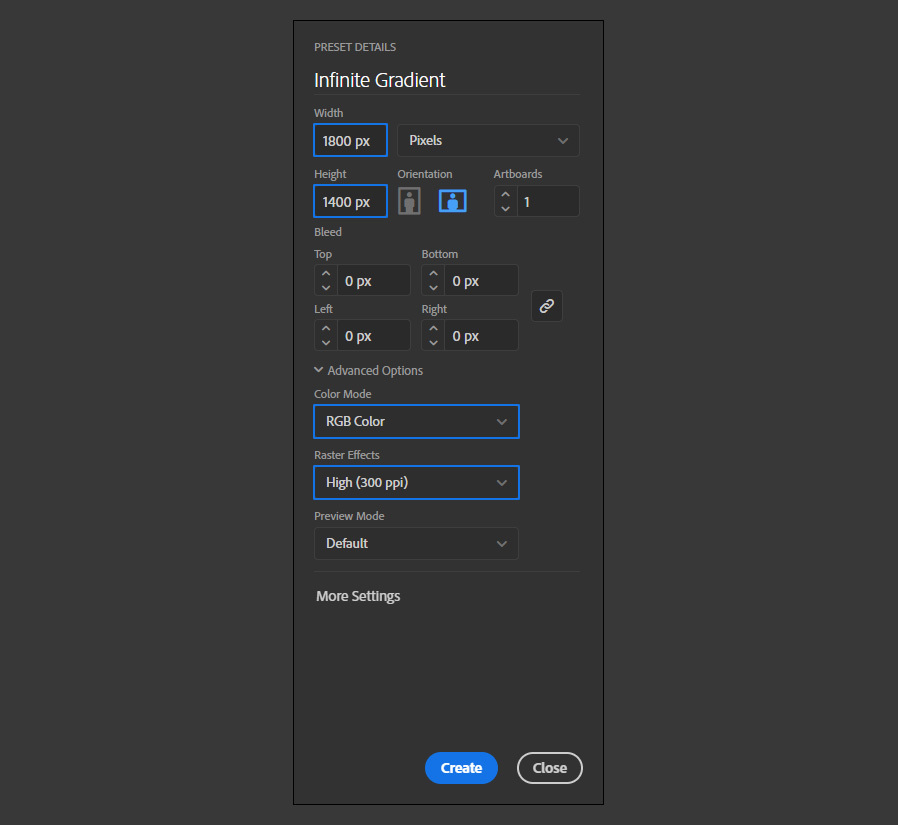
Open Illustrator and make a new file at any size you want. In this case I will make mine at 1800 x 1400 px.
Step 2
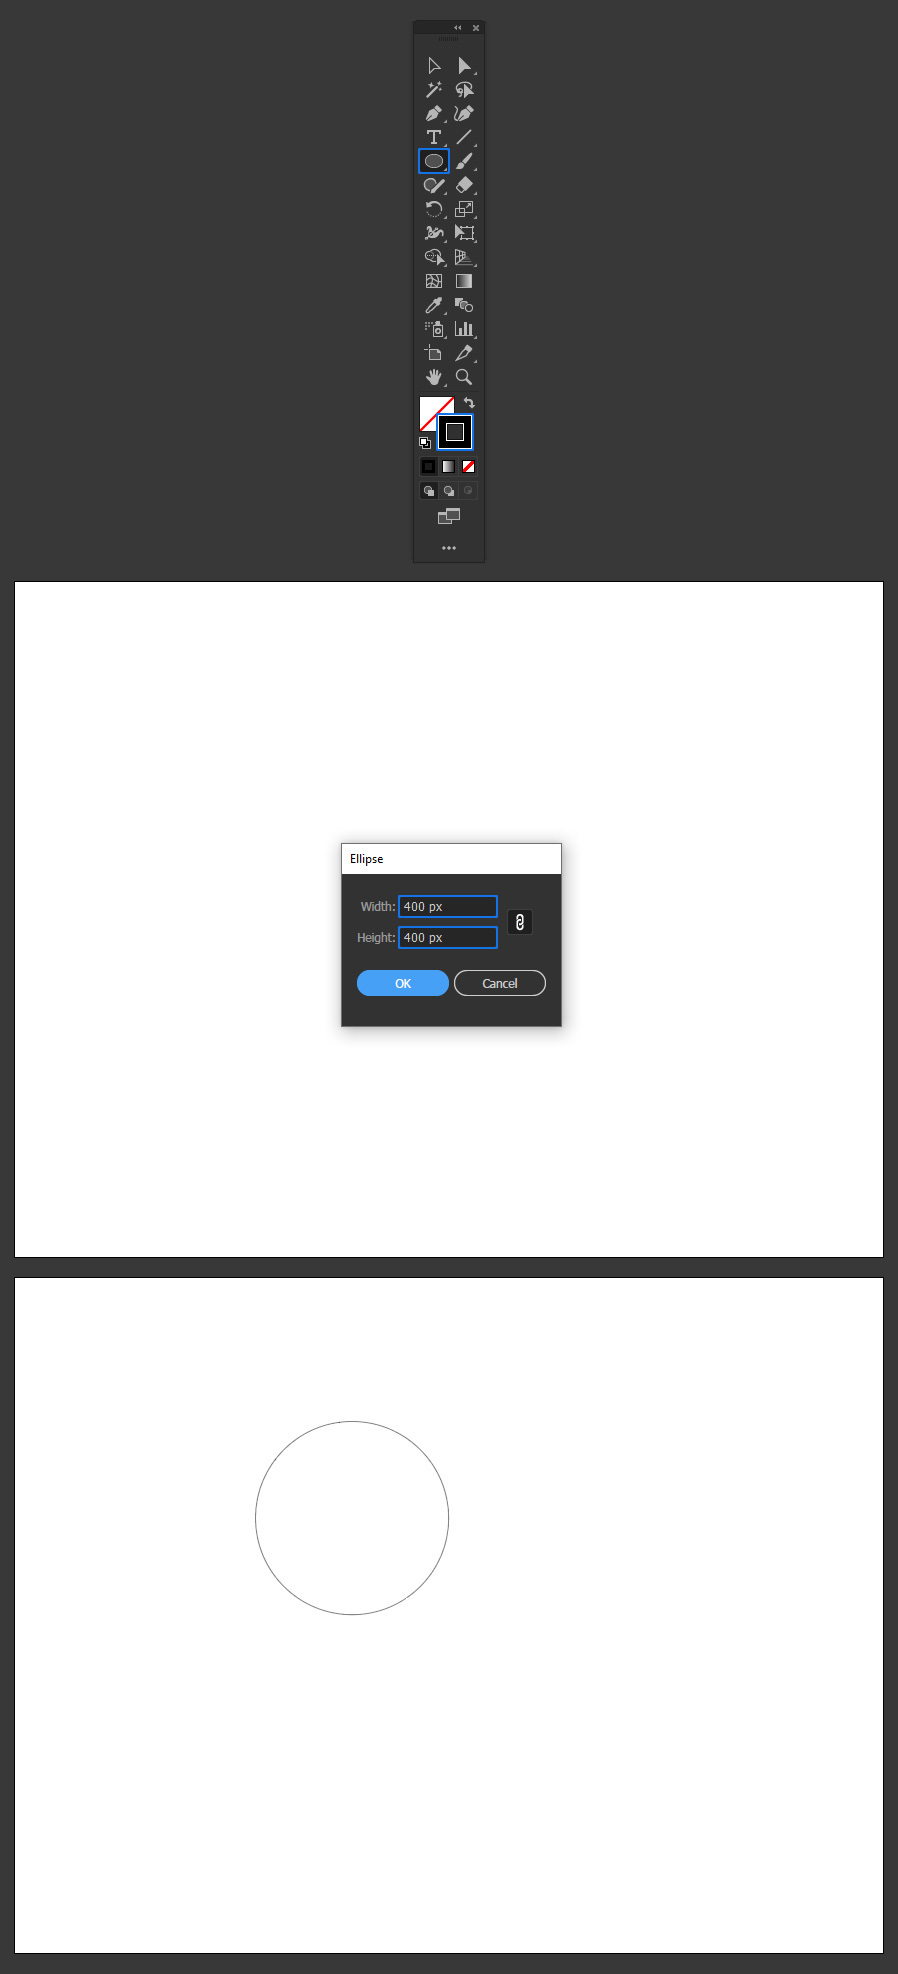
Select the Ellipse Tool (L). Click once over the artboard, set the Width and Height to 400 px and click OK.
Step 3
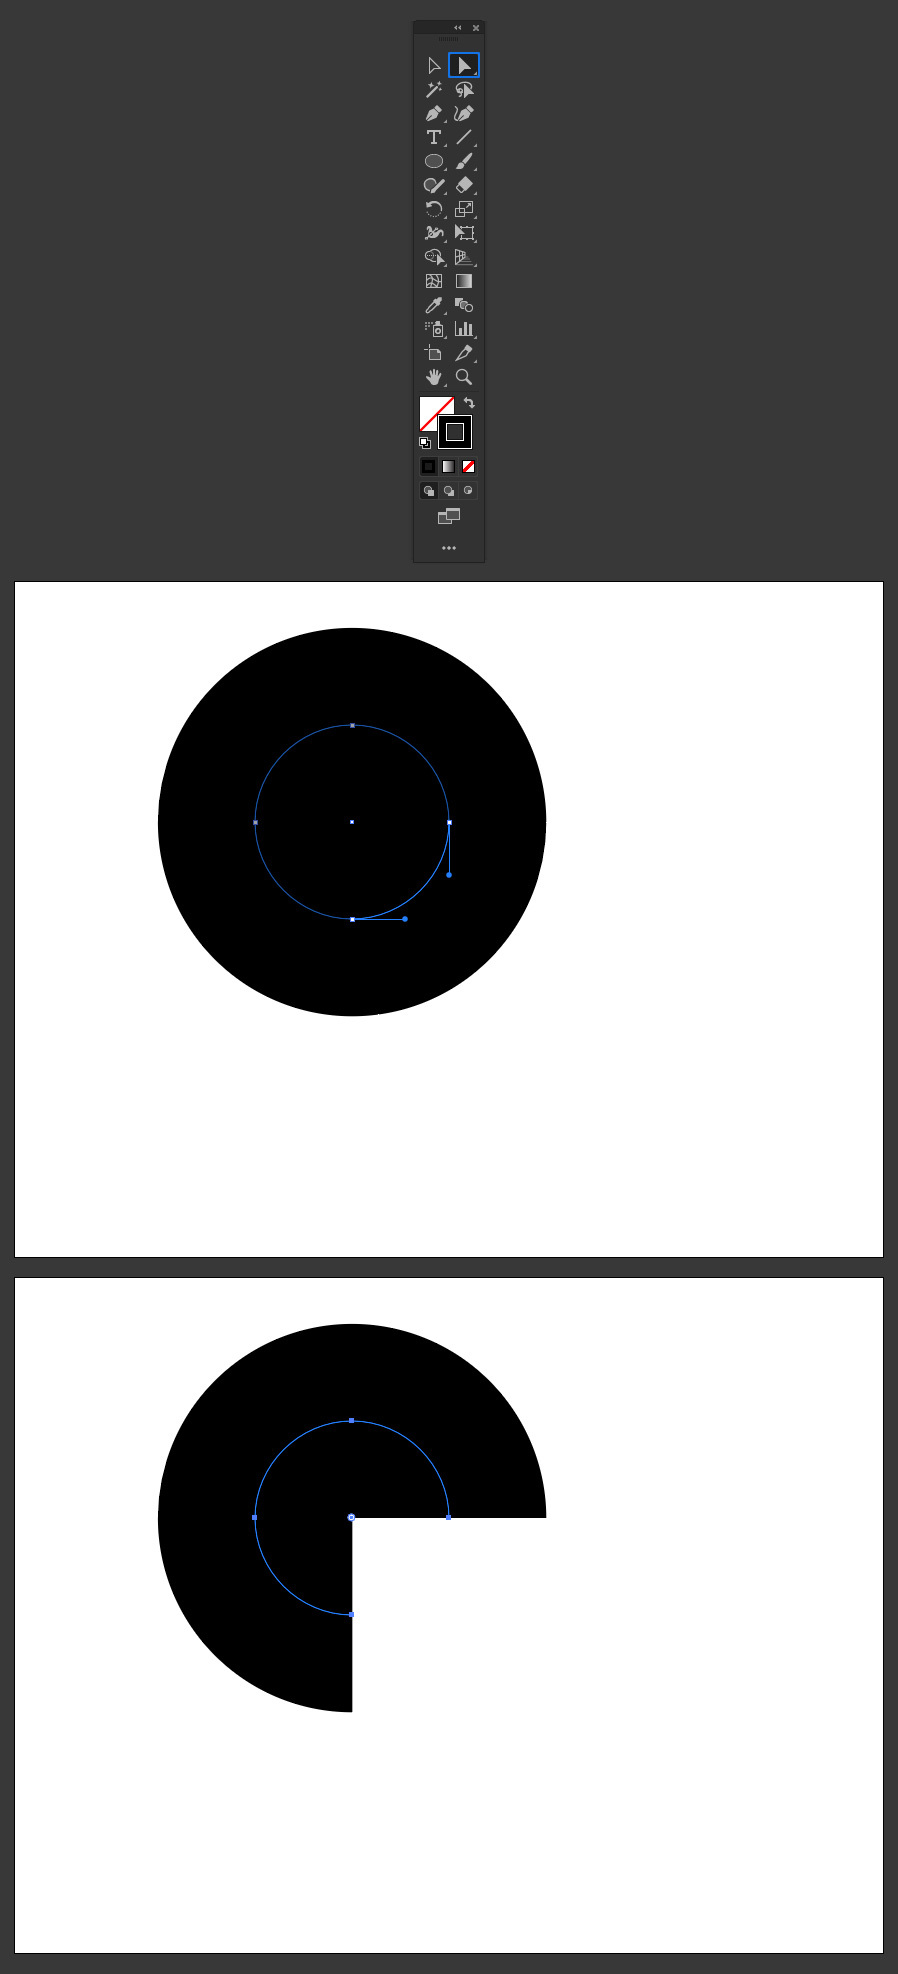
Go to Window > Stroke and set the stroke Weight to 403 pt.

Step 4
Select the Direct Selection Tool (A). Select the lower right quarter of the cicle and hit the Delete key on your keyboard.
Step 5
Go to Edit > Copy and then to Edit > Paste in Place.
Step 6
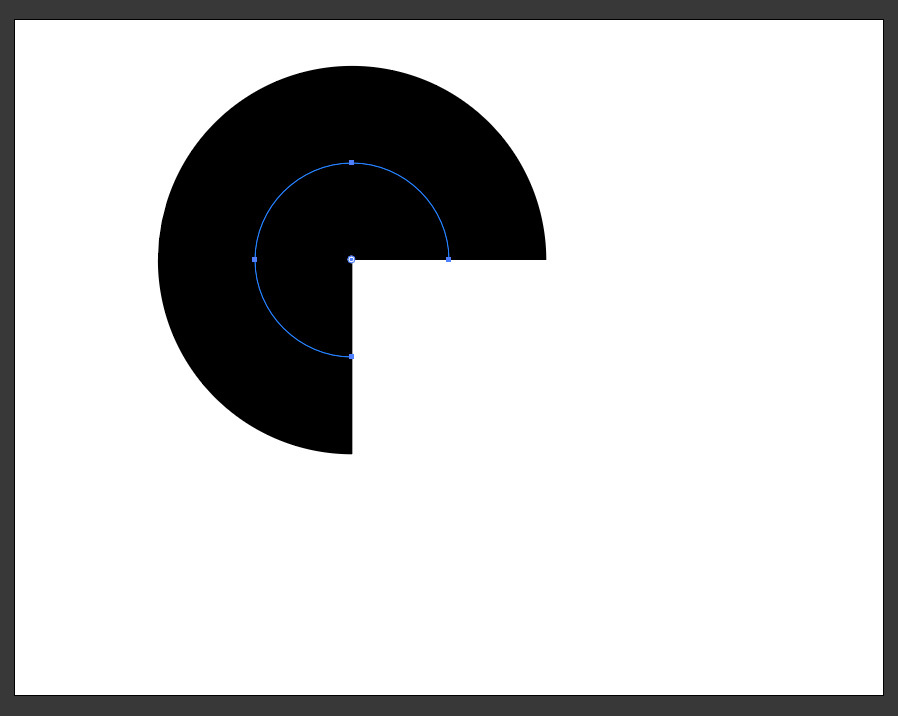
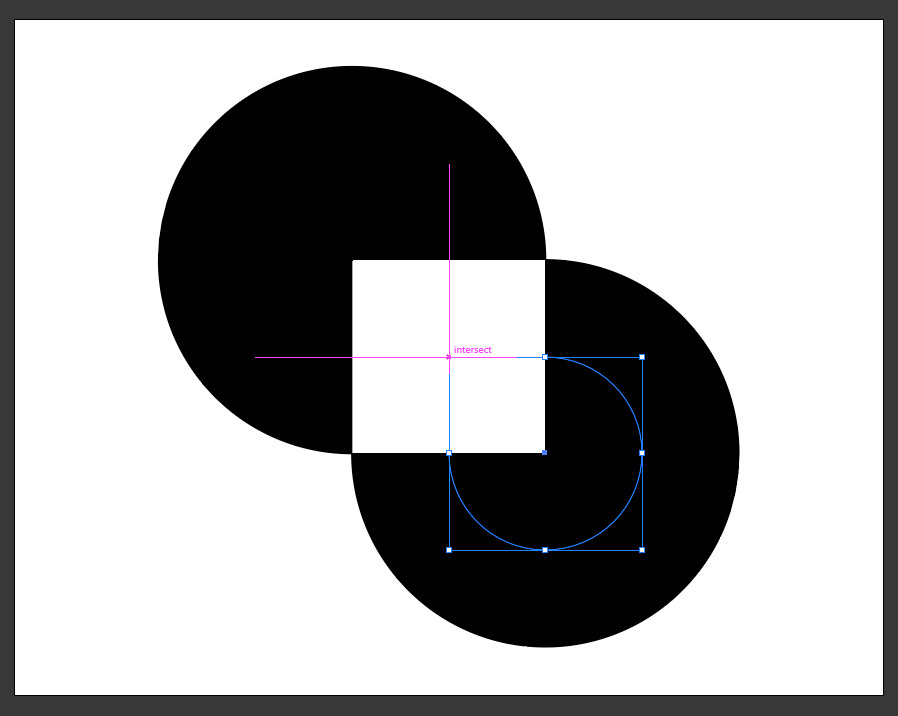
Rotate the copied circle 180º and make it snap on both end points of the original circle as shown.
Step 7
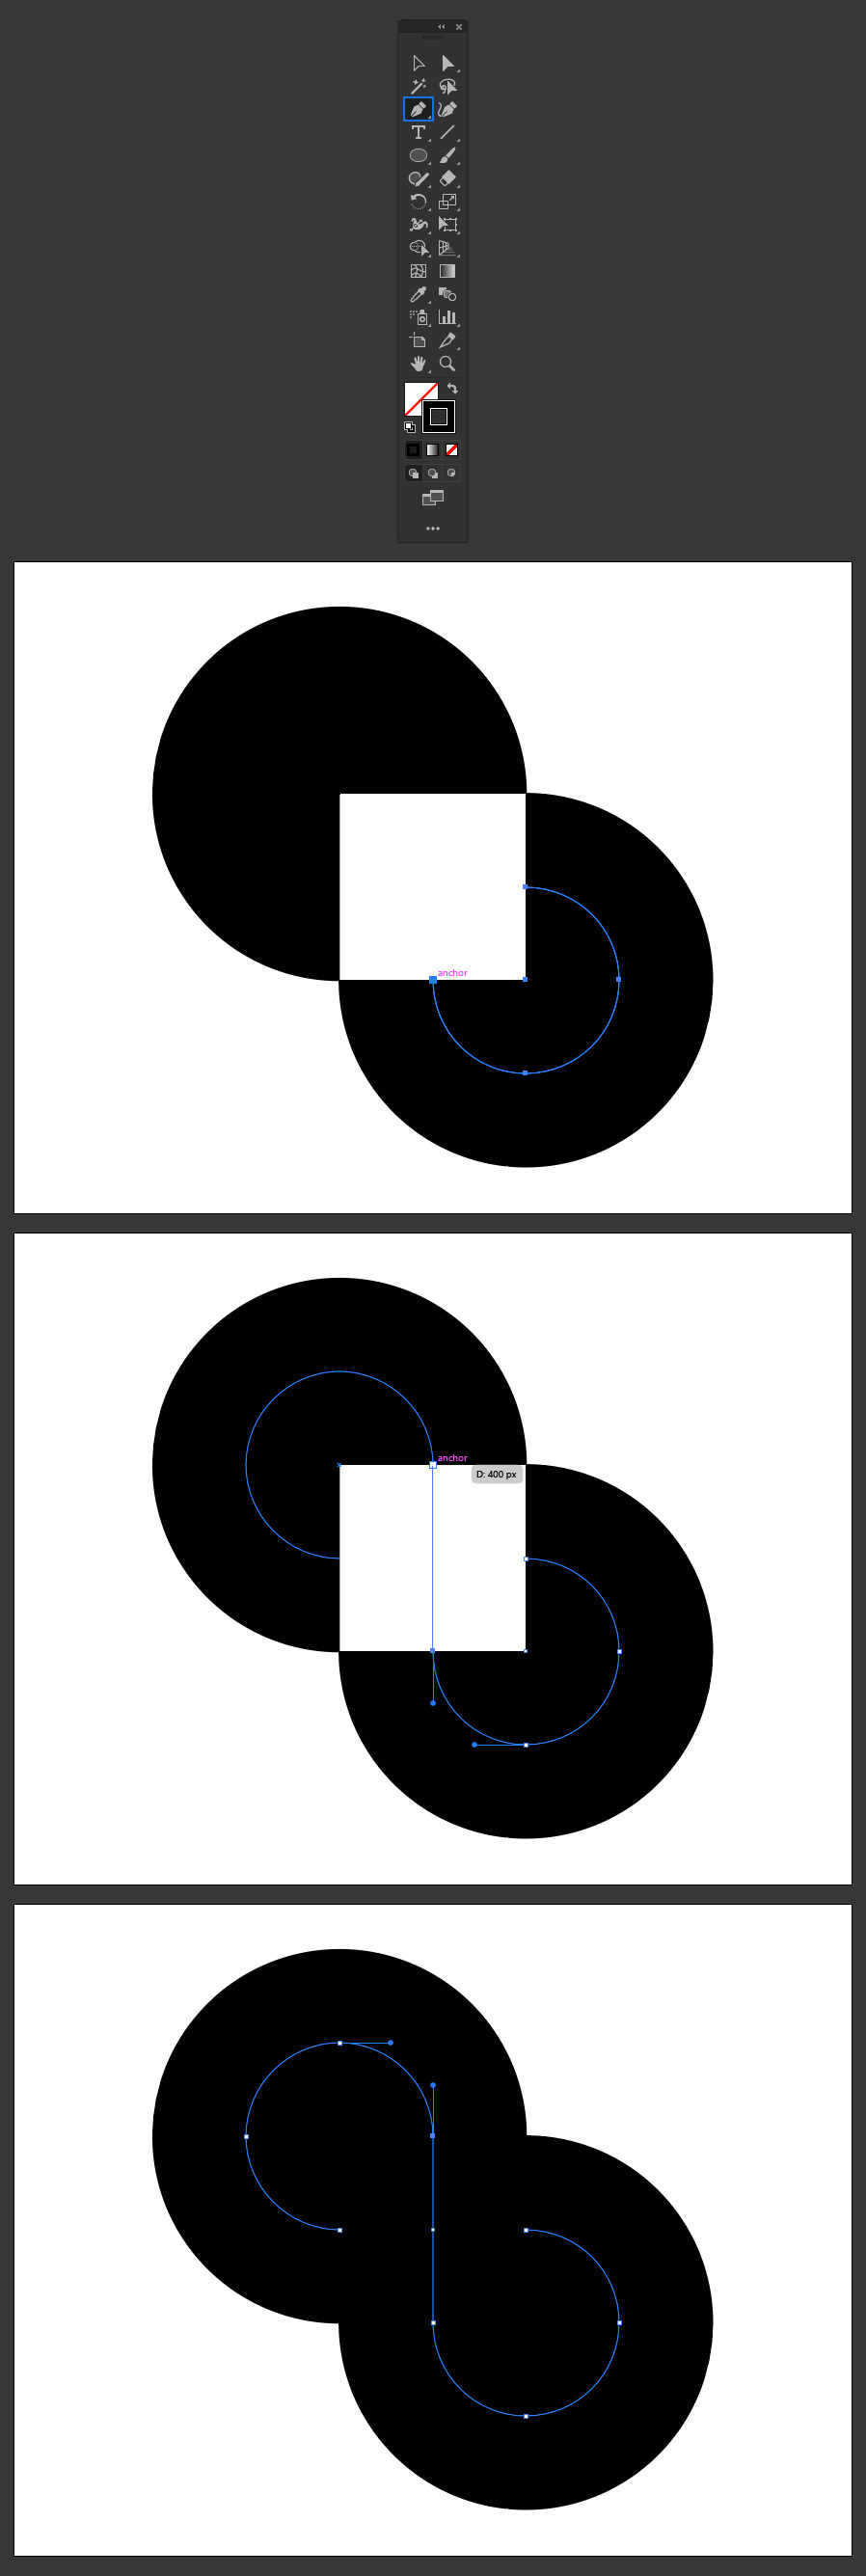
Select the Pen Tool (P). Click once on the end anchor point of the copied circle and then click once on the end anchor point of the original circle to join both shapes as shown.
Step 8
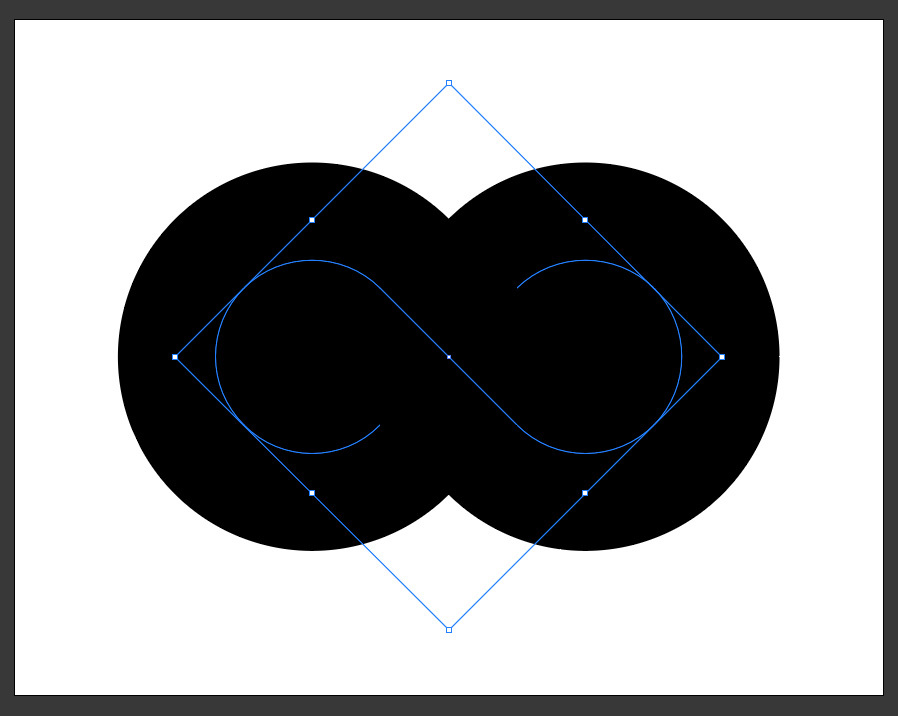
Rotate the shape 45º.
Step 9
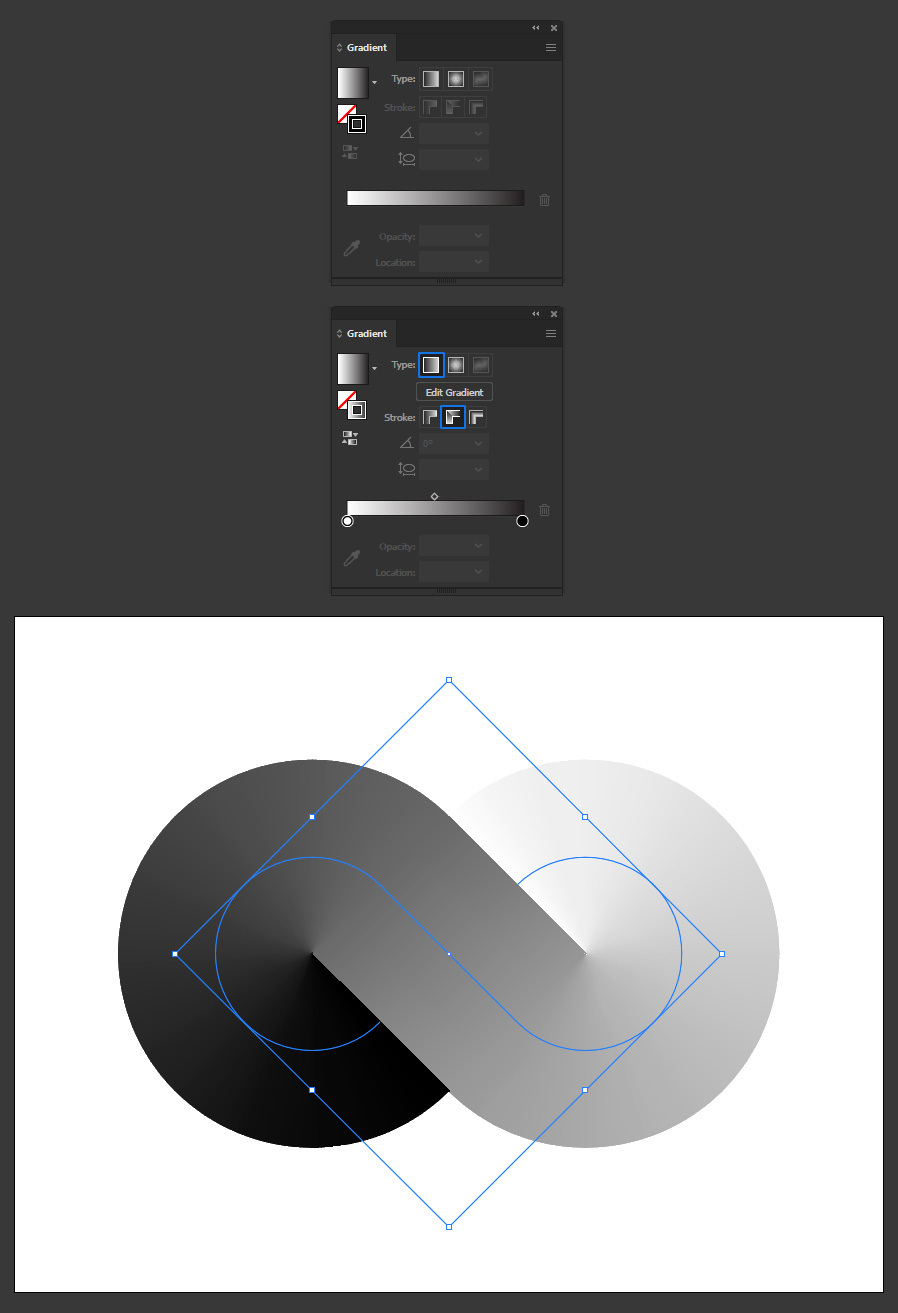
Go to Window > Gradient. Select the Linear option and be sure to select the "Apply Gradient Along Stroke" in the Stroke type.
Step 10
Click below the gradient thumbnail to add a new control point.

Step 11
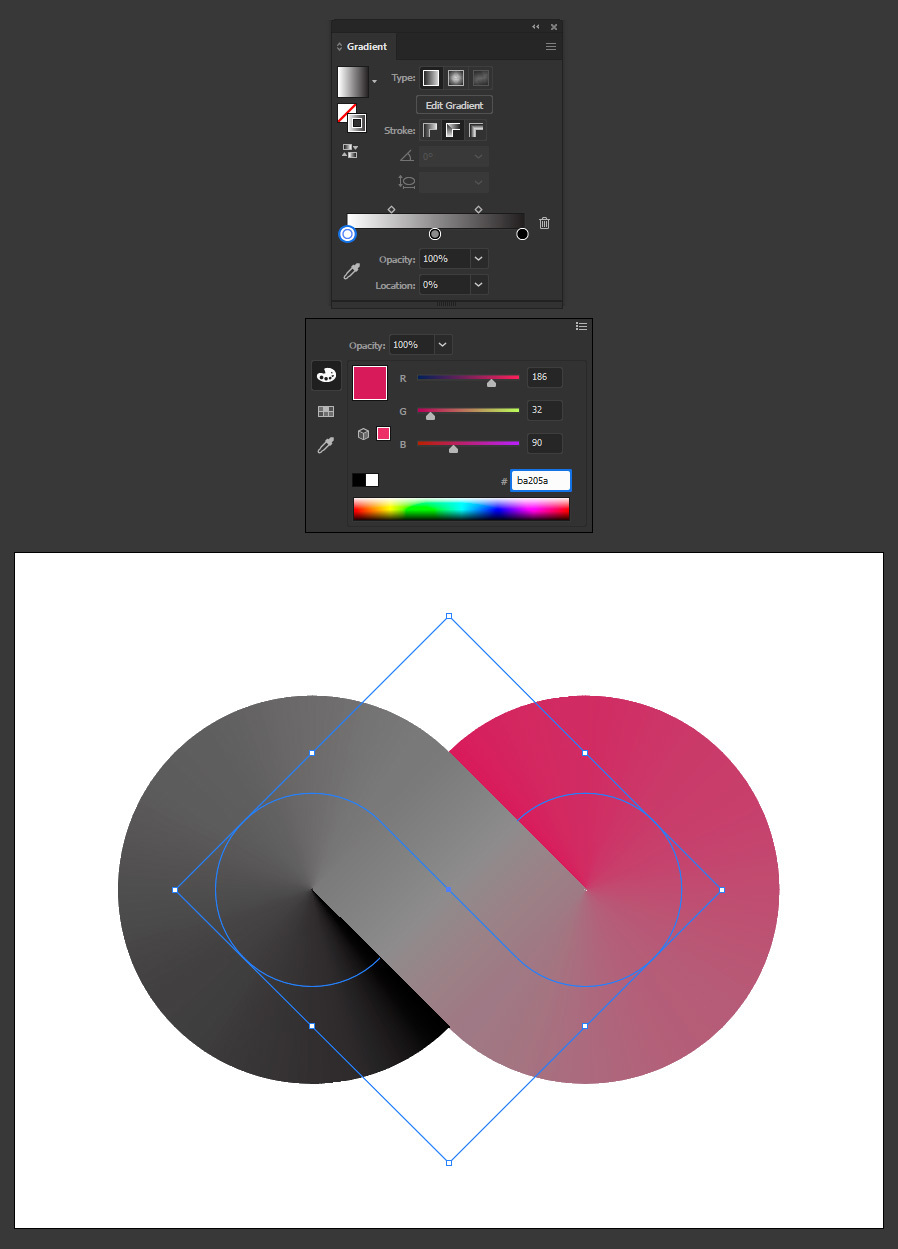
Double click on the first control point and set any color you want. In this case, I will set mine to #ba205a.
Step 12
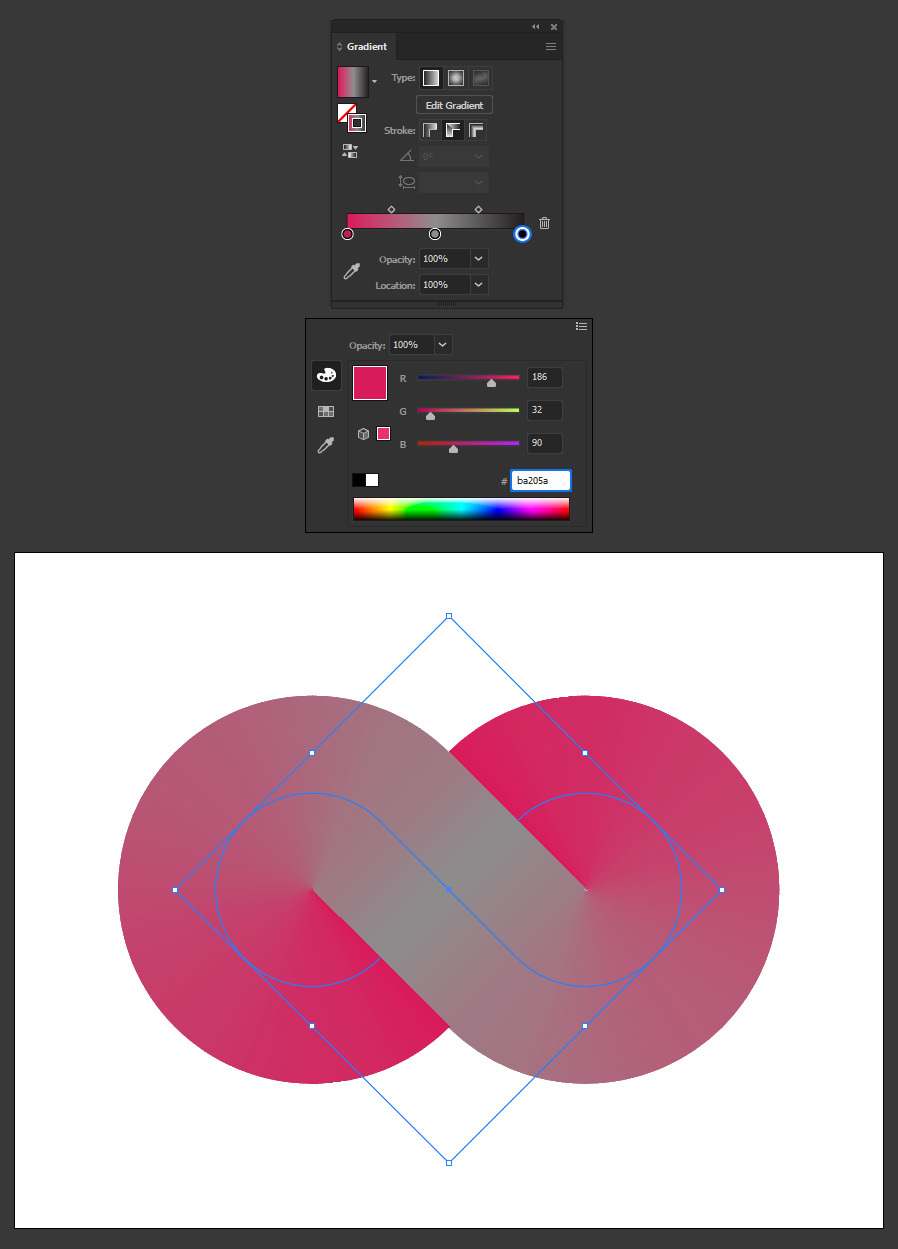
Now double click on the last control point and set the same color you've used on your first control point, which in this case is #ba205a.
Step 13
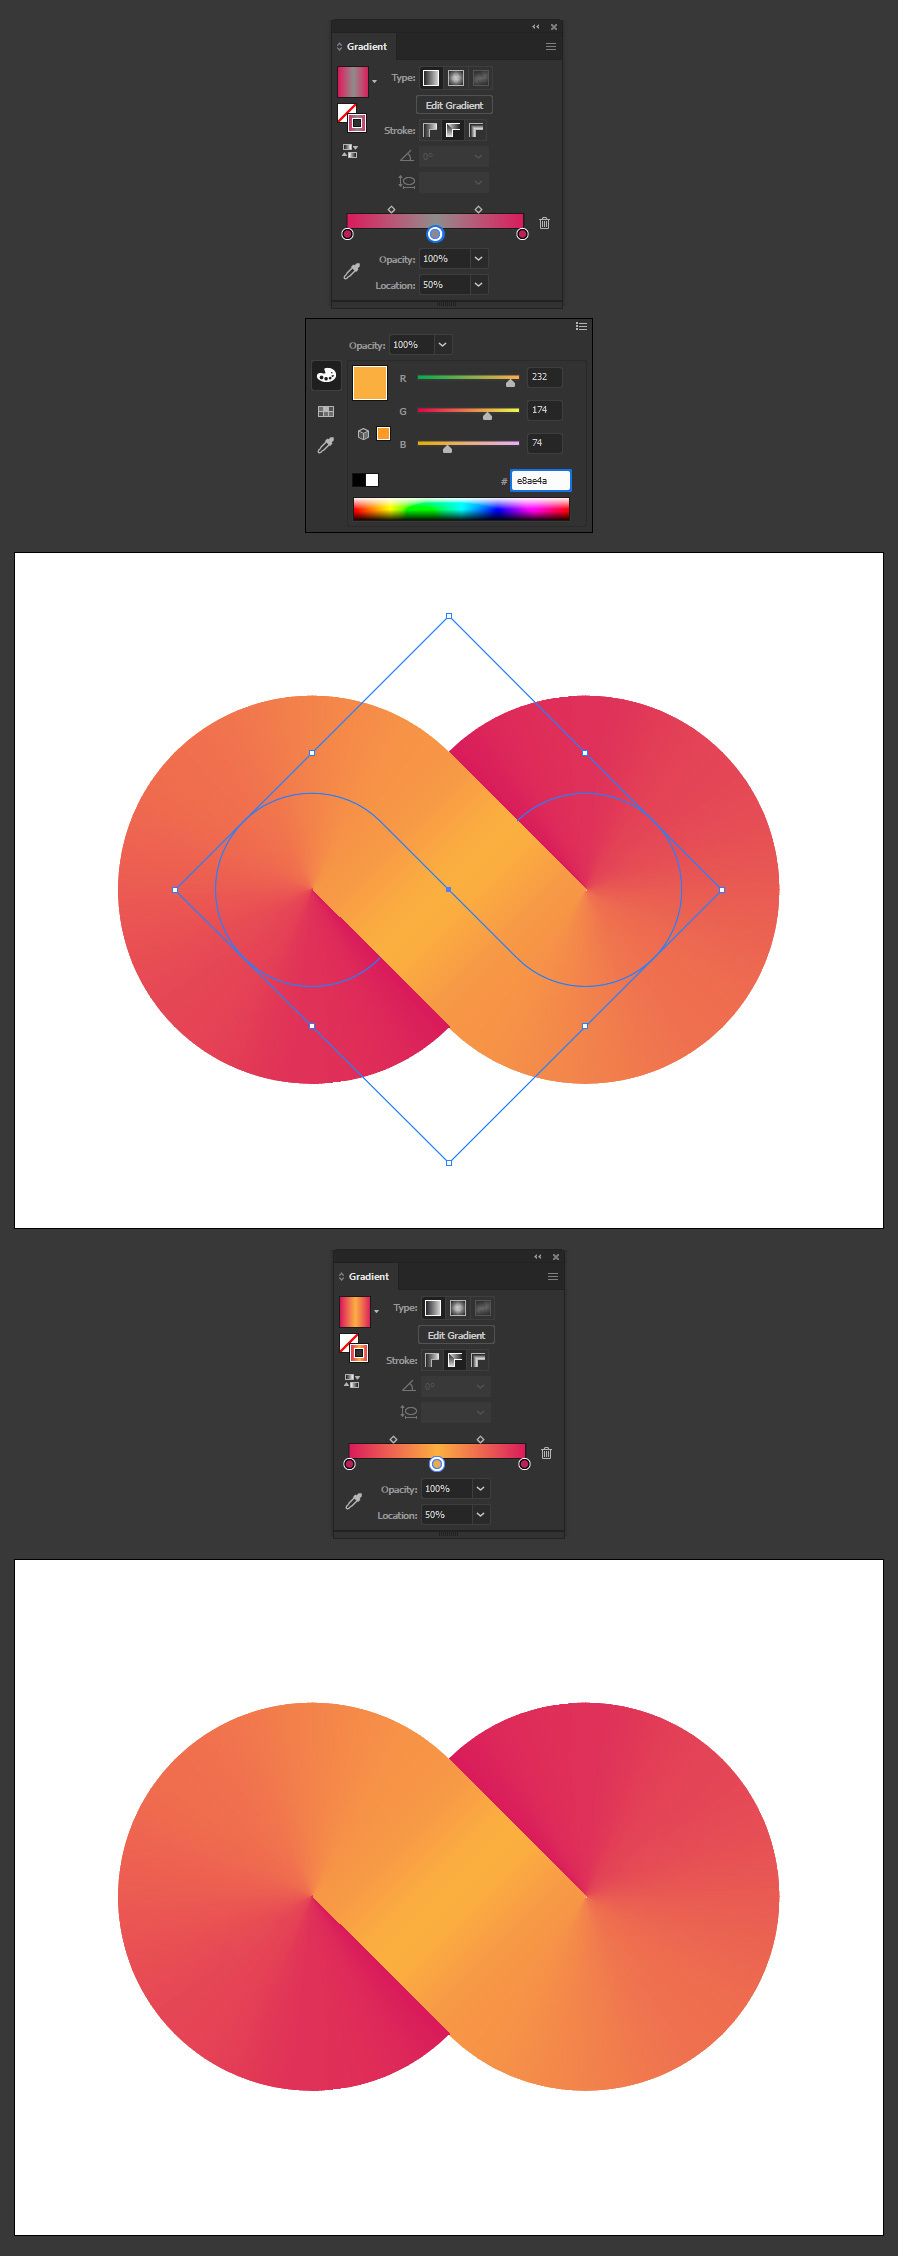
Lastly, double click on the middle control point and set any color you want. I will set mine to #e8ae4a.
A Final Note:
If you later want to change the gradient color, simply open the Gradient editor and change the colors to your liking. You can use as many control points as you wish, but be sure to set the first and last control points to the same color to get the infinite gradient effect along your stroke.
