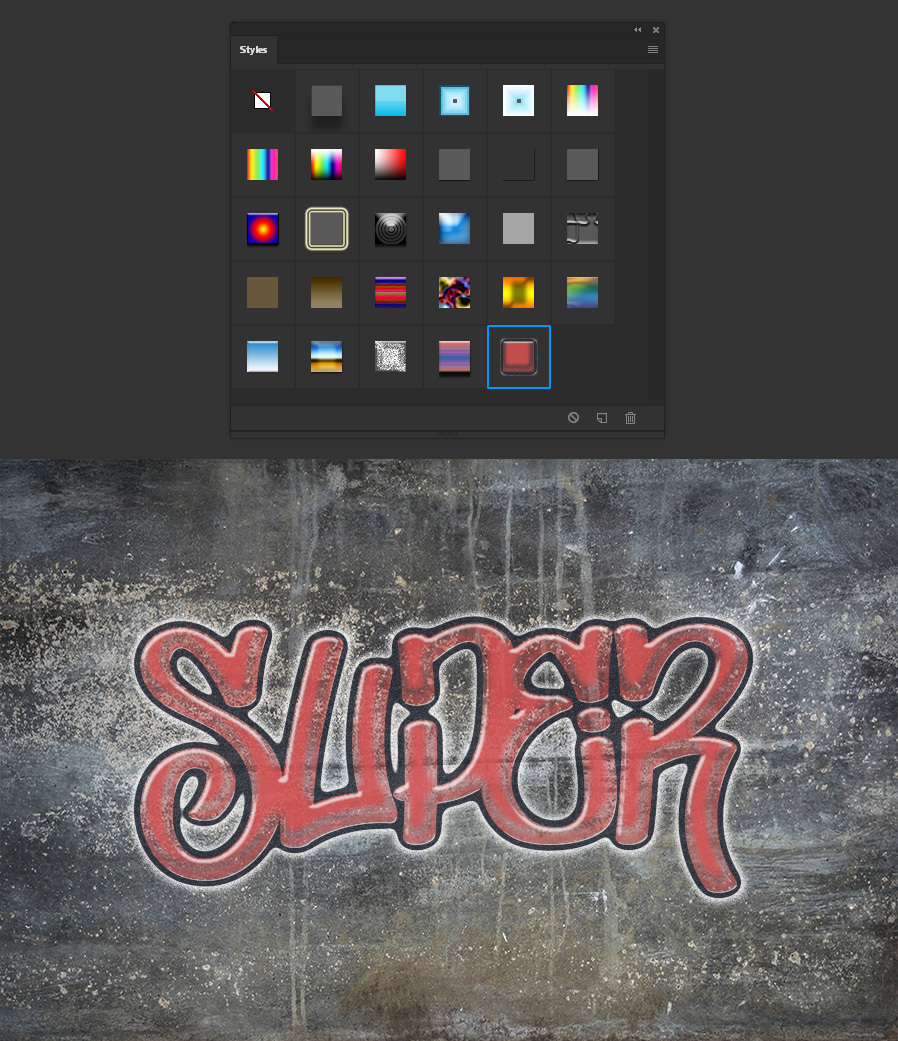
How to Make a Graffiti Text Effect in Photoshop
Photoshop text effects
Graffiti has been around for many years as part of the urban culture in forms of simple writing to very complex drawings and designs. Although graffiti is illegal in most countries, there is a way that you can express yourself trough graffiti and it is by making it in Photoshop. Today, you will learn how to make a graffiti layer style using native Photoshop tools and customizing some contours to achieve a realistic graffiti style that you can later replicate on any other element without having to make the effect all over again.
But before we start, and if you want to follow this tutorial exactly as described please download the following assets:
Step 1
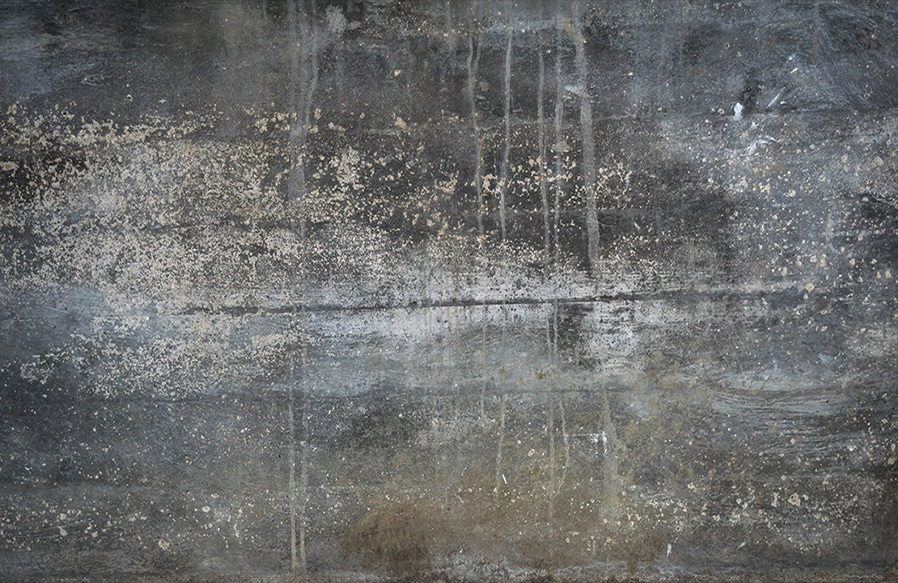
Open the wall background image in Photoshop.
Step 2
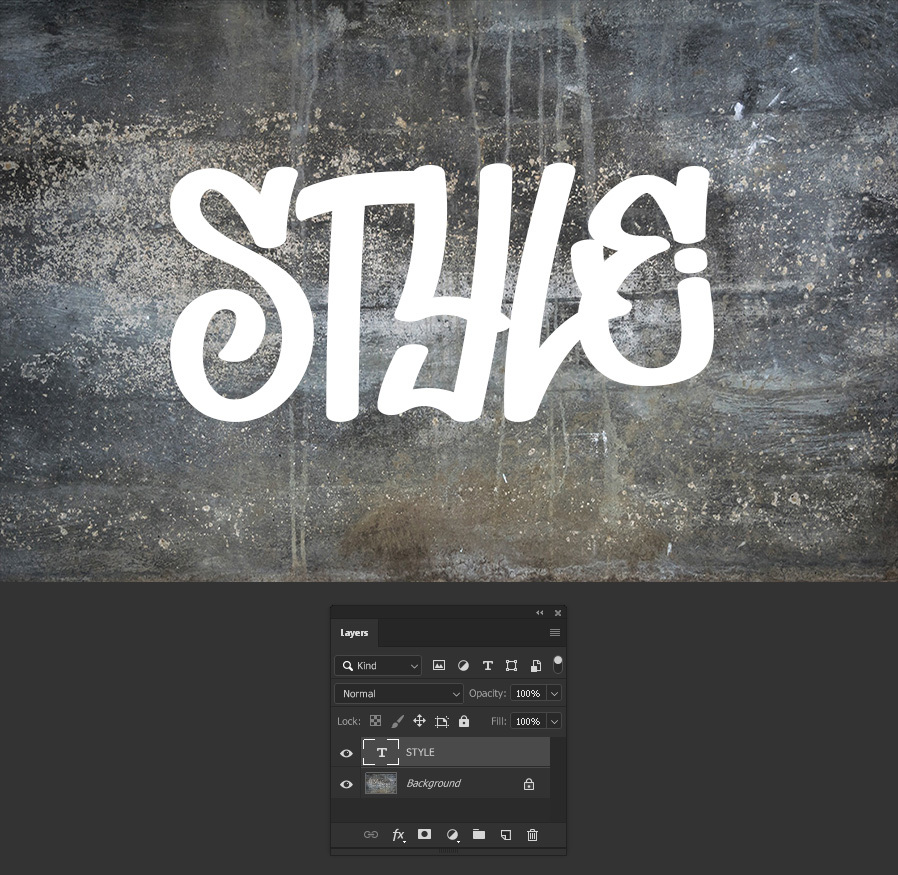
Select the Type Tool (T) and type any text you like. In this case I am using the “Don Graffiti” font at 370 px.
Step 3
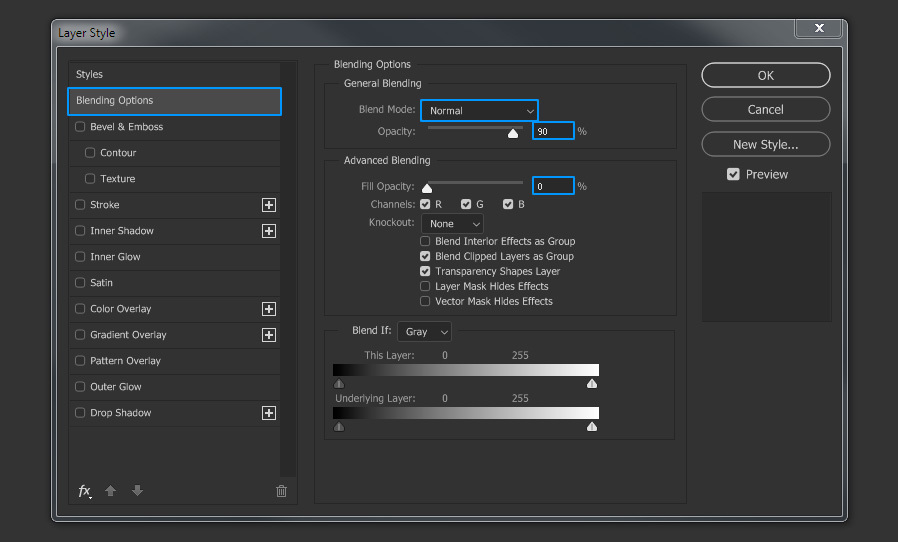
With the text layer active go to Layer > Layer Style > Blending Options. Under General Blending be sure to have the Blend Mode set to “Normal” and bring down the opacity to 90%. Under Advanced Blending set the Fill Opacity to 0%.
Step 4
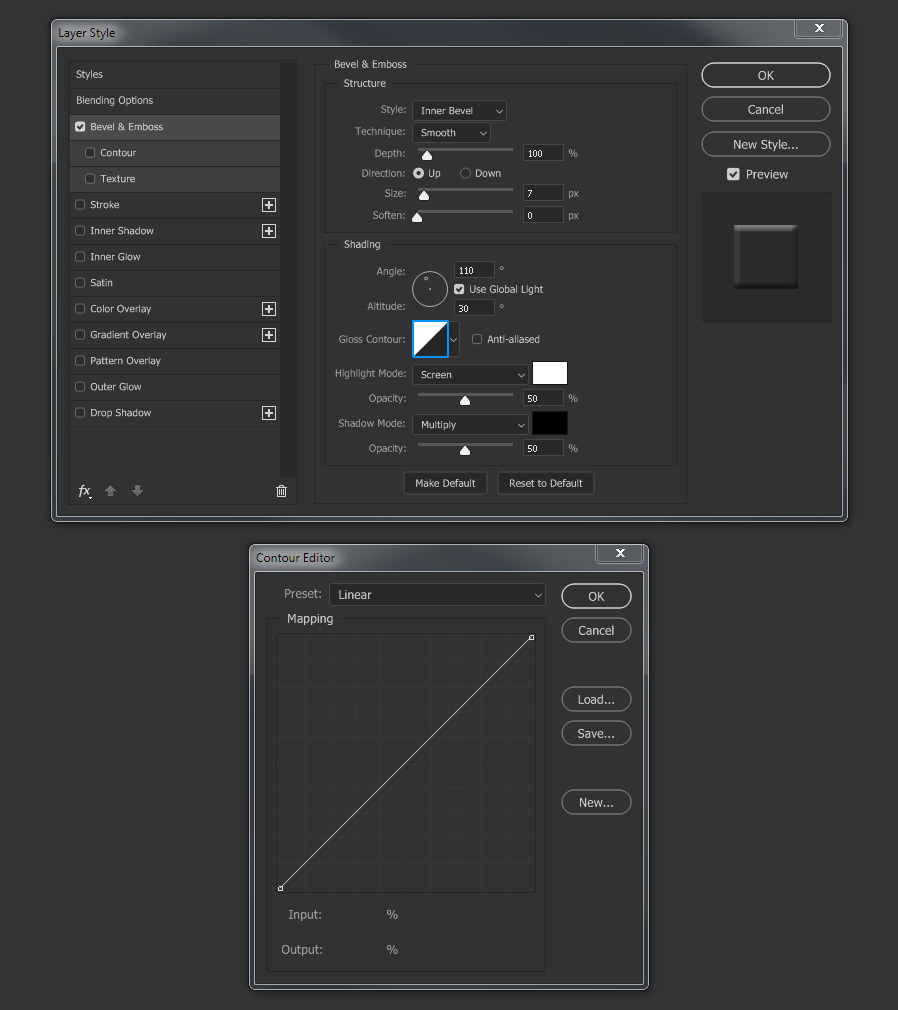
Check the Bevel & Emboss Option and click on the Gloss Contour thumbnail to open the Contour Editor.
Step 5
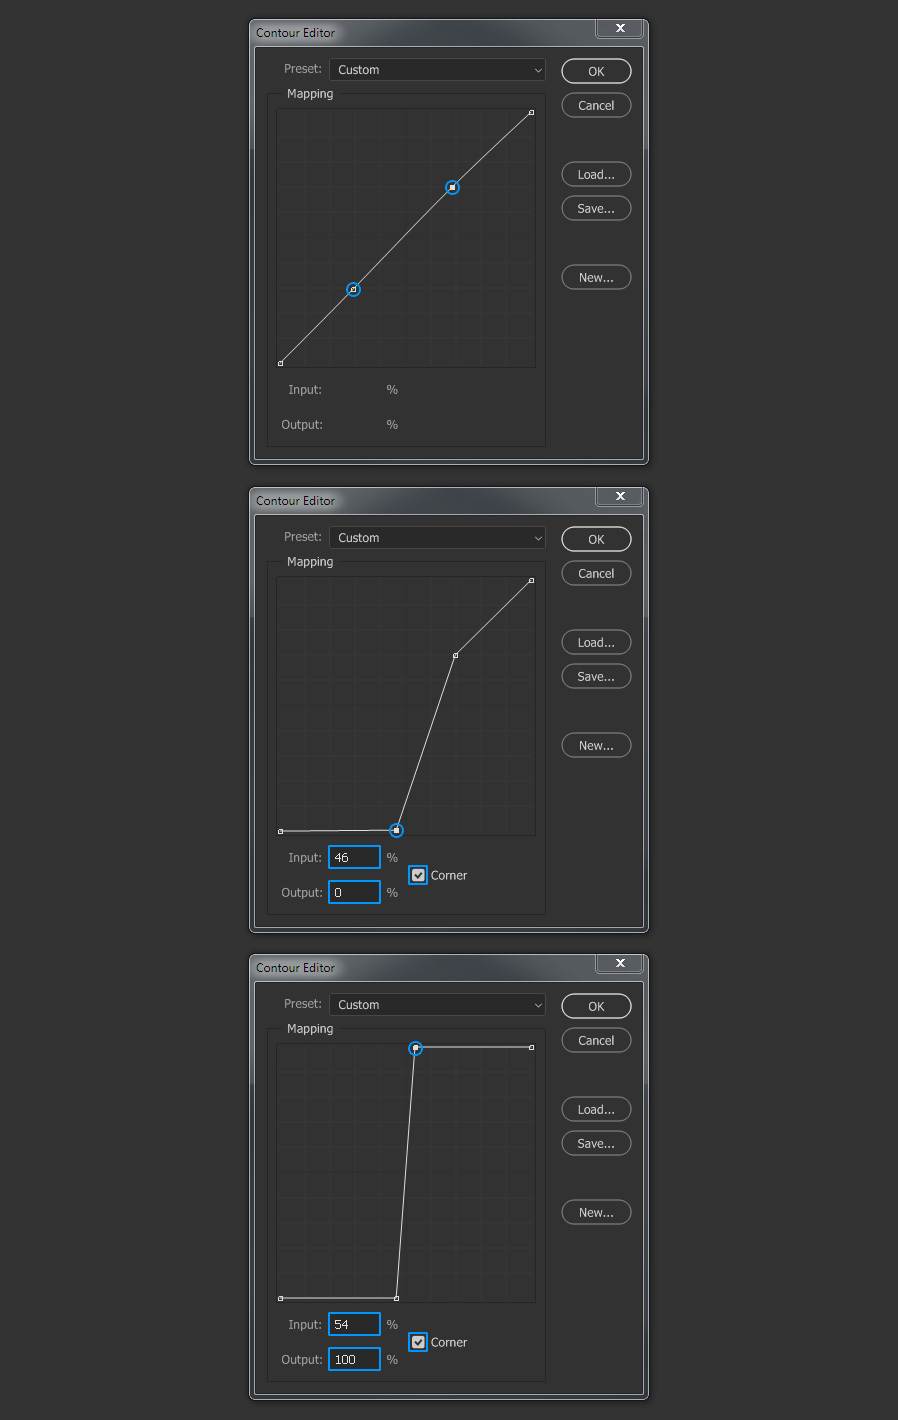
Add two new anchor points in the mapping curve by clicking over the line. Set the first point to Input: 46% - Output: 0% and check the “Corner” option. Set the second point to Input: 54% - Output: 100% and also check the “Corner” option.
Step 6
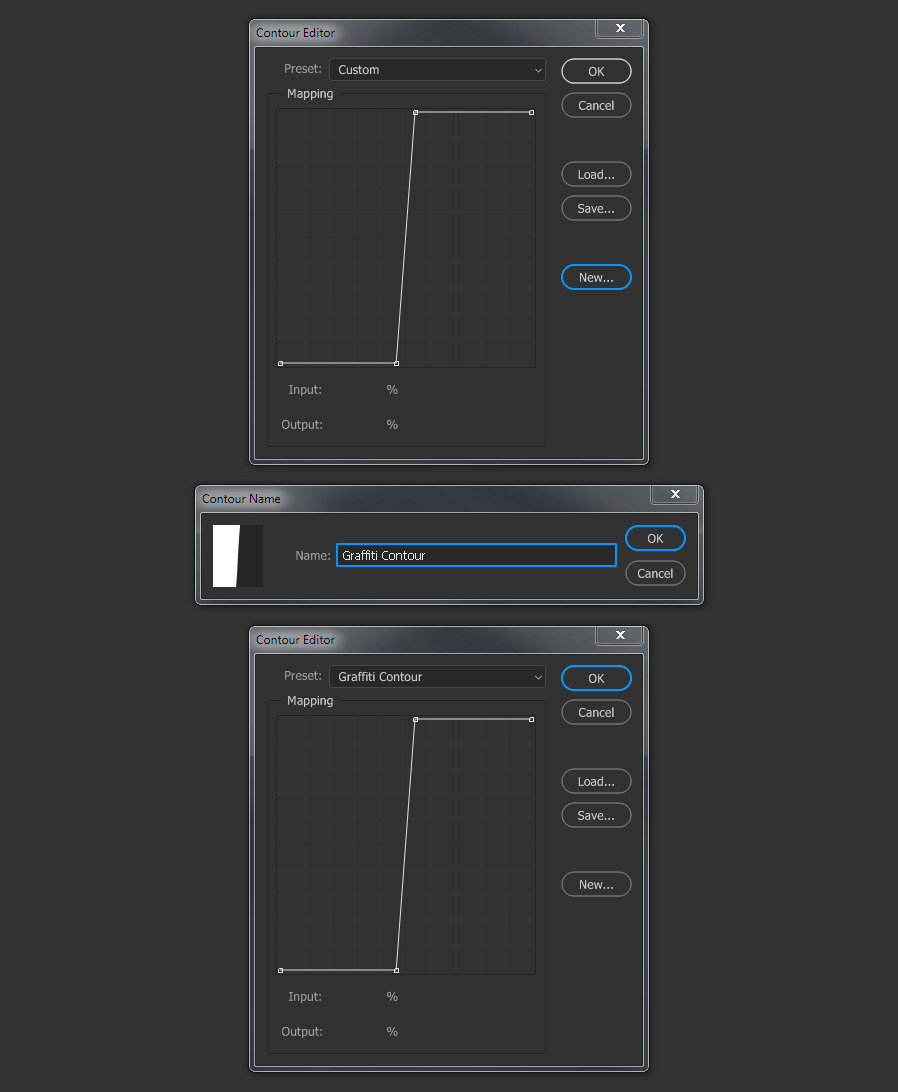
Click the New button. Name the contour as “Graffiti Contour”, click OK and then click OK in the Contour Editor.
Step 7
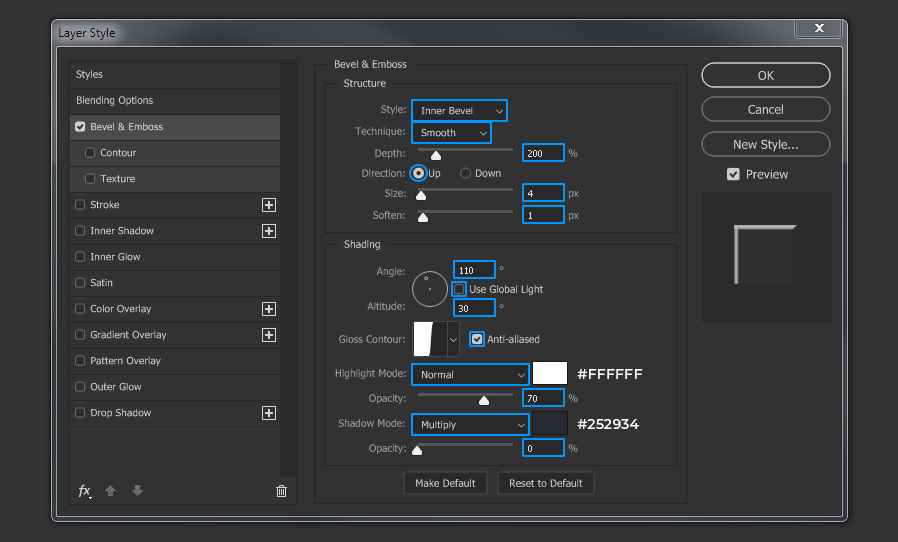
Still in the Bevel & Emboss options, apply the following settings:
Step 8
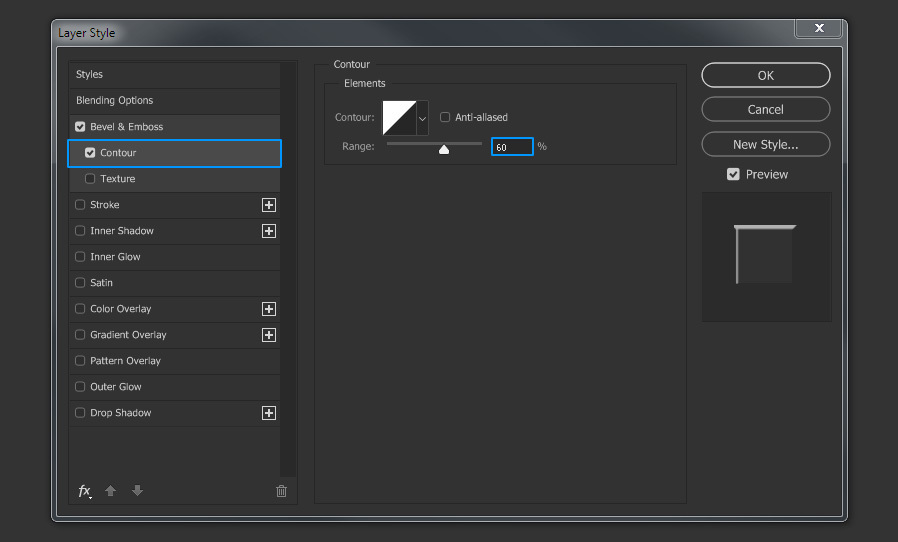
Check the Contour option and set the Range to 60%.
Step 9
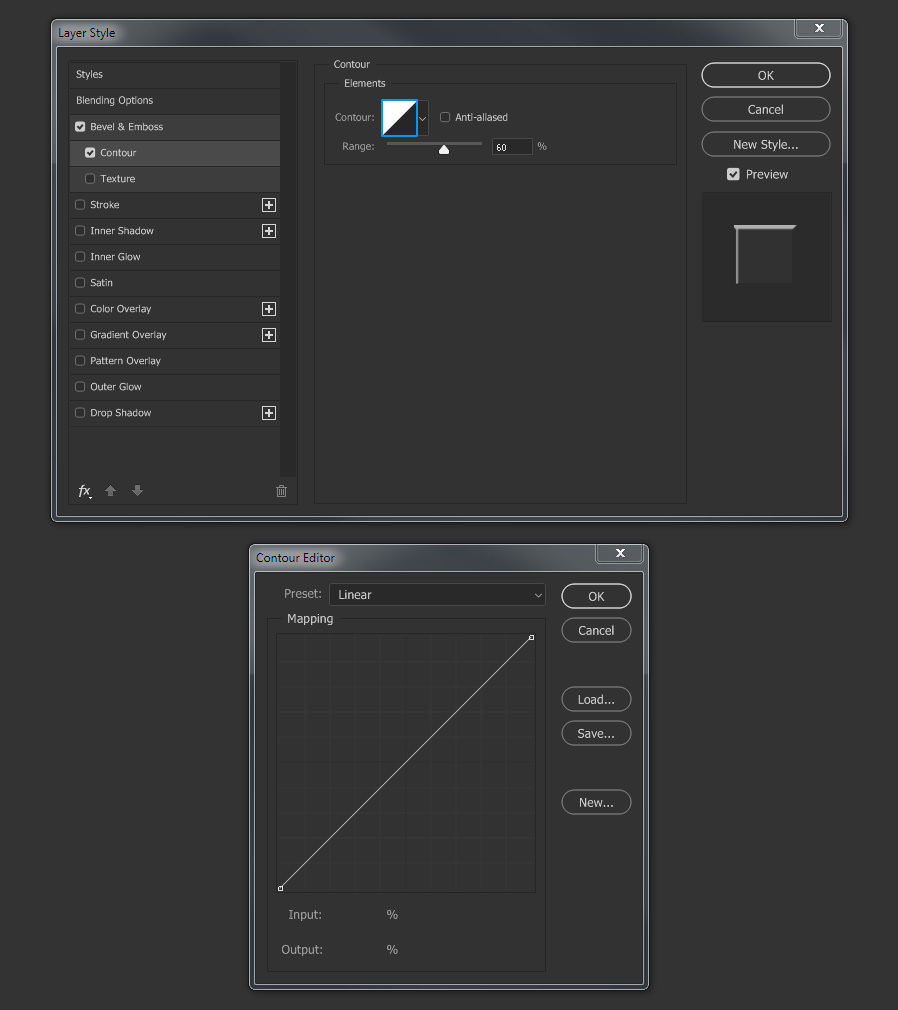
Click on the contour thumbnail to open the Contour Editor.
Step 10
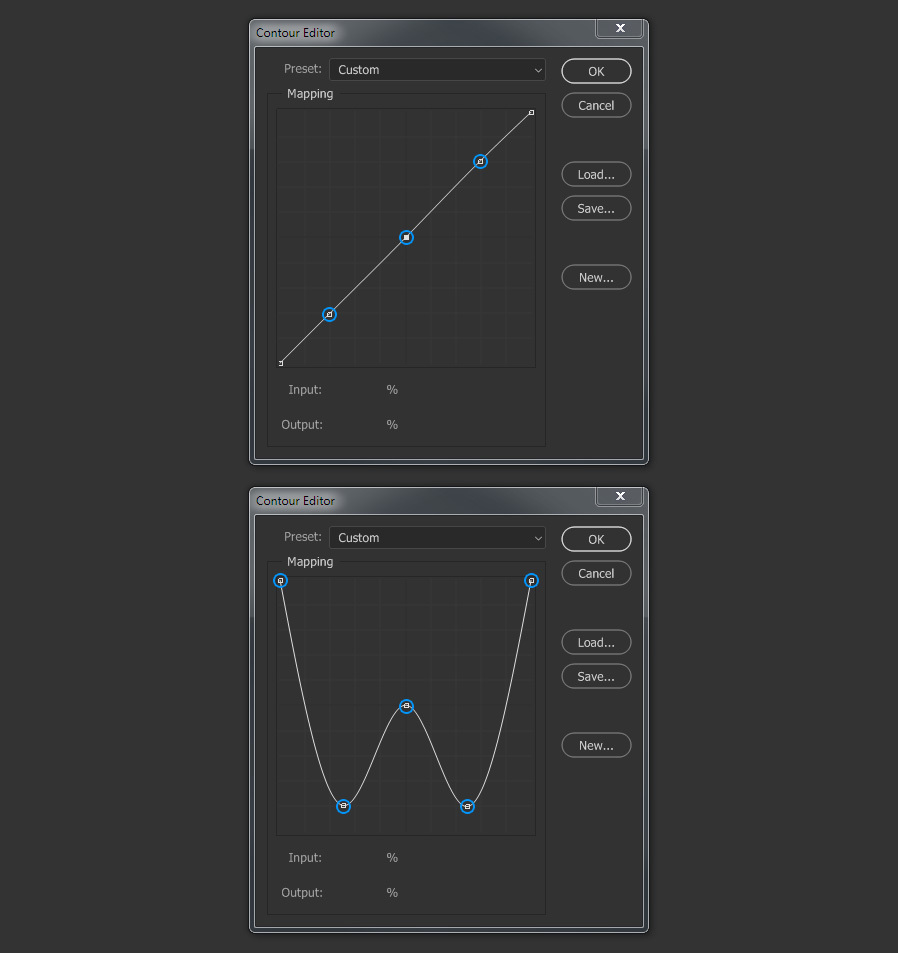
Add 3 new anchor points to the curve and set the following values for each of them (click OK in the Contour Editor when finished):
- Point 1: Input 0% - Output 100%
- Point 2: Input 25% - Output 10%
- Point 3: Input 50% - Output 50%
- Point 4: Input 75% - Output 10%
- Point 5: Input 100% - Output 100%
Step 11
Check the Inner Shadow Option. Click on the arrow next to the Contour thumbnail, select “Rolling Slope – Descending” and apply the following settings.
Note: The color you choose here will be the color that your text will have.

Step 12
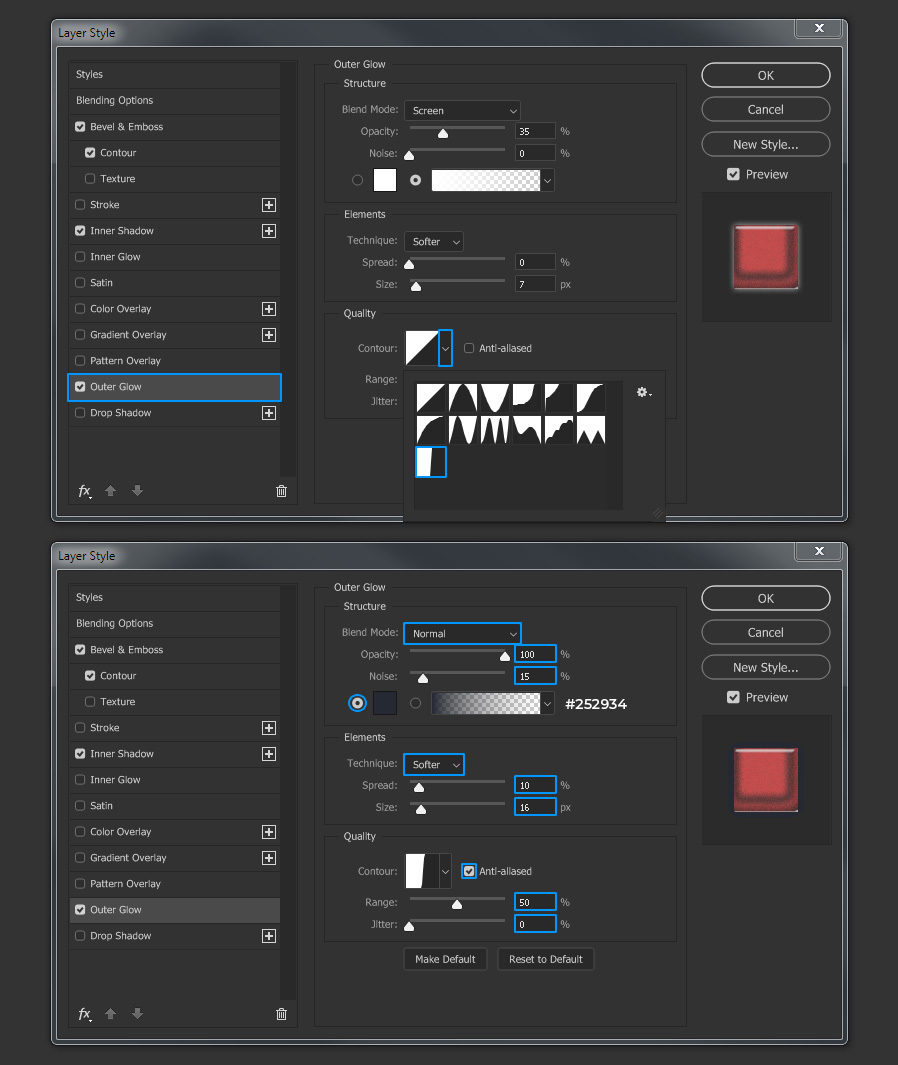
Check the Outer Glow option. Click on the arrow next to the Contour thumbnail, select the contour we saved before “Graffiti Contour” and apply the following settings.
Step 13
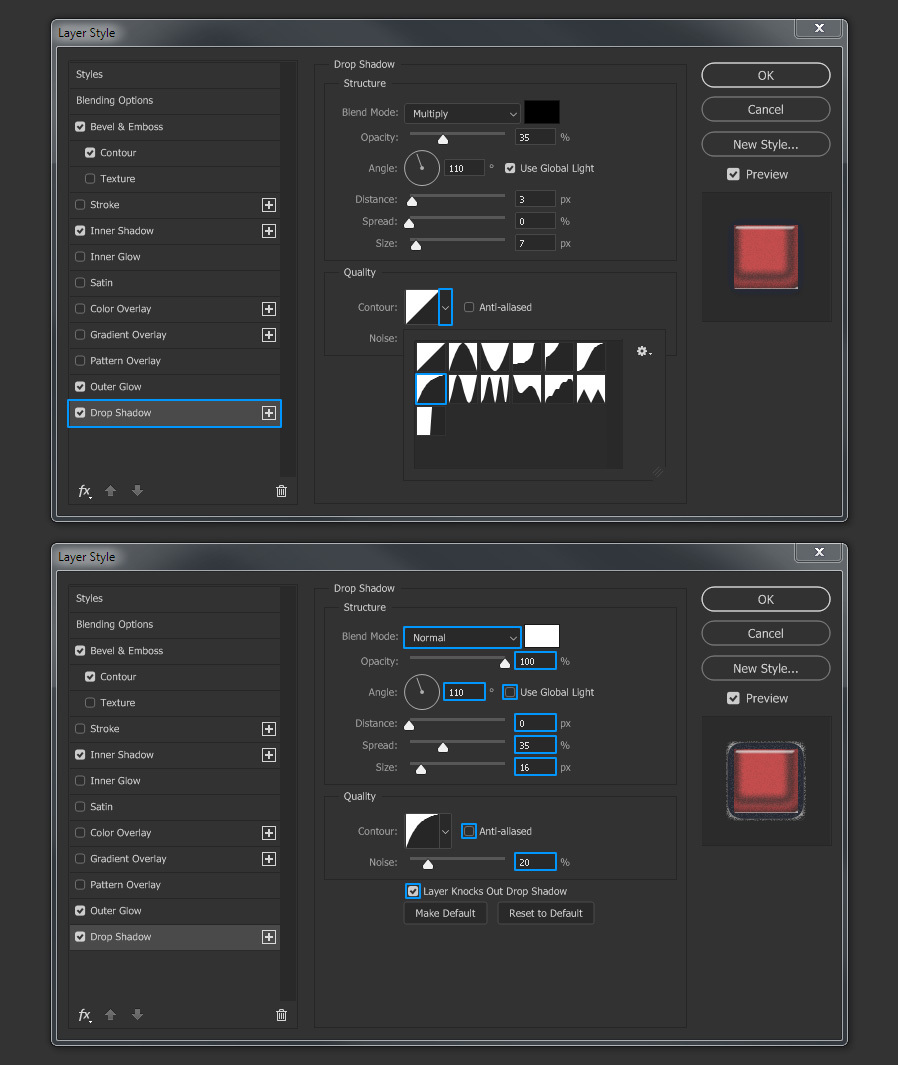
To finish our graffiti style click on the Drop Shadow option. Click on the arrow next to the Contour thumbnail, select “Half Round” and apply the following settings.
Step 14
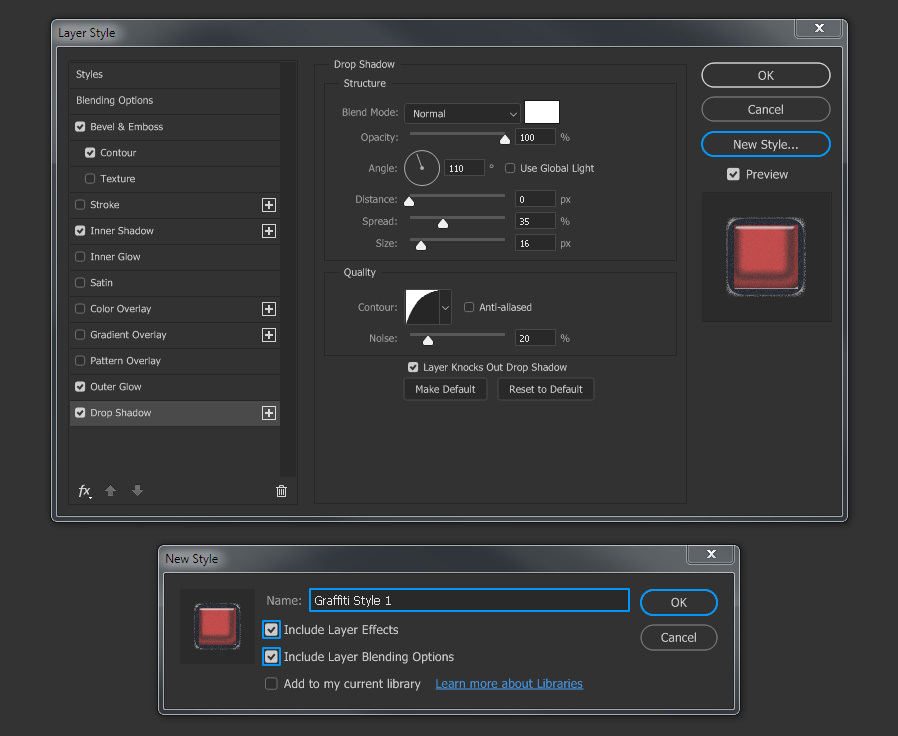
Before clicking on the OK button in the Layer Style Panel, click on the “New Style” button. Name the style as “Graffiti Style 1”, be sure to check the “Include Layer Effects” and “Include Layer Blending Options” and click OK.
Step 15
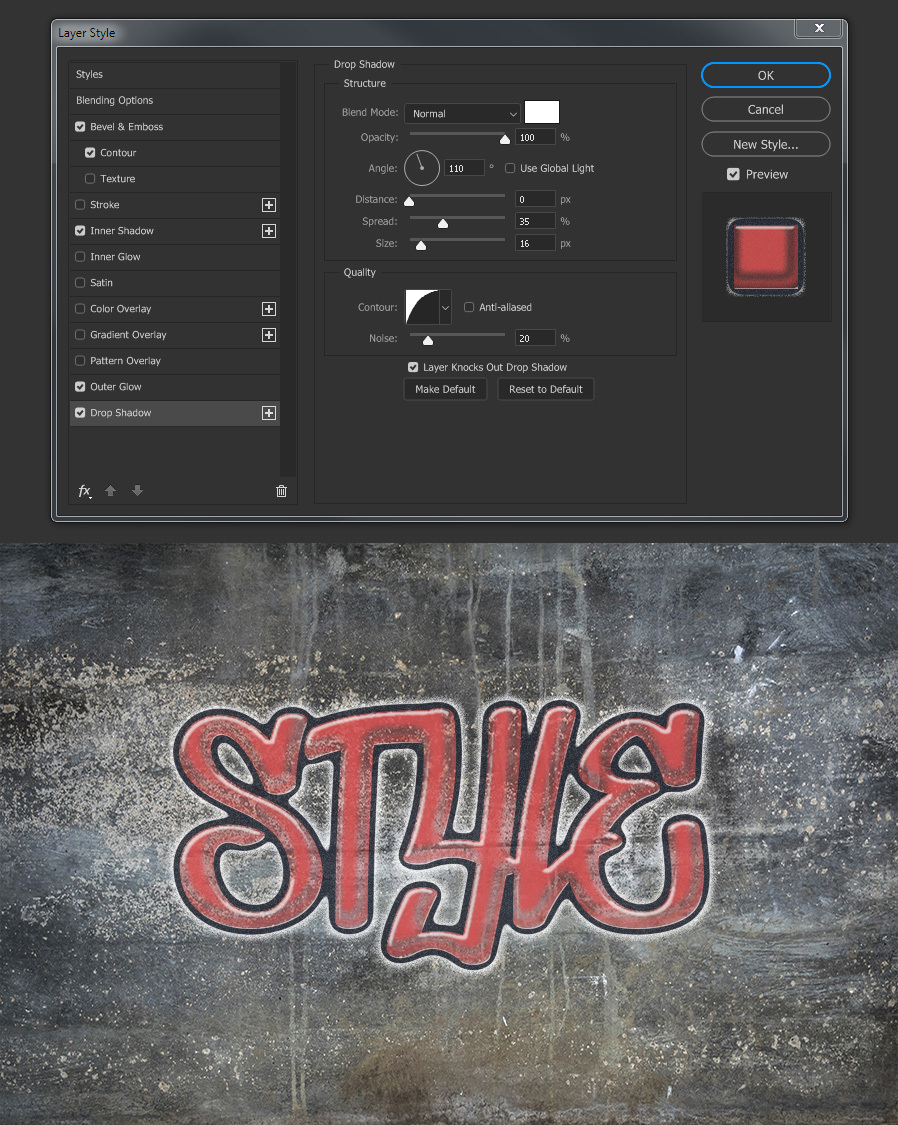
Finally, click OK in the Layer Style panel to apply the graffiti style to the text.
Step 16
The next time you want to apply the Graffiti Style to another layer, simply go to Window > Styles (to display the styles) and click on the “Graffiti Style 1” thumbnail we just created.
