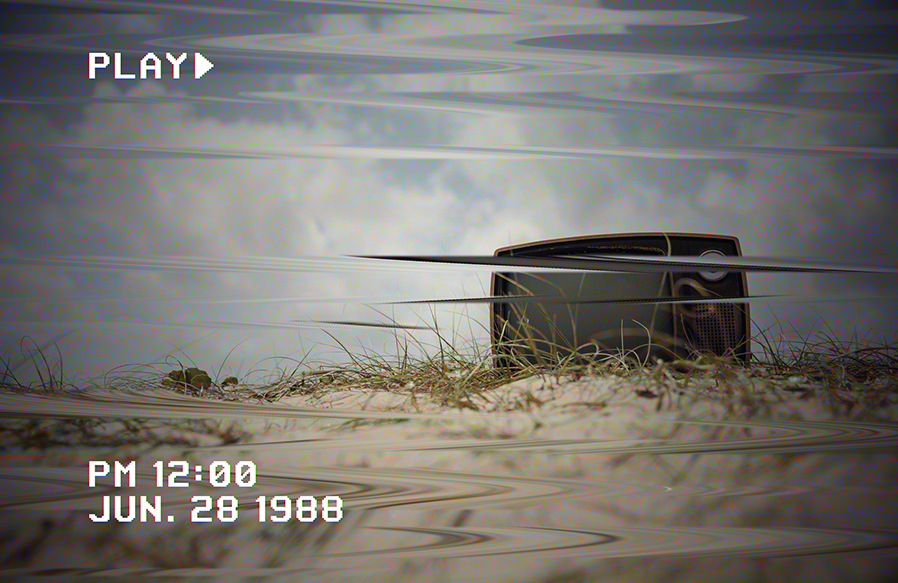
How to Create a VHS Distortion Image Effect with Photoshop
Pause your images retro style
This tutorial will teach you how to recreate the classic distortion effect that used to occur when pausing a VHS cassette (perhaps slightly exaggerated). We will use Smart Objects, Adjustment Layers, Filters and Masks within Photoshop to achieve this effect.
Preview
Here is the end result that we will be recreating:

Step 1
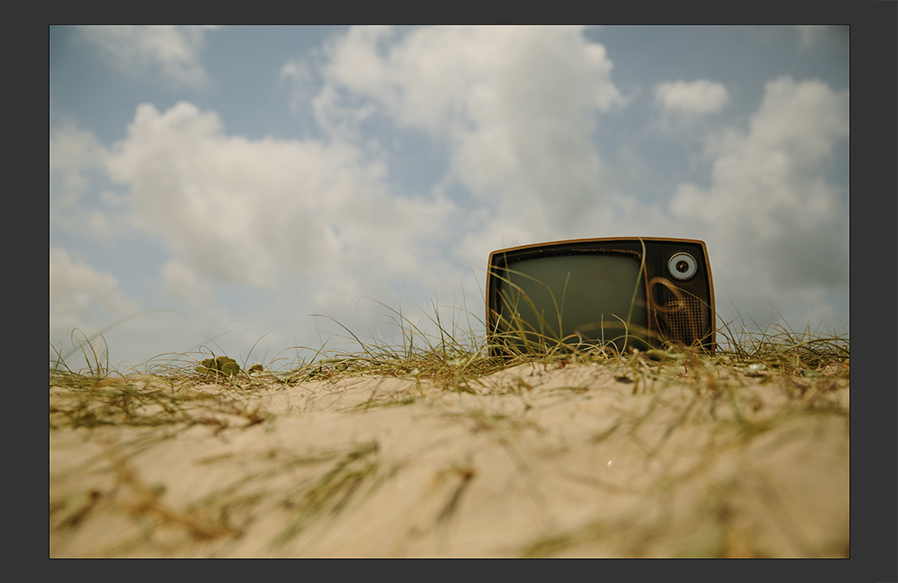
Start off by opening your image in Photoshop CS6 or newer. I am using this image from Unsplash.
After opening the image, go to Image > Image Size... and resize (or crop) the image to 4800 x 3200 px. This is so that it matches the resolution of the RGB noise overlay image that we will be adding later (you can download the overlay early here if you want to be prepared).
Step 2
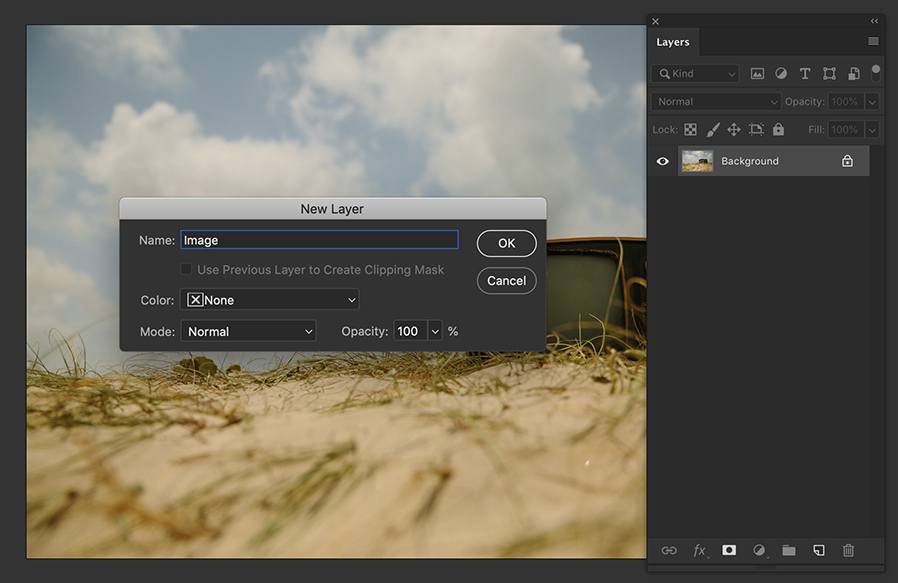
A little bit of preparation, double click on the Background layer to unlock it and give it a simple name such as 'Image'.
Step 3
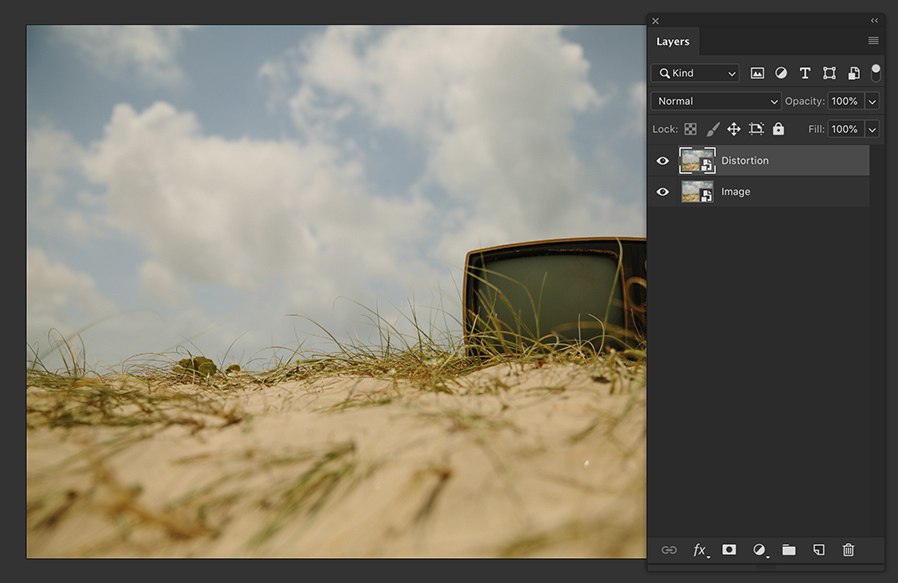
Right click on the layer and choose Convert to Smart Object then duplicate the layer for safe measure and rename the copy 'Distortion'.
Step 4
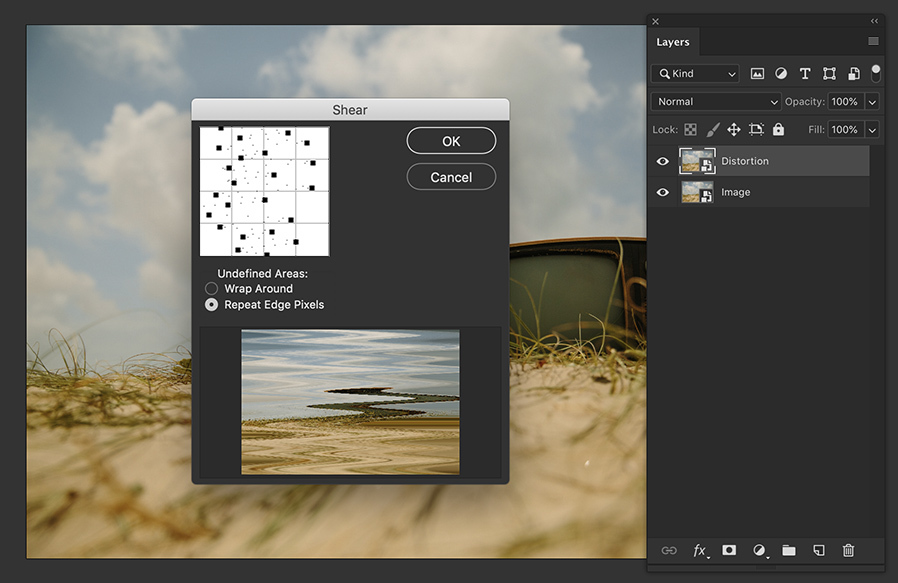
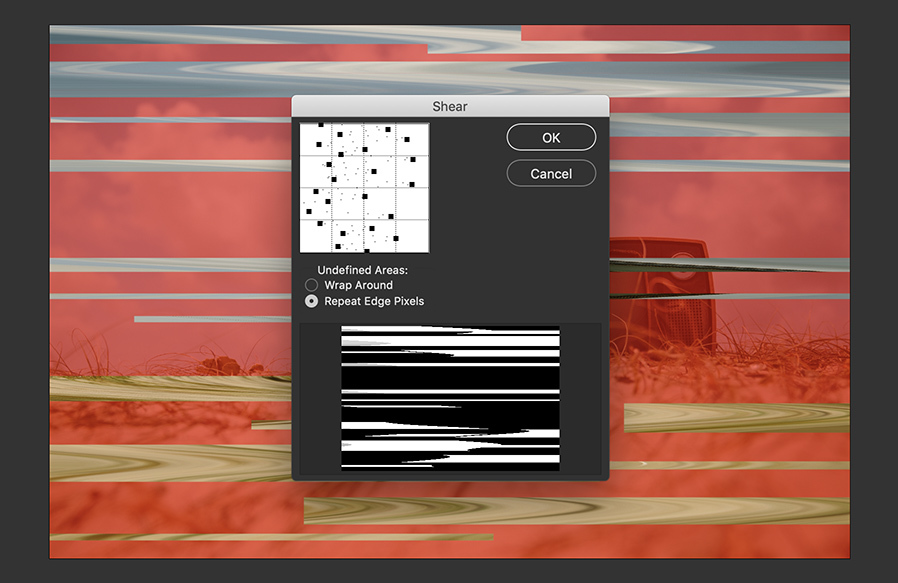
Next go to Filter > Distort > Shear and use the grid in the top left corner to create a zig zag pattern from top to bottom. Add new points as needed (I ended up with 24) and try to vary their distance out from the centre line.
Hit OK when you are done.
Step 5
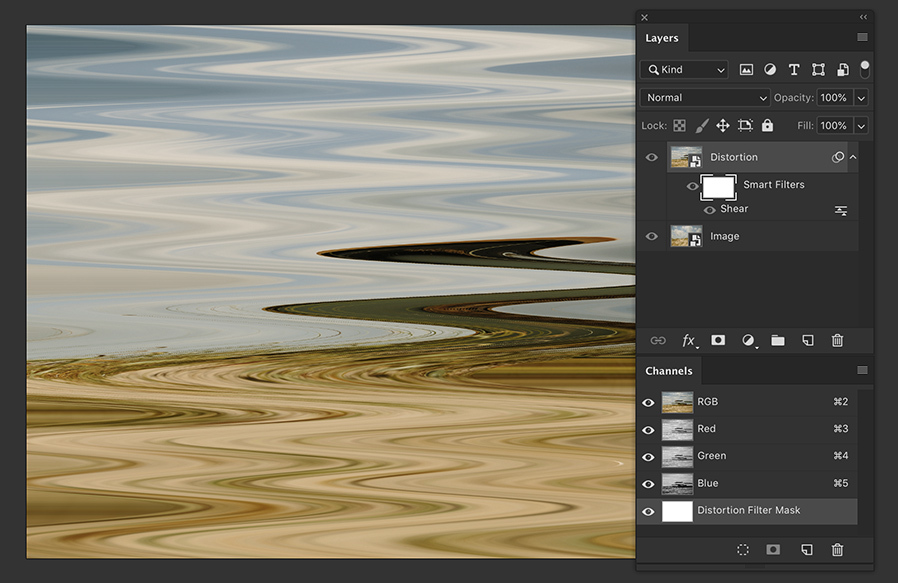
Click on the little arrow on the 'Distortion' layer to show the Smart Filters and select the white Mask thumbnail.
In the Channels window, click the eye icon next to 'Distortion Filter Mask'
Step 6
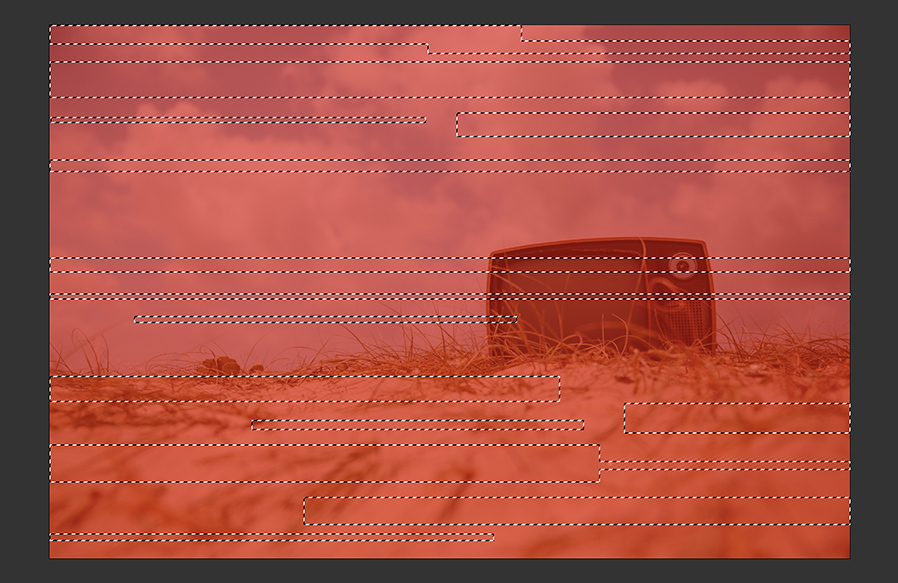
Press CMD+I or CTRL+I to invert the colors so that the white becomes black (shown as a red overlay).
Use Marquee Selection Tool to draw a series of horizontal rectangles whilst holding down the Shift key. These are the areas where the distortion will be visible so, if you want the subject of your image to be clear and visible, avoid drawing a rectangle on top of it.
Step 7
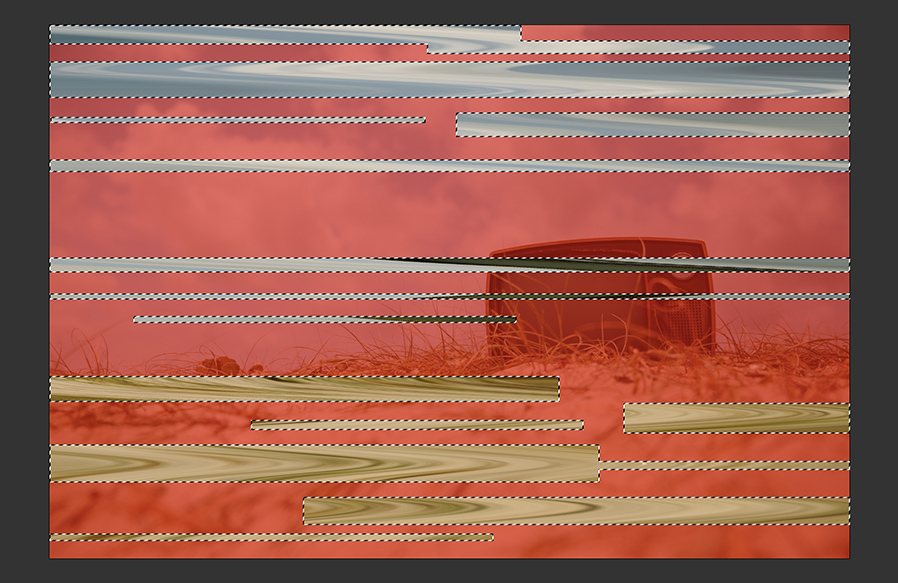
Now use the Paint Bucket Tool to fill your selection with White (#FFFFFF).
Step 8
Deselect (CMD+D or CTRL+D) your selection and press CMD+F or CTRL+F to repeat the same Shear filter.
Step 9
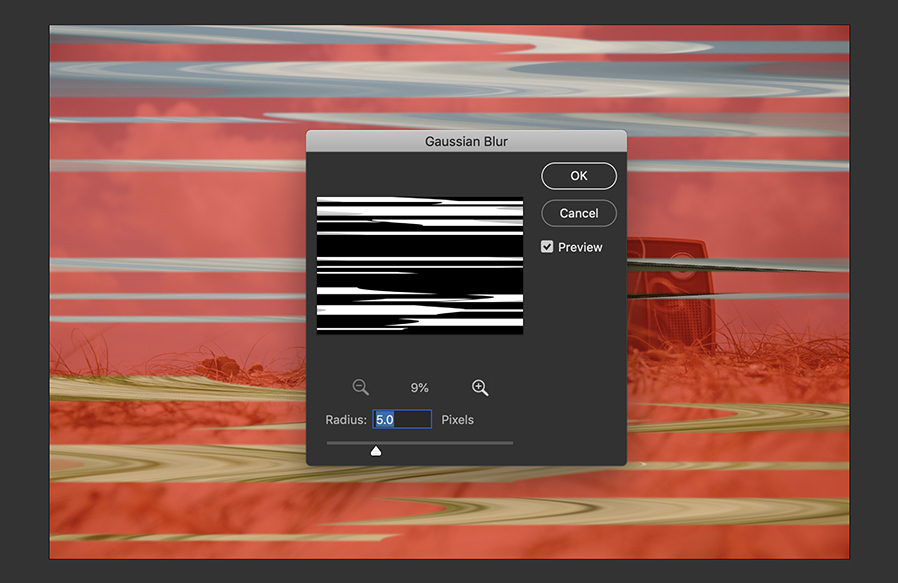
To soften the edges slightly, go to Filter > Blur > Gaussian Blur and enter 5.0. Press OK.
Step 10
Click the eye icon to hide the Distortion Filter Mask channel and go back to the Layers window.
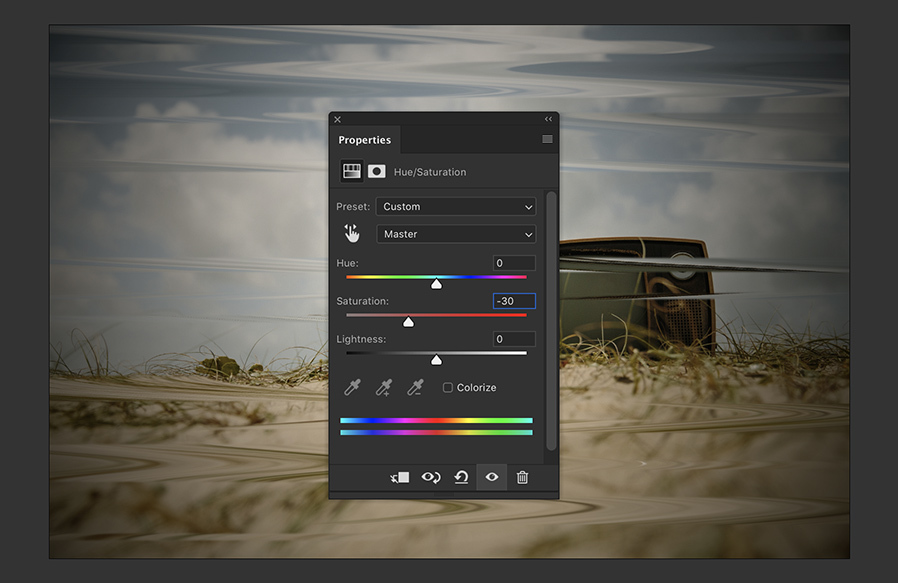
Add a new Hue/Saturation adjustment layer and enter -30 for the Saturation value.
Step 11
Set the foreground color to Black.
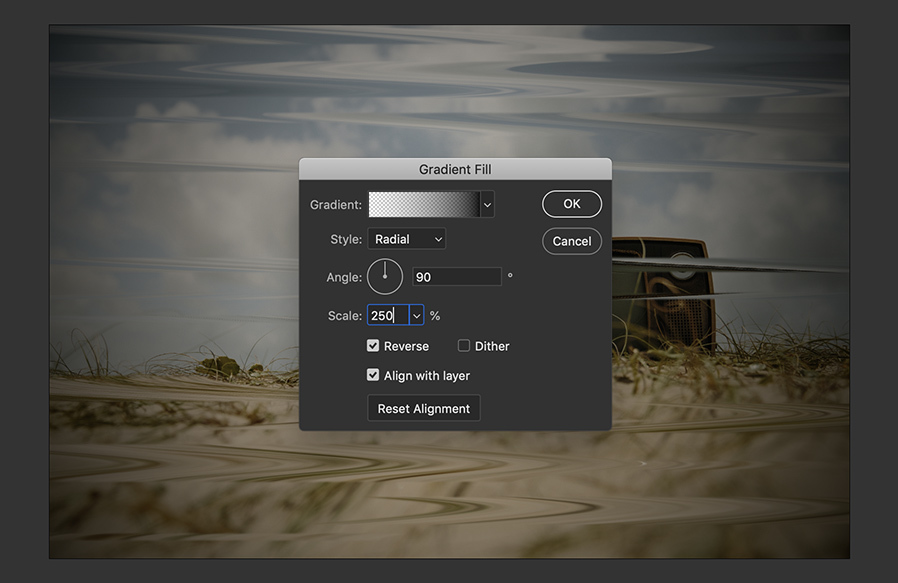
Go to Layer > New Fill Layer > Gradient... and choose the foreground to transparent preset.
- Style: Radial
- Angle: 90
- Scale: 250
- Reverse: Yes
- Dither: Yes *I forgot to check this option in the screenshot
- Align with Layer: Yes
Click OK. This will create a vignette effect around your image.
Step 12
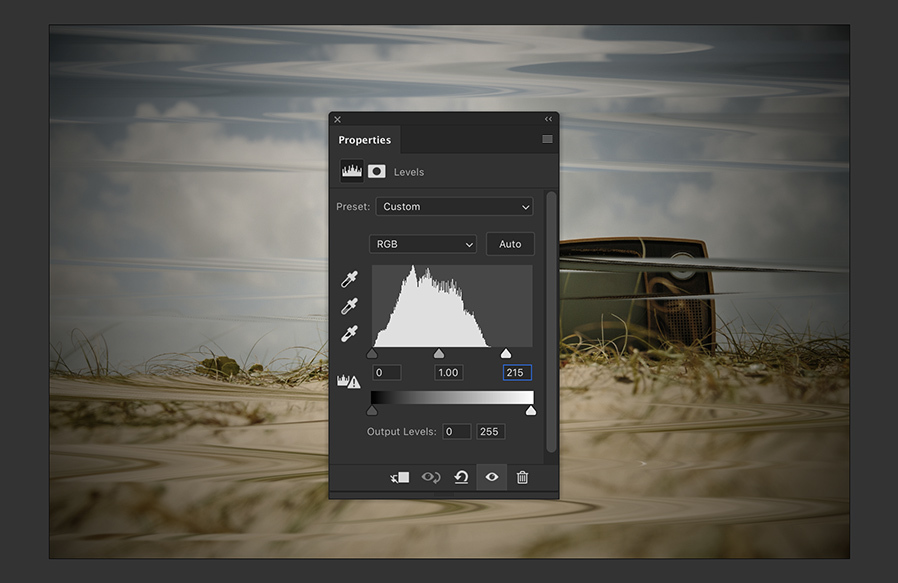
Create another new adjustment layer, this time Levels.
Set the Highlights Input Level to 215.
Step 13
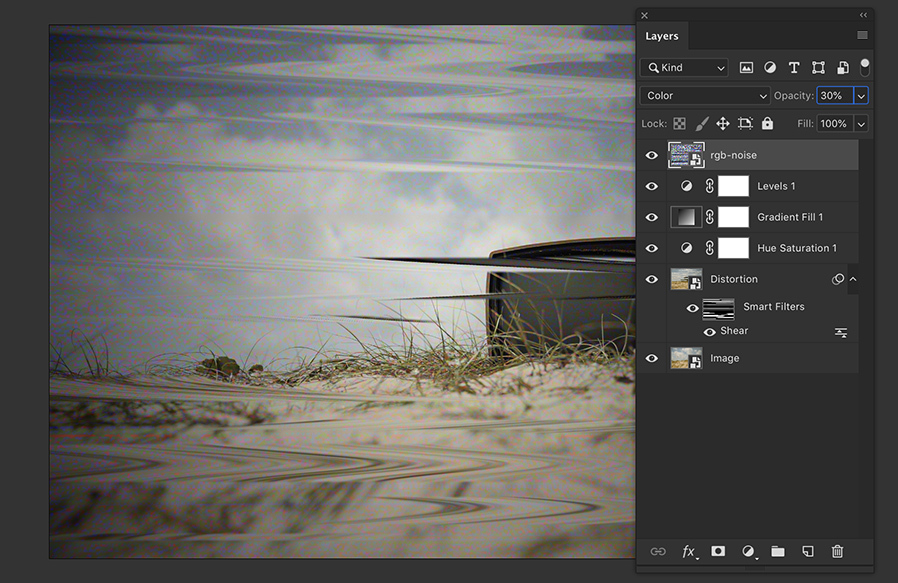
Download this RGB Noise overlay if you haven't already and place it into your document above all the other layers. (This is also a good opportunity to check all of your layers are in the right order).
Step 14
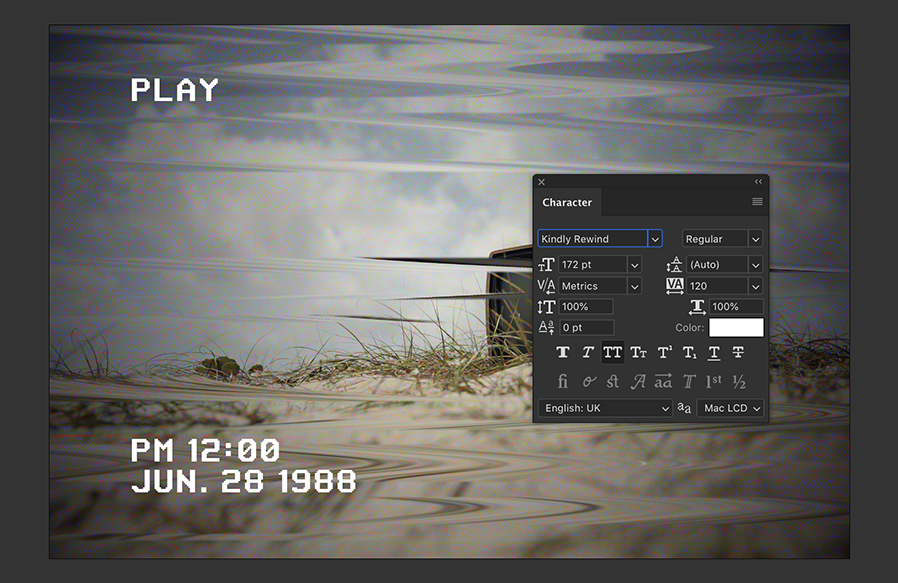
Download Kindly Rewind or another VHS looking font and type out some text.
- Font: Kindly Rewind
- Size: 172 pt
- Tracking: 120
The text itself can be anything you want but I recommend "PLAY" at the top and a date and time of your choosing at the bottom. I chose my birthday.
Step 15
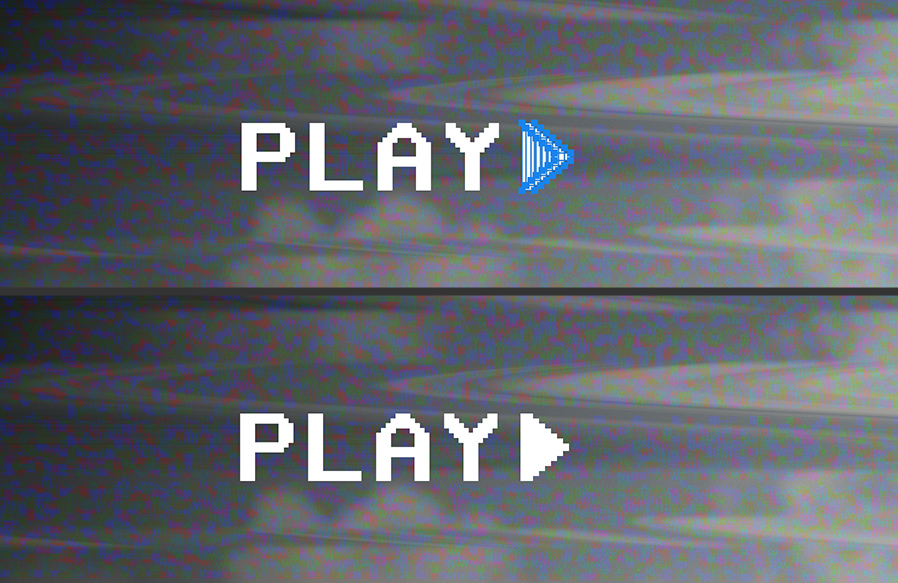
Use the Rectangle Tool to draw a pixellated arrow shadow shape in the same style of the Kindly Rewind font. It's kind of hard to tell but the shape is nothing more than a bunch of rectangles combined that are gradually getting smaller in steps.
Step 16
Group together the text and icon into group called 'Text'.
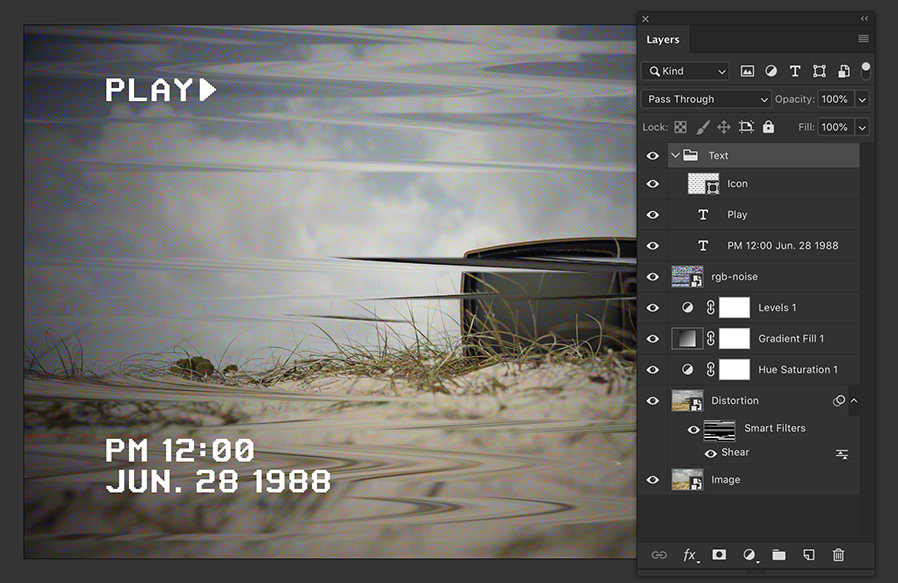
Step 17
Duplicate the Text group 3 times and label them Text (R), Text (G), and Text (B). To indicate red, green and blue respectively.
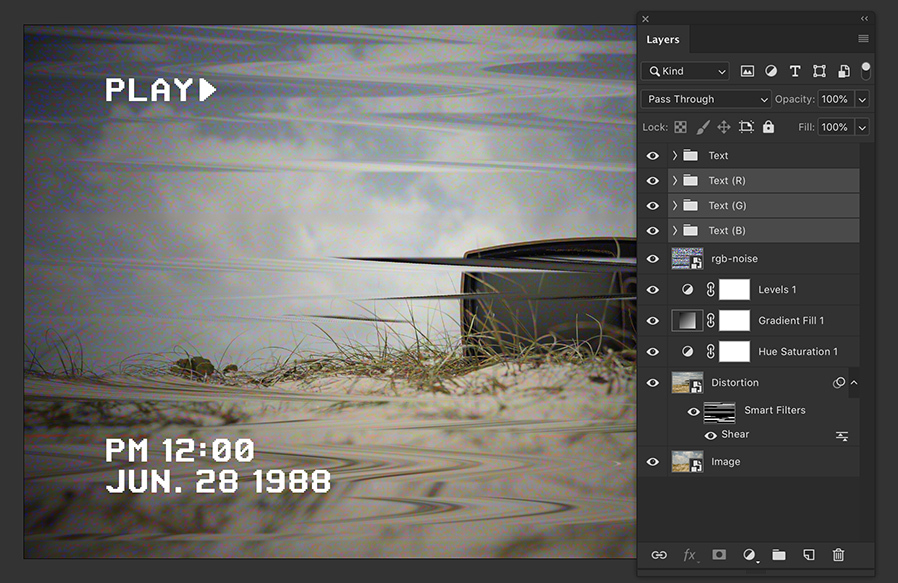
Step 18
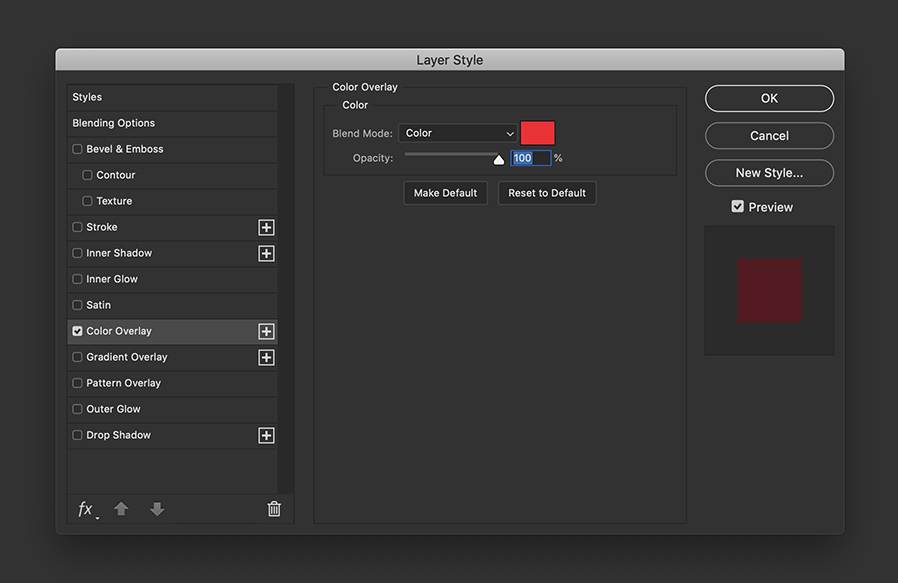
Double click on the Text (R) layer to open Layer Styles and choose Color Overlay.
- Blend Mode: Color
- Color: #ff002a
- Opacity: 100%
Step 19
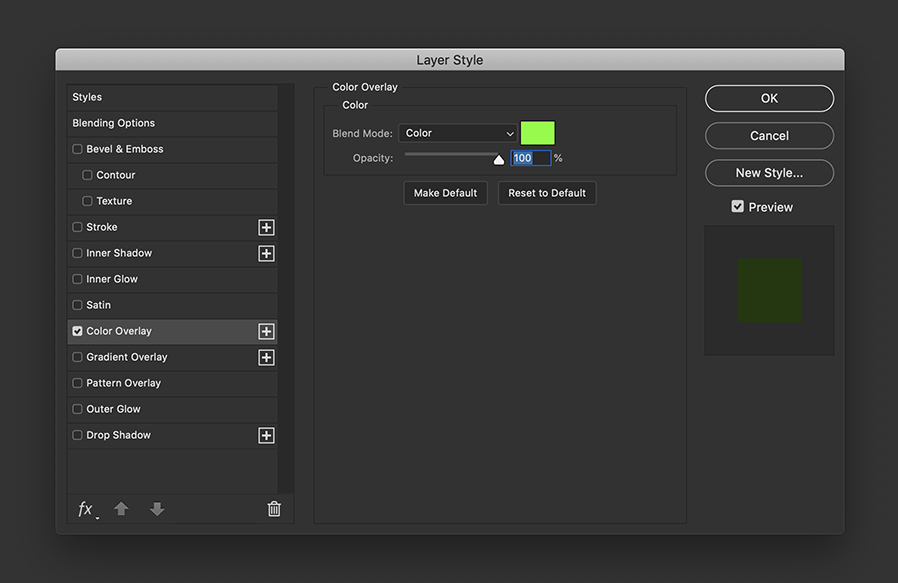
Double click on the Text (G) layer to open Layer Styles and choose Color Overlay.
- Blend Mode: Color
- Color: #72ff00
- Opacity: 100%
Step 20
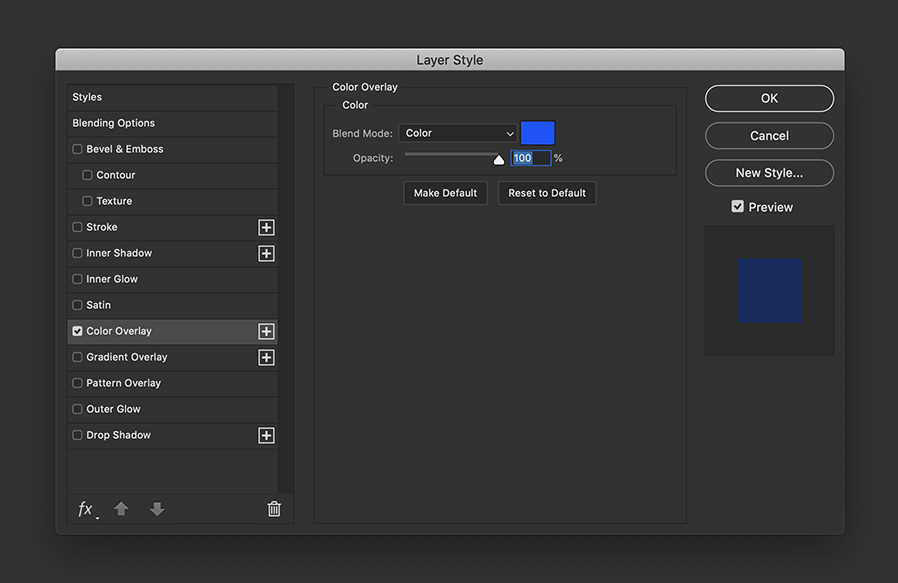
Double click on the Text (B) layer to open Layer Styles and choose Color Overlay.
- Blend Mode: Color
- Color: #004eff
- Opacity: 100%
Step 21
Use the arrow keys to nudge the Text (R) 8-12 pixels left, Text (G) 8-12 pixels right, and Text (B) down and right 4-6 pixels each way.
Result & Conclusion
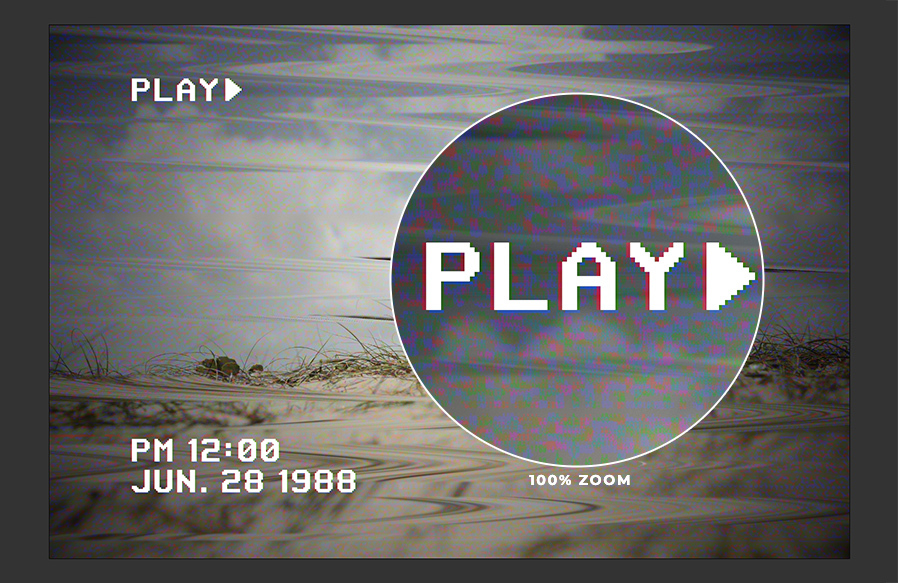
Here is the end result, as you can see it is quite a departure from the original image and recreates that retro VHS distortion effect nicely. The technique of masking a filter is quite an interesting one that opens up almost unlimited possibilities when it comes to manipulating filters (think gradient masks on blur effects for example).
I hope you enjoyed following with this tutorial and learned something new in the process!
