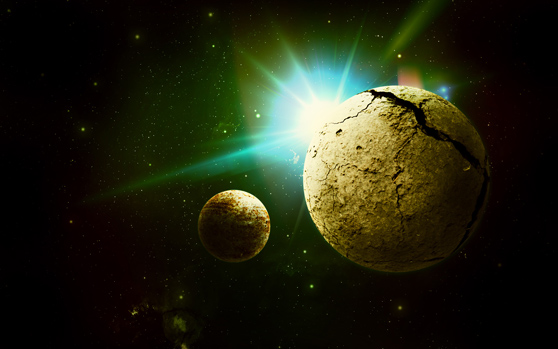
Creating a Stunning Space Image Using Textures
Space is vast. Similarly, the range of stunning images of space is vast. I could sit and look through images of nebulae and galaxies for hours and never get bored. But what if we try to make our own space image? Read on to find out how we can fuse a number of techniques to create this beautiful image.

 Create a new layer, and click a few times around the canvas and you?ll see a few stars spotted around the place. We?ll want to add a glow to the stars, to make them stand out. To do this, add this layer style to the layer.
 Copy this sphere, and paste it back into our main document. Scale it down, and burn and dodge it in the following areas. We want quite strong lighting, so don?t be subtle with your burning and dodging.
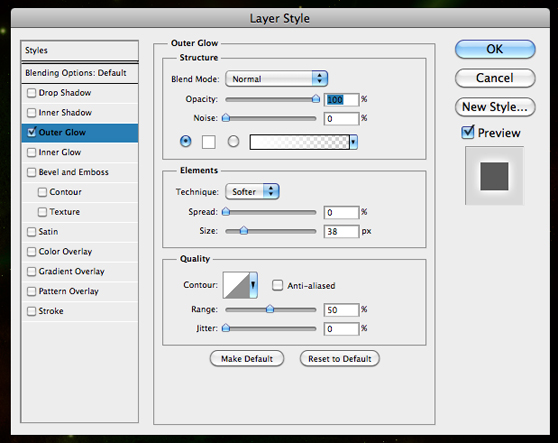
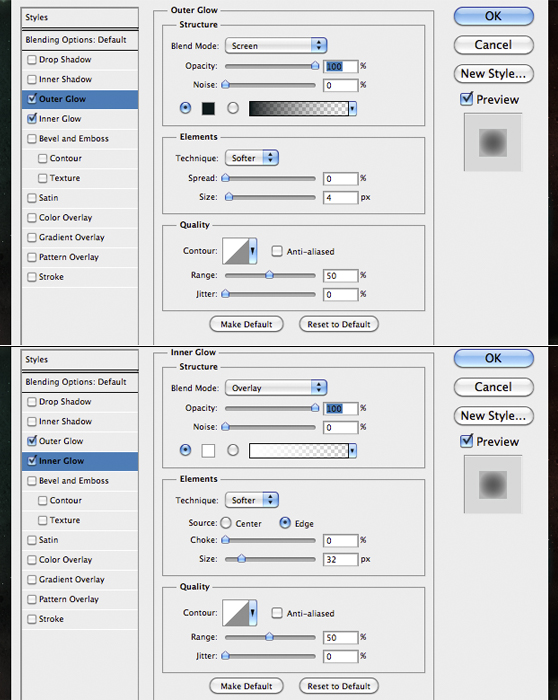
 Now we just want to add a little glow to the planet, so we?ll add the following styles to the layer.
 Once again, like the previous planet, we?ll add a few layer styles:
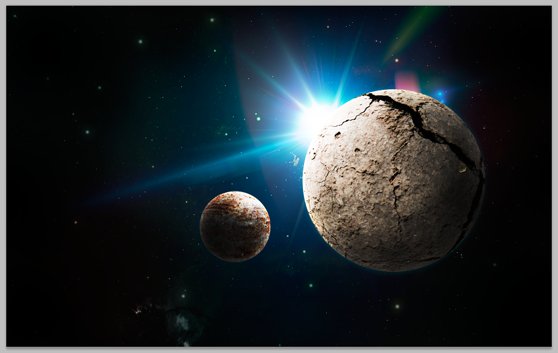

Preview
Click on the image for a larger preview
Step 1
First, we?ll have to create our canvas to work on. Set up a new document, any size you want, really. I?m going for the popular desktop wallpaper size of 1920x1200. Set the background color to #131415.Step 2
Next, we?ll add a subtle background image to give the image some depth. For this, we?ll use Sebastiano?s vintage cloud textures. Paste any of the textures into the document, and scale it down to fit the canvas. Go to Image > Adjustments > Black & White to convert the layer to grayscale. Set the blending mode to Overlay.Step 3
Now, we?ll add a further layer of space detail to bring this to life. Bring this free nebula stock image into the document, and once again, scale it down and convert it to grayscale. This time, we?ll set the blending mode to Color Dodge.Step 4
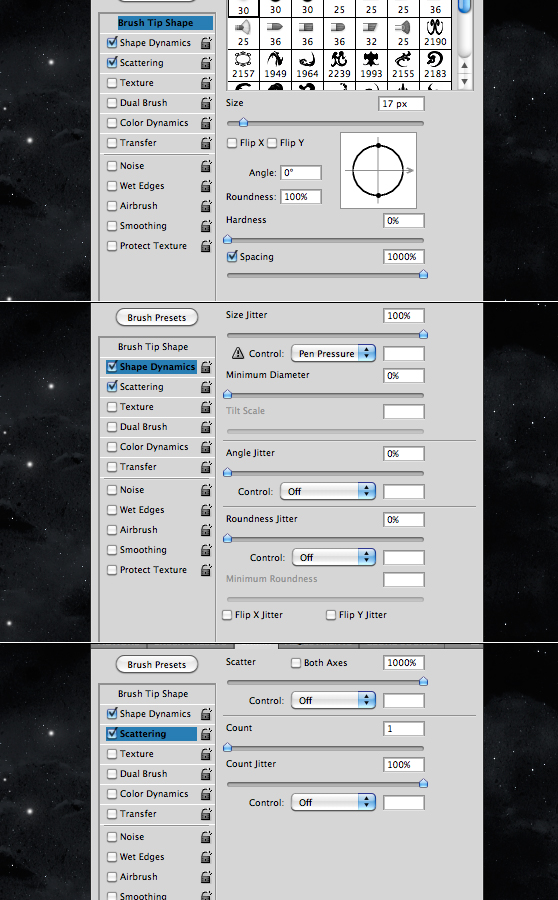
The background is really starting to come together, but I feel we need a few larger stars, just for yet more depth to the image. To do this, we?ll create a brush and scatter it a bit. Select a soft, round brush at 17px. Then, in the brush panel (F5 to bring it up), add the following criteria. Create a new layer, and click a few times around the canvas and you?ll see a few stars spotted around the place. We?ll want to add a glow to the stars, to make them stand out. To do this, add this layer style to the layer.

Step 5
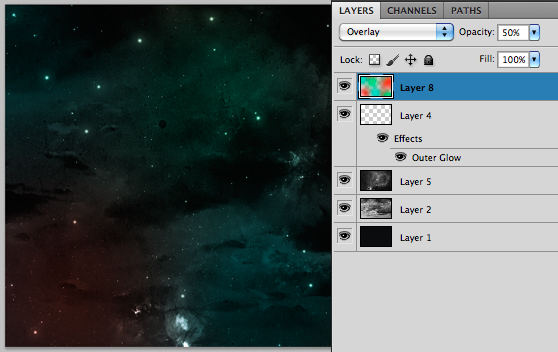
The background, whilst nice looking, is a little bit dull - Let?s give it a bit of color. To do this, create a new layer, and select a large soft brush at 1300px. Then, with the colors #dd2a00, #00ed91 and #00ed7b, paint a few blobs of color around the canvas. Make the opacity 50%, and the blending mode Overlay. You can see that the background is really looking quite vibrant.
Step 6
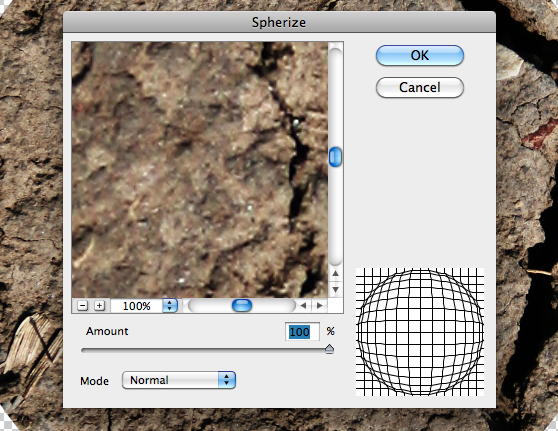
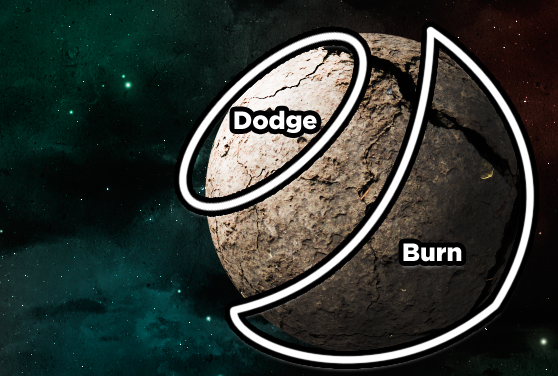
Now, it?s time to create the planets themselves. We?ll start with the larger planet. Take any texture you want (I would recommend Caleb?s cracked ground textures and open it in a separate document. Using the Elliptical Marquee tool, make a circular selection of the texture. Copy that selection, and paste it into a new document. Then, turn it into a sphere with Filter > Distort >Spherize, with the amount at 100%. Copy this sphere, and paste it back into our main document. Scale it down, and burn and dodge it in the following areas. We want quite strong lighting, so don?t be subtle with your burning and dodging.
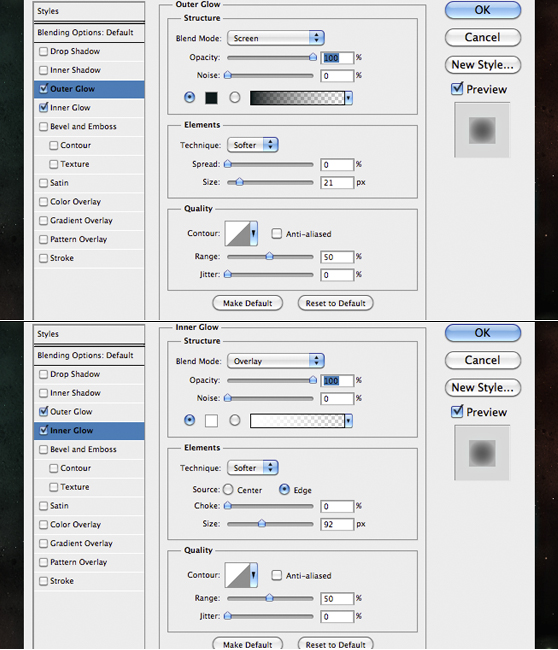
 Now we just want to add a little glow to the planet, so we?ll add the following styles to the layer.

Step 7
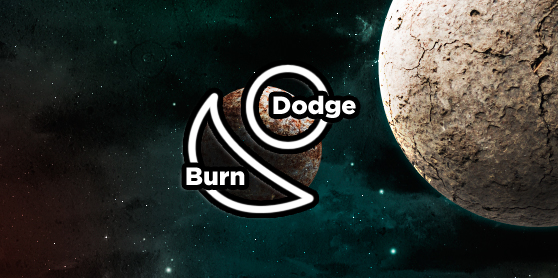
To create the smaller planet/moon, we?ll do the same technique as the previous planet, only this time using a different texture (I?m using one of Piervincenzo?s rust textures). We?ll then add a burning and dodging in the following regions: Once again, like the previous planet, we?ll add a few layer styles:

Step 8
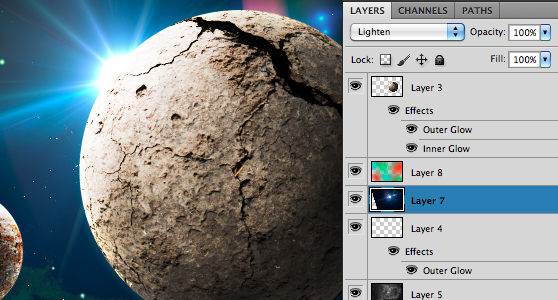
Next, we?ll add a lens flare to the mix. You can use a Photoshop default lens flare, but I find them a little limiting, so I?m using a lens flare from ThinkDesign?s pack. Choose whichever one takes your fancy, and paste it in the document. Place that layer underneath the layer which contains the background coloring. Scale it down, and rotate and position it so it peeps over the larger planet. Set the blending mode to Lighten to remove the edges.
Step 9
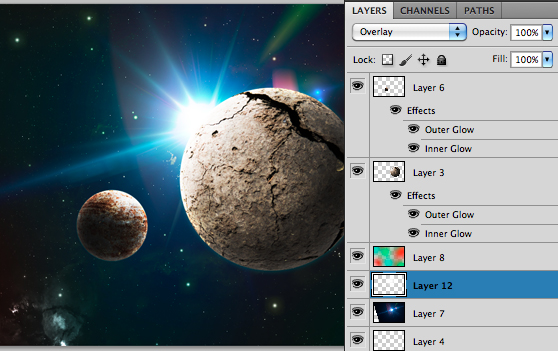
Whilst we have a nice lens flare here, I think it could do with a little bit more intensity. To achieve this, take a large, soft white brush (somewhere around 600px) and, on a new layer, click once to create an additional glow. Set this layer?s blending mode to ?Overlay?
Step 10
In my opinion, the image is a bit cluttered around the edges, taking the emphasis off the planets. Therefore, we?ll take a large soft black brush and paint around the edges, adding a bit of a manual feather.
Step 11
Take a step back from the image and observe it now - How does it look? Do you think it needs something else. Personally, I think the bottom of the image is a little light, considering where our light source is. To fix this, we?ll take a soft, round, black brush, at about 300px and, on a new layer, paint around the bottom to darken the image. We want a bit of detail to shine through, however, so set the layer to 40% opacity.
Step 12
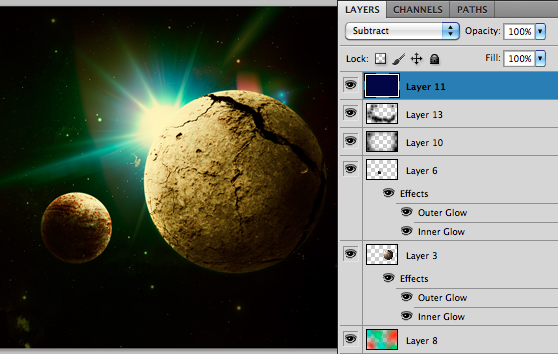
The image is finished, in terms of content, but something isn?t right - It just doesn?t all fit together. Therefore, we?ll add a tint to bring the whole thing together. To do this, create a new layer, and fill it with #030b4a. Set the blending mode to Subtract, and you?ll have an orange tint which completes the image and makes it look more ?together?.
Step 13
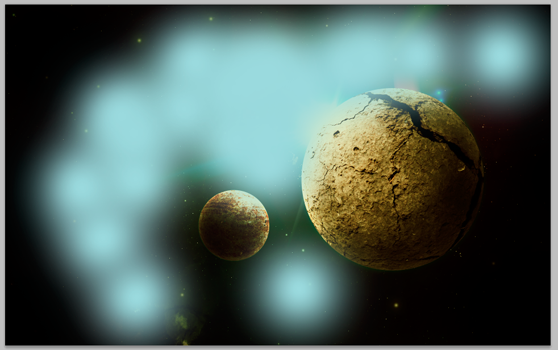
Looking at the image for a final time, I still think we need the lens flare to be a bit more striking. To do this, we?ll make a new layer above our tint layer. With a soft brush at 450px and set to #aed9de, paint in the areas shown. Then, set the layer to Overlay and watch your work come to life.
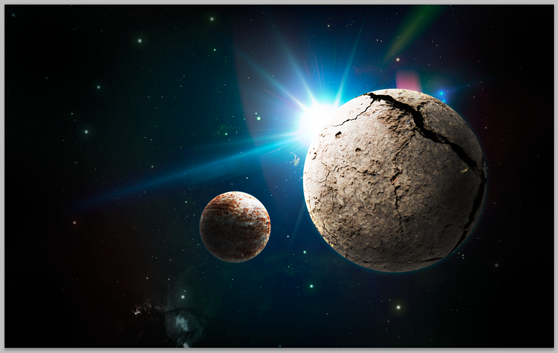
Final Result
