Create a Colorful Smoke Cloud Effect in Photoshop
Learn how to create this eye-catching effect in Photoshop using a single source image. This tutorial cover various techniques including creating scatter brushes, using gradient overlays and masking text layers.
Preview
Before we jump in to the tutorial, here is a quick preview of what we will be creating:

Step 1
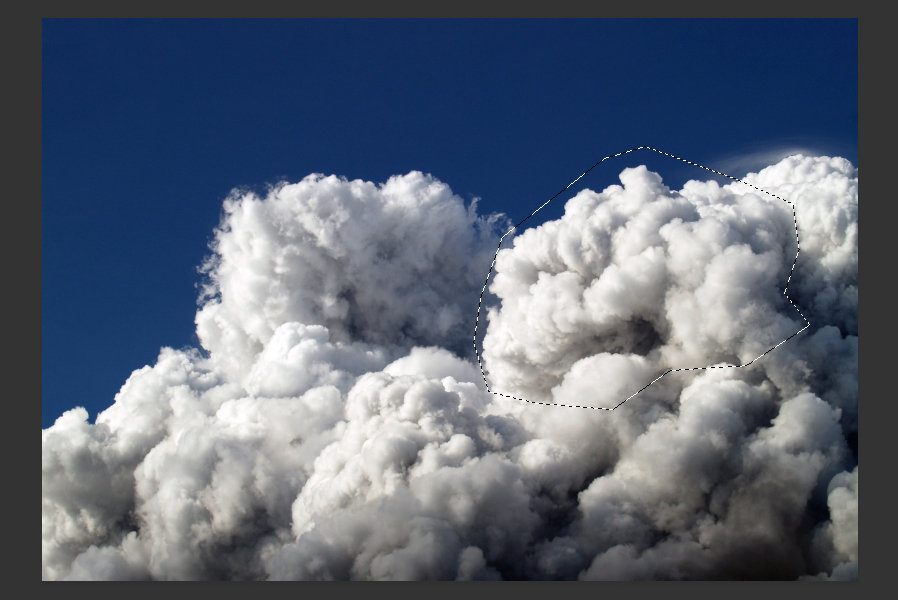
We are going to begin by creating a cloud brush. Download this free cloud photo and open it in Photoshop. Then make a rough selection around the area shown and copy it to the clipboard. You don't need to be too precise here, we will tidy it up later.
Step 2
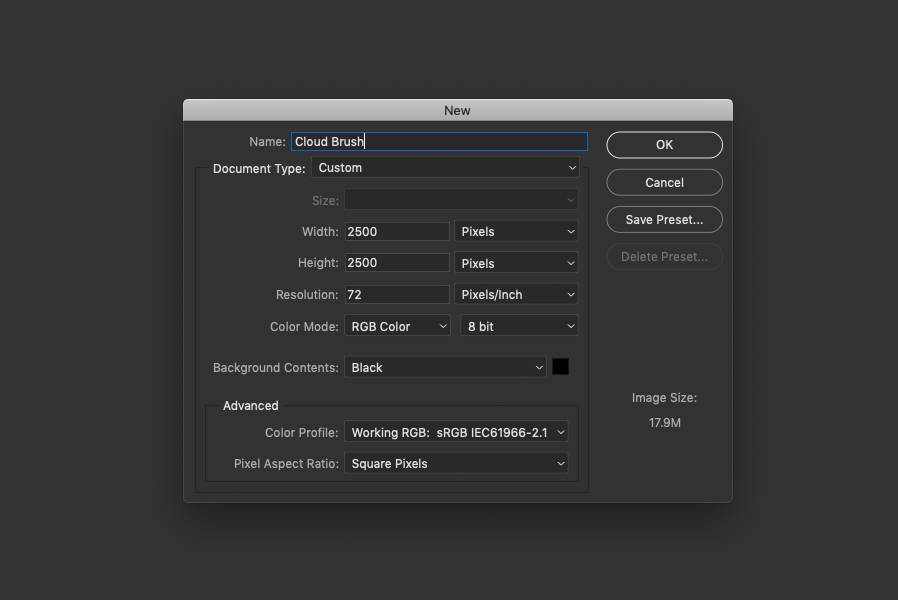
Create a new document and set both the width and height to 2500 pixels. This is the maximum size for brushes in older versions of Photoshop and should be more than enough for our brush. Also set the background color to black.
Step 3
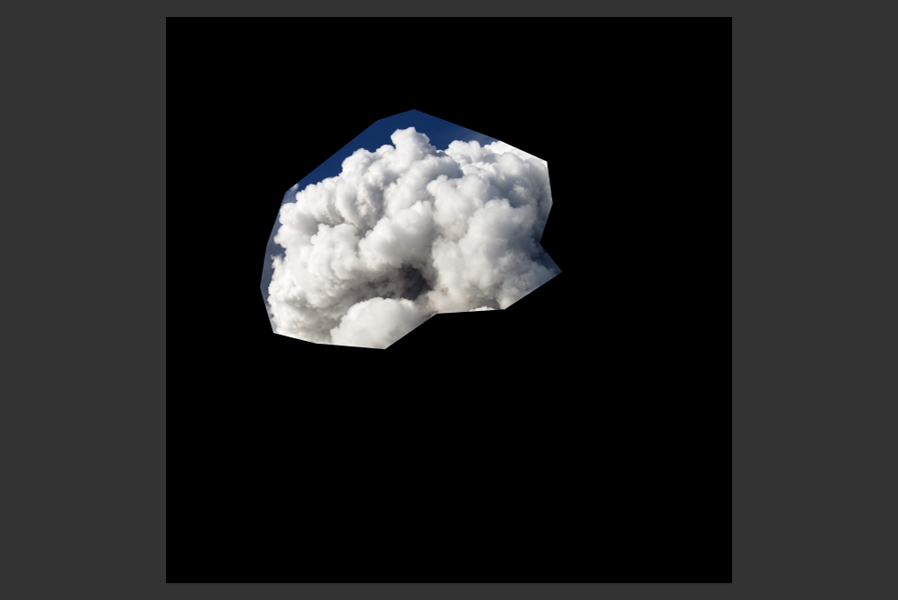
Paste your selection from the earlier step into the new document
Step 4
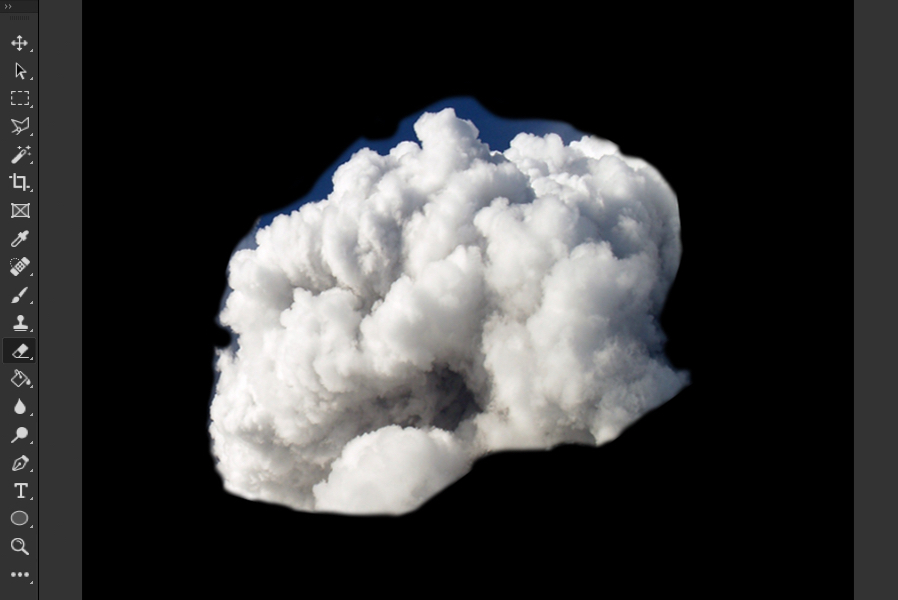
Select the Eraser tool and using a soft round brush clean up your selection. It's okay to leave some blue sky areas, but be sure to get rid of any hard white edges.
Step 5
Duplicate (CMD+J or CTRL+J) the cloud layer and from the Edit > Transform menu choose Flip Horizontal and then Flip Vertical. Move the duplicated layer down and with the Transform controls (CMD+T or CTRL+T) try to align the edges of the duplicated layer with the original to form an almost circle.
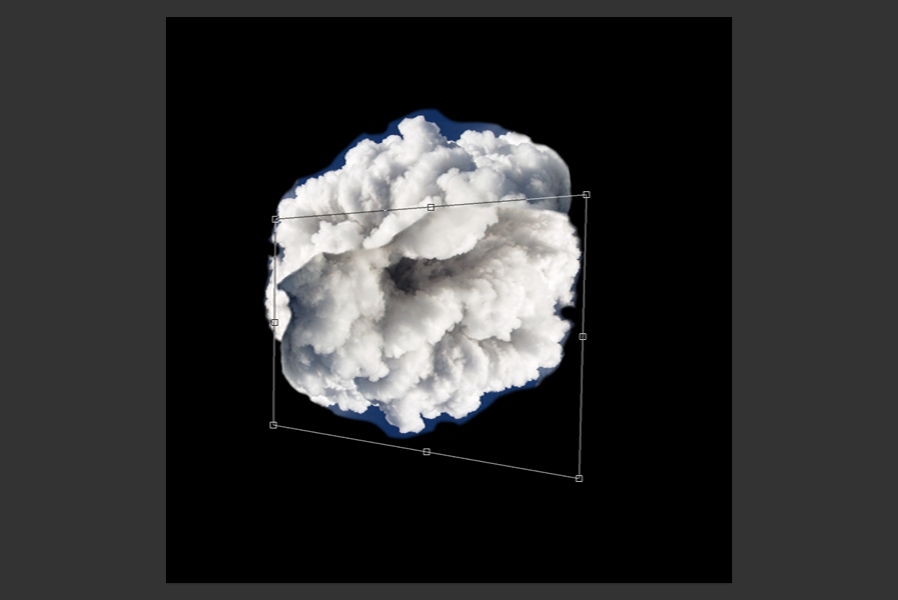
Step 6
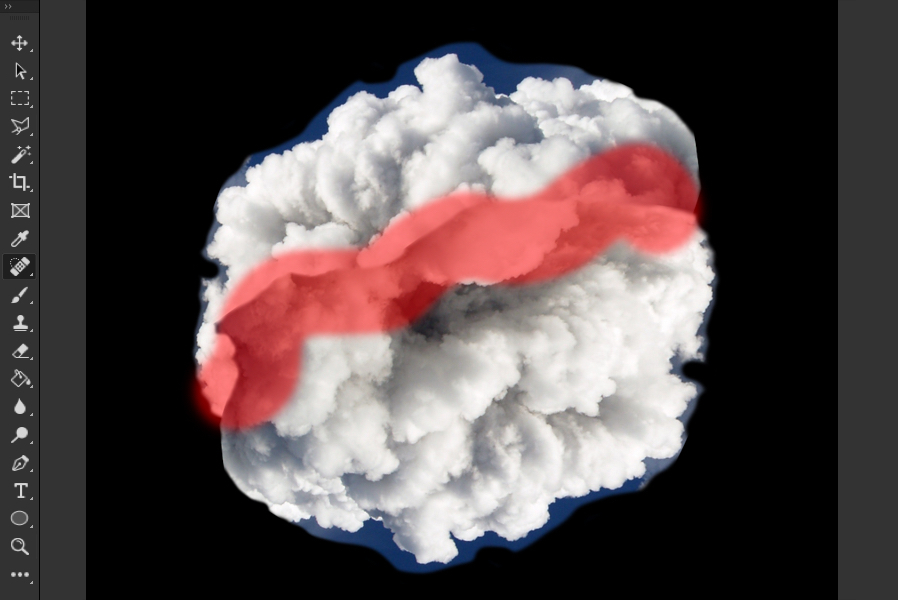
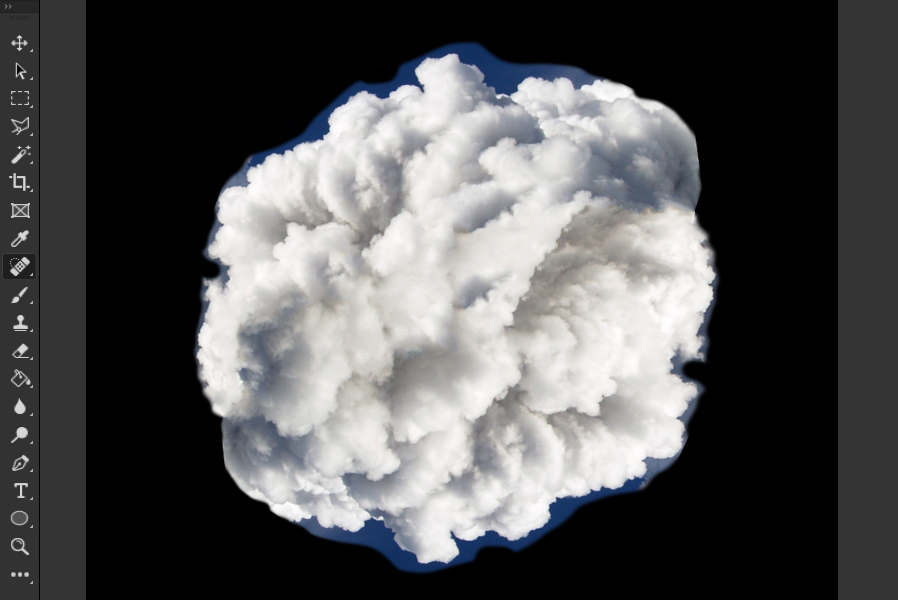
Select the Healing Brush tool, choose a round brush preset and set the Hardness to 85%. Click and drag over the seams where the two sections of cloud meet. Repeat as necessary to blend together the clouds.
Step 7
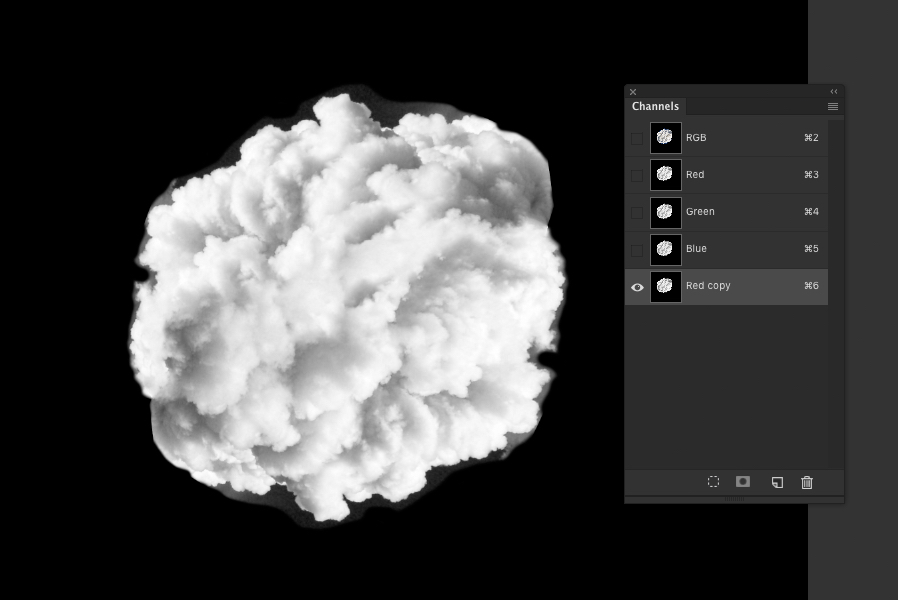
Open the Channels window and click on the Red channel, then duplicate the channel.
Step 8
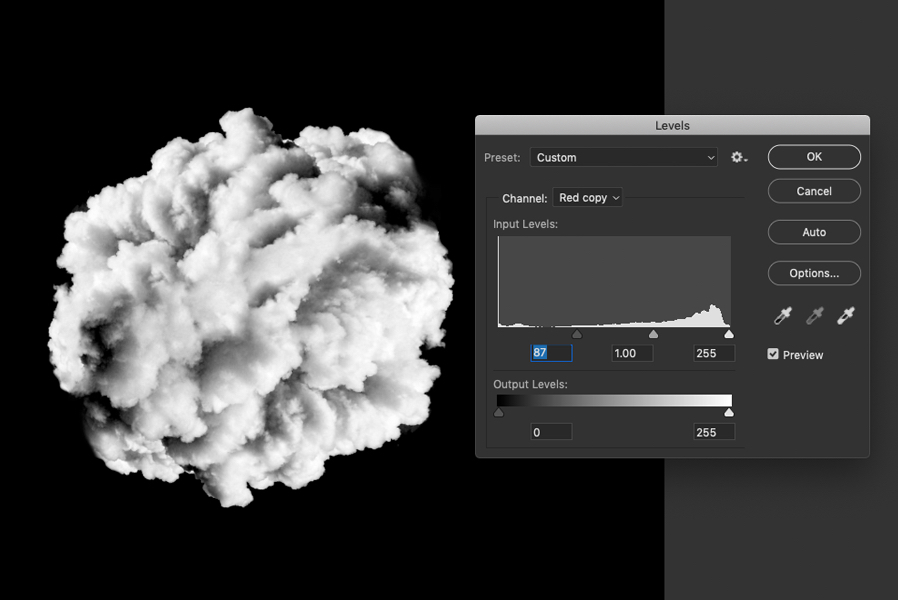
Go to the Image > Adjustments menu and choose Levels... (CMD+L or CTRL+L). Drag the shadow input level slider until the cloud is completely isolated and there are no hard edges.
Step 9
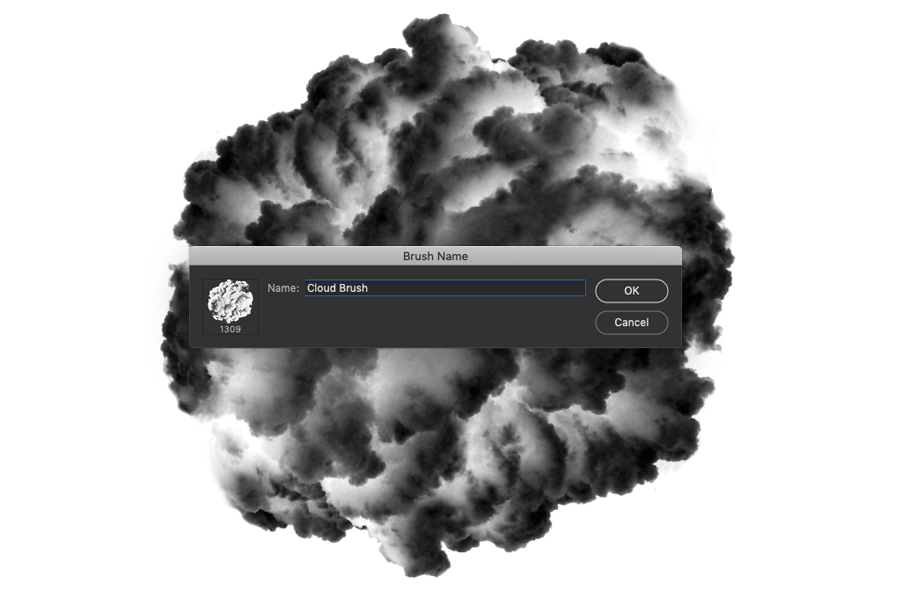
Go to the Image > Adjustments menu and choose Invert (CMD+I or CTRL+I). Then go to the Edit menu and choose Define Brush Preset.. enter a name and click OK.
Step 10
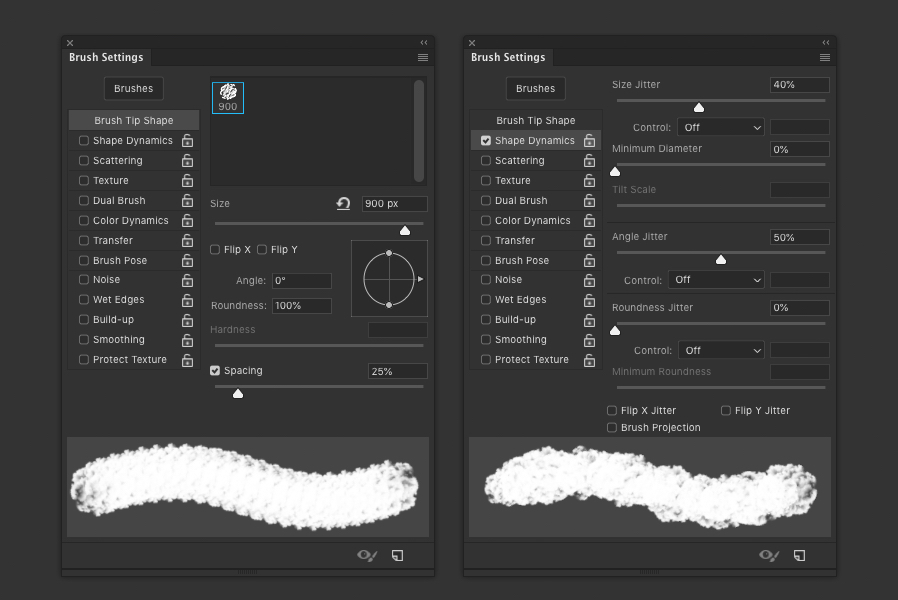
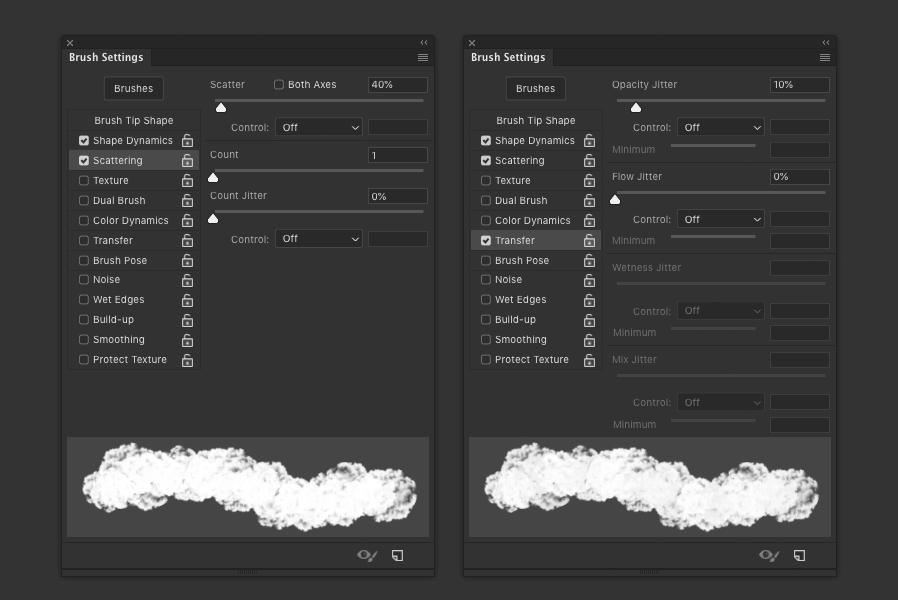
Open the Brush Settings window and enter the settings as shown below:
- Size: 900 px
- Spacing: 25%
- Size Jitter: 40%
- Angle Jitter: 50%
- Scatter: 40%
- Opacity Jitter: 10%
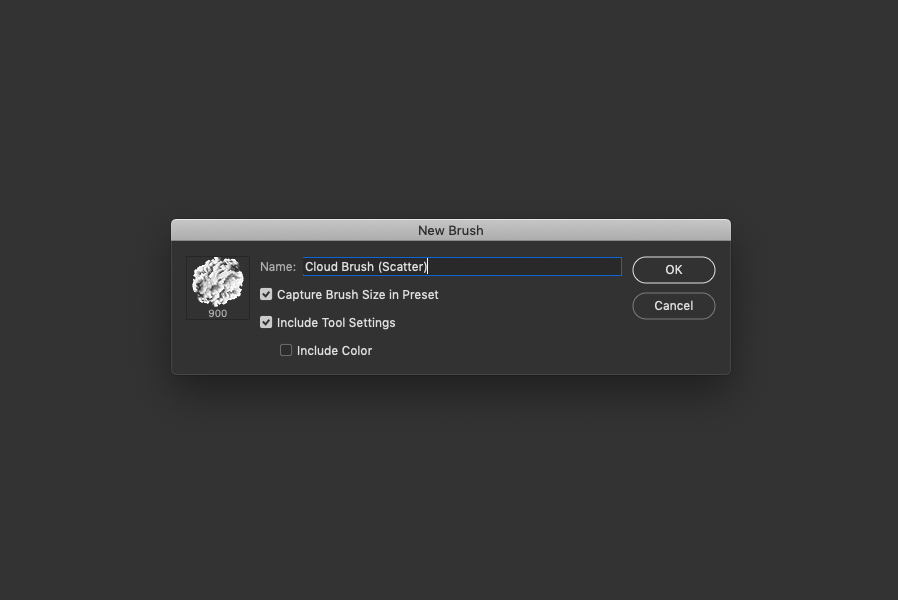
When you are done, create another new brush preset with these settings.
Step 11
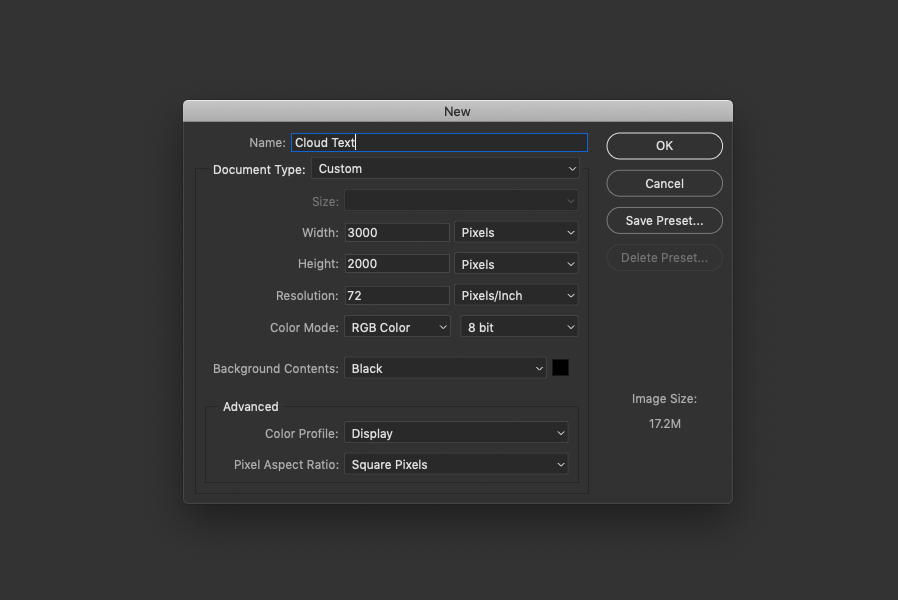
Go to File > New... (CMD+N or CTRL+N) and create a new 3000 x 2000 pixel RGB document with a black background.
Step 12
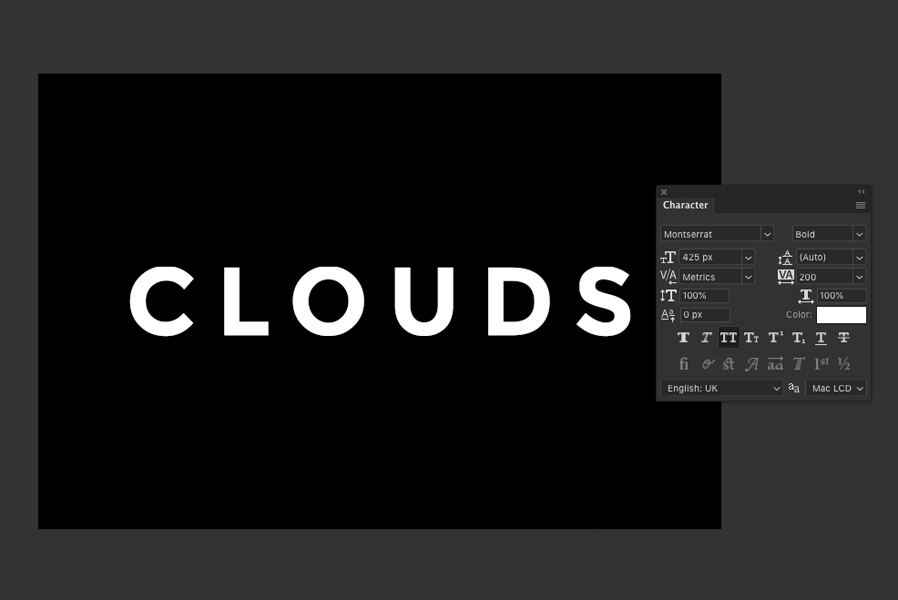
Select the Type Tool and add the text 'CLOUDS' with the following settings:
- Typeface: Montserrat
- Size: 425 px
- Tracking: 200
- Color: White
Step 13
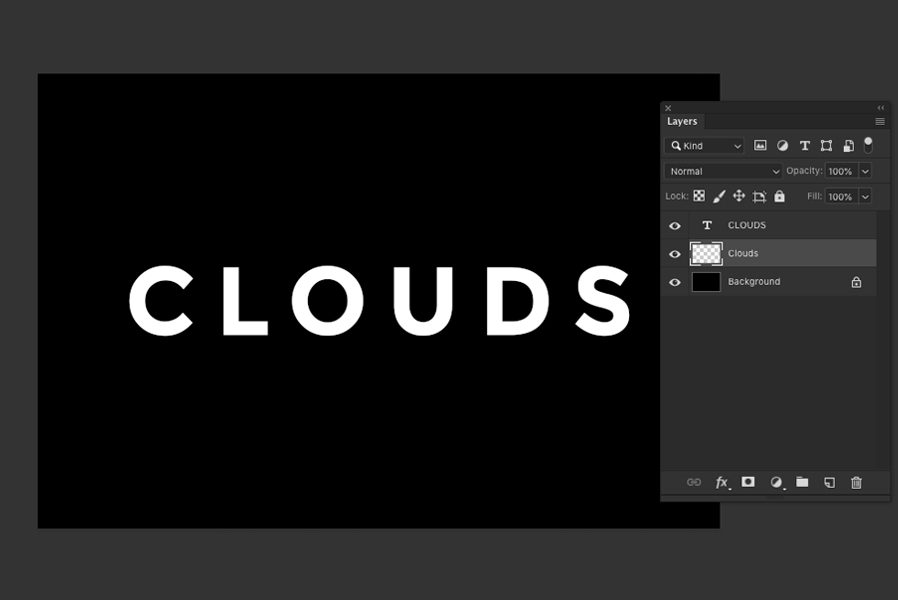
Go to the Layer > New menu and choose Layer... to create a new blank layer below the text for our brush.
Step 14
Set the foreground color to White and using our new scatter brush, paint some clouds behind the text. This might take a few attempts to get it just right, feel free to Select All (CMD+A or CTRL+A) and delete the clouds then try again if you aren't happy with the result.
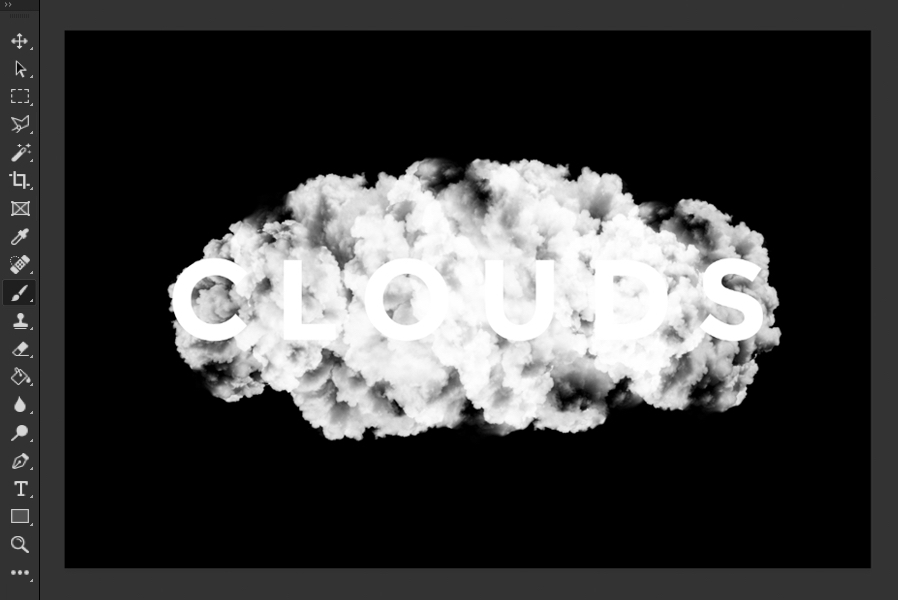
Step 14
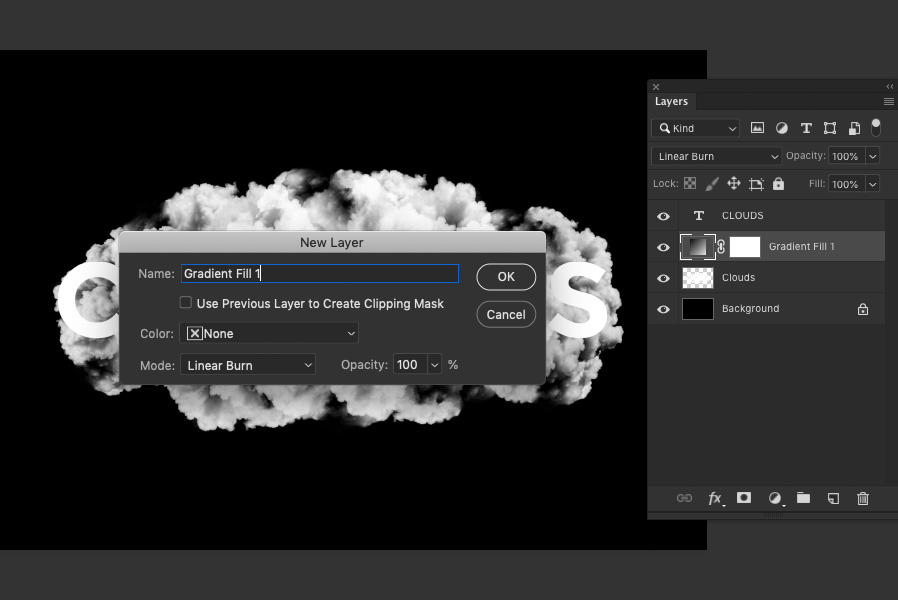
When you are happy with the clouds, it's time to add some color. Go to the Layer > New Fill Layer menu and choose Gradient... set the Mode to Linear Burn and click OK.
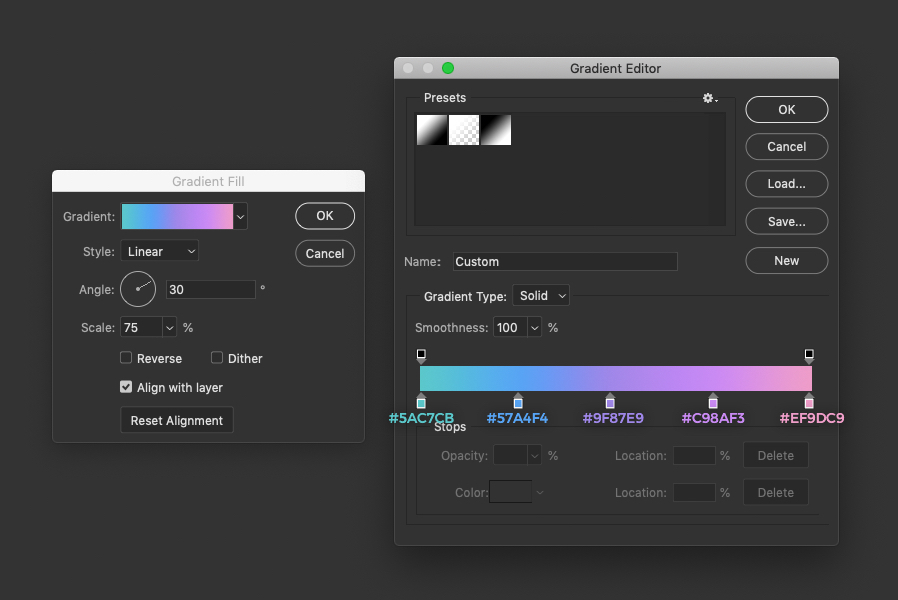
In the next window; create a Linear gradient, set the angle to 30º and the Scale to 75%.
Then for the gradient itself, use 5 equally spaced color stops and set them to the following RGB colors from left to right:
- #5AC7CB
- #57A4F4
- #9F87E9
- #C98AF3
- #EF9DC9

Step 15
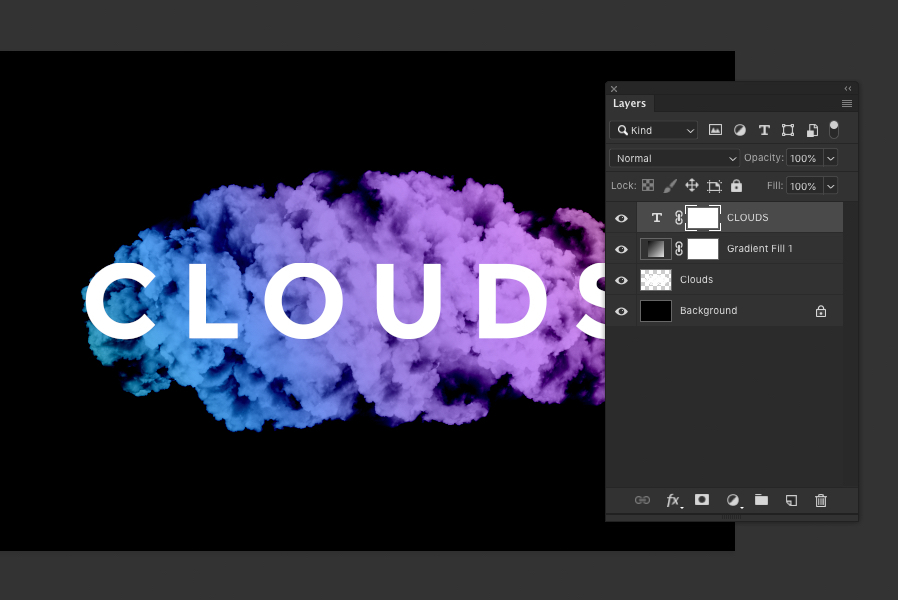
This is starting to look pretty cool now, but we can blend the text and clouds together better by using a mask. Select the text layer and choose Reveal All from the Layer > Layer Mask menu.
Step 16
Set the foreground color to Black and using a round brush with ~25% hardness carefully paint over areas of the text that you want to be hidden. Tip: try to look for and follow patterns in the cloud to make the effect look more realistic.
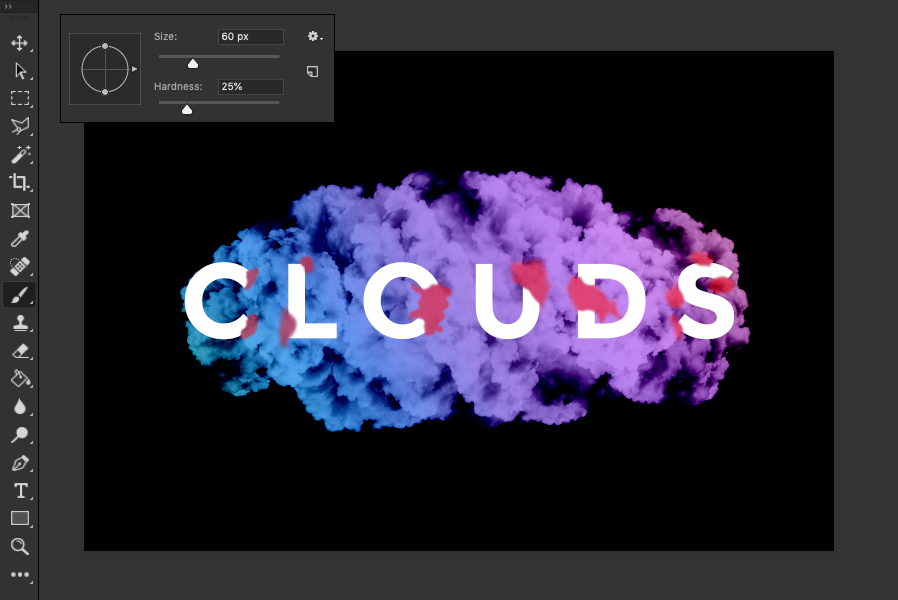
Result & Conclusion
Here is the final result, you can personalise this effect easily by using different text and custom gradients or even go as far as to use different source material for the brush (such as smoke or powder).

Thanks for following along with this tutorial, I hope you have learned some new techniques and invite you to share your results in the comments below.


