Illustrator Mastery: 25 Techniques Every Designer Must Know
Like so many others, I began my design career by experimenting with Adobe Photoshop. At the time bitmap graphics were more accessible and more easy to understand. Vector graphics, Adobe Illustrator and especially bezier curves contained a shroud of mystique, and I was having too much fun with Photoshop to see what was behind Illustrator's magic curtain. Fast forward a few years later when I began to dabble in logo design, and suddenly Illustrator became the go-to tool. What amazed me was how much I had missed out on by not picking up Illustrator along side Photoshop in the beginning.
So now here we are using Illustrator on a daily basis to produce incredible vector illustrations, but like Photoshop, there are many tools within illustrator that are often overlooked. So we decided to put together this handy guide of 25 essential tips for Adobe Illustrator.
 Below the tool icons are thumbnails displaying the current colors for fill and shape. You can swap these colors by pushing (X) on the keyboard. You can also reset them back to black and white by pushing (D).
 Also, another very important set of buttons on this panel are the Draw Normal, Draw Behind and Draw Inside options. These are handy buttons to know when drawing objects on the art board.
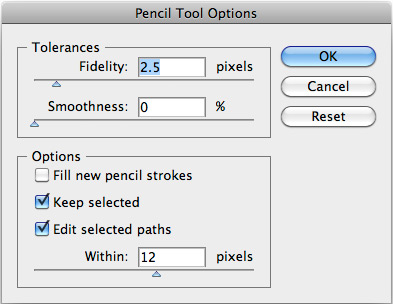 You can double-click the Pencil Tool icon to adjust the following settings:
Fidelity - Controls how often anchor points are added to the drawing path and how far you have to move your cursor before a new point is added
Smoothness - Controls how smooth the path is. The higher the number here the more points are added to the path as you draw, resulting in a more accurate line.
Fill New Pencil Strokes - Simply adds a fill color to the line after you draw it. This results in more of a shape than a line.
Keep Selected - Controls whether or not the line should be selected or unselected after your done drawing it.
Edit Selected Paths - Determines whether you will be merging with an existing path if your new line gets within a specified distance of it.
Within X Pixels - Determines how close your new line must be to an existing path to merge.
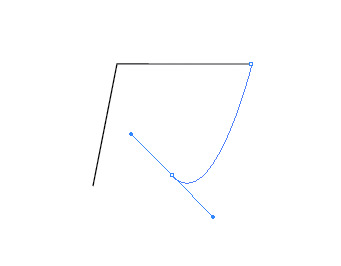 The basic concept of the Pen Tool is clicking to add points versus drawing a line. As you add points Illustrator adds the line between the points automatically. You can then edit the lines by clicking and dragging the anchor points and their handles.
For more information and examples using the Pen Tool visit the Adobe Illustrator Reference Manual.
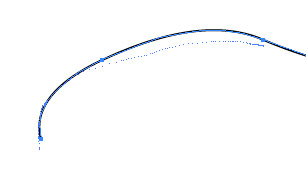 The path eraser tool, and with a single smooth motion click and drag it along the segment of the path you want to erase.
 This is one is the closest to the PS equivalent. Select this tool and click and drag it across the portion of a shape that you would like to remove.
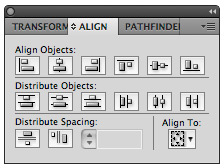 The Align Panel contains an array of options to align and distribute objects. This panel is essential if you need your artwork to align perfectly.
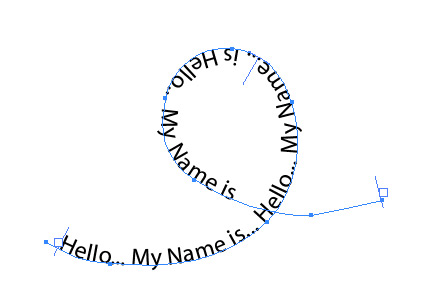 Also note, that the usual type options are available from the Character Panel ((Cmd + T).
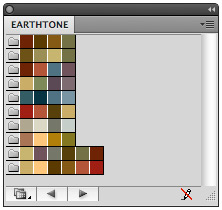 Once your colors and gradients are contained within the panel you can save them from the drop down menu within the swatches panel.
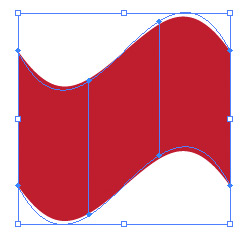 Then edit any anchor point on the envelope with the Direct Selection Tool. This gives you the ability to fine tune the object to whatever shape you desire.
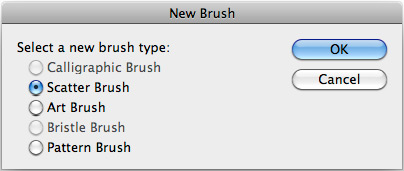
 on the Brushes Panel, or drag the selected artwork to the Brushes panel. From the pop up window that appears select the type of brush you want to create, and click OK. Each brush type has it's own settings. Play with these to create a multitude of different brush behaviors from the same piece of art.
 and click the selected object.
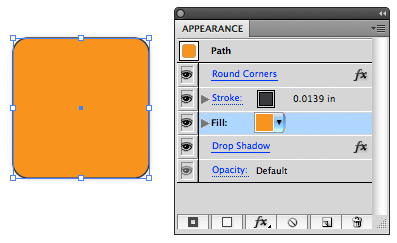 Take a peak at the Appearance Panel (Window | Appearance). From within this panel you can control EVERYTHING about an object or group of objects. Get to know this panel and understand how to use it. It will make a huge difference in your workflow and how your vector artwork is structured.
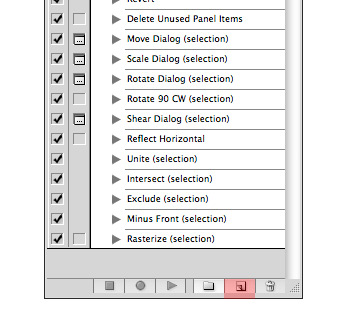 To create an action simply open the Actions Panel and click the New Action Button. Once you push Record all of your tasks will be recorded until you press the stop button on the Actions Panel.
This is an incredibly powerful feature to add to your work flow. For example, if you had a series of 45 button files that all needed to be resized and have a drop shadow applied. You could set that up as an action and apply it with the click of a button versus doing it all by hand.
Get to Know the Tools Panel
The panel appears on the far left side when you open Illustrator. The panel can be moved around by dragging it's title bar. The tools found here are some of the most important within Illustrator. You'll use these tools to create and manipulate objects on the art board. Some of the tools have options when you double click them, and some have hidden tools when you click and hold the mouse down over them. These are indicated by small black triangle in the bottom right of the tool icon. Below the tool icons are thumbnails displaying the current colors for fill and shape. You can swap these colors by pushing (X) on the keyboard. You can also reset them back to black and white by pushing (D).
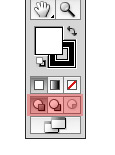
 Also, another very important set of buttons on this panel are the Draw Normal, Draw Behind and Draw Inside options. These are handy buttons to know when drawing objects on the art board.
Drawing like a Pro with with the Pen and Pencil Tools
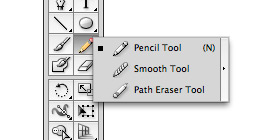
Pencil Tool
The Pencil Tool lets you draw free form like a pencil on paper. It will create open or closed paths, and will place points anchor points as you draw. You can't determine where the anchor points are positioned but you can adjust them after you are done drawing. The Pencil too is great for for creating a sketch look and feel. It's not as precise as the Pen Tool, but that's the whole point. You can double-click the Pencil Tool icon to adjust the following settings:
Fidelity - Controls how often anchor points are added to the drawing path and how far you have to move your cursor before a new point is added
Smoothness - Controls how smooth the path is. The higher the number here the more points are added to the path as you draw, resulting in a more accurate line.
Fill New Pencil Strokes - Simply adds a fill color to the line after you draw it. This results in more of a shape than a line.
Keep Selected - Controls whether or not the line should be selected or unselected after your done drawing it.
Edit Selected Paths - Determines whether you will be merging with an existing path if your new line gets within a specified distance of it.
Within X Pixels - Determines how close your new line must be to an existing path to merge.
Pen Tool
The Pen Tool is the meat and potatoes of Illustrator. It takes a little bit of practice to understand how to properly use the Pen Tool. But once you've mastered placing and editing anchor points you can draw or trace anything you desire. Anchor points are the heart of drawing within Illustrator. The basic concept of the Pen Tool is clicking to add points versus drawing a line. As you add points Illustrator adds the line between the points automatically. You can then edit the lines by clicking and dragging the anchor points and their handles.
For more information and examples using the Pen Tool visit the Adobe Illustrator Reference Manual.
Keyboard Shortcuts to Make Drawing Easier
Move a shape while drawing it (spacebar + mouse drag) Draw from the center of a shape (Option + mouse drag) Increase or decrease polygon sides, star points, arc angle, spiral winds, or flare rays (mouse drag + up or down arrow keys) Switch through drawing modes (shift + D) Join paths (Cmd + J)Understanding Perspective Drawing
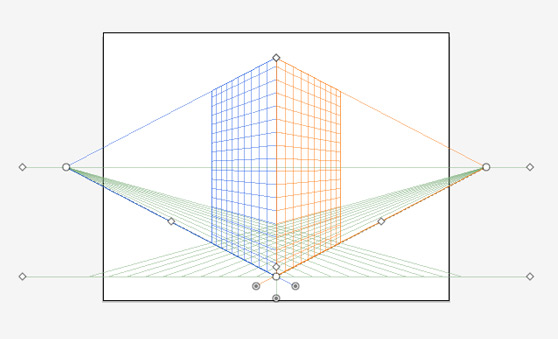
If you're a comic book or cartoon illustrator then you already have a sold grasp on perspective drawing. If you're a graphic designer the concept may be new to you, but with a little practice it's easy to master within Illustrator. The concept of perspective drawing revolves around vanishing points and how a 3 dimensional scene is naturally perceived by the human eye. For example, a long straight road will appear to vanish in the distance. Objects will appear smaller the further away they are, etc... Starting in CS5 Adobe introduced a slew of new features that allow you to control perspective drawing like never before.
Let's take a closer look
In Illustrator click (View | Perspective Grid | Show Grid) or (Cmd + Shift + I) to show the Perspective Grid. While the grid is in view you can add shapes that will automatically adjust to perspective view. Using the Perspective Selection tool (shift + V) you can then edit the grid placement and adjust your objects all within perspective.Using the Eraser Tool to Fine Tune Your Illustrations
Once you've filled your art board with illustrations, how do you erase what you don't want? Erasing in Illustrator is a little different than Photoshop. There are three common methods for erasing artwork in Illustrator.Path Eraser Tool (located under the Pen Tool)
 The path eraser tool, and with a single smooth motion click and drag it along the segment of the path you want to erase.
Delete Anchor Point Tool (-)
Select this tool and simply click the anchor points you want to remove. The path will readjust once the point is removed.Eraser Tool (shift + E)
 This is one is the closest to the PS equivalent. Select this tool and click and drag it across the portion of a shape that you would like to remove.
Perfect Placement with Rulers, Grids, Guides and the Align Panel
Illustrator makes aligning objects a snap. There is a wide variety of tools to help us place objects in exact position. Just like in Photoshop the rulers (Cmd + R) and guides are available. There is also a handy grid (Cmd + ") if you need it. But most importantly let's take a look at the Align Panel. The Align Panel contains an array of options to align and distribute objects. This panel is essential if you need your artwork to align perfectly.
Using Illustrator as the Ultimate Type Tool
Illustrator makes it incredibly easy to work with type. Just view the options under the type tool (T) to get started. One of the of the most useful tools is Type on a Path. First draw a path of any shape, and select the Type on a Path Tool. Then select the path with your cursor and begin typing. There are some excellent opportunities for type design using this tool. Also note, that the usual type options are available from the Character Panel ((Cmd + T).
Using Swatches and Color Groups to Stream Line Color Management
The swatches panel contains colors, tints, gradients, and patterns that can be saved separately from your document. Why is this useful? Let's say that your working on a project that contains 4 colors plus a gradient and two seamless patterns for a client. This is print project 1 of 8 that the client has requested, and you know that you will be using these exact colors over all of these pieces. You can simply create a new color group by choosing it from the panel drop down menu, then drag and drop each color to the group, or choose "Add Selected Colors" from the drop down. Once your colors and gradients are contained within the panel you can save them from the drop down menu within the swatches panel.
Did you know?
You can save swatches between Illustrator, InDesign and Photoshop. Simply save the swatch library for exchange. The colors will appear the same between applications as long as your color settings are synchronized.
Adding One Click Artwork using Symbols
Symbols in Illustrator provide an excellent way to reuse artwork from one source. For example, let's say you're designing a user interface, and the design contains 10 12 buttons, and halfway through the design you decide to change the button style slightly. Since you've created all of your buttons from one initial symbol, all you have to do is edit the original to change all instances of the button. This can be an incredible time saving tool.
To create your own symbols
Simply drag your artwork to the symbols panel and the new symbol dialog box will appear, where you can name your symbol. The symbol type defaults to Movie Clip. You can set the registration point, align to grid, and utilize 9?Slice Scaling if you plan to export for Flash. To edit a symbol simply double click the thumbnail in the symbol library or an instance on the document. Any changes made to the symbol will be saved and applied to all instances. Also note, that you can save Symbol Libraries just as you would with swatches so that you can use symbols between documents.Did you know?
You can set the symbol type to MovieClip. This comes in handy when exporting to Flash.
Filling Your Shapes with Gradients, Meshes and Patterns
Gradients
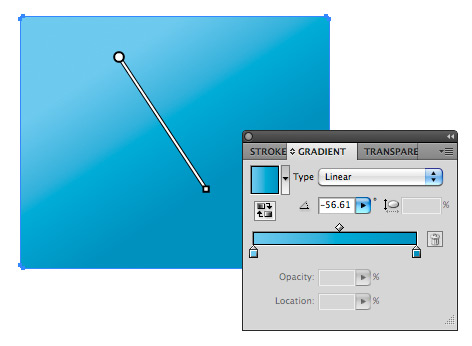
Gradients in Illustrator can be added from the gradient panel (Window | Gradient). In the Gradient panel, the Gradient Fill box thumbnail displays the colors and type of the current gradient. When you click the thumbnail, the selected object on the art board is filled with the gradient. Gradients can also be added with the Gradient Tool (G), which provides some of the same features as the Gradient Panel except they are directly over the object on the art board. With the slider you can modify the angle, location, and spread of a linear gradient or the focal point and origin of a radial gradient. You can also add and edit color stops right from the slider when you hover the mouse over it.
Meshes
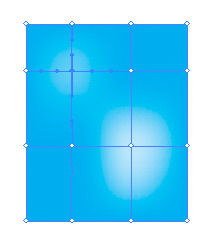
When a mesh object is created it allows that object to contain multiple colors which can flow in different directions and transition smoothly from one point to another. Multiple lines cross the object and provide a way to easily manipulate color transitions on the object. Where these lines cross a mesh point is created. Mesh points appear as diamond shapes and act similar to anchor points but with the capability of accepting color. You can add and delete mesh points as needed. To convert an object to a mesh, simply select the Mesh Tool (U), choose a fill color for the mesh, and begin click on the object to add mesh points.
Patterns
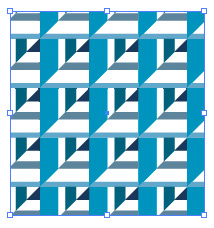
Patterns in Illustrator are saved in the Swatches Palette. Anything can be saved as a pattern, but most likely you will be creating a seamless design. To create a new pattern simply choose (Edit | Define Pattern). Patterns can be saved along with colors and gradients in a Swatch Library.
Ultimate Shape Manipulation using Envelopes
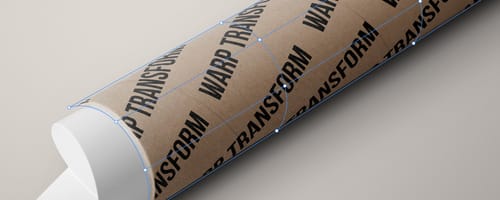
Envelopes are objects that reshape selected objects. You can make an envelope out of an object or you can use a preset warp shape or a mesh grid as an envelope.To distort an object using an Envelope
Select an object. Choose (Object | Envelope Distort | Make With Warp or Make with Mesh). To use a object as the shape of the envelope, make sure two objects are selected, the top most object being the envelope shape, and select (Object | Envelope Distort | Make With Top Object). Then edit any anchor point on the envelope with the Direct Selection Tool. This gives you the ability to fine tune the object to whatever shape you desire.
Keyboard Shortcuts for Editing Shapes
Switch Pen tool to Convert Anchor Point tool (alt)PC (option)Mac Switch between Add Anchor Point tool and Delete Anchor Point tool (alt)PC (option)Mac Move current anchor point while drawing with Pen tool (spacebar + mouse drag) Cut a straight line with Knife tool (alt + mouse drag)PC (option + mouse drag)Mac Cut at 45° or 90° with Knife tool (shift + alt + mouse drag)PC (shift + option + mouse drag)MacTake Your Illustrations to the Next Level with Brushes
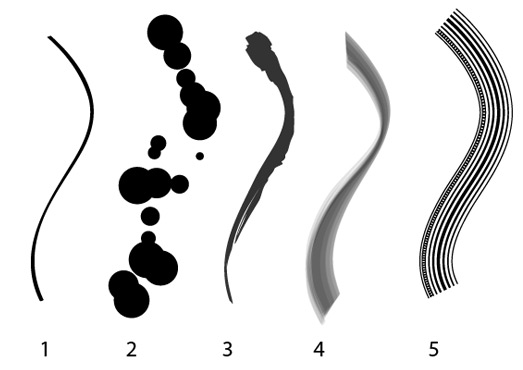
Brushes are simply stylized paths in Illustrator. There are 5 types of brushes available.
- 1. Calligraphic brushes - Create strokes that resemble those drawn with the angled point of a calligraphic pen.
- 2. Scatter brushes - Disperses copies of an object along a path.
- 3. Art brushes - Stretch a shape evenly along the length of a path.
- 4. Bristle brushes - Create brush strokes with the appearance of a natural brush with bristles.
- 5. Pattern brushes - Paint a pattern that repeats along a path. Pattern brushes can include up to five tiles, for the sides, inner corner, outer corner, beginning, and end of the pattern.
Creating Your Own Brushes for Ultimate Customization
The power of brushes in Illustrator lies in creating your own set of custom brushes from artwork you've created. For example, If you have a set of charcoal pencils you use for sketching, and you'd like the same effect within Illustrator, you could scan dots made with your pencils, scan and vectorize them, and create your own set of charcoal pencil brushes to use within Illustrator.To create a new brush
Select the artwork you want to use on the art board, then Click the New Brush button on the Brushes Panel, or drag the selected artwork to the Brushes panel. From the pop up window that appears select the type of brush you want to create, and click OK. Each brush type has it's own settings. Play with these to create a multitude of different brush behaviors from the same piece of art.

Painting with Live Paint
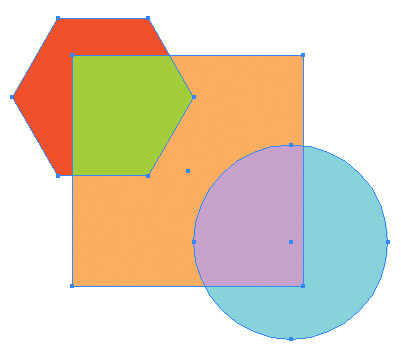
Live paint treats your art board as though it were a coloring book, meaning that all paths are on the same surface versus in front of, and behind each other. The paths will be used to divide the artwork into areas that can be colored. Once you've created a Live Paint group each path will remain editable, and Illustrator will adjust your colors to the path if you decide to edit the shape. It's sort of like editing a coloring book page after you've colored it.
To create a Live Paint Group
Select one or more paths or compound paths, then choose (Object | Live Paint | Make). Then select the Live Paint Bucket tool and click the selected object.
Trace Your Own Hand Drawn Artwork Using Live Trace
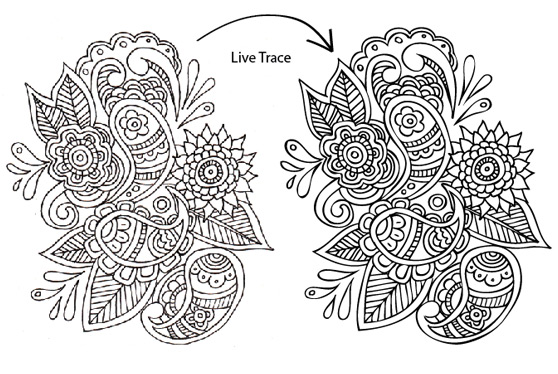
Live trace is an incredibly powerful tool. In my mind it lengths the outside world to the vector world of illustrator. If you're used to drawing objects by hand and then scanning and editing them in Photoshop, then try the same process in Illustrator by first running your hand drawn sketch through Live Trace.
To use Live Trace
Import your bitmap (scanned) artwork on the art board by using (File | Place). With the artwork selected got to (Object | Live Trace | Tracing Options...). There are several presets within the Tracing Options window, or you can use the controls to fine tune your own settings. Check the preview check box to see your settings applied in real time. When you are satisfied click the Trace button. After your object is traced click (Object | Expand) to turn your artwork into editable paths.Did you know?
From within the Tracing Options window you can choose Fills or Strokes. So if you're bringing a scanned line drawing into Illustrator you can convert it to strokes, and edit then you can edit the path as if you've created it from scratch in Illustrator.
Non-Destructive Design with Appearance Attributes
Appearance Attributes are similar to adjustment layers in Photoshop. Basically its Illustrator's answer to non-destructive design. Appearance attributes are properties applied to the look of an object that do not effect its underlying structure. If you apply an appearance attribute to an object and then decide to remove it later, it does not change the underlying object or any other attributes applied to the object. Take a peak at the Appearance Panel (Window | Appearance). From within this panel you can control EVERYTHING about an object or group of objects. Get to know this panel and understand how to use it. It will make a huge difference in your workflow and how your vector artwork is structured.
Saving and Reusing Styles with the Graphic Styles Panel
Graphic styles in Illustrator are similar to Layer Style in Photoshop. So if you are familiar with Layer Styles then this concept is not new to you. With graphic styles you can save all of the attributes you have applied to an object. For example, say you have applied a gradient fill and stroke color, altered the objects transparency, and apply a drop show effect. Now simply drag this object to the Graphic Styles Panel and a new style will be created that you can then apply to other objects. Note that you can save a group of graphic styles for use in other documents just as you would a group of swatches from the Swatches Panel.
Adding a Professional Touch with Special Effects
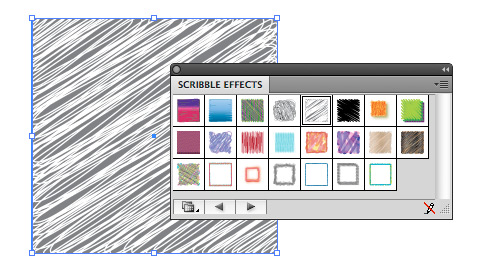
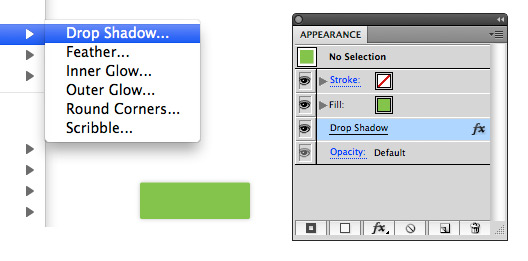
Special effects can be added to an object in much the same way you would in Photoshop. You can apply these effects by selecting an object and choosing an effect from the Effect menu. Remember that all effects can be edited from the Attributes Panel. See above for details.
Automating Tasks to Make Your Life Easier within Illustrator
Actions
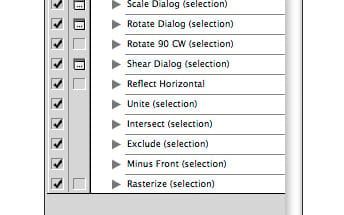
If you've read our previous Mastery post on Photoshop then you are already familiar with actions. They work the same way in Illustrator. Basically, and action is a recorded series of tasks that you can run over and over again with the click of a single button. To create an action simply open the Actions Panel and click the New Action Button. Once you push Record all of your tasks will be recorded until you press the stop button on the Actions Panel.
This is an incredibly powerful feature to add to your work flow. For example, if you had a series of 45 button files that all needed to be resized and have a drop shadow applied. You could set that up as an action and apply it with the click of a button versus doing it all by hand.
